Category: Stupid Easy

These recipes are seriously easy and delicious!

Cold Noodles with Tomatoes (Tomato Triple Play)

Cold Noodles with Tomatoes (Tomato Triple Play)

I have taken over tomato duties from the hubby who has given up on becoming an urban farmer.  We just haven’t had any luck with turning our garden into a summer veggie paradise.  My bounty from 5 tomato plants so far has been a grand total of 4 tiny red orbs 🤦🏻‍♀️

FORTUNATELY, we have a wonderful farmer’s market in town.

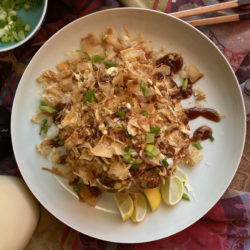
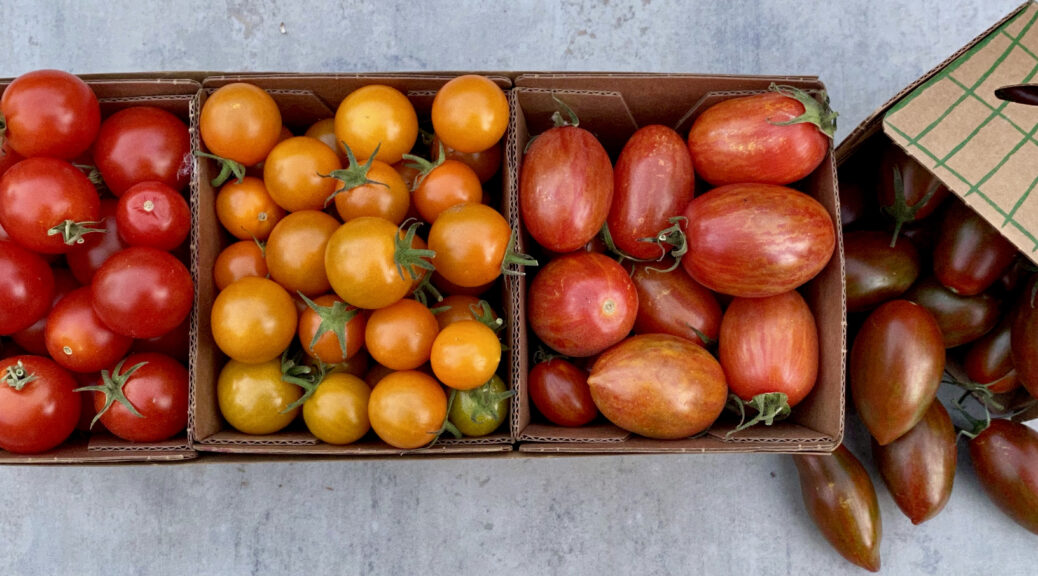
My haul from last week’s farmer’s market included a variety of cherry tomatoes including Bronze Torch Cherry Tomatoes (pictured on the right above) from Live Earth Farm in Watsonville. We have been buying Live Earth produce since my kids were toddlers and they’re in their twenties now!  The Bronze Torch Cherry Tomatoes are simply AH-MAZING.  Sweet, tomatoey, delicious.

Tomato Trifecta

I am a big fan of Eric Kim.  He writes regularly for New York Times Cooking and just published a wonderful cookbook, Korean American.  It is hands down one of my favorite books. His recipes are easy and delicious and his writing is even better.  You can also find him on YouTube making many of his recipes, he’s funny, personable, and charming.  I went to his book signing at Omnivore Books in SF, fun, I’m such a food groupie.

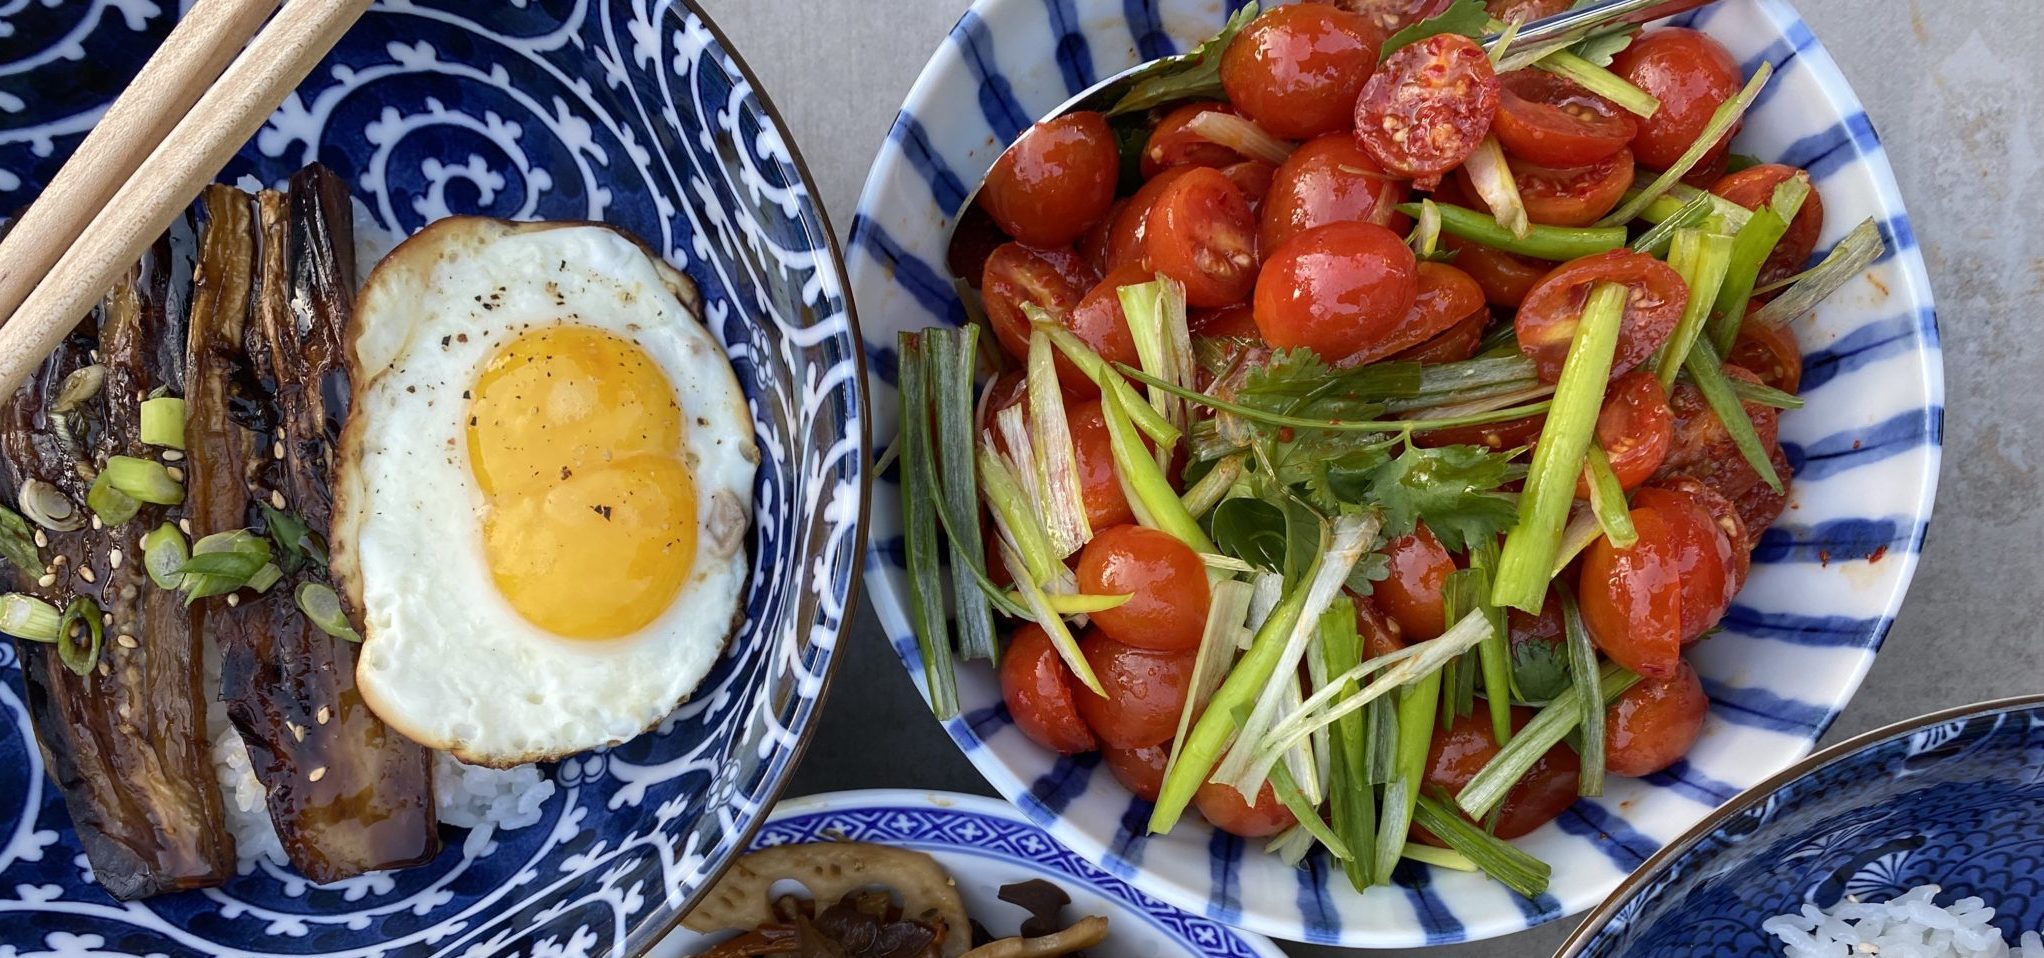
I love his Grape Tomato Quick Kimchi which I make all the time.  Serve as Banchan (side dish-pictured on the right above) one day and as a sauce over noods the next day.  It is downright delicious.  As soon as I saw his Cold Noodle with Tomatoes recipe I jotted it down on my MAKE ASAP list.  It is so easy and incredibly delicious.  It should go on your list too.

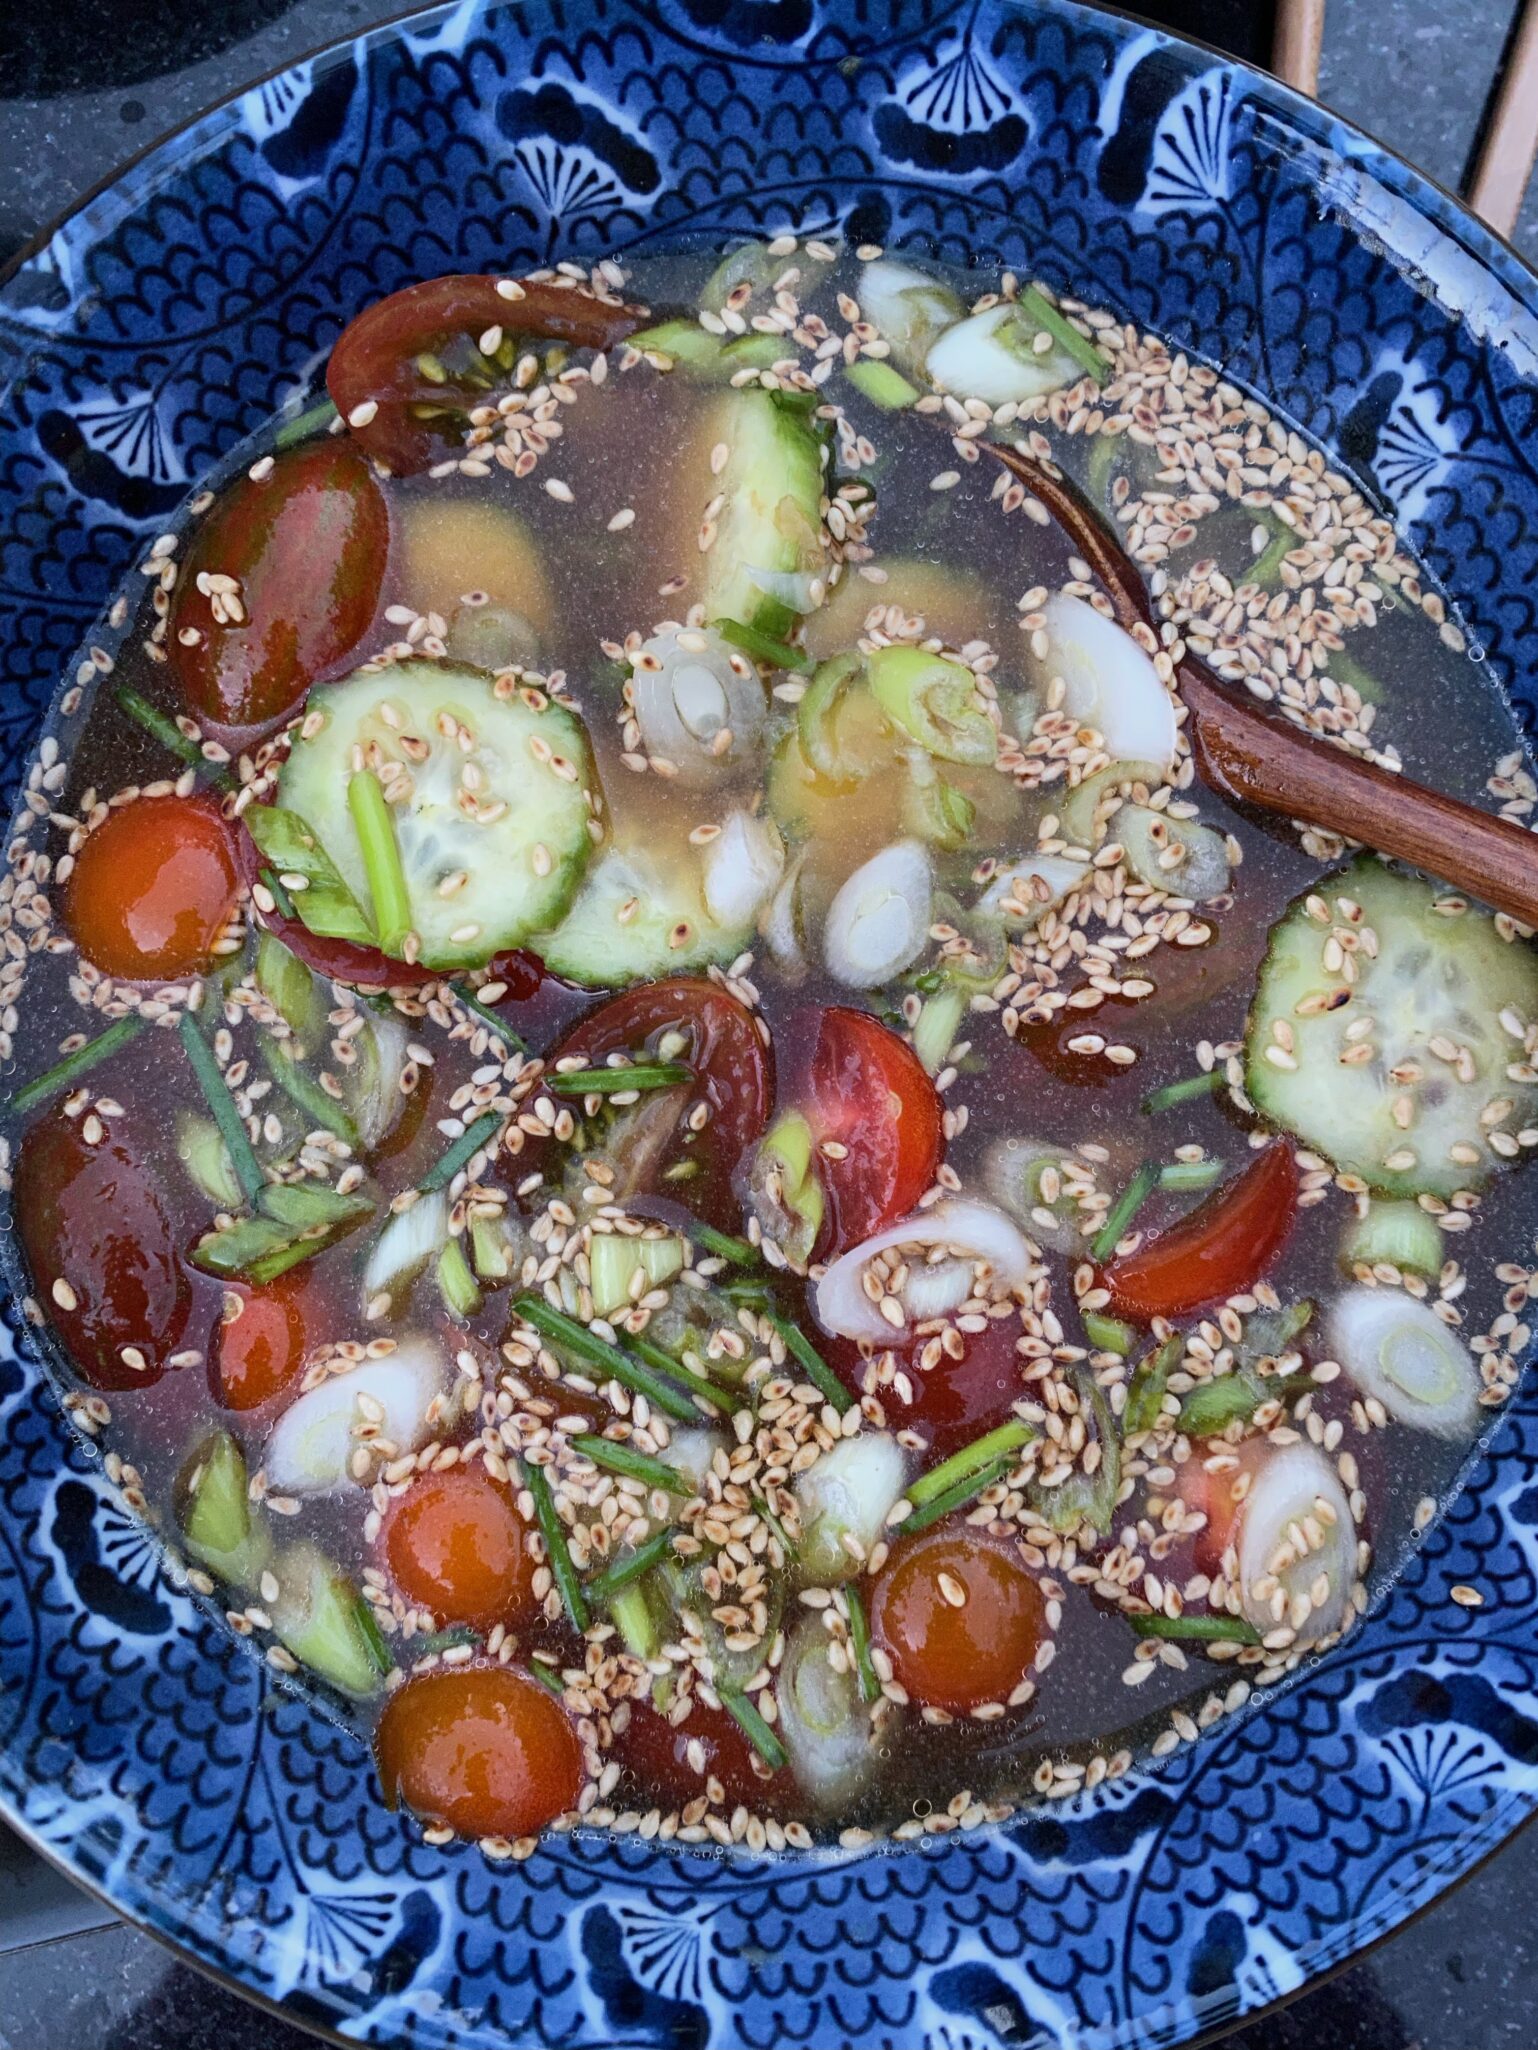
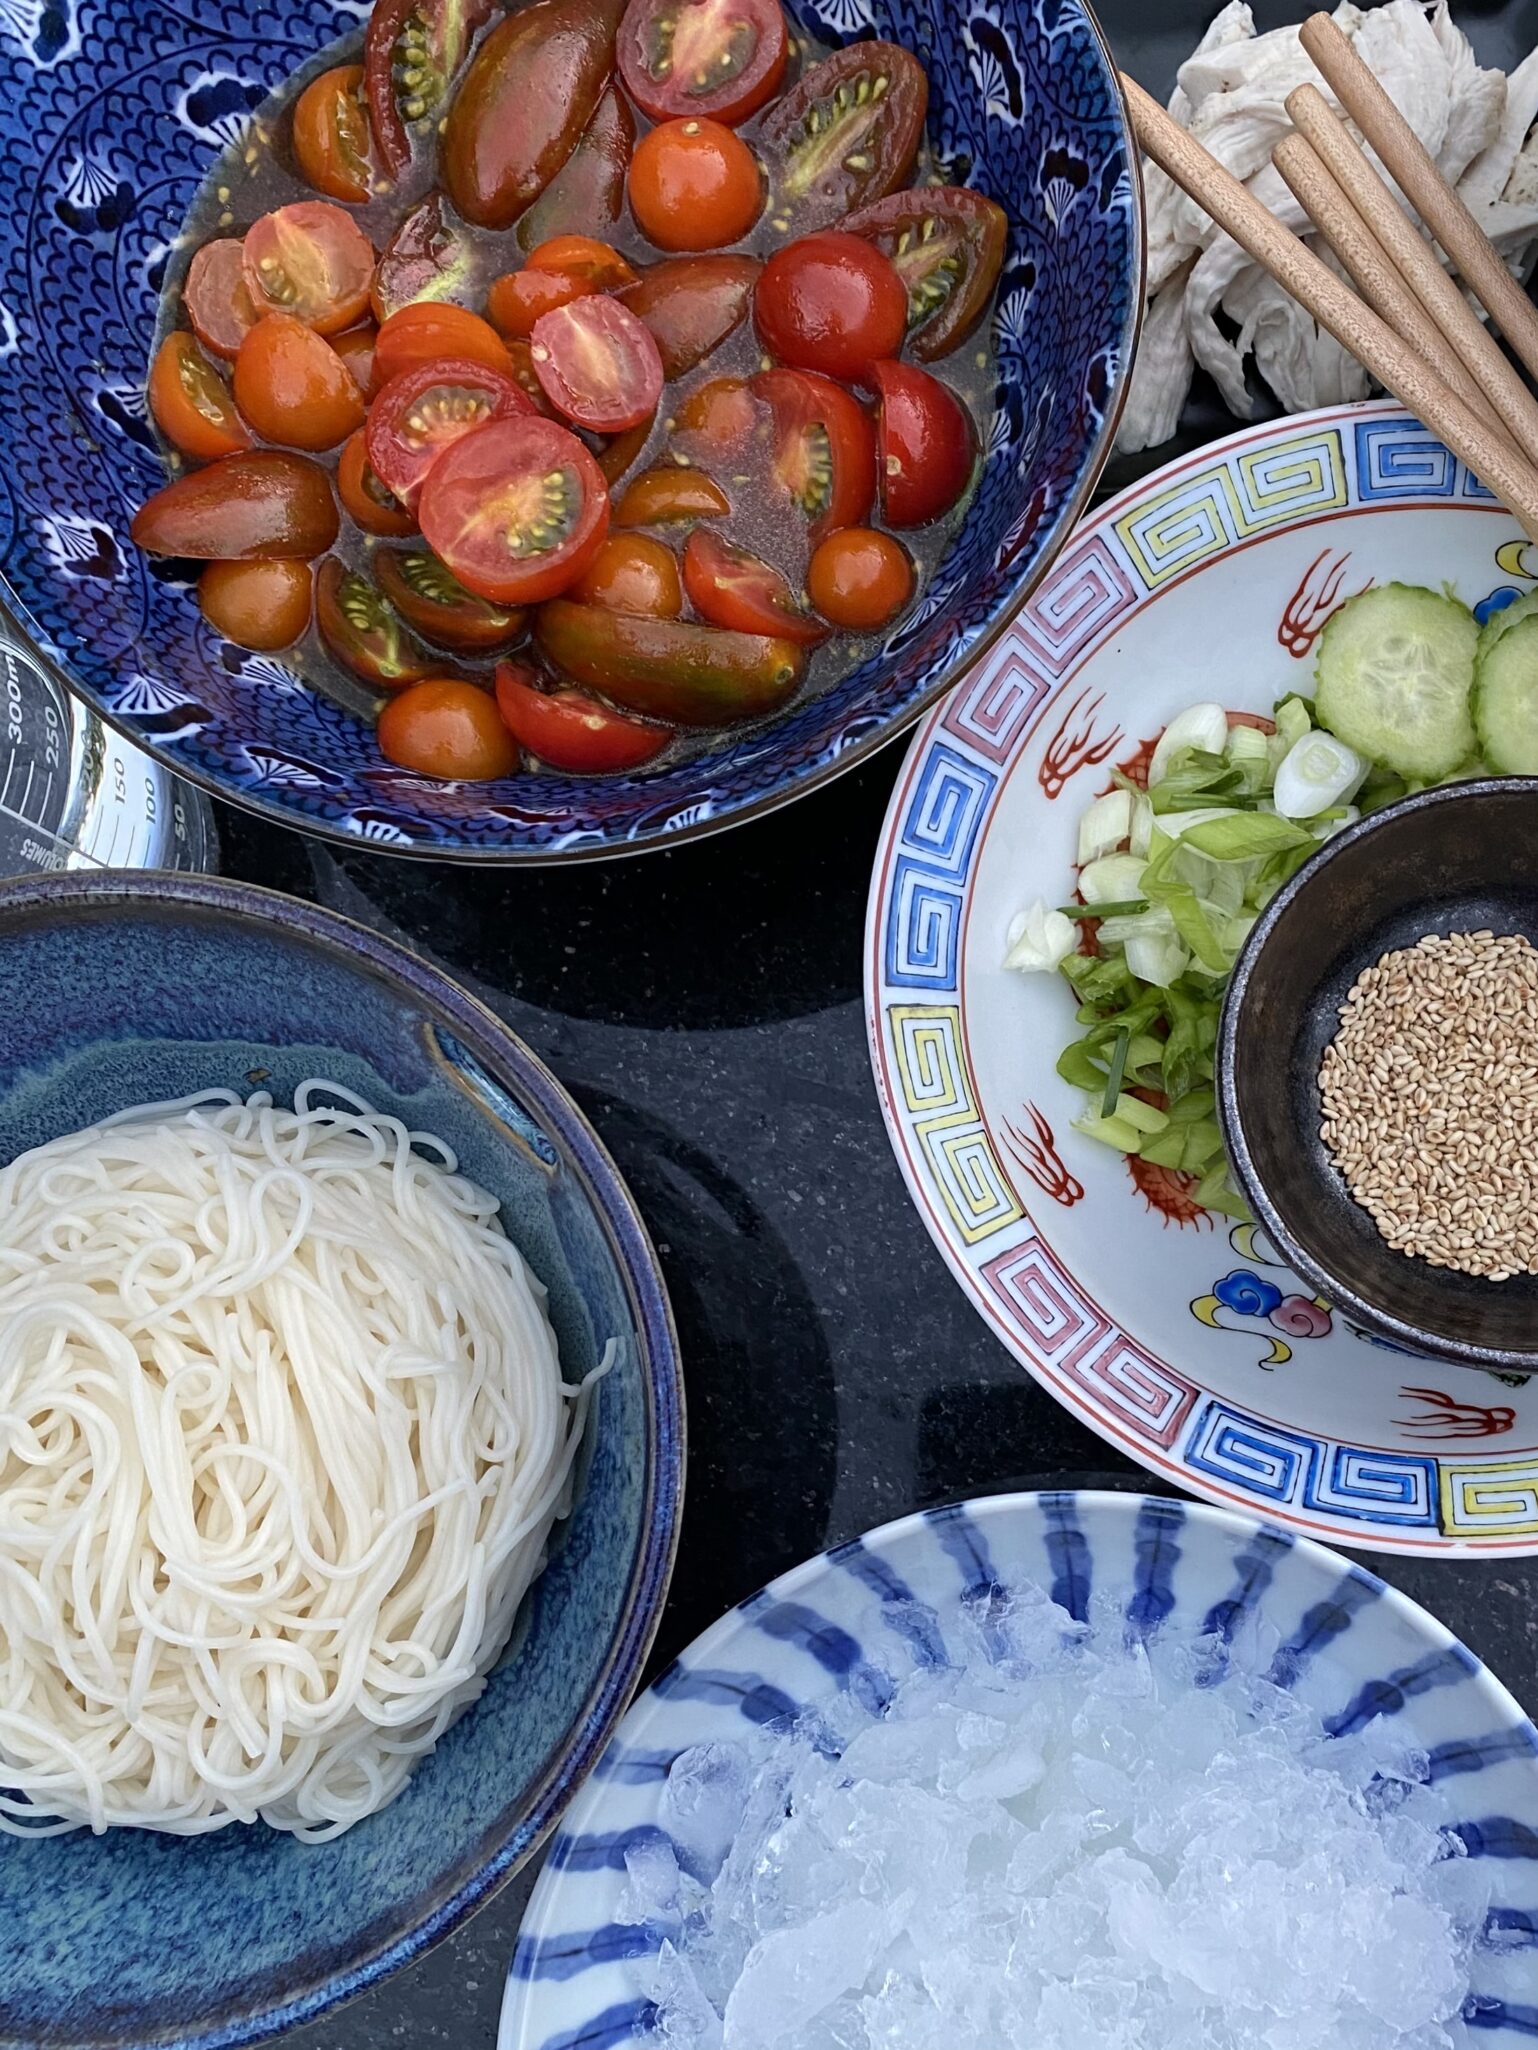
Start with cherry tomatoes, slice them in half, and sprinkle with salt.  Let the tomatoes sit in the bowl while you put together the rest of the dish.  No need to use a strainer as the juices from the salted tomatoes become part of the broth.  Mince garlic, get out the rice vinegar, soy sauce, Dijon mustard, and sesame oil, and toss it all in a bowl along with the tomatoes.  Next, add cold-filtered or bottled water to the bowl (use water that tastes good).  Add diced scallions, and slices of radishes (the little red ones) or cucumbers to the broth. Set the broth aside.

Here’s the Hard Part

How to cook your somen.  DO NOT COOK YOUR SOMEN while you are getting the other components together. Make the broth and set it aside.  Focus on the noods so you don’t overcook them.  For somen (thin Japanese wheat noodles), start with plenty of unsalted water.  Somen has salt in it. If you use too little water, the noods will absorb too much water because of the salinity. Watch them like a hawk, and stir them with chopsticks or tongs while cooking to separate the noodles, this takes 3-4 minutes TOPS.  Remove from heat, rinse thoroughly under cold water and drain well.

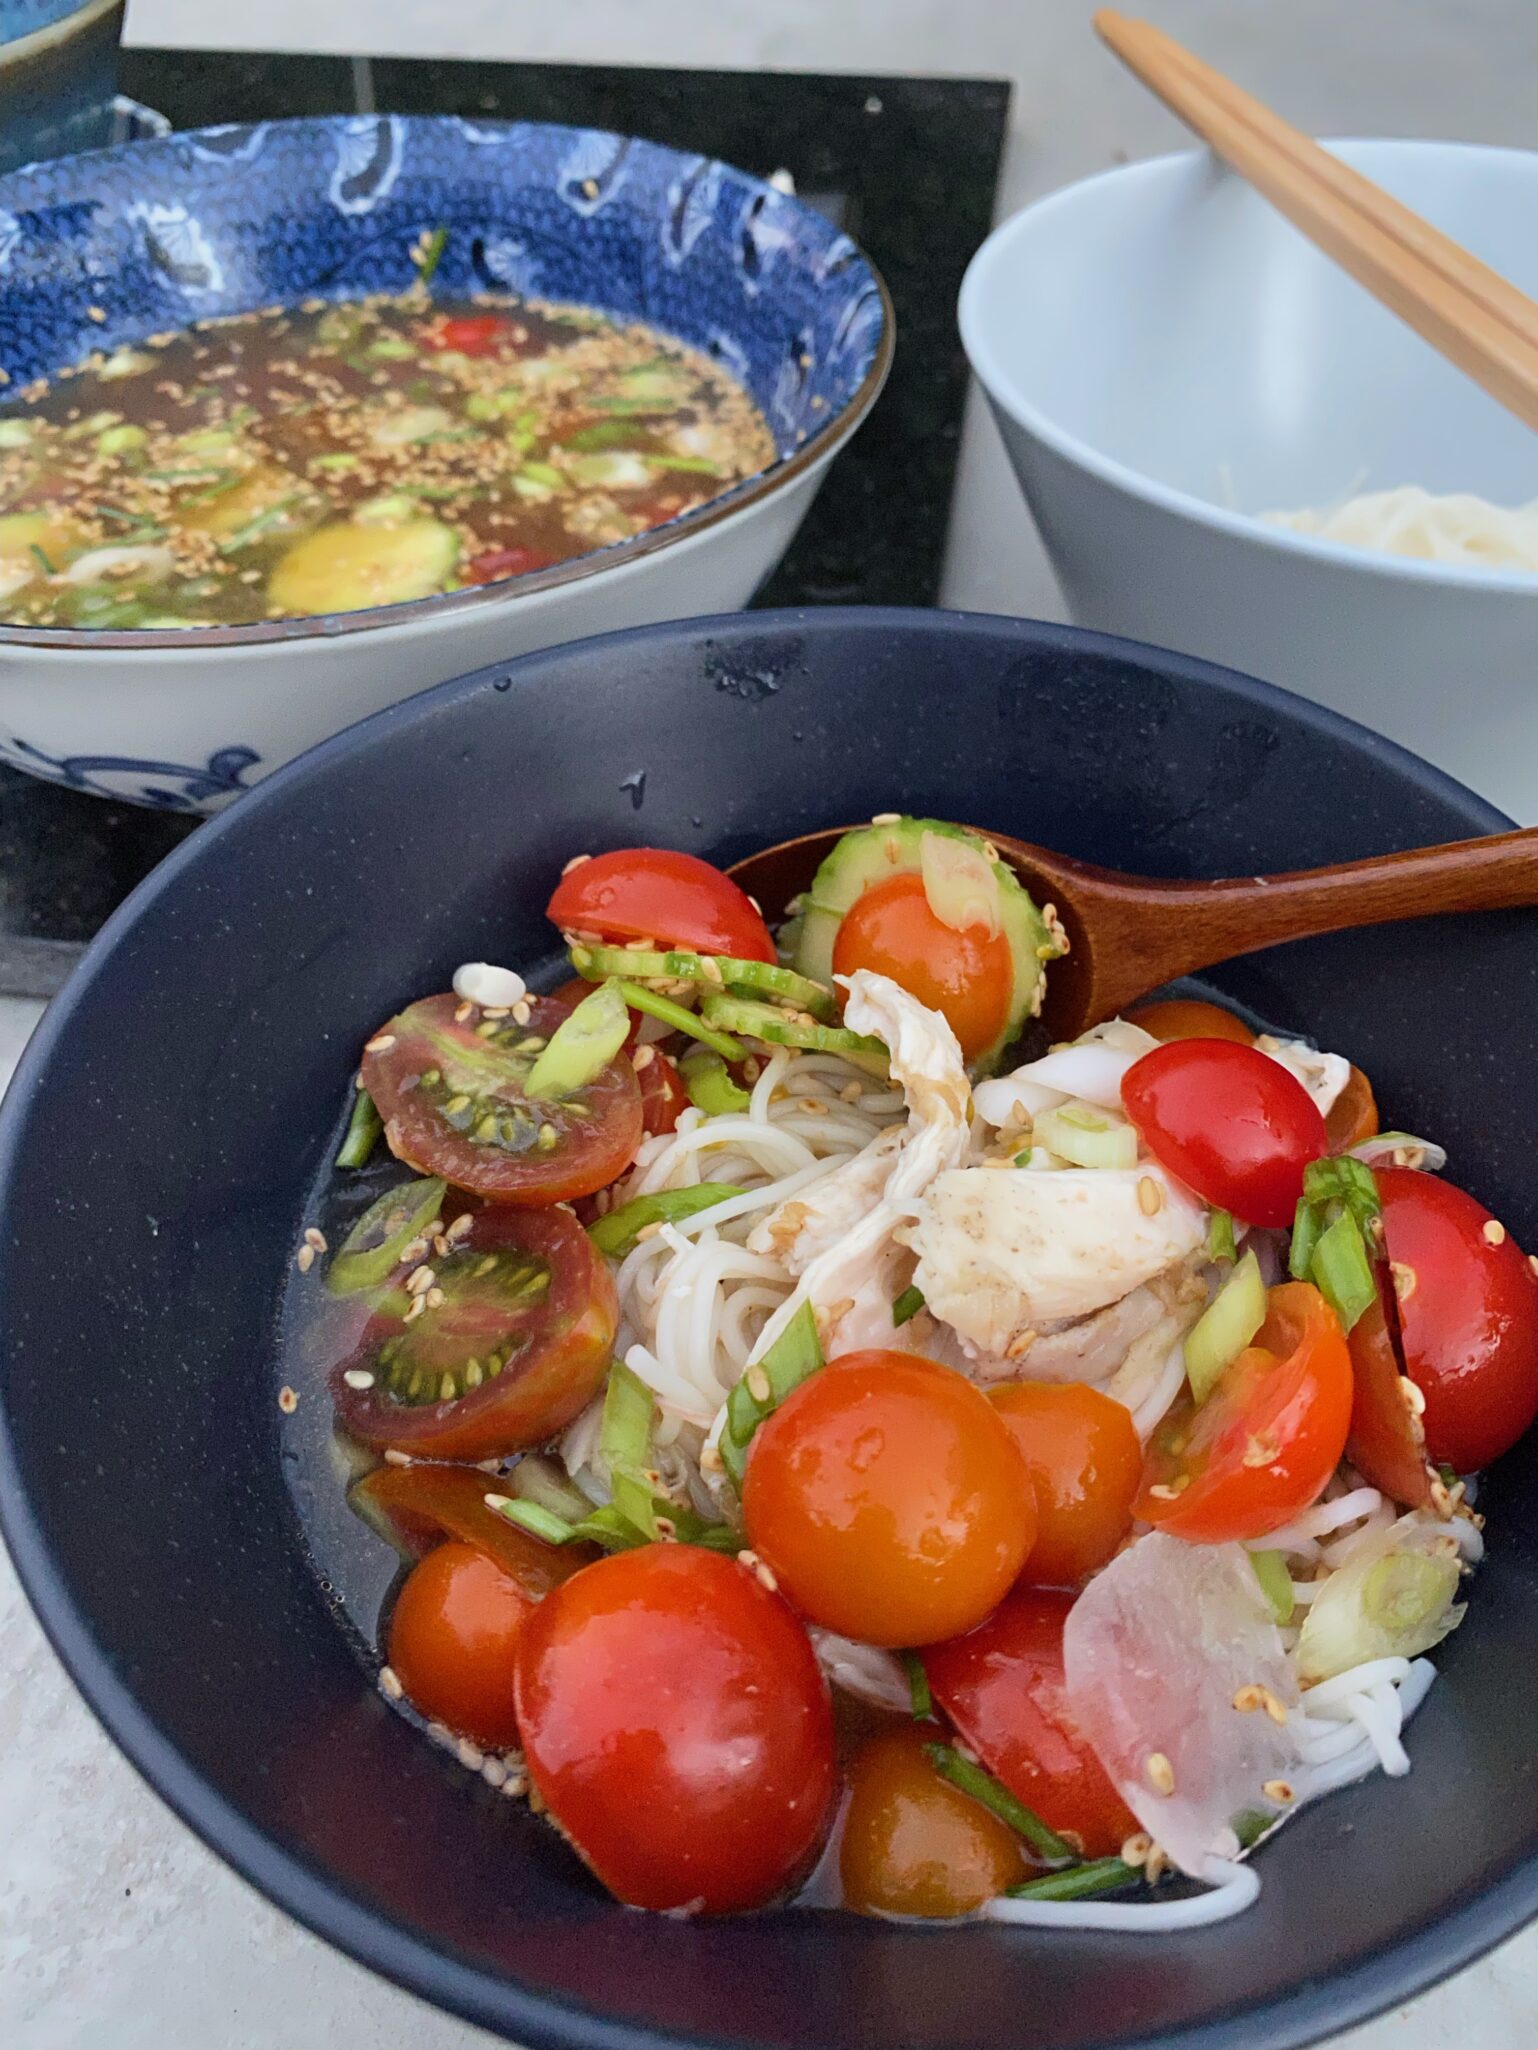
Before serving, twirl noodles into a bundle and place them in a bowl.  Add crushed ice to the tomatoes and pour it over your noodles.  Garnish with additional scallions and sesame seeds.  It’s so refreshing, the perfect summer meal.  Carnivores, feel free to add shrimp or chicken or half of a hard-boiled egg.   Serve asap on a hot summer day.  Sooooooo good.

BONUS,  Ottolenghi’s Charred Tomatoes and Cold Yogurt.  Yes, my trifecta of tomato recipes.  Tomatoes, roasted with thyme, cumin seeds, lemon, and garlic,  served over yogurt or Labneh. It’s my go-to party appetizer, especially in the summer.  It’s “lick the bowl clean” good.  A showstopping, easy dish.  Make it, you’ll thank me.

Cold Noodles with Tomatoes

Refreshing, delicious, and easy to prepare, Eric Kim's Cold Noodles with Tomatoes
Course noodles, one bowl meal, pasta, Soup
Cuisine Asian, Asian-American, Korean
Keyword cherry tomatoes, Cold noodles, Cold Noodles with Tomatoes, soup
Prep Time 15 minutes
Cook Time 5 minutes

Ingredients

The Star

  • 2 pints ripe cherry tomatoes halved
  • 2 teaspoons kosher salt (Diamond Crystal)

The Noods

  • 12 to 14 ounces somyeon somen, capellini or other thin wheat noodle

Soup and Seasonings

  • ¼ cup rice vinegar
  • 2 tablespoons soy sauce Kikkoman, Sempio 501 or 701 or LKK Premium Soy
  • 2 tablespoons granulated sugar
  • 1 large garlic clove finely grated
  • ½ teaspoon Dijon mustard
  • ½ teaspoon toasted sesame oil
  • 2 cups cold filtered water or bottled water of your choice.
  • 1 tablespoon toasted sesame seeds

The Garnishes

  • 2 radishes thinly sliced, or cucumbers work in a pinch
  • 2 scallions thinly sliced at an angle
  • 2 cups crushed or cubed ice

Omnivore Options

  • cooked shrimp or shredded chicken
  • hard boiled eggs, but not too hard-boiled lol

Instructions

  • In a large bowl, toss together the tomatoes and salt. Let sit until juicy, about 10 minutes.
  • Bring a large pot of water to a boil. Cook the noodles according to package instructions, drain and rinse under cold water. Set aside. See post for how to cook somen noodles.
  • Add the vinegar, soy sauce, sugar, garlic, mustard and sesame oil to the tomatoes, and toss with a spoon until well combined. Stir water into the tomatoes and sprinkle the surface of the broth with the sesame seeds, radishes and scallions.
  • Right before serving, add the ice to the broth. Divide the noodles among bowls, and ladle in the broth and any unmelted ice, making sure each serving gets a nice sprinkling of tomatoes, radishes, scallions and sesame seeds.
Whole Roasted Cauliflower Takoyaki Style-Ahead of the Game

Whole Roasted Cauliflower Takoyaki Style-Ahead of the Game

So, you drew the short straw, didn’t you?  Yep, the proverbial boring Thanksgiving dish.  Vegetables, sheesh.  Auntie has drawn dessert, ugh, means lime green jello mold with pineapple.  Which is not dessert actually but it’s ok, she’s your Aunt.

Could be worse, you could have drawn salad.  Really, who goes for salad first on Thanksgiving?  Sure I take the customary 2 lettuce leaves and a crouton to make my plate look balanced.  It’s all for show I don’t actually eat it.  At least we can salvage the veggie dilemma.

I am here to make you the belle of the ball, a prince among paupers.  Along the way, we are demystifying the twenty-dollar whole roasted cauliflower.  Yeah, fess up, you have paid that much and didn’t even blink an eye when you did.

You will never order whole roasted cauliflower again.

Well, at the least, you won’t pay twenty bucks for it.

You don’t have to core it this much, I was a bit overzealous

Start with a nice looking head of cauliflower,  Wash it, trim off the outer leaves, (here is my hack) core the center stem with a melon baller if you have one. If not use a paring knife.  Coring shortens cooking time.

Slather the cauliflower top and bottom with olive oil.  I use a squirt bottle, a brush would work also.  Season with salt and pepper, again, top and bottom.  Place on a parchment or foil-lined baking sheet.

That’s it.  Your work is done.  Your oven does the rest of the heavy-lifting. Roast for about 45-50 minutes.  Pierce it with a knife, if it goes through fairly easy, it’s done.  Out comes a beautiful toasty, crispy edged, soft- centered, delicious, cauliflower canvas, ready to be painted.

You can top your cauliflower with just about anything.  I have served it with roasted tomatoes, or brushed with a garlic and herb butter, it’s your cauliflower, go crazy.

My latest razzle dazzle topping was inspired by a recipe I found in a little book called Emily the Cookbook. Emily is a pizza joint in Brooklyn that is on my bucket list of places to try.  They serve a roasted broccoli dish that is based on the toppings for Takoyaki, a popular Japanese seafood-filled round pancake.  So simple, yet so good.  In fact, it’s so simple I’m using pics to show you how to make it.

All you need is Okonomi Sauce (preferred) or Tonkatsu Sauce (think Worchestershire/Steak Sauce but better), Kewpie Mayonnaise (Japanese mayo), Bonita Flakes (fish flakes) and green onions.

Squirt a bunch of the mayo (it even comes in a squirt bottle-how easy is that?) all over the top.

Then squirt a bunch of Okonomi Sauce on top.

Finish with a flurry of bonita flakes, green onions and some sesame seeds if you like. Want to keep it vegetarian? Instead of bonita flakes,  TJ’s has a fish-free furikake.

That’s it.  Easy and Monster tasty!

Whole Roasted Cauliflower with Takoyaki Style Sauce

Easy and delicious way to serve cauliflower. Whole roasted with a umami bomb sauce.
Course Appetizer, Main Course, Vegetable
Cuisine Fusion
Keyword Cauliflower, takoyaki sauce, Whole roasted cauliflower
Prep Time 10 minutes
Cook Time 50 minutes
Servings 4

Ingredients

  • 1 head cauliflower 1.5-2 pounds
  • 3-4 tbsp good quality olive oil
  • salt and pepper

Takoyaki Sauce

  • Kewpie Mayonnaise
  • Okonomi Sauce
  • Bonita Flakes or Furikake
  • Green Onions for garnish
  • Toasted Sesame Seeds for garnish
  • Lemon wedges for garnish

Instructions

  • Preheat oven to 450 degrees
  • Wash and trim cauliflower. Remove leaves and cut stem even with the bottom of the cauliflower. Using a melon baller or paring knife, core cauliflower stem. Take care not to cut too much, you want to leave the stalks connected to the stem.
  • Brush or squirt olive oil all over the top and bottom of the cauliflower. Season with salt and pepper and a little garlic salt (optional). I have used Momofuku Savory Salt for a bit more punch. The sauce will give it alot of flavor though.
  • Roast for about 45-50 minutes.  Pierce it with a knife, if it goes through fairly easy, it's done.

Takoyaki Sauce

  • Can I call this a recipe? Basically squirt copious amounts of Kewpie mayo and Okonomi Sauce in zig zag lines all over the cauliflower. Sprinkle Bonita Flakes or Furikake all over and hit it with green onions and tossed sesame seeds let.
  • Done. Bring it to the table in all it's whole roasted glory!

Notes

From the Japanese cookbook, Just One Cookbook. Kewpie imposter recipe!
For 1 cup of American mayonnaise (like Best Foods), add 2 Tbsp rice vinegar and 1 Tbsp sugar. Whisk until the sugar dissolves. For 1 Tbsp of American mayonnaise, add 1/2 tsp rice vinegar and 1/8 tsp sugar.
Pudding In the Late Night Hours Calls for Chocolate

Pudding In the Late Night Hours Calls for Chocolate

Life is on hold as we await the results of the 2020 presidential election.  I swore I wasn’t going to agonize over the process leading to the final result.  My plan was to ignore CNN, Twitter, WAPO, NYT…I decided to watch Hamilton for the umpteenth time, followed by my favorite K-drama.  As they say…

The Best Laid Plans

A quick sneak peek at Twitter and I was hooked.  It has been an agonizingly slow crawl to the finish as the Biden/Harris ticket chips away at the vote count in the battleground states. There I was tabbing back and forth between my K-drama and Twitter.  At 2am I had to stop the madness, I resorted to my favorite stress-buster activity, COOKING followed by my second favorite stress reliever-EATING.

Win-Win

At that time of the night, I needed something delicious, and comforting.  I had been eyeing a recipe in NYTcooking for a chocolate pudding made with oat milk.  Many of my friends are dairy intolerant or vegan so I am always on the lookout for desserts that fit the bill.  The fact that this pudding was quick and easy made this a no-brainer for my sleep-deprived, anxiety-riddled brain.

This pudding is so ridiculously easy and so incredibly delicious bookmark this post now.  You will thank me.  I used Planet Oat Milk but the recipe states you can use soy or almond, I’m sticking with oat milk.  I used Dutch-processed cocoa which gives the pudding its intense dark color.  You can use natural cocoa which will give you a lighter-colored pudding, either is fine.  Whisk the dry ingredients together, cocoa, sugar, cornstarch, and salt.  Slowly add the oat milk and then cook it over medium heat, STIRRING constantly so it doesn’t scorch and stays lump-free and smooth.  I used TJ’s Dark Chocolate Pound Plus Bar which resulted in a rich, intense chocolate flavor.  Experiment with different chocolates to change the sweetness and chocolate intensity.

Topped off the pudding with cocoa nib crumble from Manresa and I was in business.  Yummy.  I imagine an infinite variety of toppings would be lovely like softly Whipped Coconut Cream, whimsical sprinkles, flaked coconut, cookie crumbs, or fresh berries.

My little bowl of chocolate pudding did the trick, calmed my nerves, and gave me the courage to…GO TO BED!

Print Pin
5 from 3 votes

Oat Milk Chocolate Pudding

A delicious chocolate pudding from NYT Cooking that is dairy free and vegan
Course Dessert
Cuisine American
Keyword Chocolate Pudding, dairy-free, Dark chocolate, oat milk, Simple Bread Pudding, vegan
Prep Time 10 minutes
Cook Time 10 minutes

Ingredients

  • cup (65 grams) granulated sugar
  • cup (30 grams) unsweetened cocoa powder
  • 2 tablespoons cornstarch
  • teaspoon fine sea salt
  • 2 cups (480 milliliters) oat milk or soy or almond milk
  • 3 to 4 ounces (85 to 115 grams) bittersweet bar chocolate finely chopped, I used TJ's Dark Chocolate, which is accidentally vegan 😉
  • 1 teaspoon vanilla extract

Instructions

  • In a medium saucepan whisk together the sugar, cocoa, cornstarch, and salt. Slowly stir in the milk and stirring constantly until smooth and combined.
  • Cook over medium-low heat. Stir the mixture continuously, scraping the bottom, sides, and corners of the pan, until the pudding thickens, begins to bubble, and coats the back of the spoon or spatula, 5 to 10 minutes. Careful to not let the pudding scorch on the bottom and corner of the pot, lower heat if it cooks too fast or starts to scorch.
  • Add the chocolate and stir vigorously until the pudding is very thick and smooth, about 30 seconds longer.
  • Remove from the heat and stir in the vanilla. Spoon the pudding into a serving bowl or individual cups or ramekins. Serve warm, at room temperature or chilled. It will thicken as it cools. Garnish with whipped cream, sprinkles or chocolate chips or cookie crumbles. Use your imagination!

Notes

Before refrigerating, press plastic wrap onto the surface of the pudding to prevent a “skin” from forming on top.
The pudding will keep in the refrigerator for up to 3 days.
Vanilla Cake Pan Cake, ABC-Easy as 123, That’s How Easy Cake Can Be

Vanilla Cake Pan Cake, ABC-Easy as 123, That’s How Easy Cake Can Be

This is your lucky day!  This post is a twofer.  That is I will be posting two recipes today! Ok, maybe not so lucky as we are smack dab in the middle of a smokefest alternating with a heatwave and this post is about baking.  Although, the upside is both cakes are INCREDIBLY easy to make so your time in the kitchen will be minimal.  You can wait until it cools down if you are in a hot zone, either way, these should be in your “need a quick homemade dessert right now” file.

But Why a Twofer?

Funny you should ask.  I sat down to write a post on CAKE-TWO, thinking I had already posted this Vanilla Cake Pan Cake recipe.  Nope, not to be found.  It is on my Instagram (shameless plug) but apparently I had yet to wax poetically about that cake on my blog.  My bad.

Both recipes are from King Arthur Flour and are INCREDIBLY EASY TO MAKE.  This is one bowl baking territory.

Without further ado, CAKE-ONE.

A couple of months back,  at the start of COVID, I needed a simple cake for a virtual birthday celebration for a friend.  Since it was virtual, the fam and I would be eating most of it, so quick, easy, and small were my guidelines.  Vanilla Cake Pan Cake on King Arthur Flour fits the bill.  Get this, no butter and no eggs.  Not gonna lie, I was dubious, no butter, no eggs?  It works!  Oil as the fat, baking soda and baking powder as the leavening agents, and vanilla for flavor.  A nice little tasty cake. The cake itself is vegan, if you use a butter sub for the frosting, the entire cake can be vegan.  This cake falls in the stupid easy category.  The frosting is a classic buttercream.  You could forego the frosting for a generous dusting of powdered sugar and some berries.  But if you need a festive cake, frosting with sprinkles or jimmies is the ticket.

So, need a quick dessert?  Here’s your answer. Now, onto the second post. Heh, heh, heh.  CAKE-TWO

Vanilla Cake Pan Cake

Ingredients

Cake

  • 2 cups King Arthur Unbleached All-Purpose Flour 241g
  • 3/4 teaspoon salt
  • 1 1/2 teaspoons baking powder
  • 1/2 teaspoon baking soda
  • 3/4 cup + 2 tablespoons water 198g
  • 1/2 cup vegetable oil 99g
  • 3/4 cup granulated sugar 149g
  • 4 1/2 teaspoons cider vinegar or white vinegar 21g
  • 1 tablespoon vanilla extract 14g
  • 1/2 teaspoon almond extract

Frosting Ingredients

  • 4 tablespoons butter, regular at room temperature 57g
  • 2 1/2 cups confectioners' sugar, sifted if lumpy 283g
  • 1/8 teaspoon salt
  • 1/2 teaspoon vanilla extract
  • 2 tablespoons water about 28g

Instructions

  • Preheat the oven to 350°F. Lightly grease an 8” square or 9” round pan that’s at least 2” deep.

To make the cake:

  • In a medium-sized bowl, whisk together the flour, salt, baking soda, and baking powder. Set aside.
  • In a separate bowl or large measuring cup, whisk together the water, vegetable oil, sugar, vinegar, vanilla, and almond extract. Add the wet ingredients to the dry and stir to combine. It's OK for a few small lumps to remain. Pour the batter into the prepared pan.
  • Bake the cake for 30 to 35 minutes, until the top feels set, the edges are beginning to pull away from the sides of the pan, and a toothpick inserted into the center comes out clean.
  • Remove the cake from the oven and either serve the cake warm from the oven or allow it to cool completely in the pan before frosting.

Frosting

  • To make the frosting: Beat together the butter, confectioners’ sugar, and salt until no large pieces of butter remain. Add the vanilla and 1 tablespoon of the water, beating to incorporate. Add enough additional water, a teaspoon at a time, to make a spreadable frosting.
  • Leaving the cake right in the pan, if desired, use a spatula or flat knife to apply the frosting.
  • Store the cake, well wrapped, at room temperature for several days. Freeze for longer storage.
Spring into Asparagus Season

Spring into Asparagus Season

For some silly reason, it never seems to dawn on me that spring has finally arrived until I see bunches of asparagus in the market.  This year is especially strange with the COVID-19 crisis, time just seems to be standing still.  On a dreary rainy day last week, I finally escaped to the market and the first display I saw was the asparagus.  I cracked a little smile, grateful that spring had arrived even in the midst of the Coronavirus pandemic.

While at the market, I bought a bunch of asparagus home knowing exactly what I was going to do with it.  I had just read a wonderful essay by Eric Kim entitled “The Man Who Hated Eating Alone”. Eric is a senior editor for Food52 and author of the column Table for One.  His latest essay on eating alone, (which many of us are experiencing with self-quarantine) intertwined with James Beard’s bio and his recipe for asparagus-delicious, so simple, and perfect for one person.

The recipe calls for asparagus, butter and soy sauce. That’s it.  Thinly sliced asparagus, melt a pat of butter in a pan, add a splash of soy sauce, and saute’ for a couple of minutes so it stays crispy. Sprinkle some coarse salt to finish-boom, done.  So delicious and so easy.  It’s criminal.

But if I think about it, I love most of my vegetables prepared simply.  I make my favorite Chinese dish of pea sprouts or spinach ALOT.  Just stir-fry greens with lots of garlic, a bit of soy sauce, oyster sauce and ginger and that’s it, ready to scarf it down.  Blanch lettuce, Iceberg or Romaine, quickly in water or stock and finish with oyster sauce and oil-done and delicious.  Can’t beat that.

So I shouldn’t be surprised that such a simple recipe would be wonderful. I prepped my asparagus two ways, cut on the diagonal and shaved into long thin strips with a peeler.  Use Ponzu Soy Sauce or Soy Dashi instead of soy sauce which adds a hit of citrus and a dash of sesame oil for pop.  this would also work beautifully with sugar snap peas or snow peas.

Enjoy, Stay home, stay well.

Paper-Thin Asparagus with Butter and Soy Sauce

A simple delicious recipe from Eric Kim of Food 52
Course Side Dish
Cuisine Asian-American
Keyword asparagus
Prep Time 5 minutes
Cook Time 2 minutes

Ingredients

  • 2 tablespoons unsalted butter
  • 8 ounces asparagus cut in paper-thin diagonal slices or shave with peeler
  • Flaky sea salt and freshly ground black pepper garnish
  • 1 tablespoon soy sauce substitute Ponzu or Soy Dashi

Instructions

  • Heat a skillet over high heat and melt the butter. Add the asparagus, season with salt and pepper, and cook for 1 minute. Add the soy sauce and cook for another minute or so, until the butter and soy sauce bubble up into a sticky glaze. Serve immediately.

Notes

Though written as a serving for one, as a side dish this would feed 2-3 people.


No-Knead Bread, Bread in the Time of Corona

No-Knead Bread, Bread in the Time of Corona

The Hubs, Jorge, Sammy, and I are home while Jeffrey is in The City, and Mui is in Houston.  Like most folks, we are finding ways to occupy our time during the quarantine.  Yoga on YouTube, Wes still woodworking in the garage, and the boys playing Fortnite.  Me? Let’s see what have I been doing?

Baking, Cooking, Blogging, Eating

Unfortunately, too much of the last.  Baking has become a respite from the outside world.  Judging by Instagram posts and Facebook posts, not to mention the empty flour shelves at the grocers, a ton of people are feeling the same way.

On our daily family Face-time, Mui raved about the No-Knead Bread she had made (her post here!) It was so easy and so delicious, she convinced me to give it a go.  Although she used the recipe from King Arthur Flour, I perused the internet and found what might be Ground Zero for No-Knead Bread. Way back in the day, Mark Bittman and Jim Lahey of Sullivan St. Bakery introduced No-Knead Bread via the New York Times.  It has become a classic and convinced non-bread bakers, like me, to give it a go.

If you are hankering for a classic Wonder Bread loaf try this Maple Buttermilk Bread made easy with a bread machine.  But, if you are looking for a loaf of bread that reminds you of that little European bakery you visited or your own favorite neighborhood artisanal bakery, this is it.

Best of all, it is stupid easy and amazingly tasty.  Impress your friends and family, don’t tell them how crazy easy it was to make. No kneading required. Really, the major investment is time.  Five minutes to combine the three ingredients, flour, salt and yeast, to which you add water, but then twelve to eighteen hours of waiting before the next step.

Toss the ingredients into a bowl, stir it together-done

Plan on when you want fresh bread…a day in advance.  I throw my batter together around four o’clock in the afternoon, get a good night’s sleep, have my morning coffee, putter around and about ten in the morning I pour the wet dough out on a floured board, shape it, and let it sit another hour.  The original recipe calls for placing the dough on a tea towel after proofing, but I use parchment paper that I can then grab to transfer the dough into the heated dutch oven.  Paper and dough gets plopped in the pot in one fell swoop.  Easy peasy.

Dough after 12 hour rest
Dough after 18 hour rest
Notice the elasticity of the dough as I put it on to the floured surface
Thirty minutes before baking, turn on the oven and place your dutch oven in it.

Danger, BAKER ROBINSON, Danger!  PLEASE USE POTHOLDERS FOR THE NEXT STEPS!!!!

Pull the pot out of the oven, PLOP that baby into that SUPERHOT dutch oven and bake it covered for 30 minutes.  Uncover the pot (GLOVES PLEASE) and bake for additional 10-15 minutes to crisp and brown the crust.  Remove the loaf and let it cool.  It will be a little tough to cut the loaf when it is warm, so try to resist if you can before cutting.

Loaf #1 seen above, I didn’t score. Loaf #2 I used a serrated knife and lightly slashed the top of the loaf. (Banner pic)

Don’t loaf around, make this bread!

No-Knead Bread

Course Side Dish
Cuisine American
Keyword Mark Bittman, No-knead Bread, NYT Cooking
Prep Time 5 minutes
Cook Time 30 minutes
Resting time 18 hours
Total Time 18 hours 35 minutes

Equipment

  • Dutch Oven or oven proof pot

Ingredients

  • 3 cups all-purpose or bread flour more for dusting
  • ¼ teaspoon instant yeast
  • 1-1/2 teaspoons salt
  • Cornmeal or flour as needed
  • 1-5/8 cup water approximately 70 degrees
  • cornmeal for dusting

Instructions

  • In a large bowl combine flour, yeast and salt. Add 1-5/8 cups water, and stir until blended; dough will be shaggy and sticky. Cover bowl with plastic wrap. Let dough rest at least 12 hours, preferably about 18, at warm room temperature, about 70 degrees.
  • The dough is ready when its surface is dotted with bubbles. Lightly flour a work surface and place dough on it; sprinkle it with a little more flour and fold it over on itself once or twice. Cover loosely with plastic wrap and let rest about 15 minutes.
  • Using just enough flour to keep dough from sticking to work surface or to your fingers, gently and quickly shape dough into a ball. Generously coat a cotton towel (not terry cloth) with flour, wheat bran or cornmeal; put dough seam side down on towel* and dust with more flour, bran or cornmeal. Cover with another cotton towel and let rise for about 2 hours. When it is ready, dough will be more than double in size and will not readily spring back when poked with a finger.
  • At least a half-hour before dough is ready, heat oven to 450 degrees. Put a 6- to 8-quart heavy covered pot (cast iron, enamel, Pyrex or ceramic) in oven as it heats. When dough is ready, carefully remove pot from oven. Slide your hand under towel and turn dough over into pot, seam side up; it may look like a mess, but that is O.K. Shake pan once or twice if dough is unevenly distributed; it will straighten out as it bakes. Cover with lid and bake 30 minutes, then remove lid and bake another 15 minutes, until loaf is beautifully browned. Cool on a rack.
  • * I place the dough on floured parchment paper and used the paper to rransfer the dough into the pot. So easy. Score the top of dough lightly if desired for that cool fissure on top.

Notes

Mr. Bittman came up with a Speedy Version of No-Knead Bread, here is the video
https://www.youtube.com/watch?v=4LaODcYSRXU
Recipe
3 cups of flour
1/4 tsp yeast
1.5 t salt
 1/4 tsp red wine vinegar
1 cup hot water approximately 130 degrees, not boiling, that would kill the yeast
Rise time 3-4 hours.  Follow original recipe as directed.
 
 
I’m Just a Bread Machine and I Won’t Knead for Nobody But You (Maple Buttermilk Bread)

I’m Just a Bread Machine and I Won’t Knead for Nobody But You (Maple Buttermilk Bread)

The COVID-19 stay at home policy has me pulling out my mixing bowls, pots, and pans.  Cooking and especially baking keeps me busy and helps calm the COVID-19 jitters.  I find myself gravitating towards comfort foods and foods from my childhood.  The first thing that came to mind was bread.  Who doesn’t like the aroma of baking bread?  Is there a more perfect food than fresh warm bread, slathered with butter and a dollop of jam?  Apparently I am not alone.  Who knew that all those pictures of empty shelves at the supermarkets were of the flour aisles.

After scavenging a couple of stores, I found the last two bags of King Arthur Flour on the shelf at Whole Foods (sorry, I was THAT person) and packets of yeast at Raley’s.  I settled in under the #stayhome mandate (totally cool with it) and started my carb bender, I mean bread baking.

I made two loaves of bread, best described as polar opposites.  Both are incredibly easy but for really different reasons.

The first loaf a Buttermilk Maple Loaf comes from Lora Brody’s Bread Machine Cookbook, a book I picked up waaaay back in the day when I bought a bread machine.  The Maple Buttermilk Loaf was my go-to recipe in the book.  Great for toast, sammies, crumbs or croutons.  It has a nice flavor and the texture of classic sandwich bread.  Pretty much the bread you grew up with soft, tender, slightly sweet-yummy. Perfect for Peanut Butter  and Jelly, Fried Baloney Sammies and Tuna Fish with Chips Sandwich, the stuff of childhood. Perfect for these times.

And it couldn’t be easier, that is, as long as you still have that bread machine hiding in a closet or corner of your pantry, or call your mom, she probably has one packed away, probably in your old bedroom.

So drag that puppy out and make yourself some bread.  Literally, dump, push the button, comeback in a few hours, bam, a loaf of freshly baked bread.  Like magic. The kneading, the proofing, the resting, all take place in your bread machine.  All the rage, back in the day.  Did you buy too many berries in your moment of frenzied grocery shopping?  Make this super easy and delicious berry jam to go along with your freshly baked bread!

The second loaf is a No-Knead Bread, more like an artisan bread, almost as easy to make, and totally swoon worthy.  Find the post here.

My machine is an old Panasonic that makes 1.5 pound loaves.  Which means really TALL bread, lol. I may be crusty, but I don’t like the crust from machine made loaves.  I cut my slices into squares and keep the scraps for bread crumbs, croutons and for Sammy, he adores bread.

Maple Buttermilk Bread

Easy, delicious homemade Maple Buttermilk Bread made in your bread machine! Pefect for sammies!
Course Side Dish
Cuisine American
Keyword Maple Buttermilk Bread
Prep Time 5 minutes
Cook Time 3 hours 30 minutes

Equipment

  • Bread machine, lol

Ingredients

  • 3 Cups unbleached white flour
  • 4 tablespoons powdered buttermilk
  • 1 teasoon salt
  • 1 Tablespoon butter
  • 3 tablespoons plus 1 teaspoon pure Maple Syrup*
  • 1 Cup water
  • 2 1/2 teaspoons yeast

Instructions

  • Dump* all the ingredients in the machine except the yeast**, program for Basic Bread. Push the button. Comeback in 3.5 hours. Let bread cool so it is easier to cut.
  • *Refer to your machine directions for order of ingredients.
  • **If your machine has a separate yeast reservoir, place yeast in that.

Stay home, stay well.

Knead A Little Comfort in These Trying Times? (King Arthur Flour No-Knead Bread)

Knead A Little Comfort in These Trying Times? (King Arthur Flour No-Knead Bread)

Hi everyone! Hope you are all staying sane out there sheltering in place! It is me, Jamie, your favorite blogger. As I am clearly the superior baker in our family, I have decided to grace your feeds with a quick lil’ post about my latest baking passion:

BREAD

Now, I know what you are thinking: “bread is the last thing I should bake if I am stuck at home all day with nothing to do except move my mouse around my work computer every five minutes” WRONG. Sorry, I should not invalidate your feelings, but let me tell you why your feelings are misguided and sad.

The smell of baking bread will 100% make your home much homier.

Picture this: You are in hour 2 of a 3 hour pointless meeting, and Karen is going on and on about whether or not you are considered “business critical” (newsflash, you probably aren’t if Karen can take up 3 hours of your time to talk about nothing). You are sitting at your uncomfortable kitchen table, hunched over because it is NOT ergonomically sound, with the smell of Clorox and lemon encroaching into your six feet of space. Not fun, right? Actually, the exact opposite of fun.

Now, picture this: you just popped a loaf into the oven, and the smell of baking bread is slowly permeating through the house. You hang up on Karen because life is too short to listen to people droning on and on (sry Karen).  You improvise by using a couple of boxes to set up your very own standing desk on your kitchen table (hey, I am an engineer). While  standing there, admiring your ergonomic handiwork…

What’s that? Beep, beep, beep. Aha, your timer is going off—your bread is READY.  You pull it out, mouth-watering from the delicious, tantalizing smell.  After a few minutes, you cut into that steaming loaf, trying not to burn your fingers (Auugh, I couldn’t wait!). Smear on a slab of butter, plop a dollop of jam on it and you are in heaven. Nothing can stop you now. You are invincible, winning WFH. All your sad coworkers are at their desks having a miserable time, and here you are, a queen, eating literal carbo gold. 

In all seriousness, baking bread is definitely a vibe right now, especially with the Coronavirus pandemic.  Ask my Mom, she’s still scavenging for flour. While I was intimidated to try my hand at baking bread, it is actually pretty simple and very relaxing. Stressed about taking too much time away from work? Bread has an average of about 4 ingredients in it, and 99% of the time to make bread is for proofing and baking it. Stressed in general? Some breads can require 10-15 minutes of kneading time, which really just entails you pounding the shit out of it on a counter. Get your angst OUT.

Concerned about being buried in bread? One of the best parts about bread is that it is freezer friendly. If you can’t eat an entire loaf in two days like me, you can slice that bad boy up and freeze it in a Ziploc bag (or a reusable environmentally friendly product that I can’t get right now because I’m sheltering in place) and eat it anytime you want.

I threw together one of my favorite recipes, No-knead Crusty White Bread, from King Arthur Flour. The recipe calls for 7 ½ cups of flour, but I halved it to make just one loaf. The recipe also calls for regular flour, but I used bread flour (higher protein content). Whole foods and HEB were out of flour, so I improvised. My mom is probably cringing while reading this (she hates when I substitute. I normally would not do this, but you gotta do what you gotta do). I extended the proofing time a bit longer to compensate. 

This bread is SO easy. It took me 10 minutes to put it together initially, and I proofed it for 3 hours at room temp, then 3 hours in the refrigerator. I used a dutch oven to bake it, and I baked it for the full amount of time.  I removed the lid for the last 5 minutes just to give the top a bit more color. The CRUNCH that you get from baking it in a dutch oven kicks this bread into the top 10% of breads to bake.  I made a pot of Senate Bean Soup to go along, but this bread was the star of the meal.

Easy, versatile, delicious—the perfect recipe to make in times like these.

Hope everyone is staying safe—and sane!  Happy baking 😊

Here is the link to the recipe I used, so so tasty..not the recipe, the bread, lol.

No-Knead Bread from King Arthur Flour

I Tried To Buy Some Flour, They Said No, No, No (Not Your Mama’s Rice Krispy Treats)

I Tried To Buy Some Flour, They Said No, No, No (Not Your Mama’s Rice Krispy Treats)

Day 2 of Shelter in Place.  I receive a text from a friend that the supermarkets are a little calmer than yesterday.  That’s my cue to head to the market to pick up a few items.  Nope, not gonna go crazy, just need a few staples like flour, yeast, butter, and milk.  Since we will be “cocooning” I wanted to do some baking.  Sounds like a plan, right?

Apparently, everyone else wants to too.

Not a bag of flour of any kind on any shelf in the 3 grocery stores I tried.  Wow.  I’m dumbfounded.  I couldn’t find yeast either.  I feel like we are in pioneer living mode.  All good, time to improvise.

So I grab the next best thing, a bag of marshmallows.  I have Rice Krispies at home, just got more butter, and maybe I’ll make them happy Rice Krispies with some sprinkles.  A little bit of fun and cheeriness to offset our Coronavirus blues.

I know what you are thinking…oh please, a recipe for Rice Krispy Treats?

Not just Rice Krispy Treats.  Nope, not the “look on the side of the cereal box recipe” but Smitten Kitchen’s version which a friend from Tennessee renamed “Damn good, Double Buttah R-aah-ce Krispy Treats”.

Adapted from Smitten Kitchen. In the 3jamigos archives find it here.

Like the Big Fig Newton….here’s the hard part BROWN BUTTER  This added step elevates Snap, Crackle and Pop’s version to a whole new level.  That…and oh, twice the amount of butter.  Just trying to be transparent folks.

Melt butter over medium heat, keep an eye on it.  The butter will foam and as it gets hotter the milk particles will brown.  Keep a close eye so it doesn’t burn and stir constantly.

Look at those nice brown bits that are just flavor bombs!  So delicious!

I added happy sprinkles but sadly, they melted.  My advice is to wait until you pour the mixture into the pan to shape and cool, then go crazy scattering sprinkles on top.

BRAG ALERT!

Upside to shelter at home…Hubby just made me a cookie box to transport goodies to friends and family functions after we get through this!  So excited, box has a sliding lid and dividers for different kinds of cookies. Hmmm,not my birthday but I’ll take it.

Stay safe, stay healthy!