Category: Soul Food

Jjim Dak (Korean Braised Chicken)

Jjim Dak (Korean Braised Chicken)

Brrrrr… getting chilly out there.  While I love summer, I do look forward to winter.  As the temperature drops I start dreaming of dishes that warm the body and soul.  Soup bowls and spoons that have languished on the shelf all summer are now front and center, waiting to be filled.  Soups, rice bowls, stews, nabes,  dumplings, noodles, and casseroles are always in the winter rotation.  Comfort food with a capital C.

Some of my favorite casseroles or soups don’t require hours on the stove, this is one of them, Jjim Dak or Korean Braised Chicken.  Jjim Dak is a hearty chicken, vegetables, and glass noodle dish that comes together in an hour.  It’s flexible in terms of ingredients (which mean any veggie you have hiding in your crisper is fair game), and filling due to the addition of potatoes and glass noodles.  A TikTok video for this dish caught my attention so I headed to my favorite Korean recipe site, http://Koreanbapsang.com.  A quick search of her site and bada bing, bada boom…I found her recipe for Korean braised chicken.

Let’s get to it…Bowl Food is Soul Food

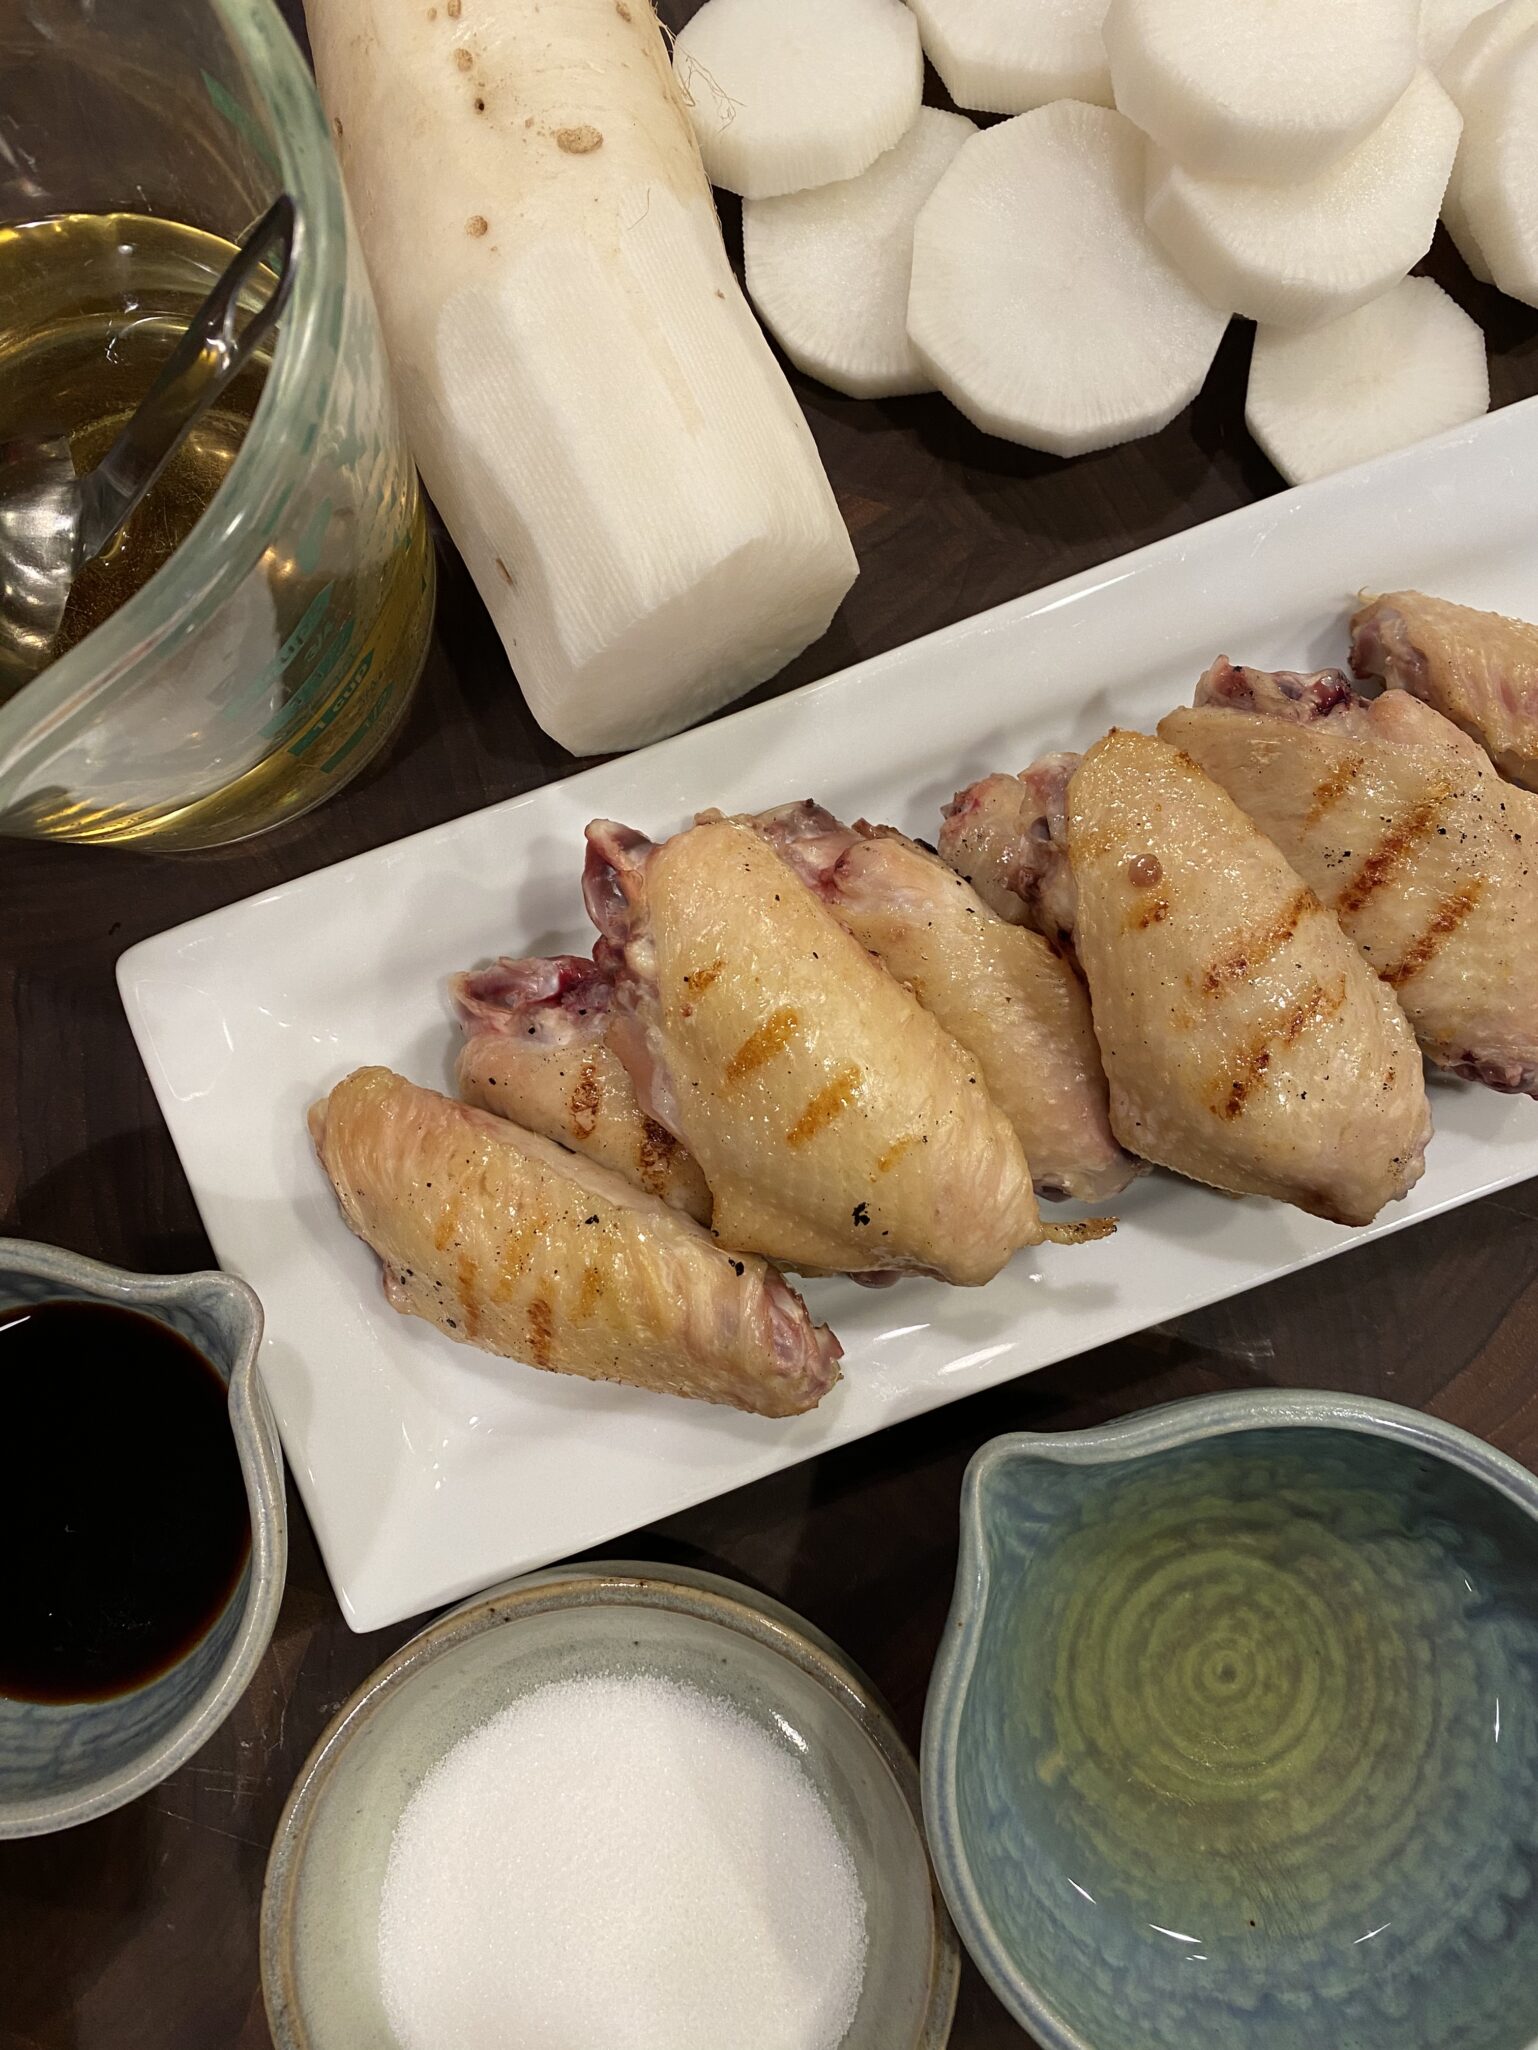
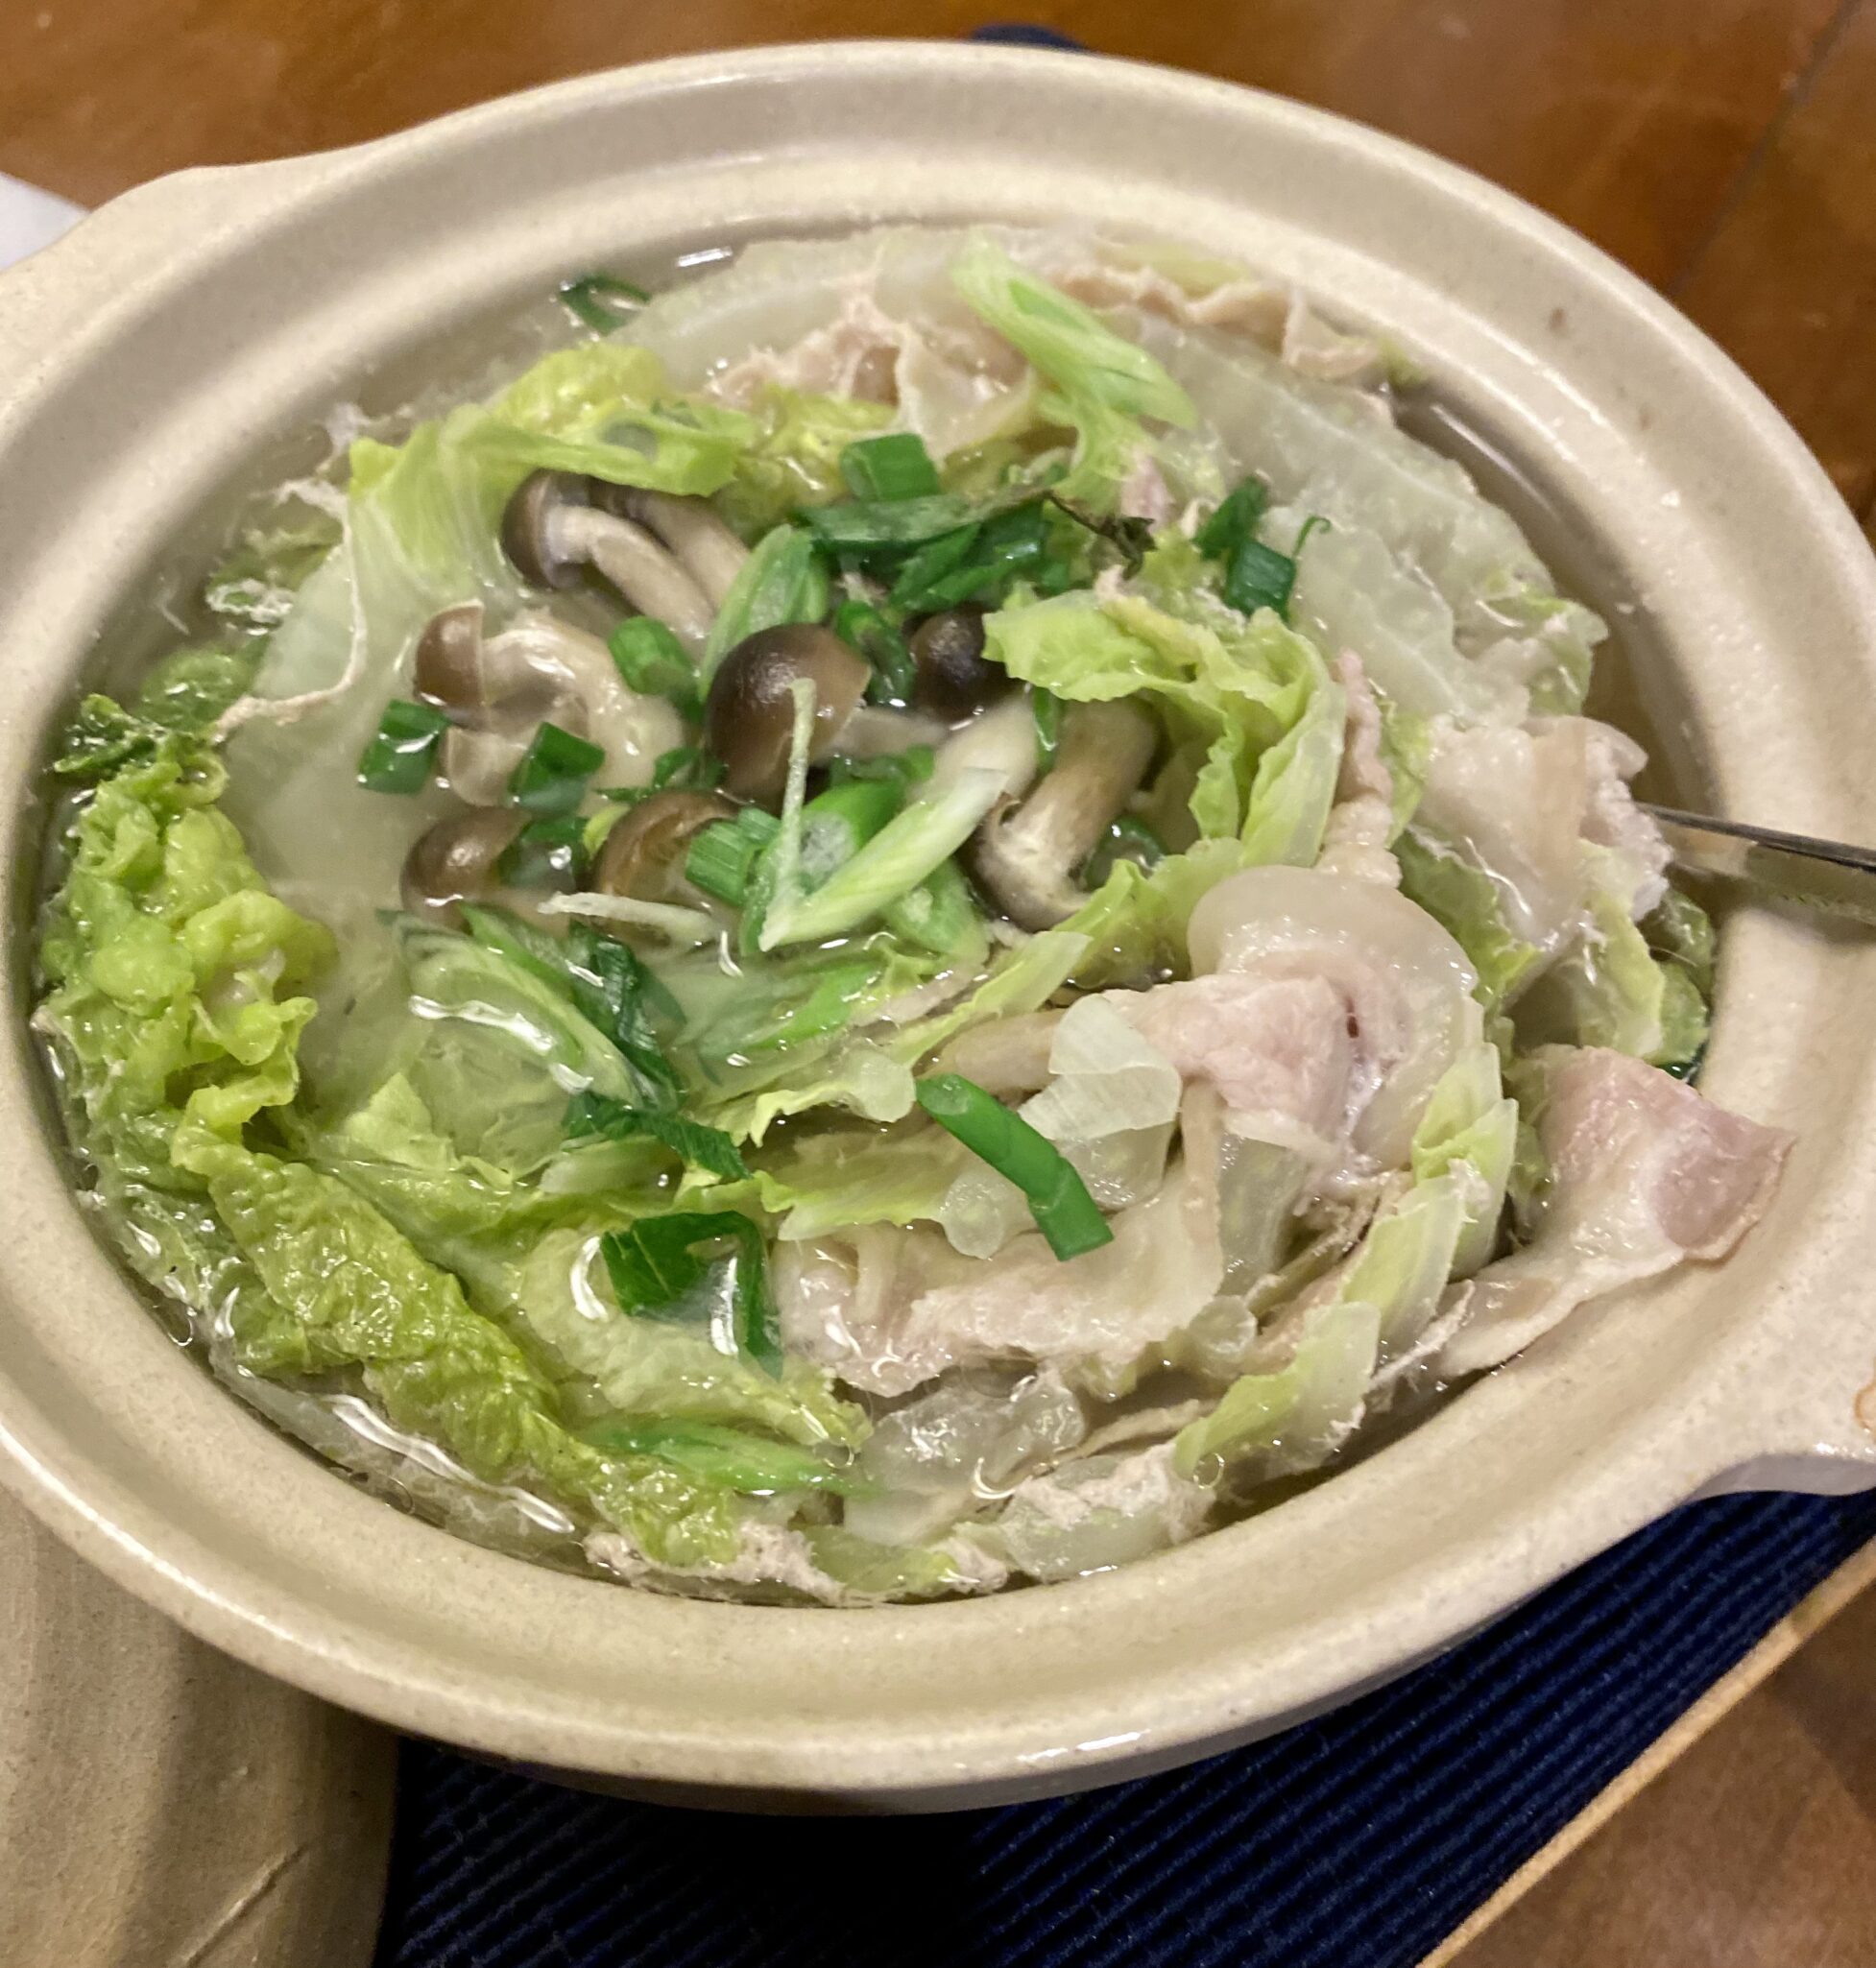
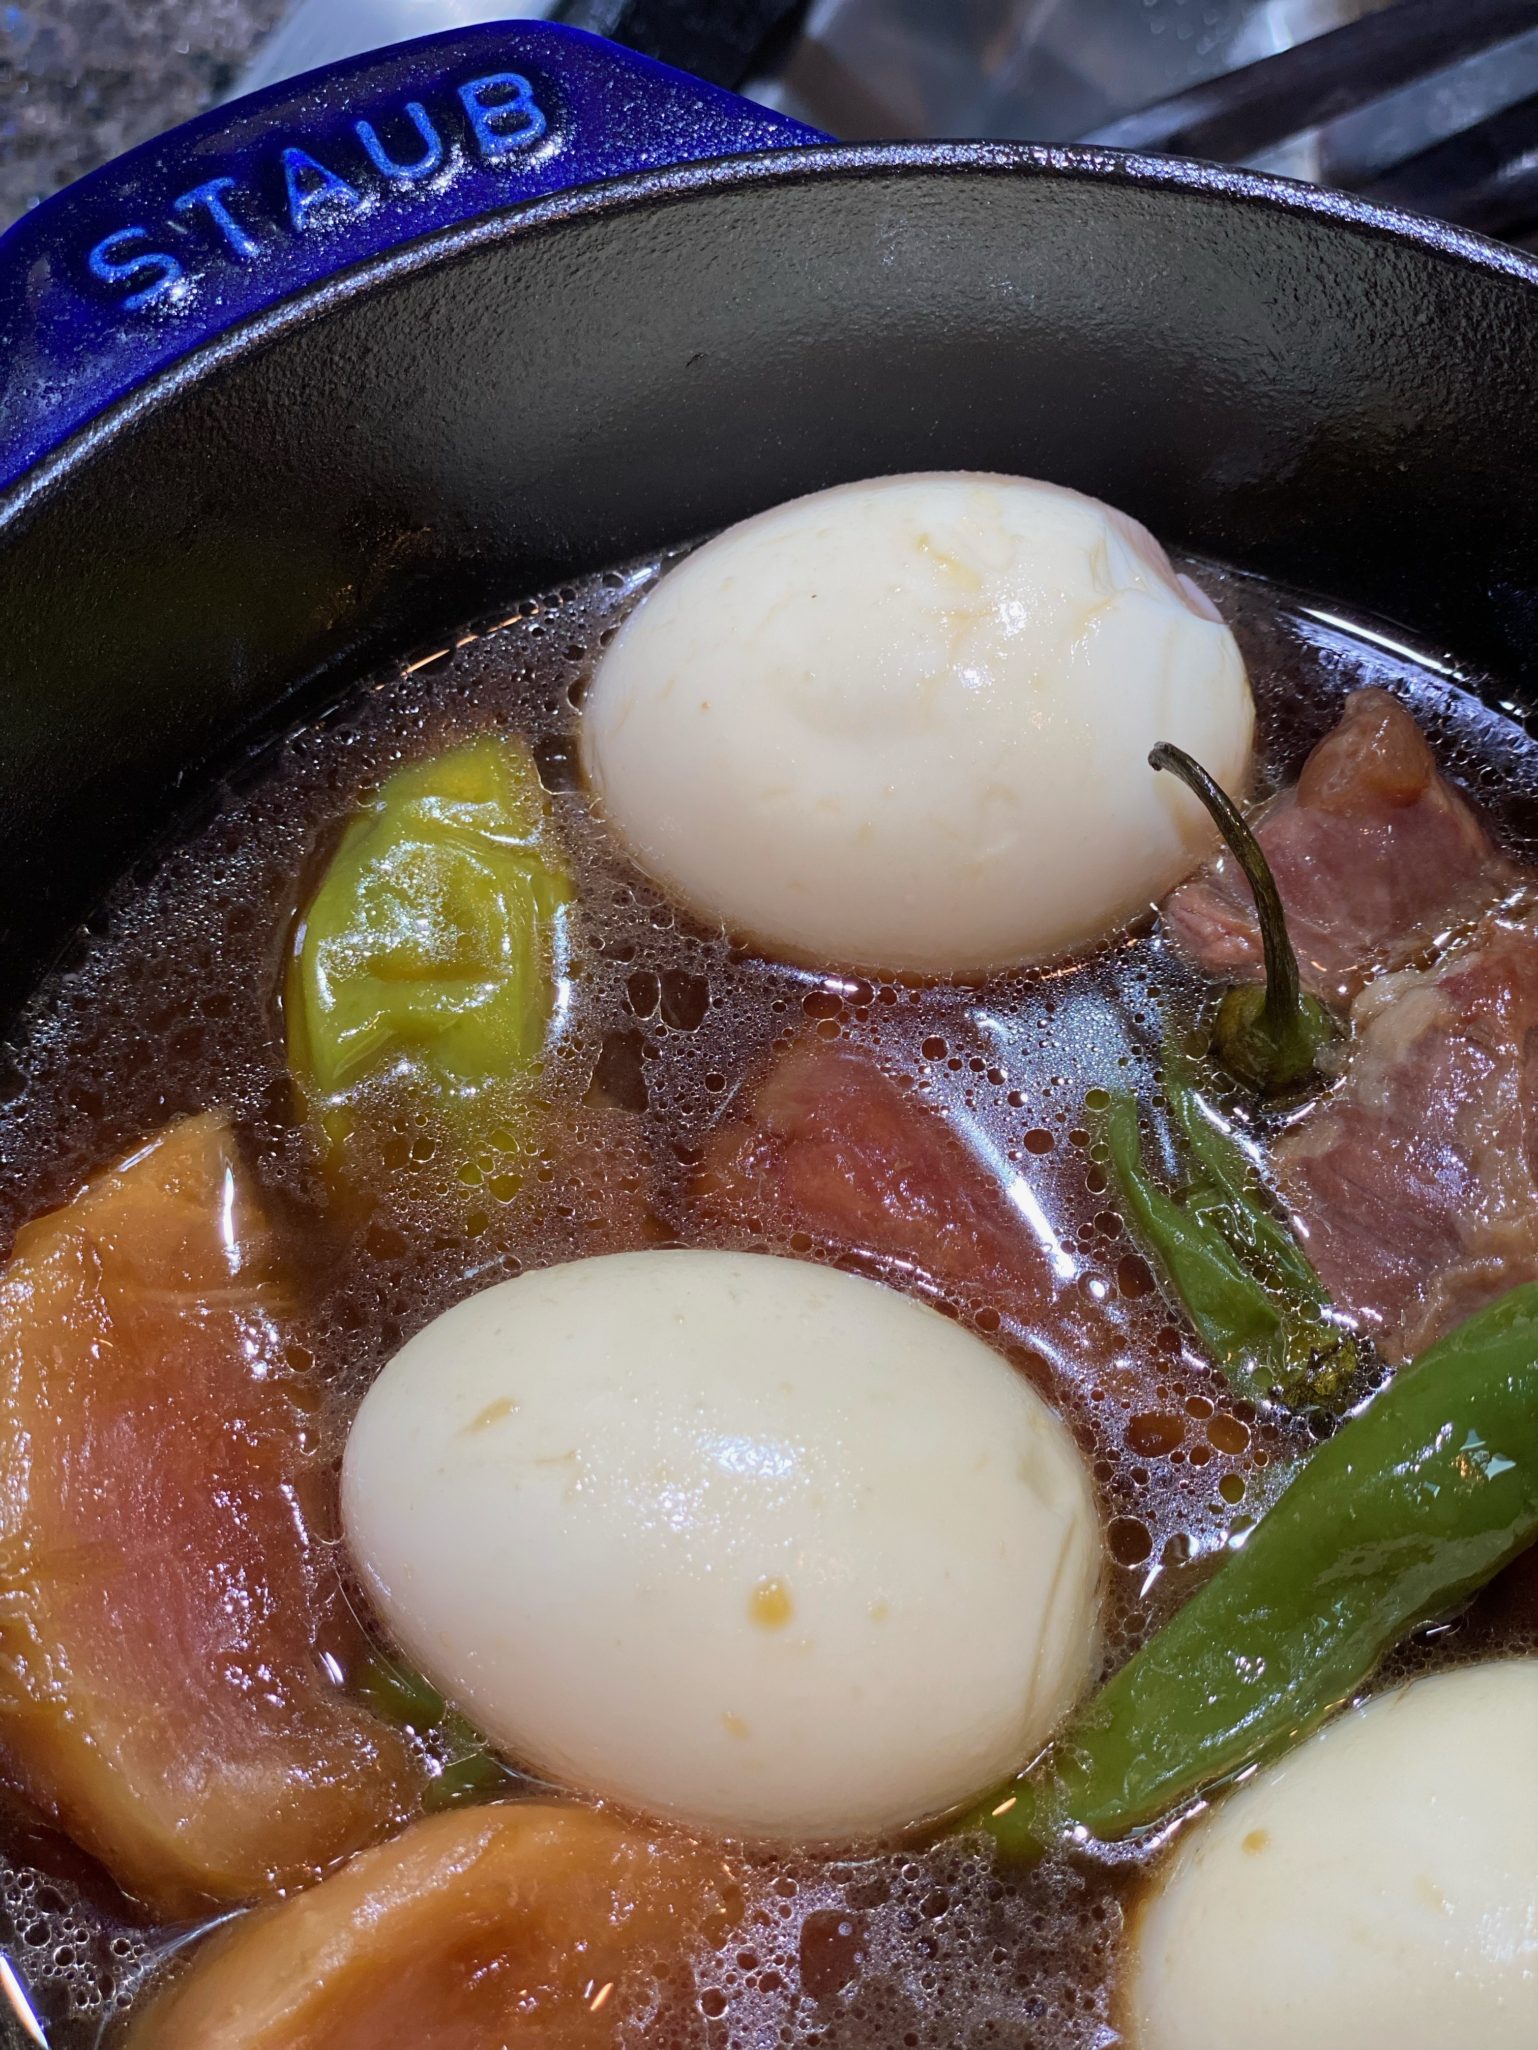
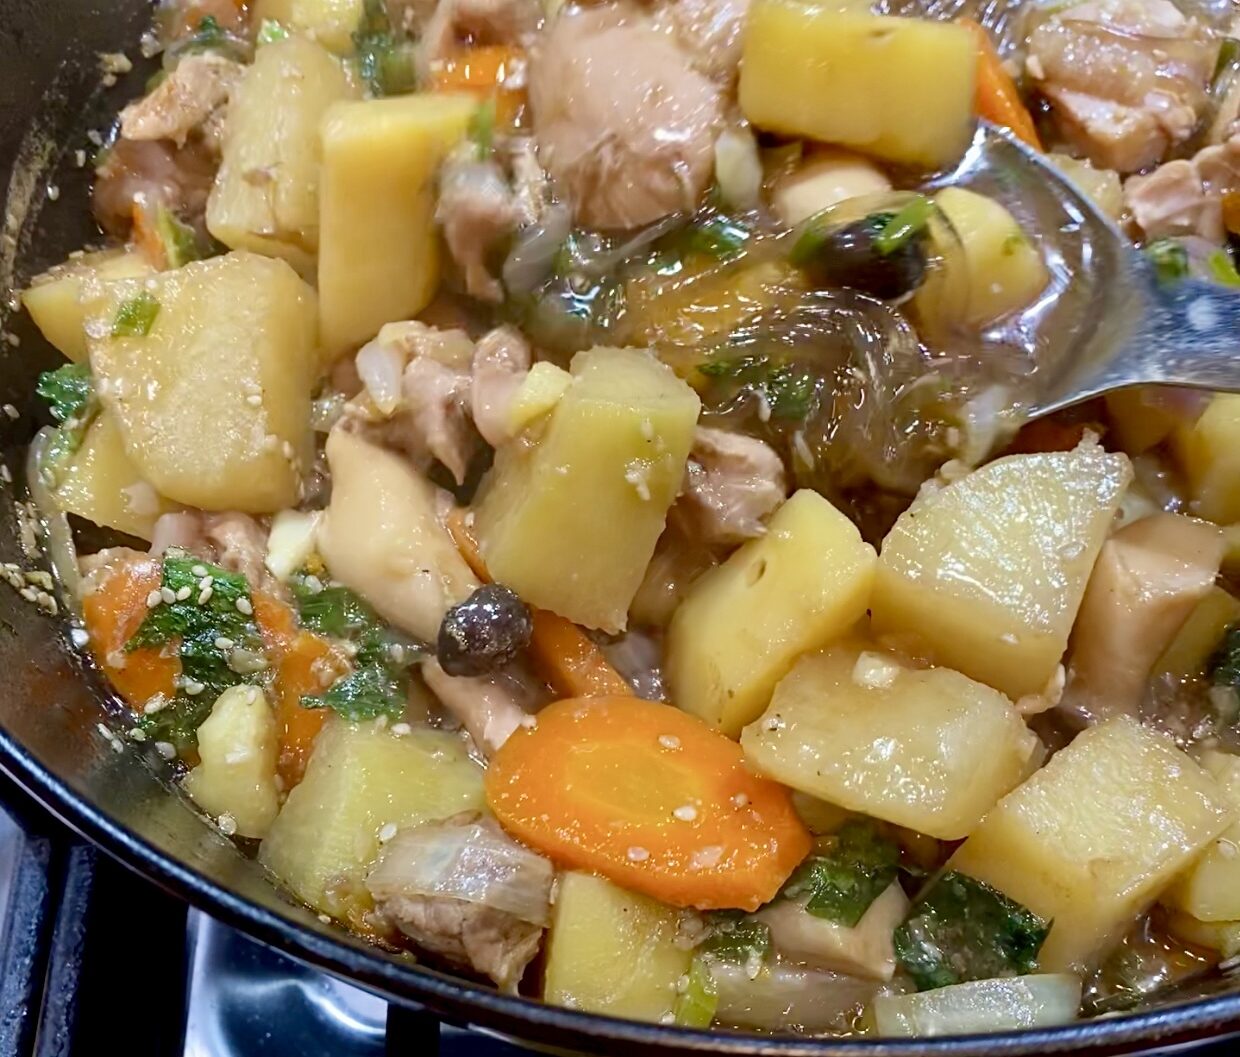
This is a very flexible recipe. The foundation is chicken, potatoes, carrots, onions, mushrooms and chili.  Braise the chicken in soy sauce, oyster sauce, a bit of sugar and mirin.  This is an easy one-pot meal that comes together quickly and is guaranteed to chase the chilly weather away.

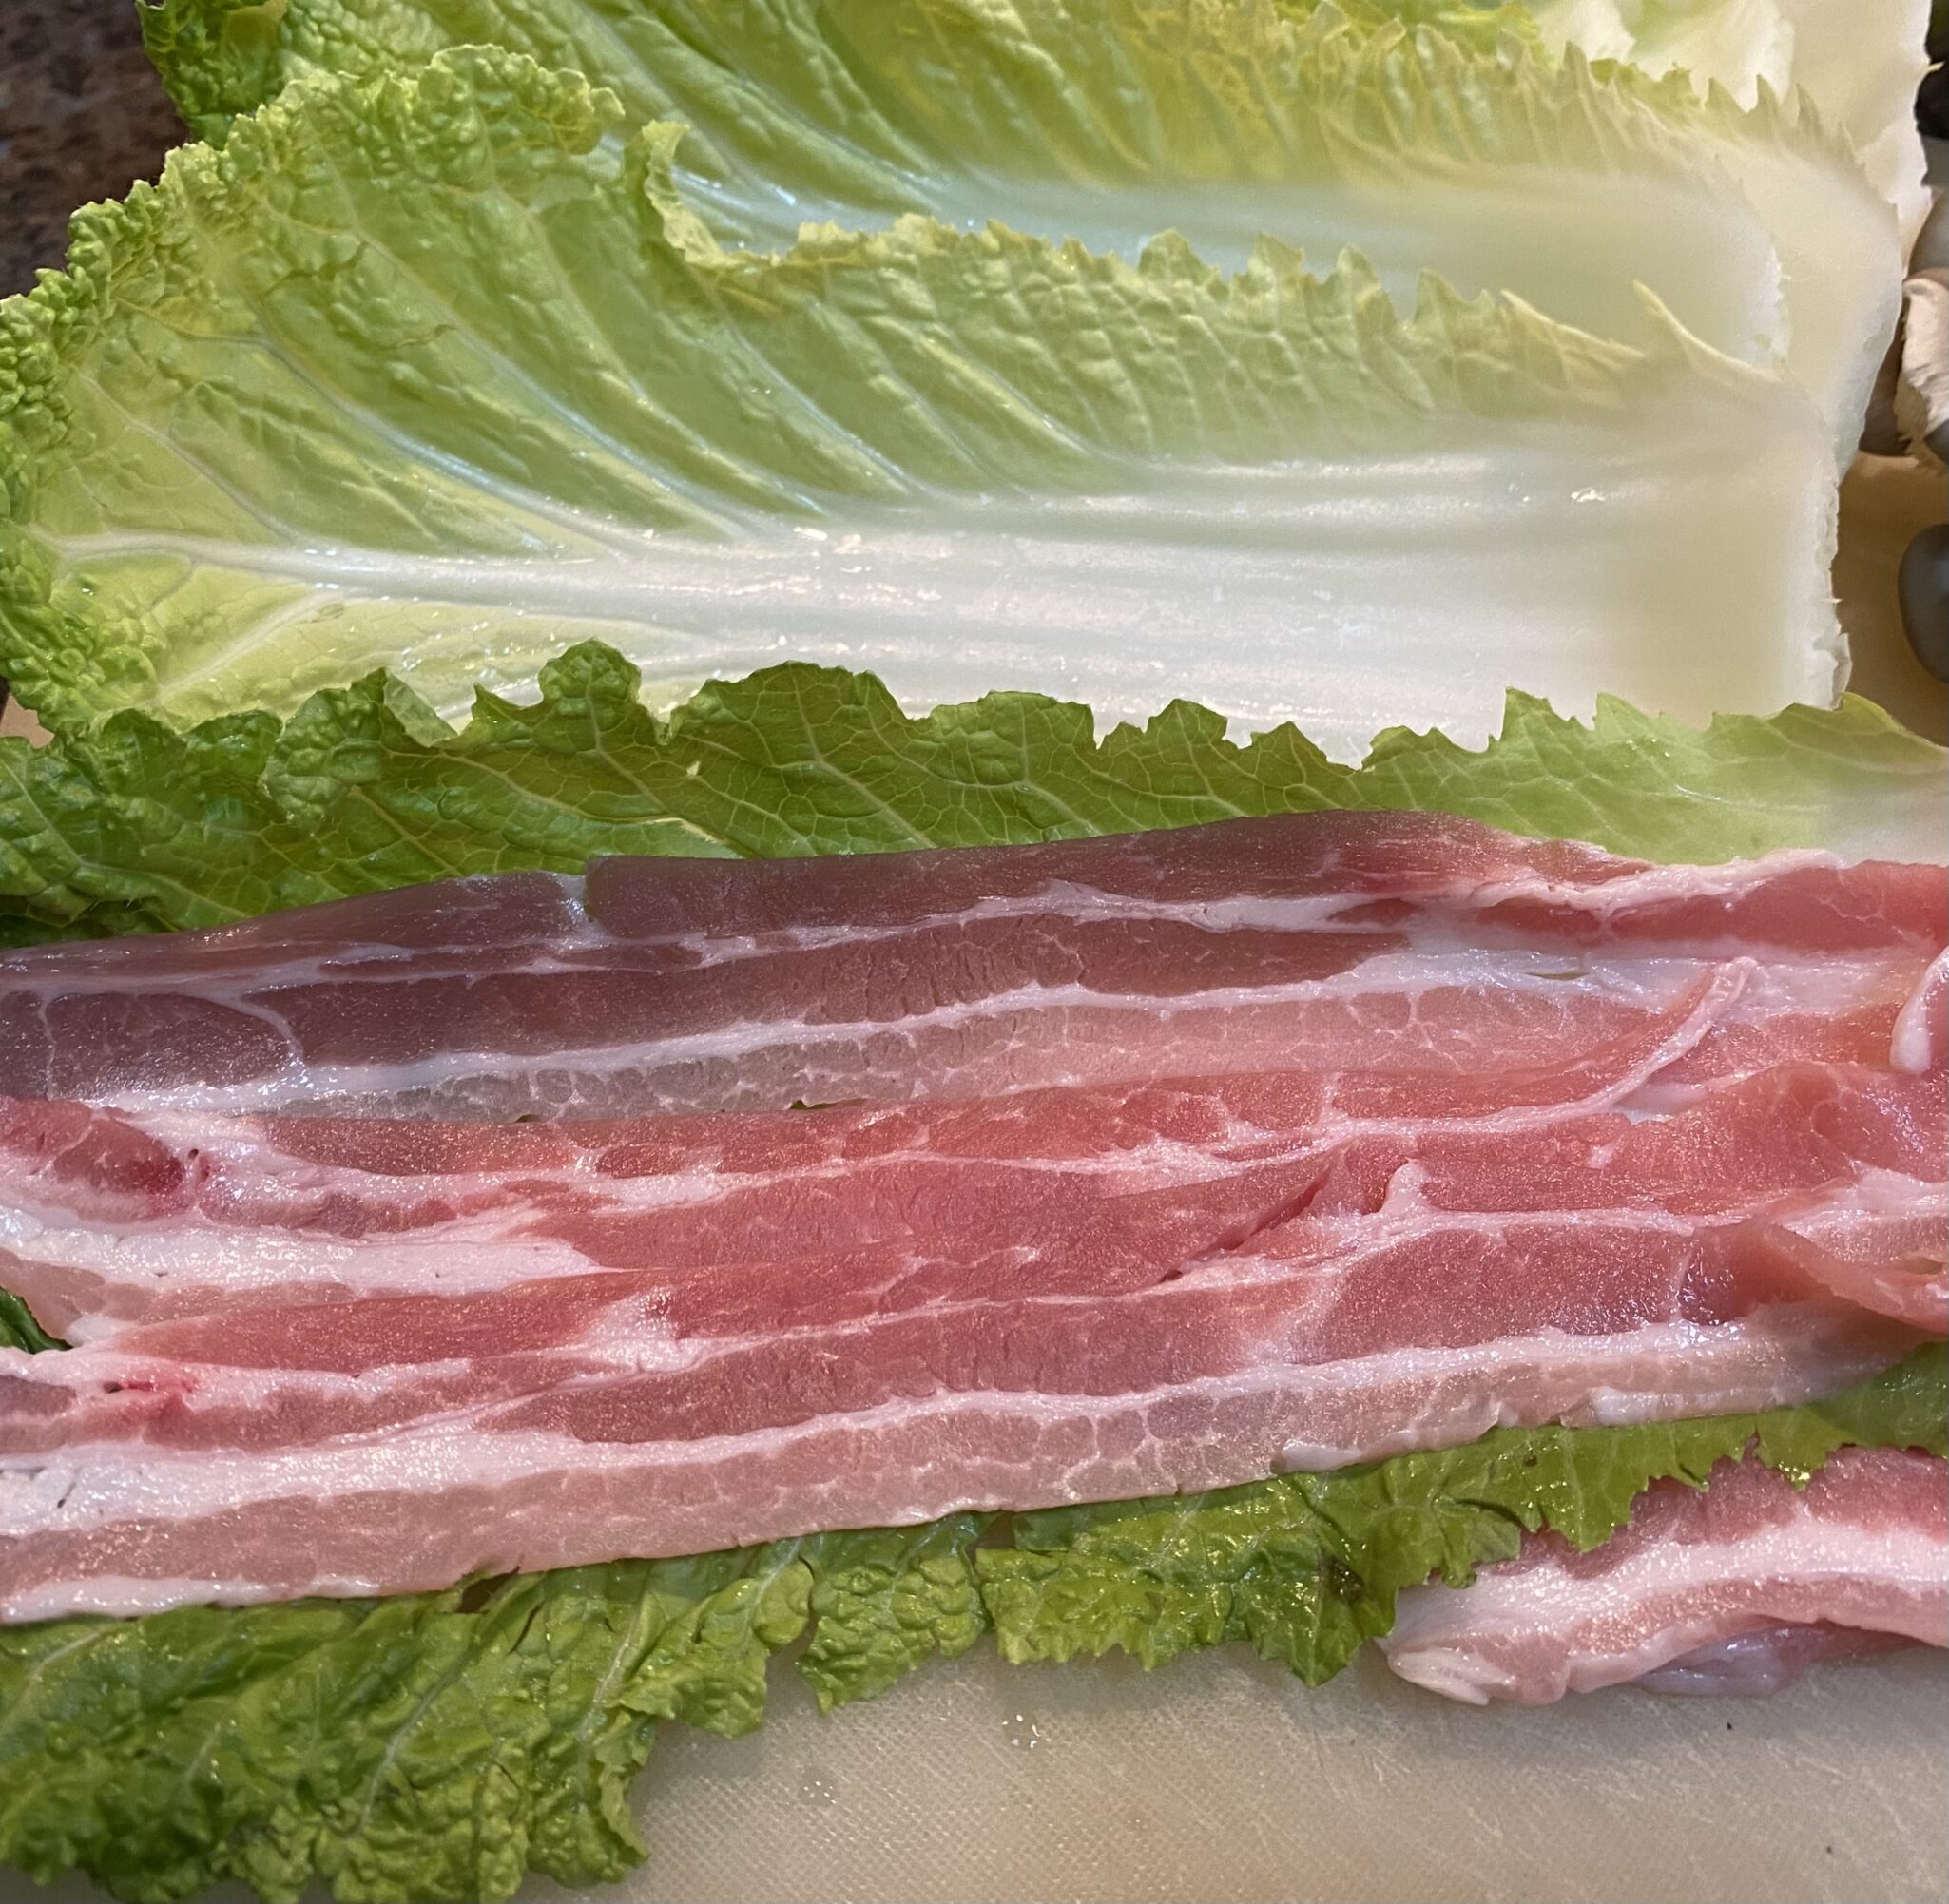
Use chicken thighs or drumsticks, preferably bone-in and cut into large bite-size pieces.  You can use boneless but you run the risk of overcooking the chicken while braising the vegetables.  You can find cut bone-in pieces of chicken at most Asian markets.  If you cut it yourself make sure to rinse the chicken after chopping for bone fragments.

Veggie So Many Choices, So Little Time…Cause I’m Hungry

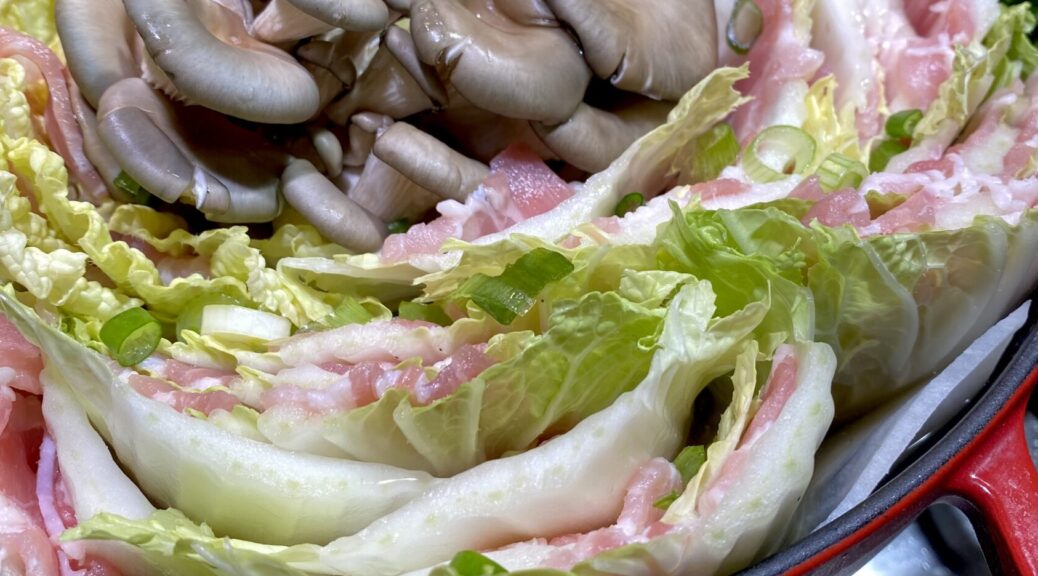
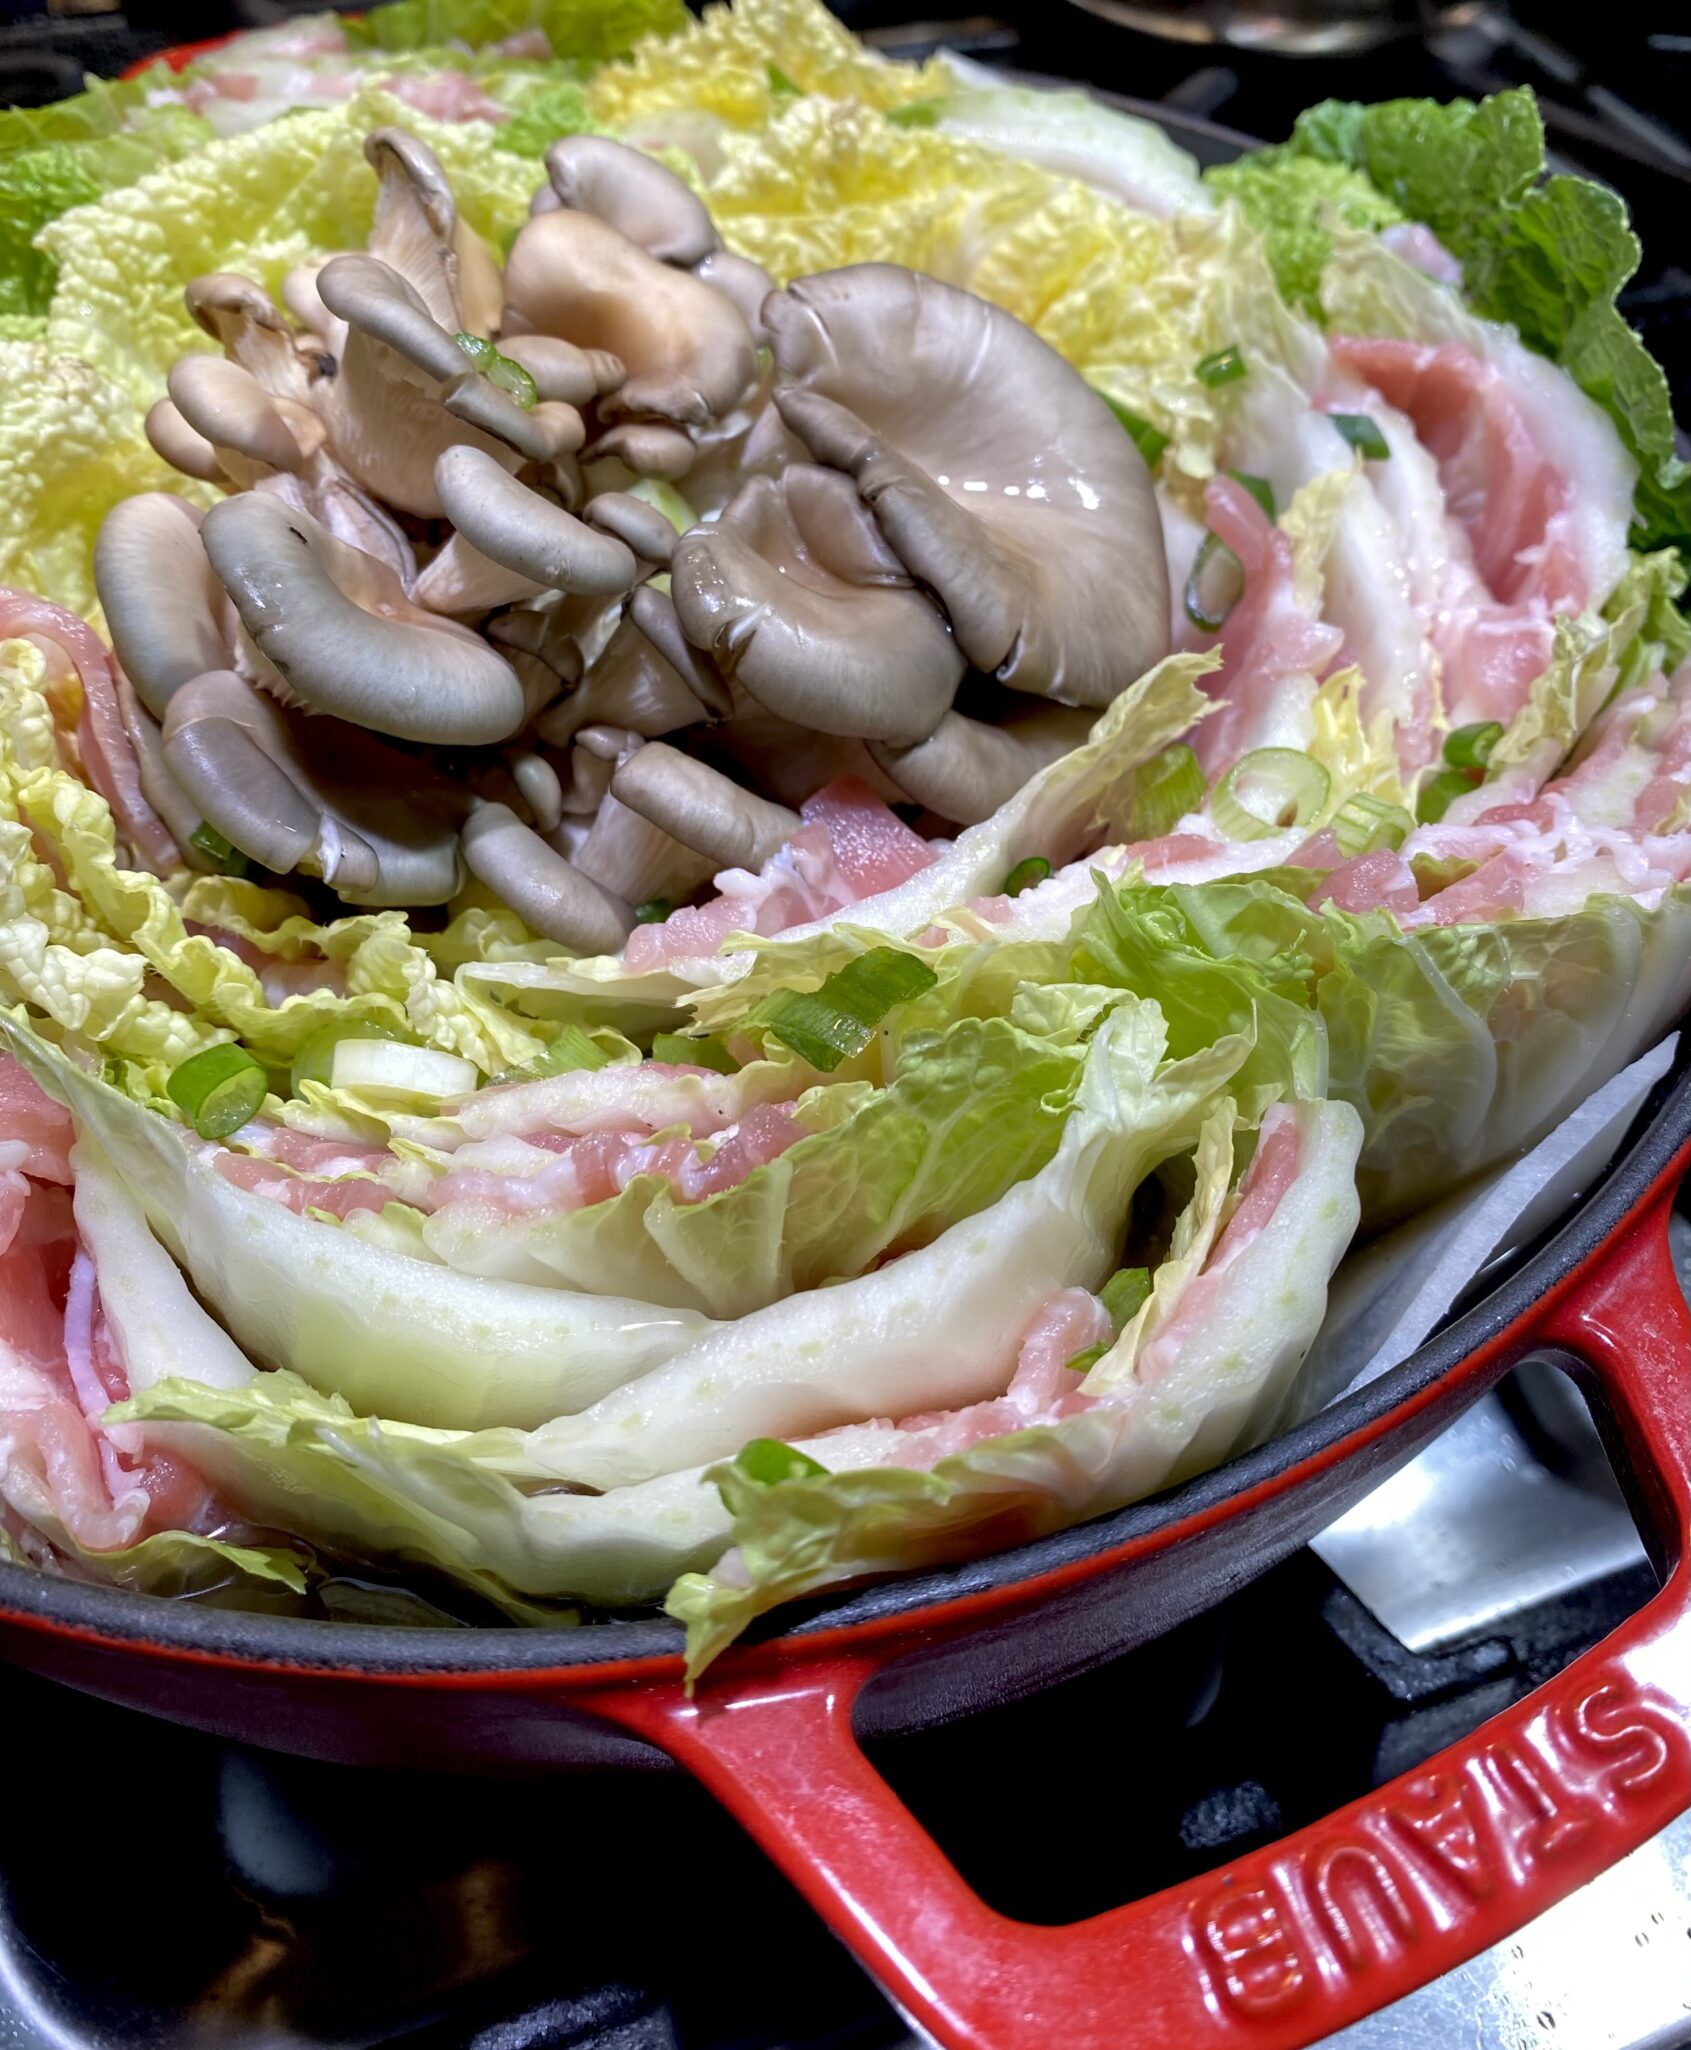
Traditionally, this dish has the usual suspects, carrots, potatoes, onions, and scallions.  Feel free to add whatever you like and it will be divine.  I added mushrooms, Korean radish, and Korean radish leaves (so excited when I saw the tops on the radishes at the market).  Hands down yummy.  So add whatever you like, including KALE (nooooo, can’t believe I wrote that).  Cut the veggies in smaller bites due to quick cooking time.  In fact, if using boneless chicken, I would dump everything in at once and not cook the chicken first.  Make it in advance, if you can, to let the flavors develop.

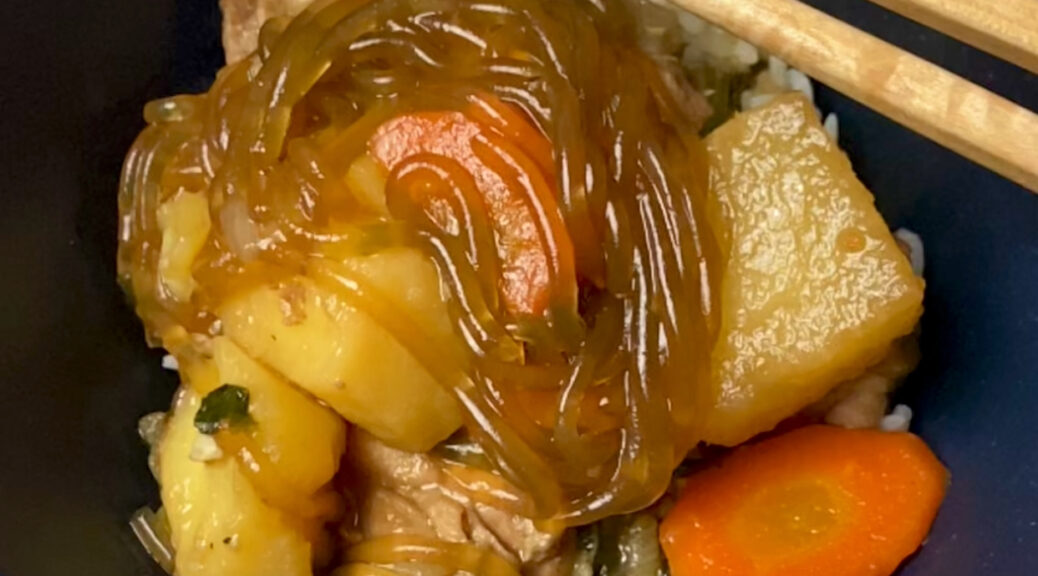
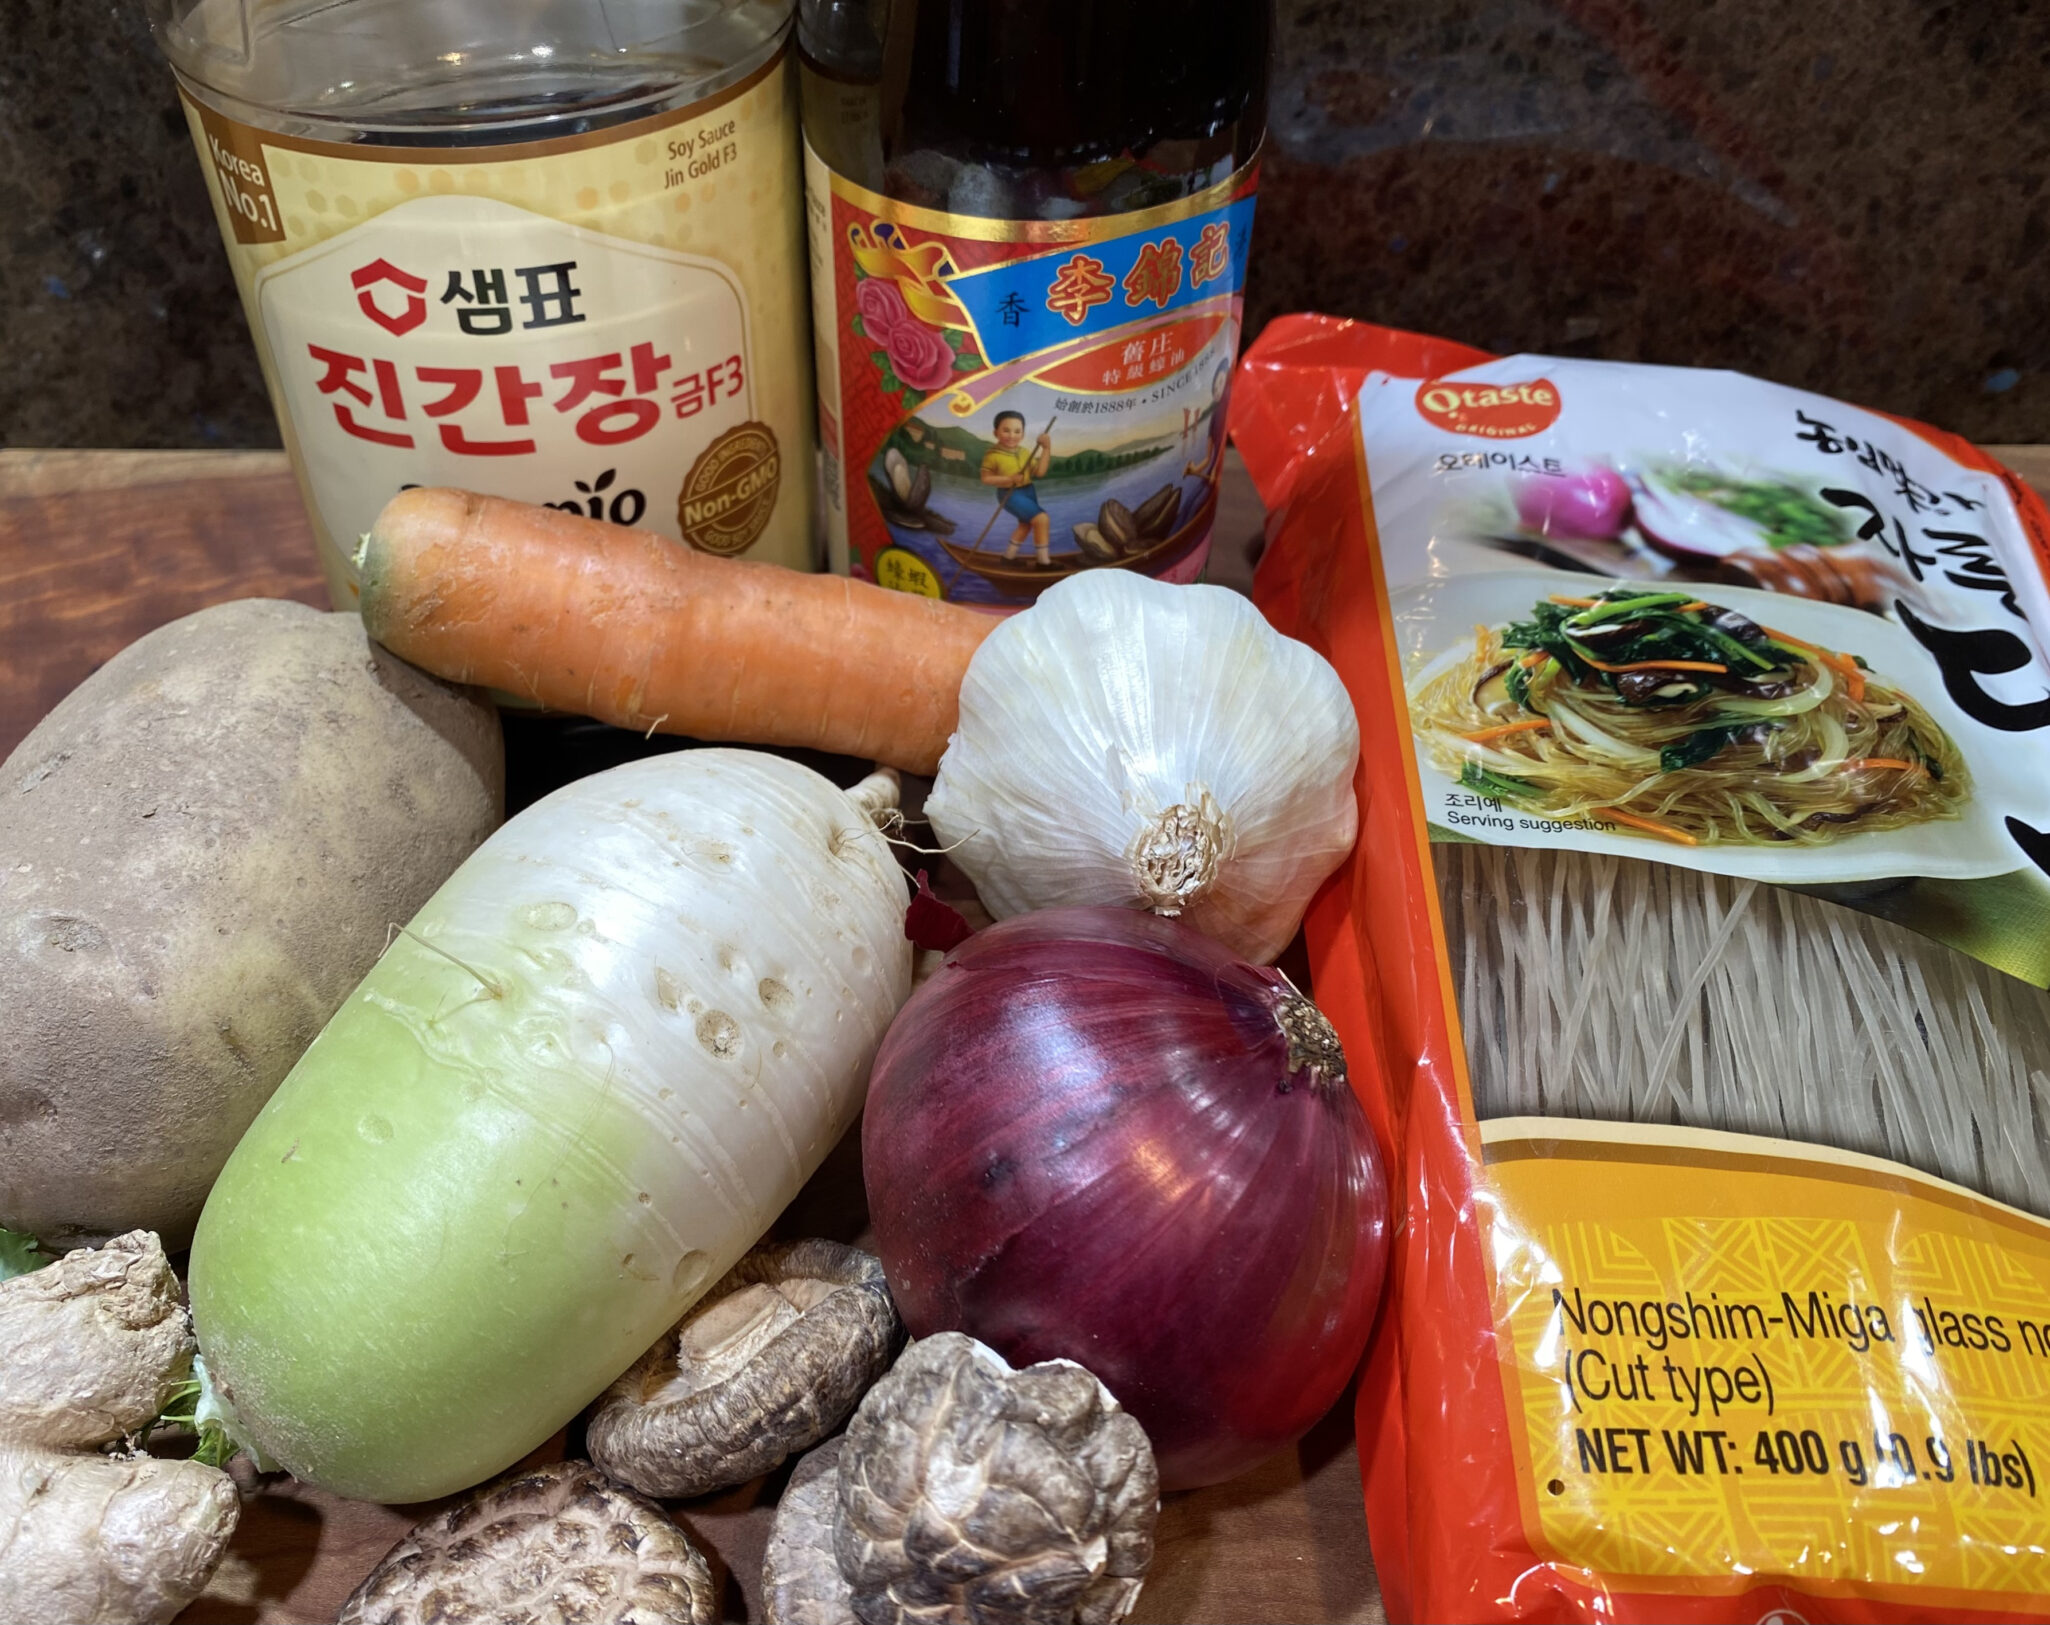
The glass noodles take this over the top.  They add texture, flavor (the noods suck up the flavor from the sauce, chicken and veggies-yummo) and substance to the dish. You can find mung bean noodles or glass noodles at most Asian stores.  Do not confuse it with rice noodles or vermicelli.  Pre-soak noods to soften, drain well before adding.

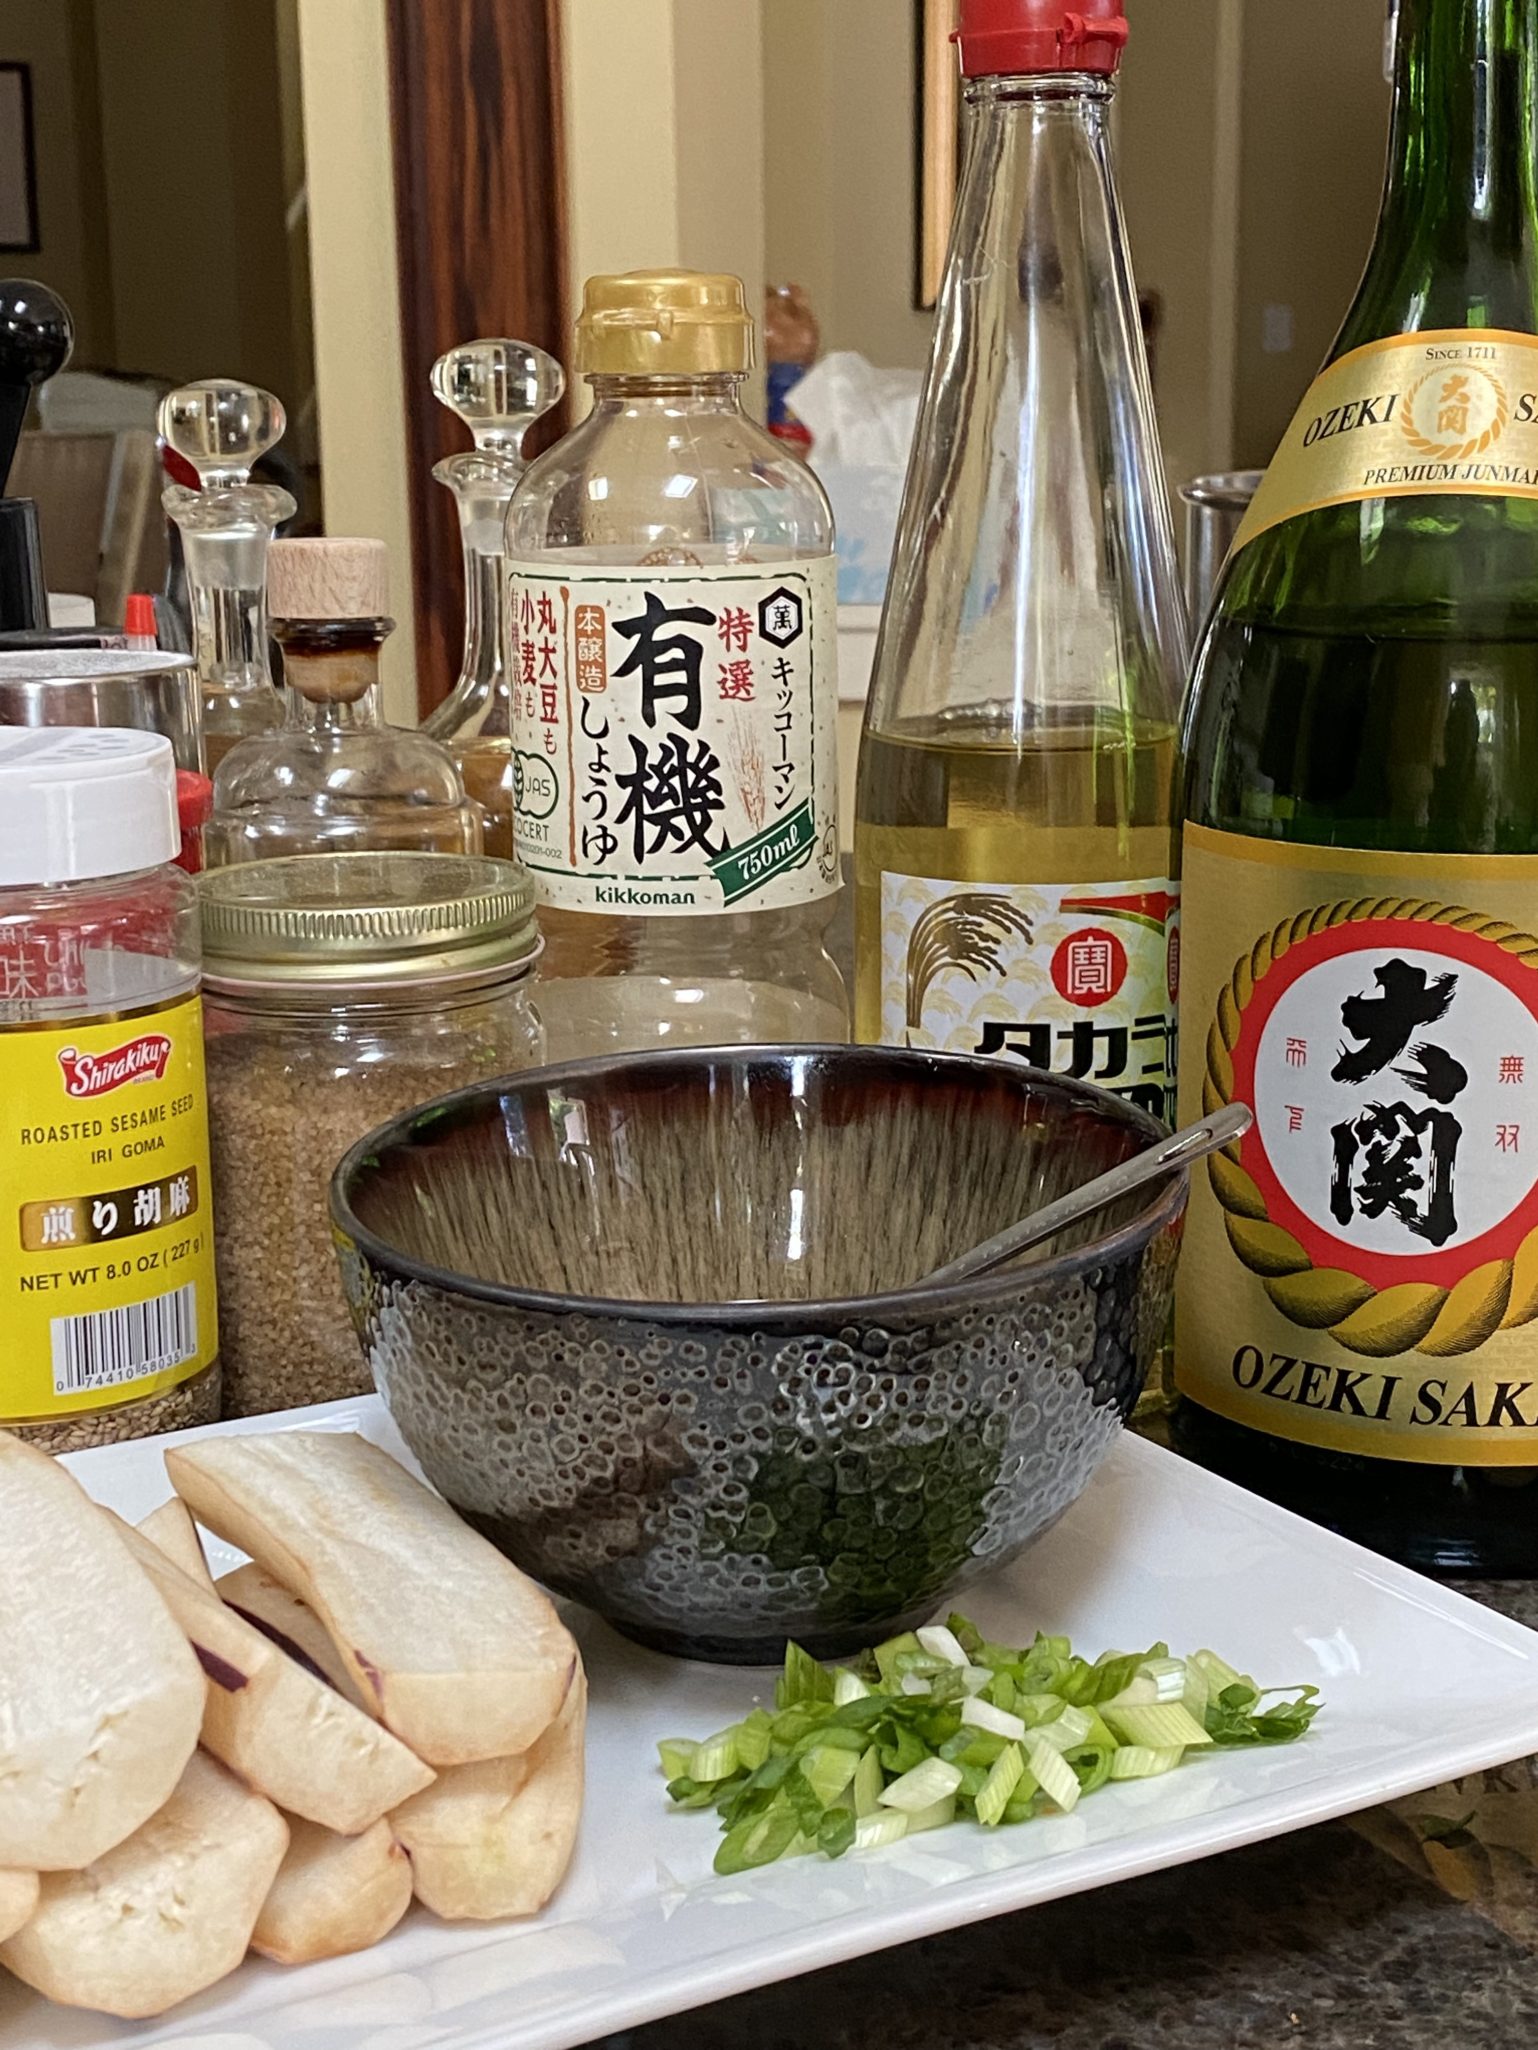
The sauce ingredients are readily available. Use  Korean soy sauce or Kikkoman which are a bit more similar to each other than Chinese soy sauces.  I could go down a rabbit about soy sauces…. Oyster Sauce, as always, my go-to is Lee Kum Kee with the lady and boy in the boat label.

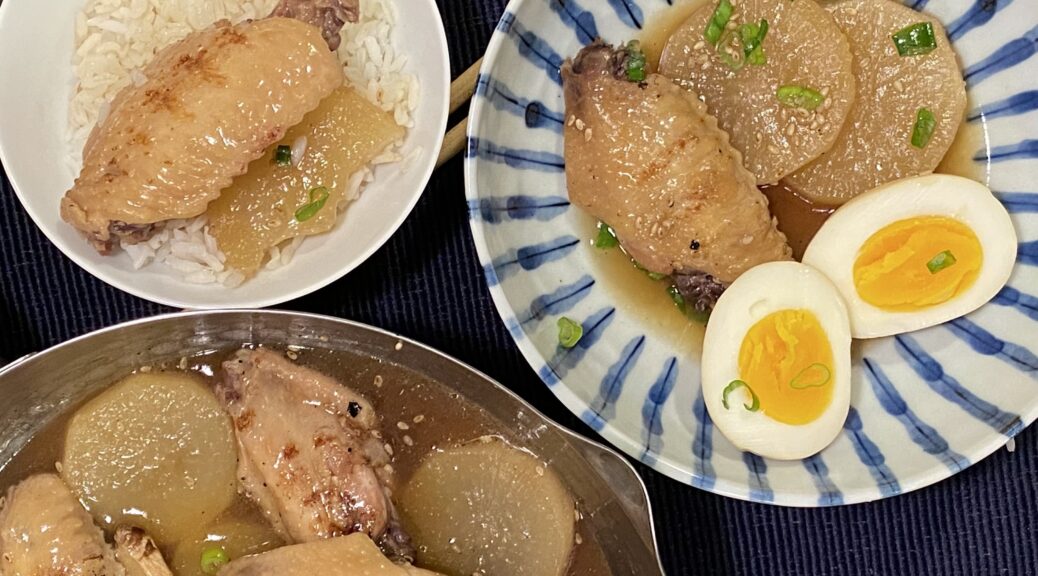
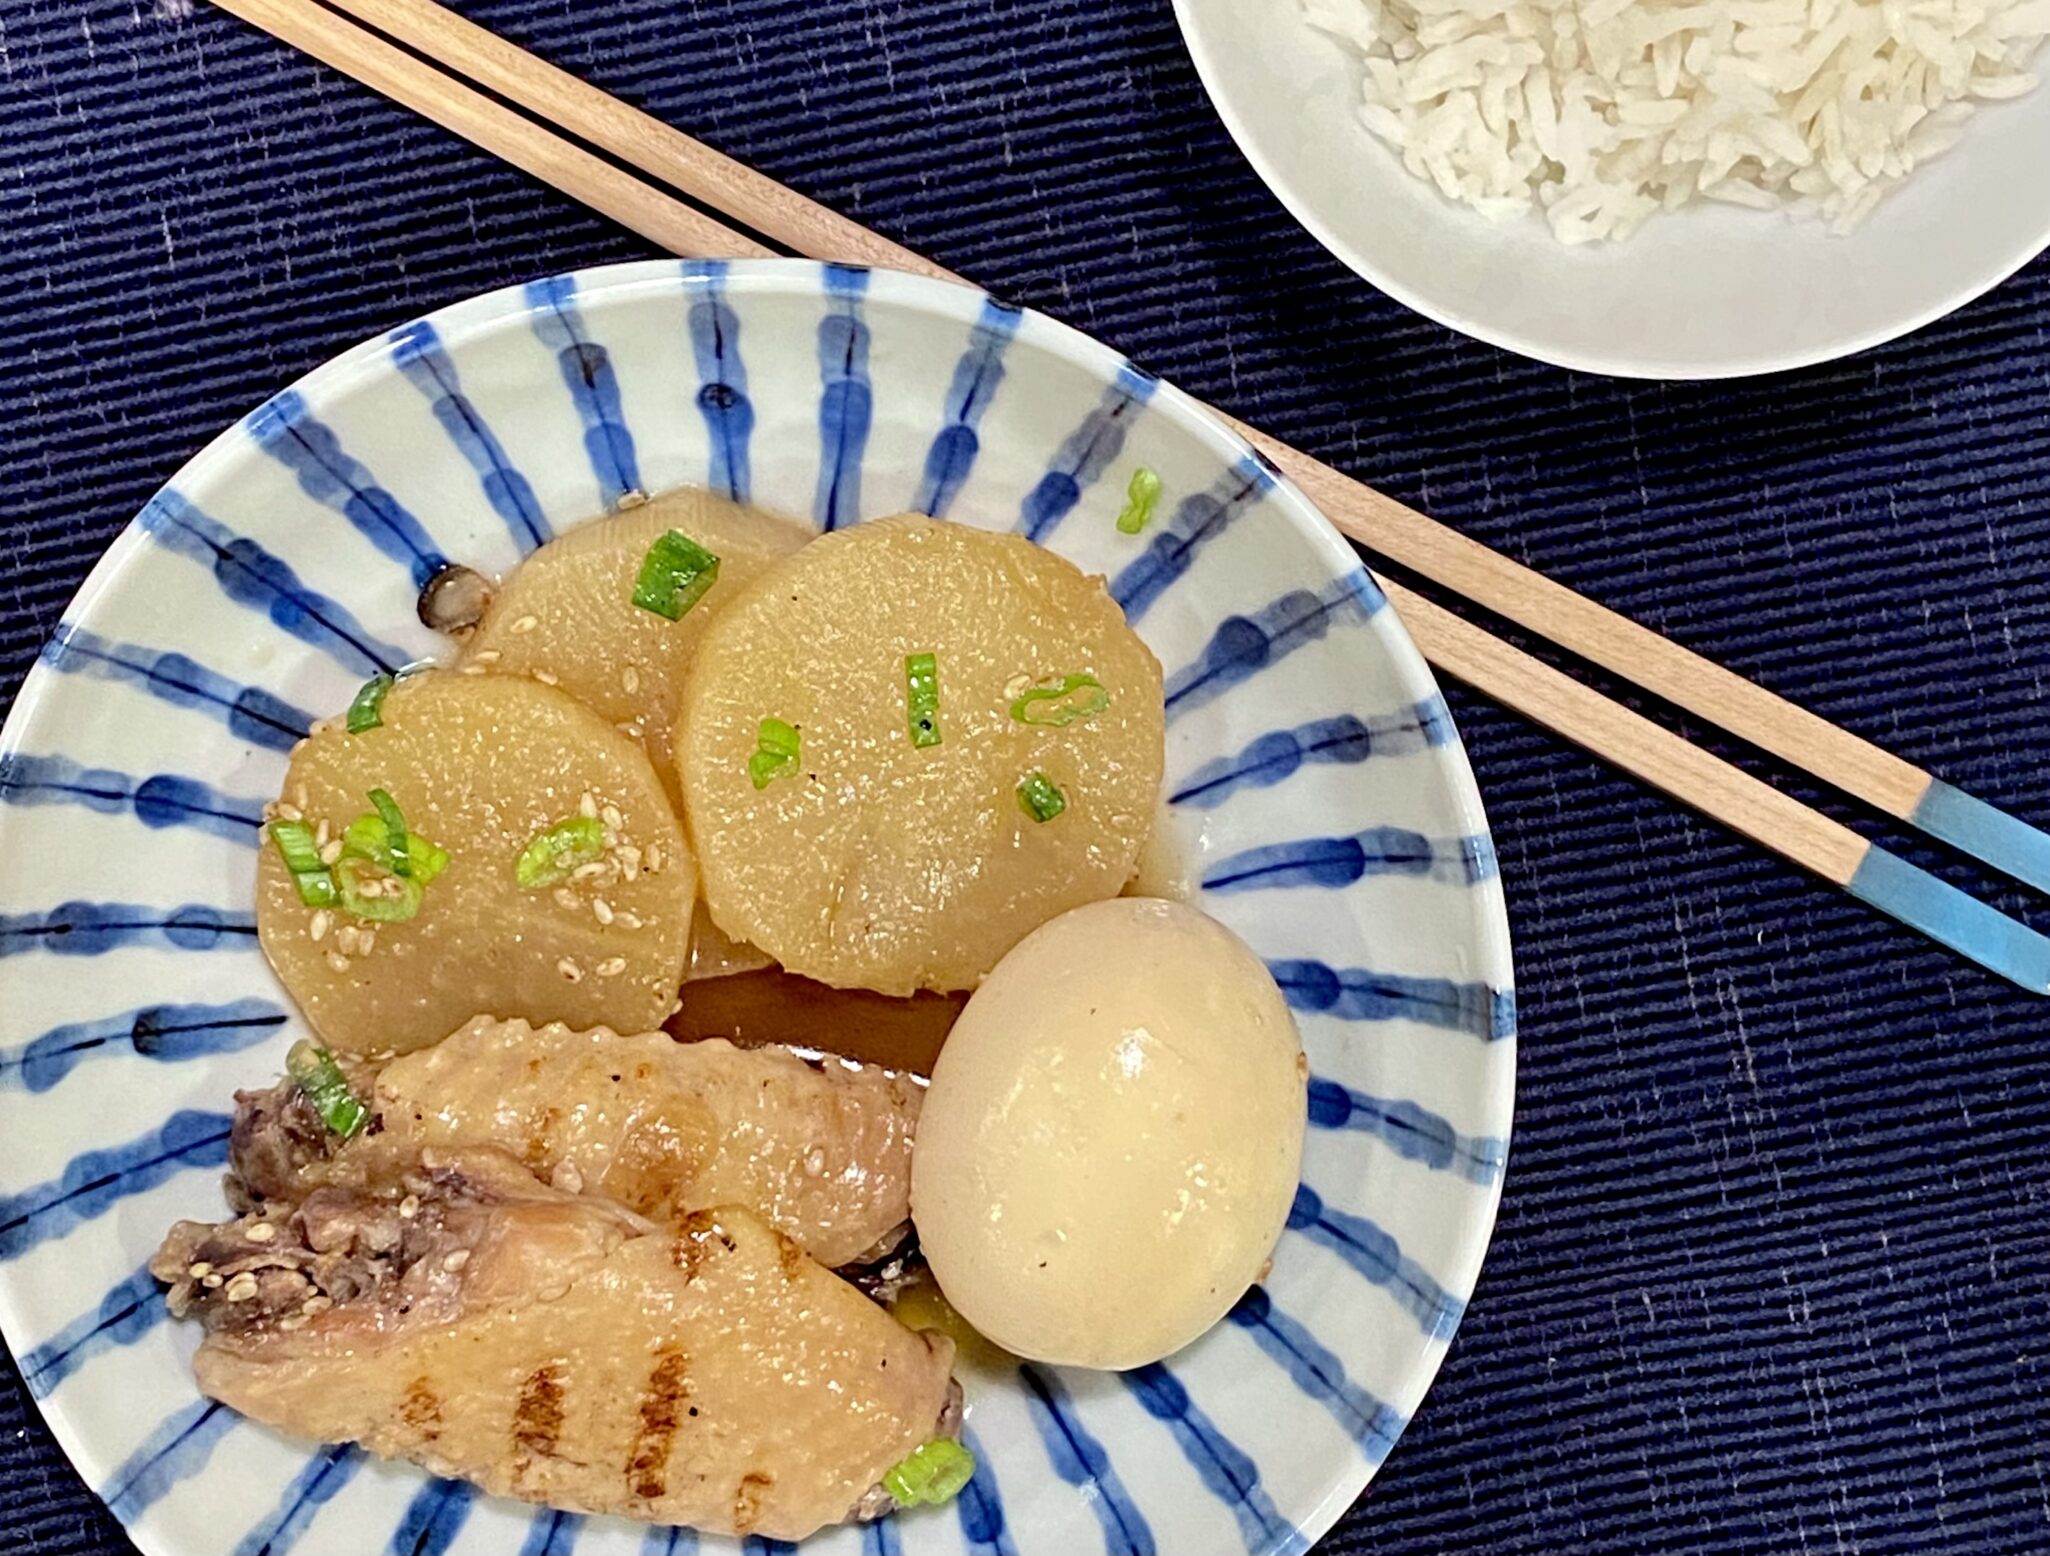
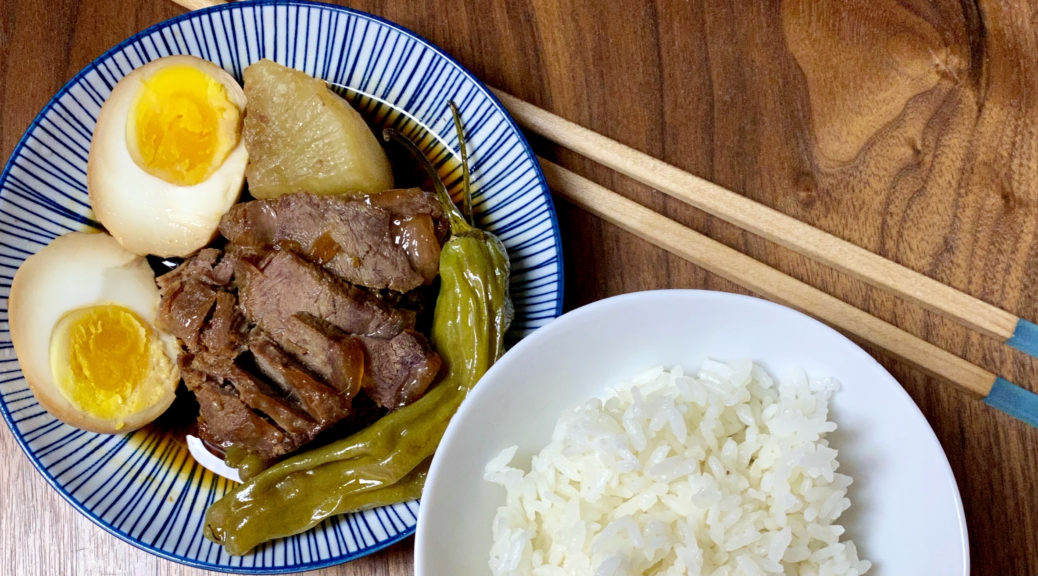
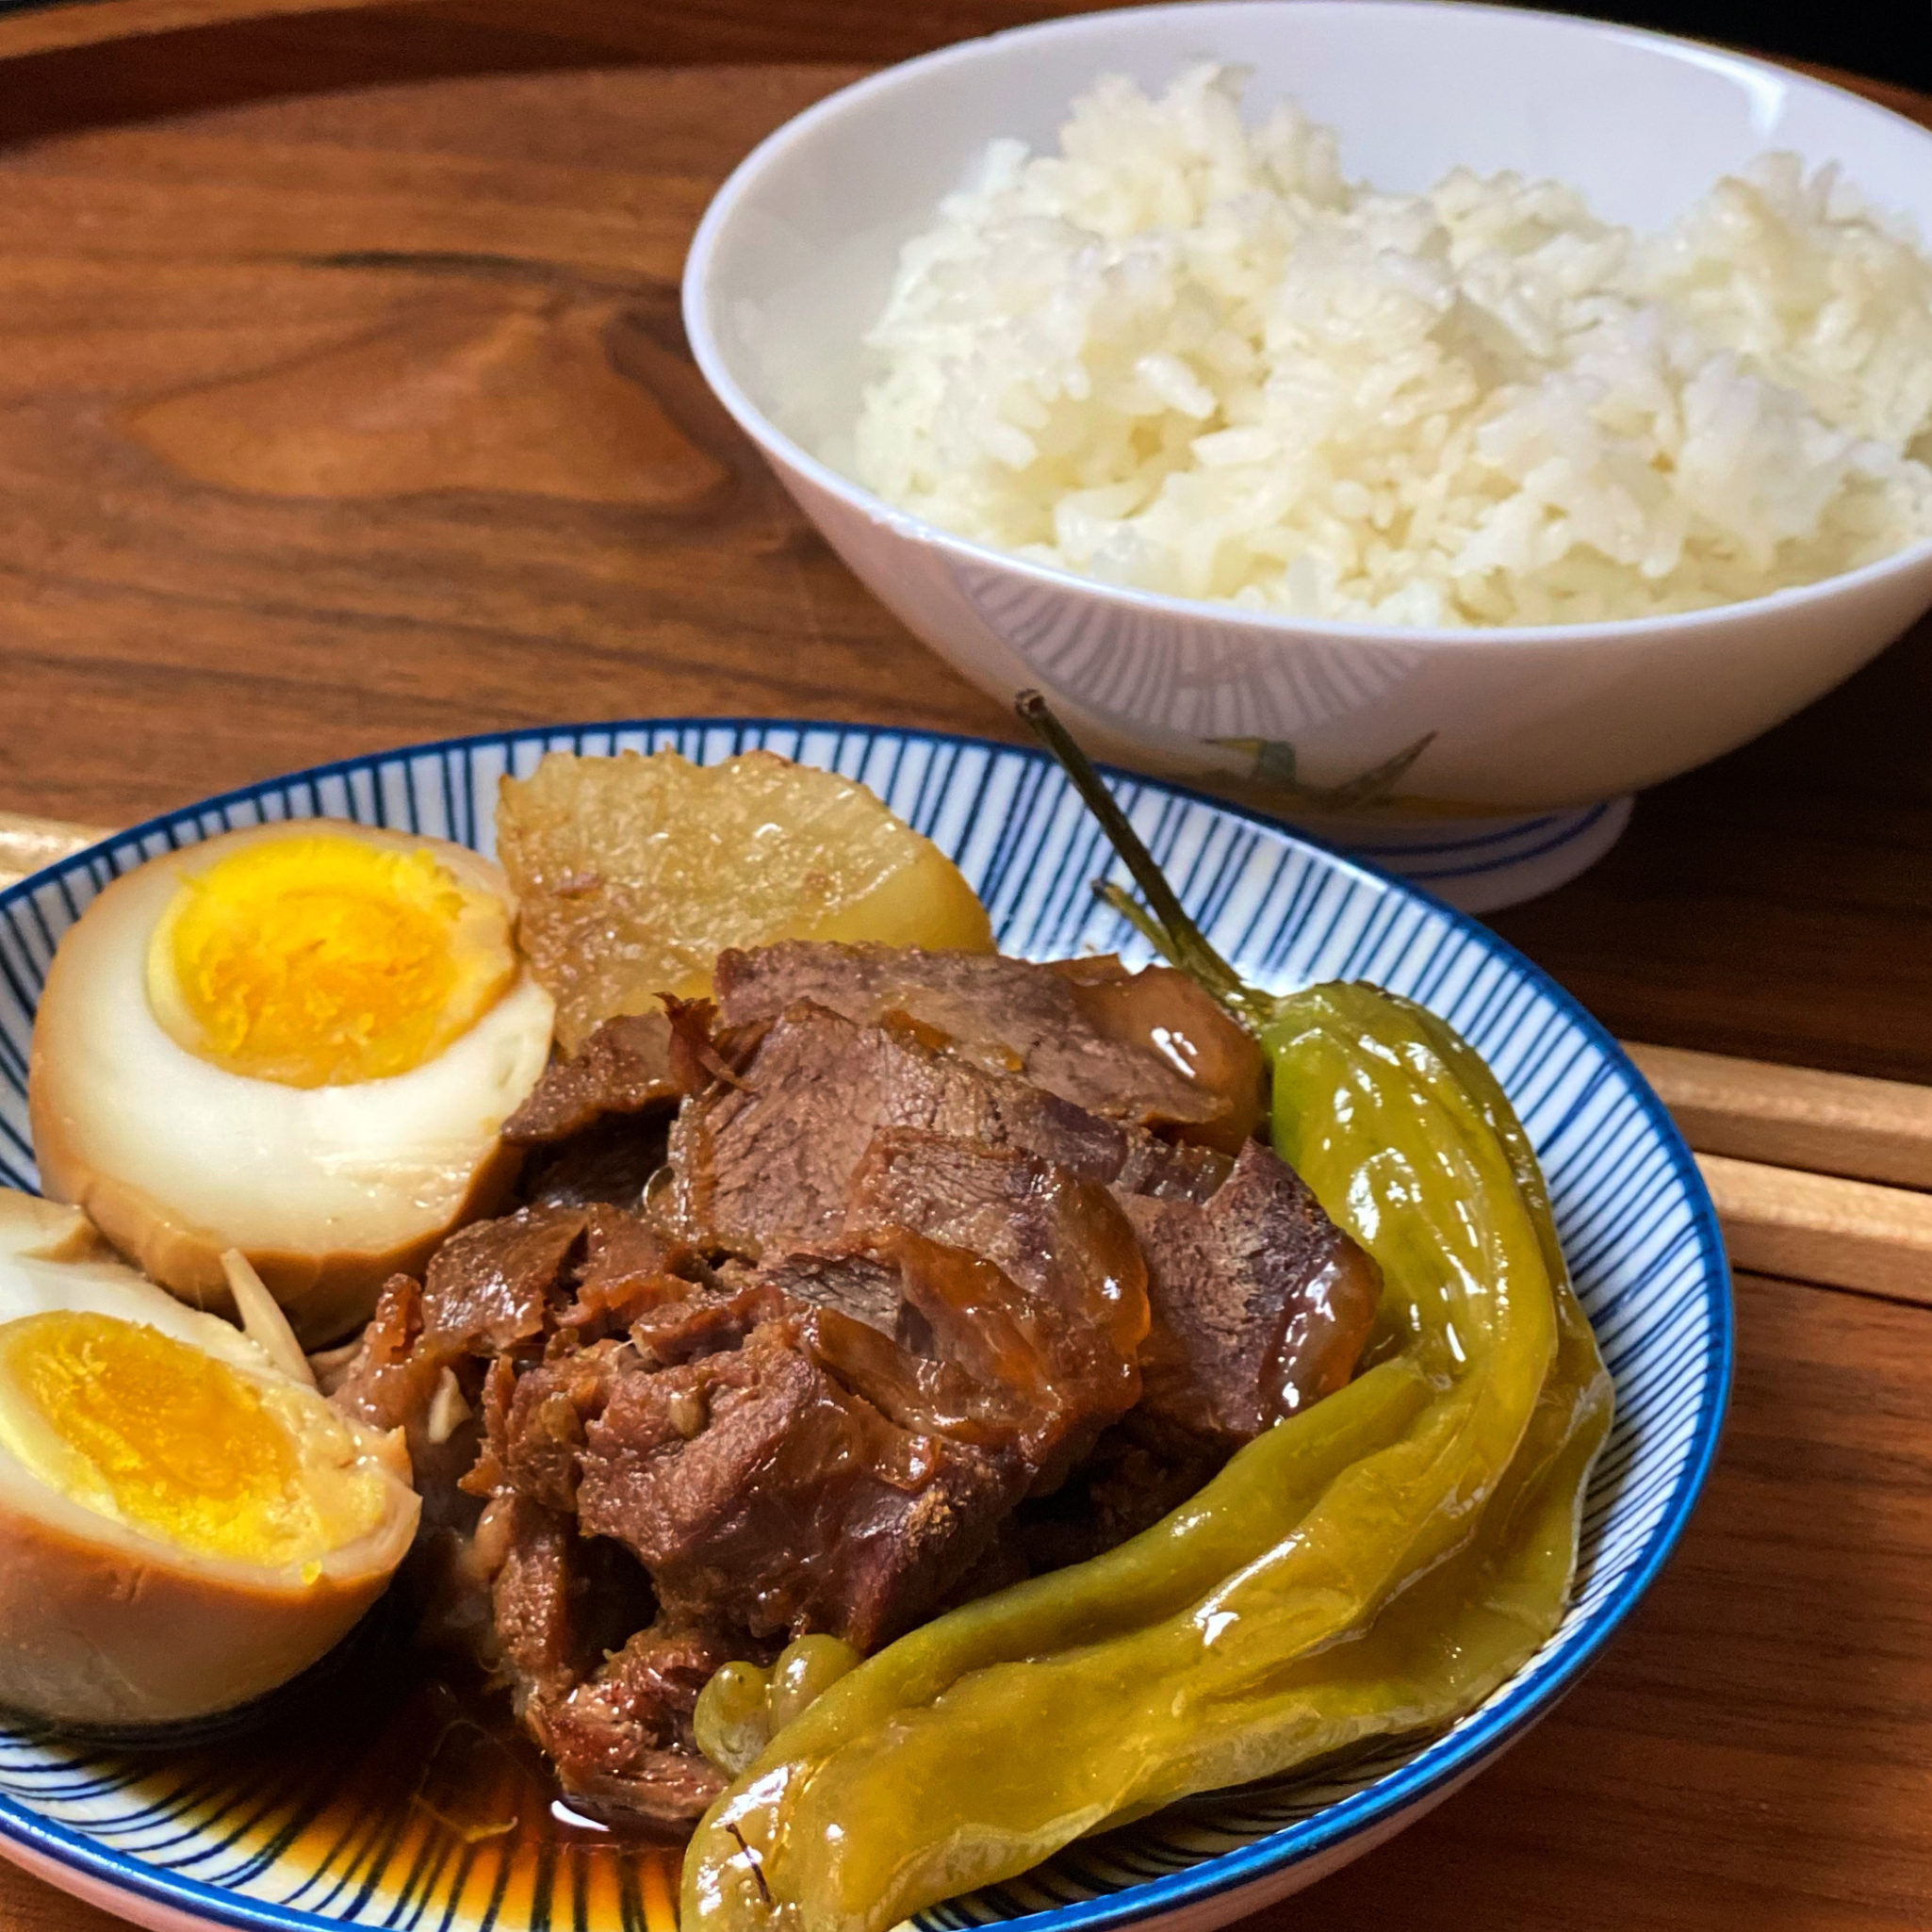
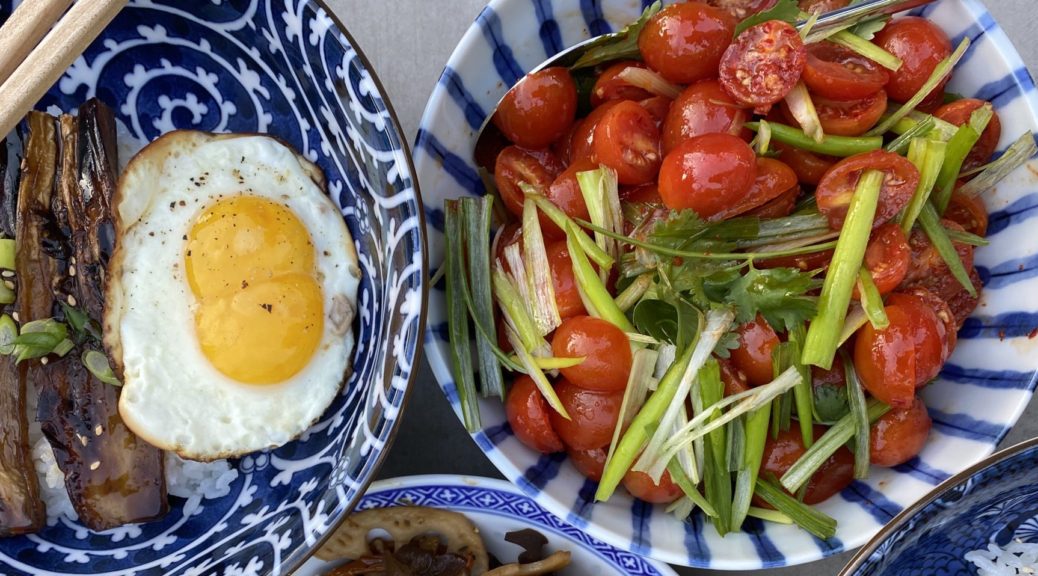
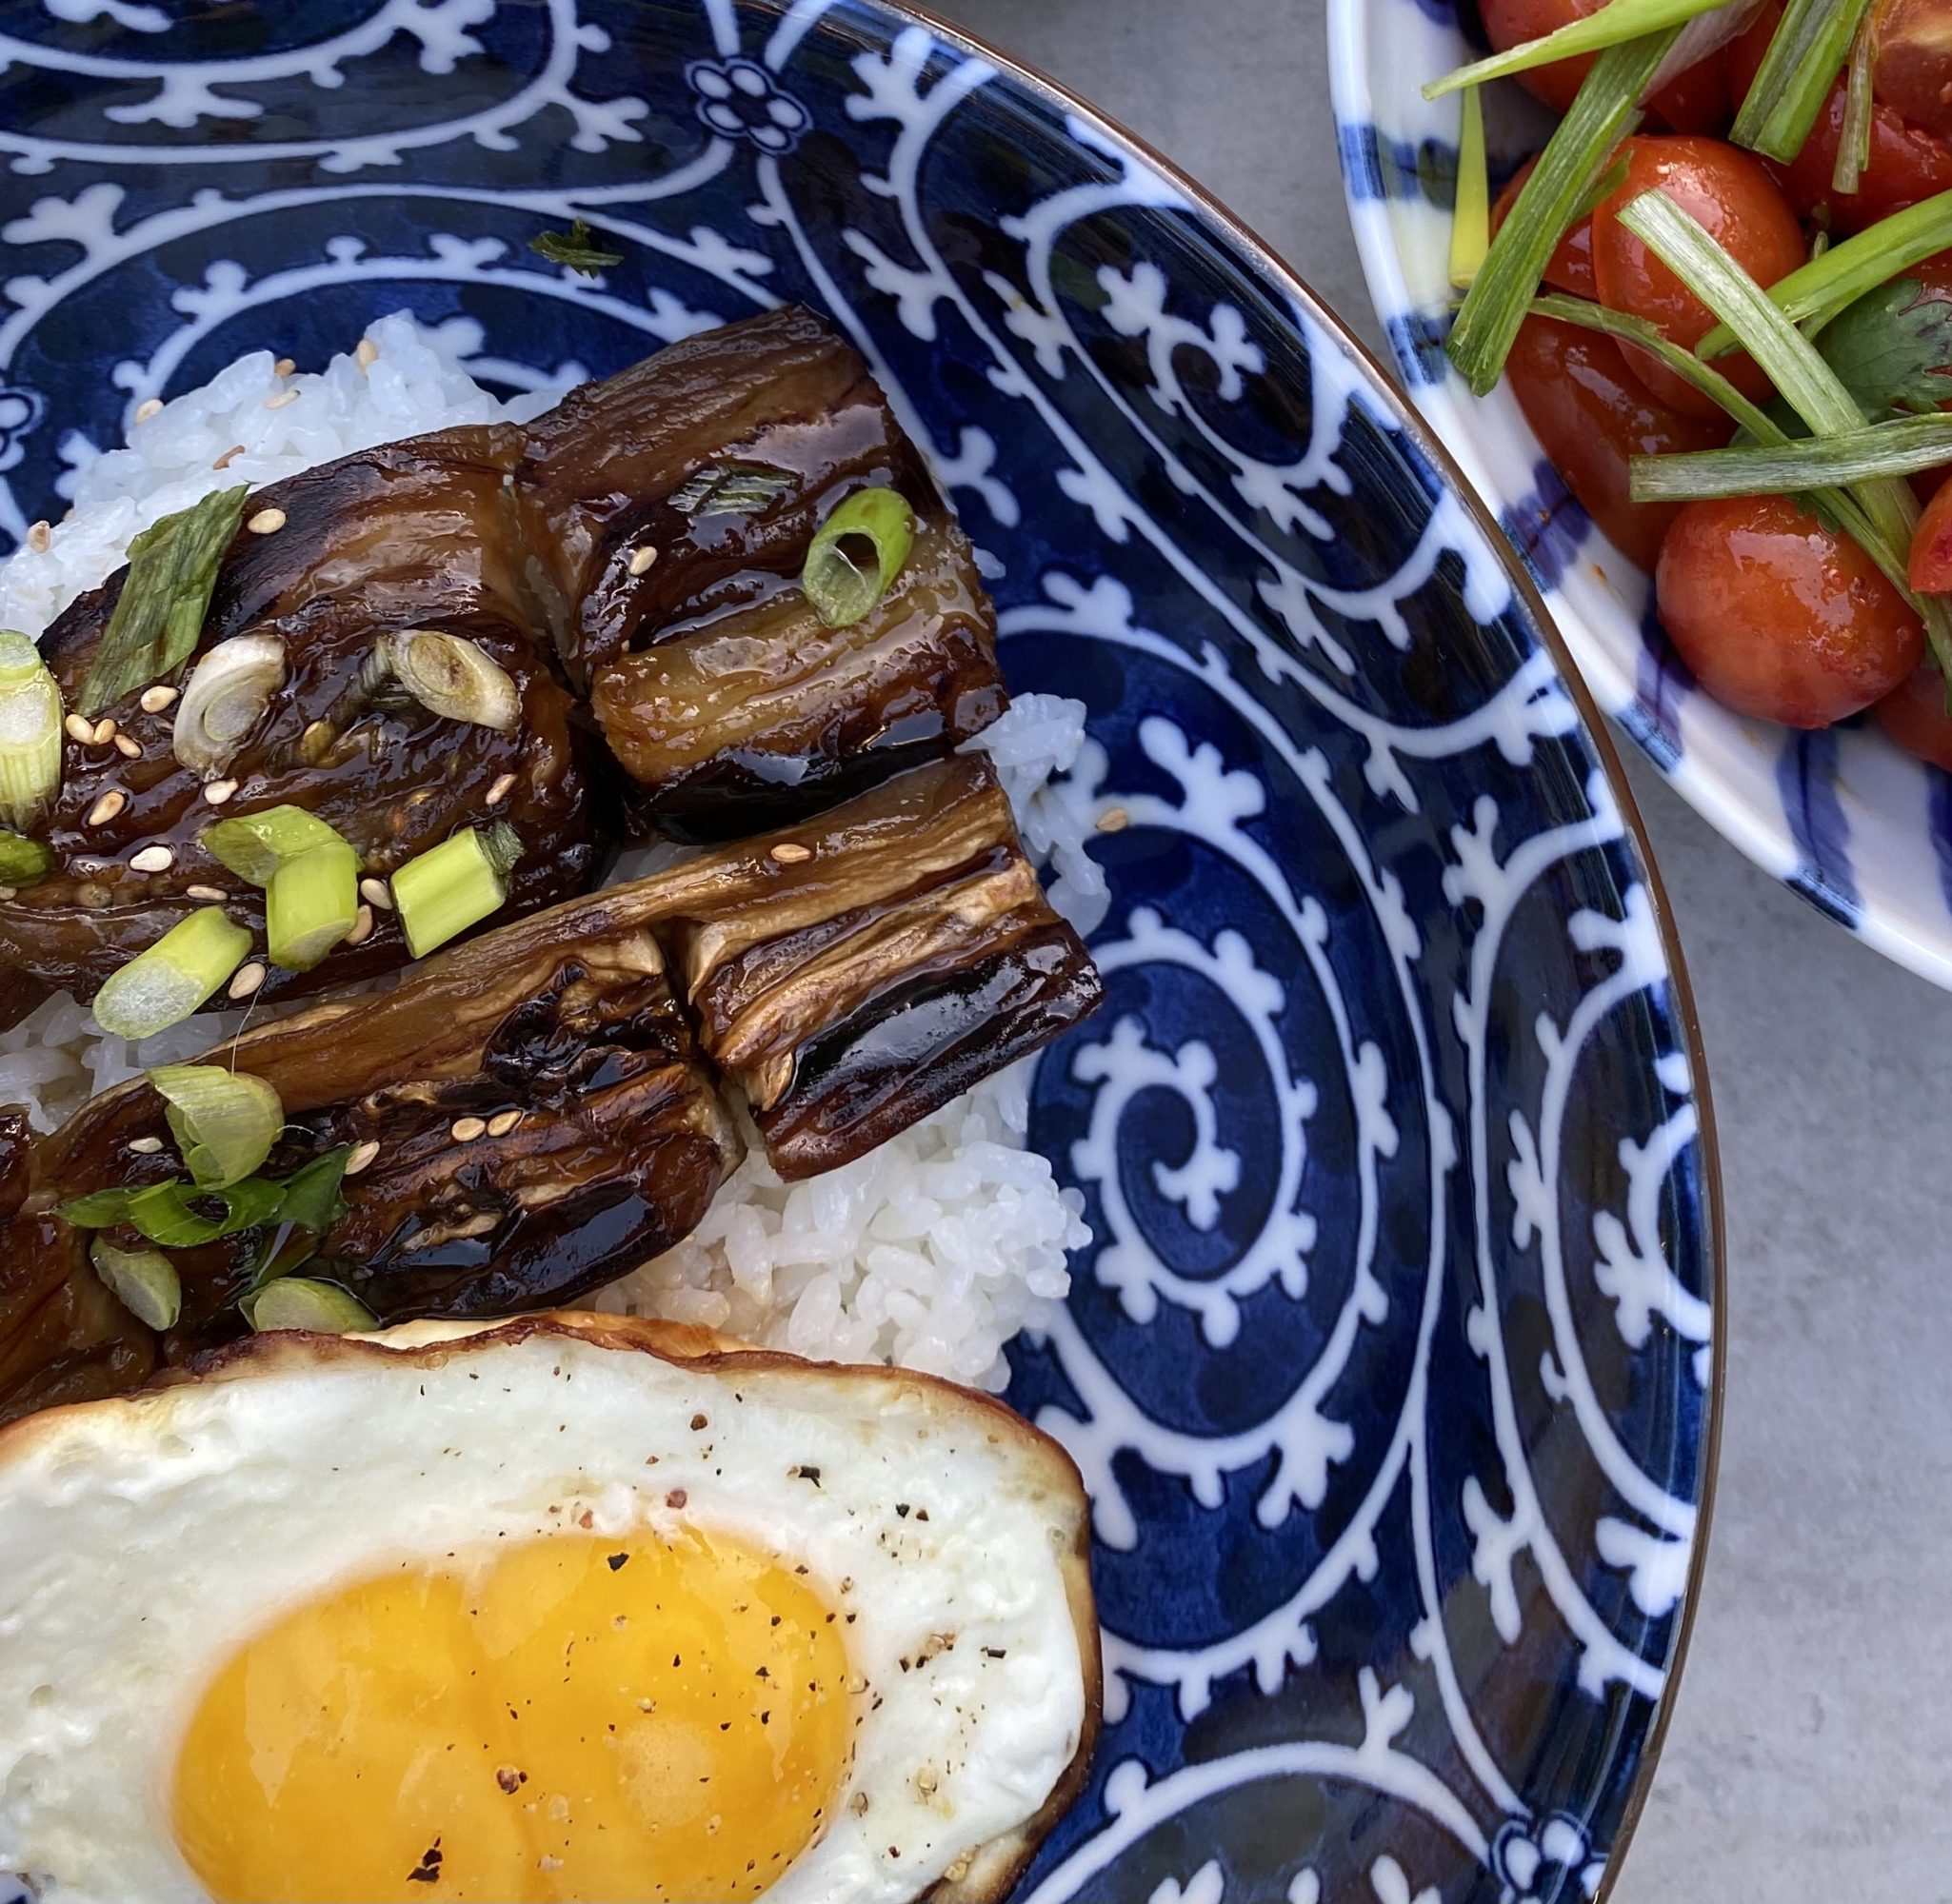
Don’t forget the bap 🍚!

There you go, a delicious one-pot meal.

Jjim Dak

Braised chicken with assorted veggies, perfect for dish for chilly nights
Course comfort food
Cuisine Korean
Prep Time 20 minutes

Equipment

  • Prep Time
  • 20minutes mins
  • Cook Time
  • 30minutes mins
  • Total Time
  • 50minutes mins

Ingredients

The Stars

  • 1 medium-sized chicken cut up (2.5 to 3 pounds of cut pieces)
  • 3 ounces sweet potato starch noodles dangmyeon, 당면
  • 2 medium white or yukon gold potatoes about 10 ounces
  • 1 medium carrot 1/4 inch slices on diagonal
  • 1/2 medium onion cut in half and sliced 1/4-inch thick
  • 3 - 4 mushroom caps rehydrated dried shiitake or fresh shiitake, white, or baby bellas
  • 2 scallions
  • 2 - 3 dried whole red chili peppers optional, mild use 1
  • 1 - 2 fresh chili peppers or jalapenos optional
  • 2 tablespoons minced garlic
  • 1 teaspoon grated ginger

Braising Liquid

  • 1/2 cup soy sauce
  • 2 tablespoons oyster sauce If unavailable, use more soy sauce
  • 2 tablespoons rice wine or mirin
  • 2 tablespoons dark brown sugar if unavailable, use regular sugar
  • 3 to 4 tablespoons corn syrup Korean jocheong (rice syrup), Oligodang (oligo syrup), or 2 to 3 tablespoons honey Adjust to taste or agave would probaly work
  • 1/4 teaspoon black pepper

Finishing

  • 1 tablespoon sesame oil
  • 1 teaspoon sesame seeds

Instructions

  • Soak the starch noodles in warm water for about 30 minutes while preparing the other ingredients. Drain well before using.
  • Clean chicken and cut into small to medium-sized pieces.
  • Cut the potatoes in chunks (about 1-1/2 inch), soak them in water while preparing the other vegetables. Cut the carrot (1/4-inch slices), mushrooms, and onion into bite-sized pieces.
  • Add the chicken pieces to a large pot. Pour 3 cups of water over the chicken. (You should reduce the amount of water if not using the noodles.) Add the sauce ingredients except sesame oil and seeds. Bring it to a boil over high heat, uncovered, and continue to boil for about 10 minutes. Skim off the foam.
  • Add the potatoes, carrot, mushrooms, onion, dried whole red chili peppers, garlic and ginger. Cover, and cook for 8 to 10 minutes. There may still be a lot of liquid, but the potatoes and starch noodles will soak up a lot of it.
  • Stir in the green chili peppers (if using), and glass noodles. Continue to cook, uncovered this time, for an additional 3-5 minutes. Stir in the sesame oil. Garnish with sesame seeds, scallions. Serve immediately.
Scallion Mac and Cheese from Little Fat Boy

Scallion Mac and Cheese from Little Fat Boy

I have been focused on cookbooks from the Asian Diaspora.  With the way the world is turning, on a definite lopsided tilt, I want to support my community.  Representation matters, and we need to see POCs, LGBTQ, you know, EVERYONE represented in all walks of life.  The gold standard should be human + compassion, empathy, and vision for a better, kinder, world.  A world you are proud to leave your kids.

Recently I dashed into the city for another book signing at Omnivore Books on Food.  Frankie Gaw, author of the long-awaited, First Generation:  Recipes from My Taiwanese-American Home was in town and I couldn’t pass on his book signing.

A graphic designer by trade, his evenings were spent creating the blog, Little Fat Boy.  Stories, beautiful photographs, and recipes, woven together in this mash-up of his Taiwanese roots, midwest upbringing, and Southern ties to Memphis. His recipes are fun, a fusion of his upbringing and later West Coast migration.  His recipes make me happy.  Yep, Cinnamon Toast Crunch Mochi or topped with Pepples cereal, tell me you’re not smiling right now.

It’s VEGAN, yeah baby…More, Please

I LOVE mac and cheese. Frankie’s Vegan version is a riff on this much-loved dish.  Is it Mac and Cheese? Nope.  Is it delicious? YEP.  In place of butter, milk, and cheese you’ll find scallion oil, cashews, garlic, and my own little tweak, nutritional yeast.  Pureeing cashews into a creamy, lovely sauce, is really so good, this may become my go-to mac and cheese when I am feeling a little lactose intolerant, lol.

Not gonna lie, cashews are not diet food, just like a lot of nuts.  The upside is they do supply protein, healthy fats, vitamins, and minerals.  Plus, no animal products were used in the making of this..so there is that.  To offset some of the calories in this dish I reduce the pasta and substitute roasted or steamed cauliflower florets.  Yummos.

I like my mac and cheese super saucy so I decrease the amount of pasta, add more cauliflower florets and throw in some mushroom broth to extend the sauce.  The kid in me likes the macaroni cooked beyond al dente, really who eats mac and cheese that’s not soft and squishy?  This is two very generous servings, actually, I think it serves 3-4 people…see the calories won’t be that bad!

Scallion Mac and Cheese

A delicious vegan version of mac and cheese with loads of umami from scallions, nutritional yeast and garlic adapted from Little Fat Boy
Course dinner, one bowl meal, Side Dish
Cuisine Asian-American
Keyword Crazy good mac and cheese, scallions
Prep Time 17 minutes
Cook Time 10 minutes
Servings 4
Calories 425kcal

Ingredients

  • 1 cup raw cashews
  • 4 scallions finely chopped white and green parts divided
  • 1/8 cup olive oil
  • 2 cloves garlic, smashed
  • 11/2 tsp kosher salt
  • 1/2 tsp granulated sugar
  • 1/8 tsp paprika
  • 1 tbsp nutritional yeast
  • 1/4 lemon, juice of
  • 1/2-1 cup water, or pasta water or mushroom boullion
  • 1 tsp hot sauce to taste optional

Toppings

  • 1/4 cup panko
  • 1 scallion, Thinly sliced

Noods

  • 4 ounces macaroni
  • 1 cup cauliflower florets or broccoli approx 4 oz

Instructions

Cashews

  • Before making dish, place cashews in a medium bowl and cover with water by 1 inch. Let the nuts soak for 2-3 hours.

Carbs & Veggies

  • Cook your pasta as directed on package. With about 3-4 minutes to go, add the cauliflower to the pot. Return to boil and cook until al dente (from original recipe-lol. In my book mac cheese needs pasta cooked beyond al dente). Drain and place back in pot. Set aside.

Sauce

  • In a skillet, heat olive oil over medium-high heat. Add scallions and garlic. The oil should not be smoking but hot enough that the aromatics sizzle when added. Stir and cook for about 2 minutes. The scallions should be soft and your kitchen should smell delicious from the scallions and garlic. Transfer all of it to a blender. Set skillet aside, do not wash! You will be using this to brown the Panko Crumbs!
  • Drain the cashews and add to the blender along with the lemon juice, paprika, salt, sugar, nutritional yeast, and water or pasta water.
  • BLEND til smooth. Add additional water or pasta water to desired consistency.
  • Add sauce to macaroni, and stir to combine. Pour into a casserole dish and spread evenly. Sprinkle Panko Crumbs and diced green onions on top, and serve immediately.

The Crumbs

  • The skillet used to fry the scallion and garlic will have residual oil to brown the Panko crumbs. On medium-high heat toss the panko in the skillet until toasty brown.

Notes

This recipe can be doubled for those times you are feeding a big crowd.  In fact,  the original recipe is double this, I cut it in half cause it's a lot of pasta.
Tomato Egg Fried Rice & the Fishy Bits

Tomato Egg Fried Rice & the Fishy Bits

A couple of weeks ago I was reading a post from the Woks of Life, a lovely blog on Asian cooking. Their post was on a classic Chinese dish, Salted Fish Fried Rice.  Salted Fish is a Cantonese ingredient made from white fish like croaker, salted and air-dried.  This process concentrates the flavor of the fish, it’s salty, fish-forward, and well, kinda funky in a good way.  Their twist was to substitute anchovies for the salted fish (hom yu, 鹹魚).  My first thought was “Yum, I gotta try this, I think I have anchovies in my pantry”.

They also have a cookbook out and it’s gorgeous.  If you need (who doesn’t)  a cookbook that covers Chinese cuisine for the novice to seasoned cook, Woks of Life fits the bill. You can order it from Books, Inc. or in the Bay Area, from Omnivore Books which has signed copies.

Dad and Gung Gung 1940s

Tales of My Grandfather

As I read their post, memories of my grandfather bubbled to the surface.  He lived in an SRO (single room only) in the heart of Chinatown above Sun Tai Sam Yuen Restaurant.  It was convenient and comfortable for him.  A line cook at Original Joe’s and at the Fairmont’s Tonga Room he walked to work from Chinatown.  His neighbors, Cantonese men of similar age, had migrated to Gum San (San Francisco) looking for work.

Read More Read More

Happy Chicken Pot Pi Day!

Happy Chicken Pot Pi Day!

Here in California, we have been battered by some extreme weather…more rain, snow and high winds than we have seen in a long, long time.  I hope folks are staying safe, warm and dry.

So we are having a somewhat subdued, quiet Pi Day.  Especially since we haven’t had power all day!  That’s not gonna stop me, pi golly.  I adore pies, sweet or savory, by the slice, as a potable hand pie, you get the pic. So Pi Day is just an excuse to make pie.  A day of cold, wet, blustery weather calls for comfort food so what better dish than Chicken Pot Pie?  

I LOVE Pot Pie.  As a kid, it was a special treat if mom pulled out Swanson’s Chicken or Beef Pot Pies for dinner.  Little did I know, it meant an easy meal for her.  As I got older and my taste became more refined I left behind those Swanson’s pies.

I discovered Marie Callendar’s Pot Pies!  So good, more crust, bigger pie, yum.

My love of pies logically led to making my own pies and this includes savory pies, top on the list is Chicken Pot Pie.   

The Elephant In the Room

Not everyone wants or has a compelling need to start from scratch and that’s OKAY!  It’s perfectly fine to start with cooked chicken (a Costco rotisserie chicken comes to mind), commercial low-sodium chicken stock AND a premade pie crust. Making a Chicken Pot Pie is a labor of love.  If any step, homemade PIE CRUST comes to mind, gives you anxiety, use a shortcut. There are great frozen pie crusts dough and puff pastry doughs that can be used to make a fabulous pot pie. Hate prepping veggies?  Frozen WORKS, really.  But if you want to go the whole nine yards…read on 🙂

For novice pie makes, this is a good recipe to make over a couple of days so it doesn’t seem overwhelming.  Make the pie crust and throw it in the fridge to chill. You could do this up to a couple of days before.  This also applies to poaching the chicken and making the filling too.  The chicken can be shredded, the stock reduced, and the filling made and kept in the fridge until you are ready to assemble the pie.

Pick your favorite veggies, I like mushrooms, carrots, celery, broccoli, potatoes, and peas.  Pretty classic aside from the broccoli.  Blanching the veggies ensures they will be nicely cooked in the pie.  Blanch 10 minutes, the goal is al dente + so they don’t get too soft.  The veggies should be cut roughly the same size for even cooking.  The exception to this would be mushrooms, saute’ these before adding to the sauce.

Sauce Me Up

What holds everything together is a simple bechamel sauce of butter, flour, milk,and stock.  Start by making the roux .  Sauté onions with the butter for flavor and add the flour. Cook this for a couple of minutes before adding the chicken stock and milk.  Simmer sauce until it is thick like gravy, stir constantly.  Season well with salt and pepper.  

Two Pie Camps

There are 2 kinds of pie people in my book, those who like crust (ME) and those who like filling (Can’t even imagine who that is).  So I’ve searched far and wide for a pie crust I like.

I love Dorie Greenspan’s pie crust recipe. It’s buttery and flaky, and best of all, it makes a generous amount of dough, enough for a two-crust pie and a small single-crust pie. That’s a lot of crust.  Which is exactly what I want.

Make the crust by hand or in a food processor.  Be extra vigilant that you don’t overprocess the dough.

This is what your dough should look like coming out of the food processor. 

Gather it up into a disc shape and chill.  Roll out 2 crusts one for the top and one for the bottom.  Follow my tweak below or line your baking dish with the bottom crust and chill again.

Let’s Get to the Bottom of the Pie

Bake your chicken pot pie with a top crust only.  What Deb?!  That’s less crust!  Hold on now…here is the tweak.  Roll out the pie dough for the bottom crust then cut out circles or squares from this sheet equal to a serving of your pie.  Bake them separately.  When it’s pot pie time, place one of these buttery, flaky rounds on the bottom of each plate then topped with a generous wedge of your baked pie over it.  Buttery, flaky, crispy, crust on the top and bottom. This, my friends, is chicken pot pie nirvana.

Let it sit for 5-10 minutes before serving!

So, Happy Pi Day, now go make some pie! Check out my IG Reel for Chicken Pot Pie!

Classic Chicken Pot Pie

Ultimate comfort food. This is the classic Chicken Pot Pie. Buttery, flaky crust with a thick, velvety Bechamel filled with chunks of chicken and veggies. A keeper!
Course comfort food, dinner, One dish meals
Cuisine American
Keyword Chicken, chicken pot pie, comfort food, food for the soul, made from scratch, pie, pot pie, savory
Prep Time 1 hour
Cook Time 1 minute
Servings 6 servings

Equipment

  • 1 food processor

Ingredients

The chicken and stock:

  • 1 3 1/2-pound whole chicken (approximately 3 cups of cooked chicken, shredded or cubed) Shoretcut 1: Sub chicken parts for whole chicken Shortcut 2: Costco Roast Chicken Yeah, you read that right
  • 1 carrot
  • 1 stalk celery
  • 1 small onion halved
  • 2 teaspoons salt or 1 t salt and 1 tablepsoon Better Than Bouillion Chicken Base

Simply Irrecrustable: or Dorie's MoRe CrUsT RecipE

  • 1 1/2 cups all-purpose flour
  • 1/2 teaspoon salt
  • 1/2 cup 1 stick chilled unsalted butter, diced into 1/2-inch cubes (best to chill cubes in the freezer for at least 15 minutes before using)
  • 1/4 cup vegetable shortening chilled
  • 3 to 4 tablespoons ice water

It's All About the Filling

  • 3 med carrots sliced about 1.5 cups
  • 2 stalks celery sliced about 1 cup
  • 3/4 cup green peas frozen or fresh
  • Use any veggies you like broccoli, squash, potatoes. You want about 3 cups of vegetables sliced or chopped.

Da Sauce: This is a generous amount of sauce so you can increase your veggies if you like.

  • 6 tablespoons unsalted butter
  • 1 1/4 cups yellow onion (you have leeway use 1 med or large onion which yields 1 cup to 1-1/2 cups diced onions diced
  • 1/2 cup all-purpose flour
  • 2 1/2 cups chicken stock reserved from cooking chicken
  • 1 1/2 cups milk
  • 1 teaspoon chopped fresh thyme leaves
  • 1/4 cup dry sherry
  • 2 tablespoons minced fresh parsley
  • 2 teaspoons salt to taste
  • 1/2 teaspoon freshly ground black pepper to taste
  • For the egg wash: optional
  • 1 egg whisked with 1 tablespoon water

Instructions

Da Chicken: A whole chicken in a large stockpot with water to make a chicken pot pie casserole. Yep, you read that right.

  • Combine the chicken, carrot, celery, onion and salt or chicken base into a large stock pot. Add cold water until just covered and bring to a boil over high heat.
  • Reduce the heat to a simmer and cook for 45 minutes. Remove the chicken from the pot and let cool for 15 minutes. While the chicken is cooling, continue to boil the remaining water and vegetables in the pot.
  • When the chicken is cool enough to touch, strip away as much of the meat as you can. Place the meat on a dish, set aside. Shred chicken or cube. You should have about 3 cups.
  • Return the chicken bones to the stockpot and continue to boil, on high heat, until the stock has reduced to a quart or quart and a half.
  • Set aside 2 1/2 cups of the stock for this recipe. Freeze remaining stock for a rainy day.

All About the Crust: Simply Recipe Yields only 1 crust. You will need to double it or make Dorie's omitting the sugar

  • Combine the flour and salt in a food processor. Add the chilled butter cubes and pulse 5 times to combine. Add the shortening and pulse a few more times, until the dough resembles a coarse cornmeal, with some pea-sized pieces of butter.
  • Slowly stream in ice water, a tablespoon at a time, pulsing after each addition, until the dough sticks together when you press some between your fingers.
  • Empty the food processor onto a clean surface. Use your hands to mold into a ball, then flatten the ball into a disk. Sprinkle with a little flour, wrap with plastic wrap, and refrigerate for at least 30 minutes, or up to 2 days, before rolling.

Filling It Up

  • Blanch prepped carrots, celery, potatoes, broccoli (if using) in water for about 10-15 minutes. Veggies should be al dente but cooked through. Set aside.
  • In a large skillet, melt butter on medium heat. Add the onions and cook until they're translucent, about 10 minutes. Add the flour and cook, stirring, one minute more.
  • Whisk in 2 1/2 cups of the chicken stock. Whisk in the milk. Decrease the heat to low and simmer for 10 minutes, stirring often until thickened and creamy.
  • Add the chicken, thyme, sherry, peas, blanched veggies, parsley, salt and pepper and stir well. Taste and adjust seasoning if necessary. Pour into prepared baking dish(s)

Pieformers: Assemble

    Bake: Preheat oven to 375

    • Roll out dough on a lightly floured surface to a little less than a quarter-inch thick.
    • Roll roughly to the shape and size of your baking dish. A little bigger so you crimp the edge. Lay pastry over filling and dish.
    • Fold the excess dough under itself and crimp edge of pie.. Cut a 1-inch vents into pie. Use a pastry brush to apply an egg wash to each pie.
    • Line a baking sheet with foil, place pie on baking sheet. Bake at 375°F for 45 minutes, or until the pastry is golden and the filling is bubbling. If the edge gets too dark, cover with foil.
    • Let cool for at least 5 minutes before serving.
    Chicken Wings and Daikon Nimono + TV for Rainy Days

    Chicken Wings and Daikon Nimono + TV for Rainy Days

    It’s raining once again in California.  Which is the best excuse to stay home (in sweats), watch a lot of TV, bake and cook.  I started the weekend on a carb bender.  First, I made No-Knead Focaccia from Bon Appetit, it gets a big thumbs up, pillowy, springy, and delicious.  Caveat:  You will have to start a day earlier for said focaccia, 8 hours of resting time. Then I started on Kristina Cho’s Milk Bread from Mooncakes and Milk Bread, also extremely delicious.  Think of it as the Asian version of Brioche, slightly sweet, buttery, rich, and soft.

    THEN, I needed a Bake Break

    Well, actually, my hips needed a break.  The combination of being a couch potato and baking is to say the least, lethal.  I had to pick one, couch or carbs. Couch won.  Mainly because I started watching a cute, sweet Japanese show on Netflix called Makanai:  Cooking for the Maiko House. In a nutshell, two BFFs go off to Kyoto to become geishas.  One is a total washout but a fabulous cook (thanks to her grandmother) and becomes the Makanai or resident chef for the geisha house.  A role usually held by an older woman.  In each episode, she makes something yummy, often a comforting, homestyle dish.

    Well, you can’t sit there watching without a bowl of something delicious.  The cold, wet, weather and The Makanai put me in the mood for Nimono.  Nimono, a family-style dish usually contains protein, vegetables, or tofu that are simmered in seasoned dashi (stock).  I scoured my fridge and found chicken wings and daikon (radish) perfect for nimono.

    Start by browning the wings.  I got fancy and grilled them, don’t bother, one more pan to clean. Then add your dashi, seasonings, and sliced daikon and bring to a boil. Cover the nimono with a piece of parchment.  This keeps everything submerged so it cooks evenly.  Then lower the heat and simmer for 15-20 minutes or until the daikon is soft.  Pierce daikon with a knife to test.  Korean radish would work well also.

    Meanwhile, as chicken and daikon are simmering, make your eggs.  Use the ramen egg recipe for a soft center yolk.  Cool the eggs and peel.  Place eggs in cold water to chill (so it doesn’t overcook when you put it in the Nimono).

    When the radish is soft, Place eggs in Nimono.  Try to submerge them so they absorb some of the flavor of the broth.  Simmer additional 5 minutes.

    Garnish with green onions, and or sesame seeds.  Serve with rice, in front of the telly, watching Makanai, or Midnight Diner, or Julie and Julia…

    Chicken Wings and Daikon Nimono and Netflix

    Simple and quick Japanese braised dish of chicken wings and radish
    Course One dish meals
    Cuisine Asian, Japanese
    Keyword Chicken, daikon, ninono, one pot meal
    Prep Time 15 minutes
    Cook Time 20 minutes

    Ingredients

    • 6-8 Ounce Daikon radish can use Korean radish cut into 1/2 inch rounds
    • 4 Eggs boiled till the yolk is still jammy, see ramen eggs post
    • 8-12 Chickin wings
    • 1 Clove Garlic
    • 2 tsp Instant Japanese soup stock (you will need 1 cup of dashi) or make dashi with packet or Shiro dashi
    • 2 tbsp Sugar
    • 1 tbsp Soy sauce if using dashi packet, increase to 2 T
    • 4 Tbsp Sake
    • 2 Tbsp Mirin

    Options

    • Add mushrooms or sliced carrots with daikon if you like

    Instructions

    • Make dashi and set aside. You can use the powder Hondashi, or dashi bags, or Shiro Dashi concentrate. For concentrate dilute 1:12 Make 1-1.5 cups
    • Peel and cut the daikon into 1/2 inch slices. Set aside.
    • Sauté the chicken wings approximately 2 minutes a side in a 3-4 quart saucepan. They should be light brown.
    • Add dashi to pot followed by soy sauce, mirin and sake. Add daikon on top. Bring to a boil then lower heat to a simmer. Use an otoshibuta (dropped or parchment lid) while simmering although you can forego this step. Simmer for 15-20 minutes or until radish is soft when pierced with a knife.
    • While chicken is simmering, make ramen eggs or hard boil the eggs just until the yolk is barely set. Peel and place eggs in an ice bath. When nimono is done, add peeled eggs to it and let it simmer another 5 minutes. Make sure the eggs are submerged in the broth.
    • Ladle the Nikon into bowls, garnish with green onions and sesame seeds. Serve with rice and a half or whole egg per person. It's worthwhile making nimono in advance, since it tastes better the next day. Or just make a larger quantity to keep. Reheat before eating at home, or reheat then let cool down again if using for bento. Can be stored in the fridge for 2-3 days.
    Mille-Feuille Nabe Blooming Delish!

    Mille-Feuille Nabe Blooming Delish!

    I’m sure I saw this on TikTok or an IG Reel.  It looked so delicious I knew I was going to make it, if not today, definitely tomorrow.  Jackpot, making it today, why?  As most of you know I stop at grocery stores so often I should be classified as a professional food shopper.  The beauty of being a “pro”, I generally have the ingredients for any dish found on the internet, lol. This is a perfect example, a quick perusal of my kitchen and I was in business.

    Thinly sliced pork – check. From Asian Market. I always keep some in the freezer, ALWAYS.

    Napa Cabbage – check. Picked up a head at the Hankook Market last weekend, cause you never know when you might need some cabbage…

    Mushrooms – check. My fridge qualifies as a certified mushroom farm most days.

    Dashi or Broth – check. I pulled my bottle of Shiro Dashi from the fridge. Literally concentrated dashi that you dilute with water, VERY good, stupid easy. For a detailed run down check out Guide to Shiro Dashi

    OR I can make Dashi with packets from Japan that I keep squirreled away in my pantry.  Again, VERY good,  a bit more work than Shiro Dashi, still super easy.

    I won’t go into making my own Dashi cause that would defeat the dinner in a few minutes mantra.

    Korean radish – check.  You don’t need it, I just happen to have some so why not?

    Staples – check.  Green onions, sesame seeds, soy sauce S&P…Hello? Would not be caught dead without any of these.

    Pot- check. Y’all know I didn’t have to list this but I wanted to mention the tiny Donabe I bought at the MANRESA fire sale.  It gives me JOY.  I also used my gorgeous Staub pot for the family-sized version.

    So that’s it, all you need to make this scrumptious, perfect when it is cold and wet outside, quick and easy dish.

    Let’s Goooooo!

    This is super easy, TRUST ME.  Have I ever steered you wrong?  Start with your Napa Cabbage, wash and separate the leaves.  You only need 1 head of cabbage and you won’t use all of it, unless you are feeding a cast of thousands, then you’re on your own.

    Take out your thinly sliced pork, I’m sure this would work with beef also. Use any protein cut for Shabu Shabu or Hot Pot.  I know you are thinking, 🤔, can I use bacon?  My inclination is no, as much as I love bacon, the flavor may be too much and too salty for this Nabe.  But if you are feeling bold, try it.  Definitely REPORT BACK to me!

    Layer the pork on the Napa Cabbage, covering most of the leaf. Continue layering until you have a stack of 3-4 leaves.  Cut crosswise into 3-4 sections, and try to match it up with your pot.  Each section should be about 2-2.5 inches in height. Definitely not taller as you will need to cover the pot when cooking.  Continue circling the pot with the sections until you reach the center.  I finished with slices of Korean radish surrounding a bouquet of mushrooms smack dab in the middle, totally optional.  But so good.

    To finish, add dashi to barely cover the cabbage, cover, and cook.  Cook for 10-15 minutes, the beauty of thinly sliced meats and veggies.  Dinner is served! BACK to the dashi.  Dashi is a fish-based stock, used in many yummy Japanese dishes.  There are ka-zillions of ways to make dashi.  Skip the traditional and time-consuming options.  I use Shiro-dashi alot.  It is a seasoned concentrated fish stock that comes in a bottle.  Dilute Shiro-dashi 10-12 fold for soups and casseroles, EASY PEASY.  The other way is using dashi packets, kind of like tea bags.  Drop it into the water, let it sit to infuse the flavor from the packets, and presto dunzo.

    CAVEAT: The Shiro Dashi is seasoned with salt and sugar while the dashi packets just impart the fish flavor.  You will need to add salt or soy if using the dashi packets.

    That’s it!  Serve it up with bowls of hot, steaming rice, maybe fry an egg or if you have Mayak Eggs or Ramen Eggs yum. So damn delicious it is criminal.  Or use the flavorful broth on a lovely bowl of noodles, udon noodles would be delicious.

    A Picture is Worth a Thousand Words…check out my Instagram for a reel on Mille-Feuille Nabe!

    Mille-Feuille Nabe

    Japanese Hotpot with Napa Cabbage and thinly sliced pork belly arranged in layers in a donabe of casserole. Dashi serves as the cooking broth that turns this into a lovely dish perfect for cold weather.
    Course dinner, Main Course, One dish meals
    Cuisine Asian, Japanese
    Keyword Mille-feuille, napa cabbage, Pork Belly, soup
    Prep Time 15 minutes
    Cook Time 15 minutes

    Equipment

    • 1 donabe If you have one, but any casserole type pot will do.

    Ingredients

    Main Ingredients

    • 1 napa cabbage medium size should do
    • 1-1½ lb Thinly sliced pork belly smaller the pot the less you will need
    • 1 bunch of mushrooms like enoki or shiimeji optional
    • Korean Radish or Daikon, thinly sliced optional

    Dashi

    • 1 knob ginger 1 inch, 2.5 cm
    • 5 cups dashi See post for dashi options!
    • 2 Tbsp sake cut in half or omit if using Shiro Dashi
    • 1 Tbsp soy sauce cut in half or omit if using Shiro Dashi
    • ½ tsp kosher salt Diamond Crystal; use half for table salt

    Finishing Touches

    • green onions, diced for garnish
    • Chili oil or Shichim Togarashi at the table
    • Rice to serve with hot pot or boil some noodles to have with the flavorful broth!
    • Any kind of eggs-Ramen, Mayak or raw that you crack and cook in the broth

    Instructions

    • Remove leaves carefully from the base, wash and drain well. Don’t throw away any leaves that naturally came off while rinsing. We’ll use these leaves later on. If you happen to get a ginormous cabbage cut in half or quarters lengthwise. I usually buy small ones so I use the whole leaf. Pat them dry before next step.
    • Layer the pork belly and napa cabbage by placing one slice between each of the leaves. Cover leaves with pork belly, trim if necessary to fit. Repeat 3-4 times depending on size of pot.
    • Cut each napa cabbage wedge into 3-4 pieces each about 2 to 2½ inches (5-6 cm) long. Each section should not be taller than your cooking pot. Try to keep the layers of napa cabbage and pork belly neatly stacked as you slice.
    • Next, start stacking the ingredients in a donabe, hot pot, or regular 10-inch pot. I used a shallow Staub pot with the grill top. Turn the stacks on their side as you pack them so the pink and green layers are visible. Start from the outer edges of the pot and work your way toward the center. Place the thicker cabbage leaves near the outside edge and the tender leaves in the center. Make sure that you pack the pot tightly as the layers will become loose once the ingredients start to cook.
    • If you don’t have enough layers to pack the pot tightly, consider using a smaller pot or place other ingredients in the center. I Like to stuff enoki mushrooms or shimeji mushrooms in the center. Or use slices of radish to surround the mushrooms.
    • Make you dashi. Don’t reduce the salt If you are using dashi from packets since the napa cabbage will release liquid during cooking and dilute the soup. If using Shiro Dashi that is seasoned omit half the soy sauce and sake. Taste your broth, it should not be too salty.
    • Pour the broth into the pot with the napa cabbage and pork belly. Start cooking on high heat. Once boiling, skim off the foam and fat on the surface using a fine-mesh skimmer. Then, reduce the heat to medium low and cook covered until the napa cabbage is tender and the pork belly is cooked through, roughly 8-10 minutes.

    Garnish

    • Garnish with chopped green onion/scallion, have shichimi togarashi (Japanese seven spice) on table or sprinkle on top of dish. Serve while hot with rice or boil up some noodles to serve in the delicious broth!
      I like adding a ramen egg or a Mayak egg t round it out.
    Cold Noodles with Tomatoes (Tomato Triple Play)

    Cold Noodles with Tomatoes (Tomato Triple Play)

    I have taken over tomato duties from the hubby who has given up on becoming an urban farmer.  We just haven’t had any luck with turning our garden into a summer veggie paradise.  My bounty from 5 tomato plants so far has been a grand total of 4 tiny red orbs 🤦🏻‍♀️

    FORTUNATELY, we have a wonderful farmer’s market in town.

    My haul from last week’s farmer’s market included a variety of cherry tomatoes including Bronze Torch Cherry Tomatoes (pictured on the right above) from Live Earth Farm in Watsonville. We have been buying Live Earth produce since my kids were toddlers and they’re in their twenties now!  The Bronze Torch Cherry Tomatoes are simply AH-MAZING.  Sweet, tomatoey, delicious.

    Tomato Trifecta

    I am a big fan of Eric Kim.  He writes regularly for New York Times Cooking and just published a wonderful cookbook, Korean American.  It is hands down one of my favorite books. His recipes are easy and delicious and his writing is even better.  You can also find him on YouTube making many of his recipes, he’s funny, personable, and charming.  I went to his book signing at Omnivore Books in SF, fun, I’m such a food groupie.

    I love his Grape Tomato Quick Kimchi which I make all the time.  Serve as Banchan (side dish-pictured on the right above) one day and as a sauce over noods the next day.  It is downright delicious.  As soon as I saw his Cold Noodle with Tomatoes recipe I jotted it down on my MAKE ASAP list.  It is so easy and incredibly delicious.  It should go on your list too.

    Start with cherry tomatoes, slice them in half, and sprinkle with salt.  Let the tomatoes sit in the bowl while you put together the rest of the dish.  No need to use a strainer as the juices from the salted tomatoes become part of the broth.  Mince garlic, get out the rice vinegar, soy sauce, Dijon mustard, and sesame oil, and toss it all in a bowl along with the tomatoes.  Next, add cold-filtered or bottled water to the bowl (use water that tastes good).  Add diced scallions, and slices of radishes (the little red ones) or cucumbers to the broth. Set the broth aside.

    Here’s the Hard Part

    How to cook your somen.  DO NOT COOK YOUR SOMEN while you are getting the other components together. Make the broth and set it aside.  Focus on the noods so you don’t overcook them.  For somen (thin Japanese wheat noodles), start with plenty of unsalted water.  Somen has salt in it. If you use too little water, the noods will absorb too much water because of the salinity. Watch them like a hawk, and stir them with chopsticks or tongs while cooking to separate the noodles, this takes 3-4 minutes TOPS.  Remove from heat, rinse thoroughly under cold water and drain well.

    Before serving, twirl noodles into a bundle and place them in a bowl.  Add crushed ice to the tomatoes and pour it over your noodles.  Garnish with additional scallions and sesame seeds.  It’s so refreshing, the perfect summer meal.  Carnivores, feel free to add shrimp or chicken or half of a hard-boiled egg.   Serve asap on a hot summer day.  Sooooooo good.

    BONUS,  Ottolenghi’s Charred Tomatoes and Cold Yogurt.  Yes, my trifecta of tomato recipes.  Tomatoes, roasted with thyme, cumin seeds, lemon, and garlic,  served over yogurt or Labneh. It’s my go-to party appetizer, especially in the summer.  It’s “lick the bowl clean” good.  A showstopping, easy dish.  Make it, you’ll thank me.

    Cold Noodles with Tomatoes

    Refreshing, delicious, and easy to prepare, Eric Kim's Cold Noodles with Tomatoes
    Course noodles, one bowl meal, pasta, Soup
    Cuisine Asian, Asian-American, Korean
    Keyword cherry tomatoes, Cold noodles, Cold Noodles with Tomatoes, soup
    Prep Time 15 minutes
    Cook Time 5 minutes

    Ingredients

    The Star

    • 2 pints ripe cherry tomatoes halved
    • 2 teaspoons kosher salt (Diamond Crystal)

    The Noods

    • 12 to 14 ounces somyeon somen, capellini or other thin wheat noodle

    Soup and Seasonings

    • ¼ cup rice vinegar
    • 2 tablespoons soy sauce Kikkoman, Sempio 501 or 701 or LKK Premium Soy
    • 2 tablespoons granulated sugar
    • 1 large garlic clove finely grated
    • ½ teaspoon Dijon mustard
    • ½ teaspoon toasted sesame oil
    • 2 cups cold filtered water or bottled water of your choice.
    • 1 tablespoon toasted sesame seeds

    The Garnishes

    • 2 radishes thinly sliced, or cucumbers work in a pinch
    • 2 scallions thinly sliced at an angle
    • 2 cups crushed or cubed ice

    Omnivore Options

    • cooked shrimp or shredded chicken
    • hard boiled eggs, but not too hard-boiled lol

    Instructions

    • In a large bowl, toss together the tomatoes and salt. Let sit until juicy, about 10 minutes.
    • Bring a large pot of water to a boil. Cook the noodles according to package instructions, drain and rinse under cold water. Set aside. See post for how to cook somen noodles.
    • Add the vinegar, soy sauce, sugar, garlic, mustard and sesame oil to the tomatoes, and toss with a spoon until well combined. Stir water into the tomatoes and sprinkle the surface of the broth with the sesame seeds, radishes and scallions.
    • Right before serving, add the ice to the broth. Divide the noodles among bowls, and ladle in the broth and any unmelted ice, making sure each serving gets a nice sprinkling of tomatoes, radishes, scallions and sesame seeds.
    Jangjorim (Soy Braised Beef 장조림)

    Jangjorim (Soy Braised Beef 장조림)

    I have a total backlog of recipes I want to share with you and this one is top of the list.  I have made this as many times as I have made Eric Kim’s Quick Grape Tomato Banchan or Ottolenghi’s Charred Tomato and Cold Yogurt (so good) and that is saying a lot.

    Do You Banchan?

    Jangjorim or Soy Braised Beef can be served as banchan (those yummy little dishes that come with every Korean meal) or as a topping to a rice bowl or in a bento box.

    I’m not a salad lover. Well, let me rephrase that, I’m not a salad maker…so much trouble.  But banchan? Worth the trouble, I’ll make a batch of each, keep them in the fridge and pull ’em out for lunch and/or dinner.  They go with everything, rice, noodles, or sammies.  Want a little funkiness in your grill cheese, add kimchi (김치).  Want crunch and spice in your noodles, add spicy cucumbers (오이무침).  Pickled or braised veggies go so well with rice, maybe that’s why I like them.

    Koreanbapsang’s recipe for Jangjorim is my starting point.  First step, make the stock to cook the meat.  The stock includes onions, scallions, garlic and Korean radish (mu,무).  The radish gives the dish sweetness, I save the radish to serve with the Jangjorim.  It’s delicious.

    Shank-alicious

    Next, cut beef into cubes and simmer in the stock.  Use brisket, flank, chuck, or my favorite, shank.  Shank is both flavorful and economical, win-win.  For those not familiar with shank, it comes cut crosswise into pieces with the bone in the center.  Remove the meat from the bone and cut it into pieces. Throw the bones into the cooking broth for extra flavor.  I’ve also used pork shoulder or butt as a substitute with nods of approval from the fam.  After simmering, remove the meat and place it in another pot along with 2.5 cups of the original stock and add the seasonings.  Reserve the radish.  Cook meat on medium heat for approximately 20 minutes.  Then add shishito peppers, boiled, peeled eggs, kelp (optional), and the reserved radish. Cook for another 10 minutes or until meat is tender.

    Shishito peppers can be a bit spicy, so if you have little kids or big kids that are spice averse, use bell peppers or Anaheim peppers, and cut into manageable bite-sized pieces.  Cook eggs as you would six-minute ramen eggs.  Chill eggs thoroughly before final braising to avoid overcooking the eggs.  Normally, the eggs are hard-boiled but jammy eggs are my jam.

    Jangjorim can be served at room temperature to warm as banchan or over rice.  The meat can be shredded or sliced.  It’s so flavorful, a little bit goes a long way.

    I love this dish and hope you will try it!

    Jangjorim (Soy braised Beef)

    Jangjorim or Soy braised Beef, adapted from Korean Bapsang, is a delicious Korean side dish that works well in a bento box too!
    Course Meat, Side Dish
    Cuisine Asian, Korean
    Keyword Banchan, Korean, shishito peppers
    Prep Time 10 minutes
    Cook Time 1 hour

    Ingredients

    Da Stars

    • 1.5 pounds shank meat or beef brisket you can sub pork shoulder or butt
    • 10 to 12 Shishito peppers or other fresh green peppers Use less and cut into halves if using large peppers
    • 3 boiled eggs* peeled

    Da Stock

    • 1/2 medium yellow onion
    • 2 stalks scallions white part only save green parts for garnish
    • 6 ounces Korean radish (about 1/4-1/3 of one radish) mu, cut into big chunks
    • 7 cloves garlic
    • 3 slices thin ginger about 1-inch round
    • 1/2 teaspoon whole black peppers or ground peppers to taste

    Da Sauce

    • 5 tablespoons soy sauce
    • 2 tablespoons soup soy sauce guk ganjang, 국간장 (or use more regular soy sauce)
    • 3 tablespoons sugar
    • 3 tablespoons rice wine or mirin
    • 1 piece 3-inch square dried kelp substitute a bay leaf

    Instructions

    • Cut the beef into 2-inch chunks. This recipe is very flexible. You use brisket or flank. I love beef beef shank which is very economical. It has great flavor and texture. You could even use pork shoulder or butt. Delicious!
    • In a medium pot, bring 8 cups of water and Da Stock ingredients to a boil. Cover and continue to boil for 5 minutes over medium-high heat.
    • Drop the meat into the pot. Bring it to a gentle boil, and remove the scum. Reduce the heat to medium. Boil, covered, for about 30 minutes.
    • Remove the meat. Strain the cooking liquid into a large bowl, and then add 2.5 cups of the liquid back to the pot. (You can save the remaining broth to make a soup or stew later.)
    • Add the meat and sauce ingredients to the pot. Bring it to a boil over high heat. Reduce the heat to medium, and boil, covered, until the meat is tender and the sauce is reduced to about ⅓, about 20 minutes. You can cook longer if the meat is still not tender enough.
    • Add the optional dried kelp, peppers and eggs and continue to boil for about 10 minutes. Discard the kelp, and transfer everything else to an airtight container for storage. Cool before storing in the fridge. Shred the meat and pour some sauce over to serve.
    • Optional: Serve the radish and onions with this dish! Normally, the meat is shredded, and served with shishito peppers and eggs.

    Notes

    Refrigerate in an airtight container. It will keep for a week. If you want to keep it longer, boil the meat and sauce again after a few days.
    The meat will become hard in the fridge. You can soften it by leaving the shredded beef out at room temperature for 20 to 30 minutes, or microwave for about 20 seconds to soften.
    Eggplant Unagi Don

    Eggplant Unagi Don

    From one of my favorite sites, Two Plaid Aprons, a vegetarian version of Unagi Don!  Eel grilled with a sweet and savory sauce or “tare” is called unagi.  Don is short for donburi, which refers to the bowl and rice that serves as the landing spot for toppings like unagi.  Rice bowls, in my humble opinion, scream comfort food and this riff is no exception. If you are looking for some protein try a fam fav like Oyako Donburi, a Chicken and Egg Donburi.

    Grilled and sauced unagi yields a smoky, savory-sweet, melt-in-your-mouth bite of deliciousness.  Eggplant braised in the same fashion makes a great stand-in for the unagi.  According to the hubster, the resident carnivore in my house, this will satisfy any meat-eater.  The tare is made with soy sauce, Mirin (sweet sake), sake, and sugar; ingredients found in most Asian grocery stores.  I like substituting dashi soy for the soy sauce which is a blend of soy sauce and fish stock that gives the eggplant a hint of brininess.

    Anyway You Slice It

    Leave the skin on the eggplant if you like. The other thing you can do is score the eggplant crosswise to mimic the striations on unagi.  Fry the eggplant until nicely charred, lower the heat and pour in unagi sauce and green onions. Cover and let the eggplant braise for 5 minutes or until tender but not mushy.  As the eggplant braises, it picks up the flavor of the sauce and becomes tender and soft like…eel. YUMMO.

    Take the eggplant out and place it over your rice.  Garnish with green onions and toasted sesame seeds.  Serve immediately.  OR, take it over the top with a runny, sunny-side-up egg.  Enjoy!

    Eggplant Unagi Don

    Eggplant Unagi Don, a delicious, easy prep, vegetarian version of Unagi Don
    Course dinner, lunch, one bowl meal
    Cuisine Asian, Asian-American, vegetarian
    Keyword eggplant, mirin, Rice Bowl, soy sauce, vegetarian
    Prep Time 5 minutes
    Cook Time 15 minutes

    Ingredients

    Da Stars

    • 2 Japanese eggplant or Chinese eggplant washed, sliced in half lengthwise and crosswise if they are long.
    • 4 cups cooked white rice Feel free to use whatever grain you like, brown rice, farley, quinoa (not my choice but hey)

    Da Sauce

    • 4 tbsp sake
    • 4 tbsp soy sauce regular or low sodium or Dashi Soy
    • 4 tbsp granulated sugar
    • 2 tbsp mirin
    • 2 stalks Green onion, sliced
    • 1/8 tsp dashi powder or granules optional use with low sodium soy sauce

    Da Garnish

    • Toasted white sesame seed, sliced green onions

    Instructions

    Unagi sauce:

    • In a small bowl, mix together sake, soy sauce, sugar, mirin and dashi if using. If you use Soy Dashi, skip the powder. Set aside until needed.

    Eggplant Prep

    • Cut off stem of the eggplant and peel the skin with a vegetable peeler, this is optional, if you like skin, save yourself a step. Cut the eggplant in half crosswise, then slice each half evenly lengthwise. Lightly score eggplant crosswise every 1/8-1/4 inch, don't cut thru! This makes it look more like unagi.

    Cookin' It

    • In a 10-inch shallow pan over medium high heat, add a couple tablespoons of oil. Once the oil is hot, place eggplant flat side down and sear until golden brown, about 2 to 3 minutes. Flip eggplant and sear the other side for a minute or two until golden brown.
    • Stir the prepared unagi sauce and pour it into the pan. Reduce heat to medium/medium-low to keep the sauce at a simmer. Place a lid on the pan and cook eggplant slices for 5 minutes.
    • After 5 minutes, remove the lid and flip eggplant slices to their flat side. Add half of the sliced green onions to the sauce and continue simmering for 2 to 3 minutes, or until the eggplant slices are tender and the sauce is reduced to a thick glaze. Remove pan from heat.

    To Serve:

    • Scoop a serving of hot rice into each bowl.
    • Place two slices of eggplant unagi flat side up on each bowl of rice. Garnish with the remaining green onion and sesame seeds. Bowl food is soul food!