Category: Proteins

beef, pork, poultry, fish

Crying Tiger Beef (Grillin’ and Chillin’)

Crying Tiger Beef (Grillin’ and Chillin’)

A reel for Crying Tiger Beef had me salivating until I read the words “recipe coming soon”.  Nooo, it looked so yummy I wanted to try it immediately.  But, I understand. How many times have I posted a dish on IG or FB with the same caveat?  Coming soon.  So I turned to a tried and true cookbook, Simple Thai Food: Classic Recipes from the Thai Home Kitchen by Leela Punyaratabandhu, and found her recipe for Crying Tiger Beef.  It’s a great book for a “Thai food is not in my wheelhouse but I love it” person, like ME.  Her recipe for Pad Thai is my go-to.

Tomatolly Off on a Thai-gent

The dipping sauce for  Crying Tiger Beef in Simple Thai is a variant.  Instead of the traditional one made with toasted rice and tamarind, this one has roasted cherry tomatoes.  Since tomato season is upon us and I am a tomato FREAK, this was a no-brainer.  Glad I did, it’s delicious.  I will include both recipes for you to try.  I expect a report on which version reigns supreme in your house.

Where’s the Beef?

The marinade and sauce work with different cuts of beef.  Wanna get fancy? Ribeye or NY strip steaks.  A quick weeknight meal, flank steak, or skirt steak gets the 👍.  Flanken-style short ribs would work well also.

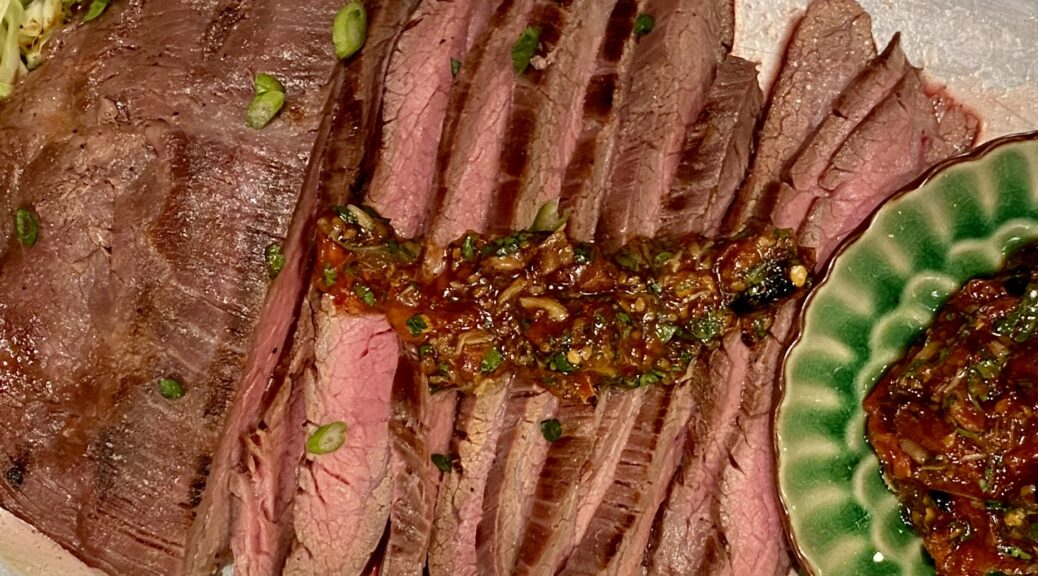
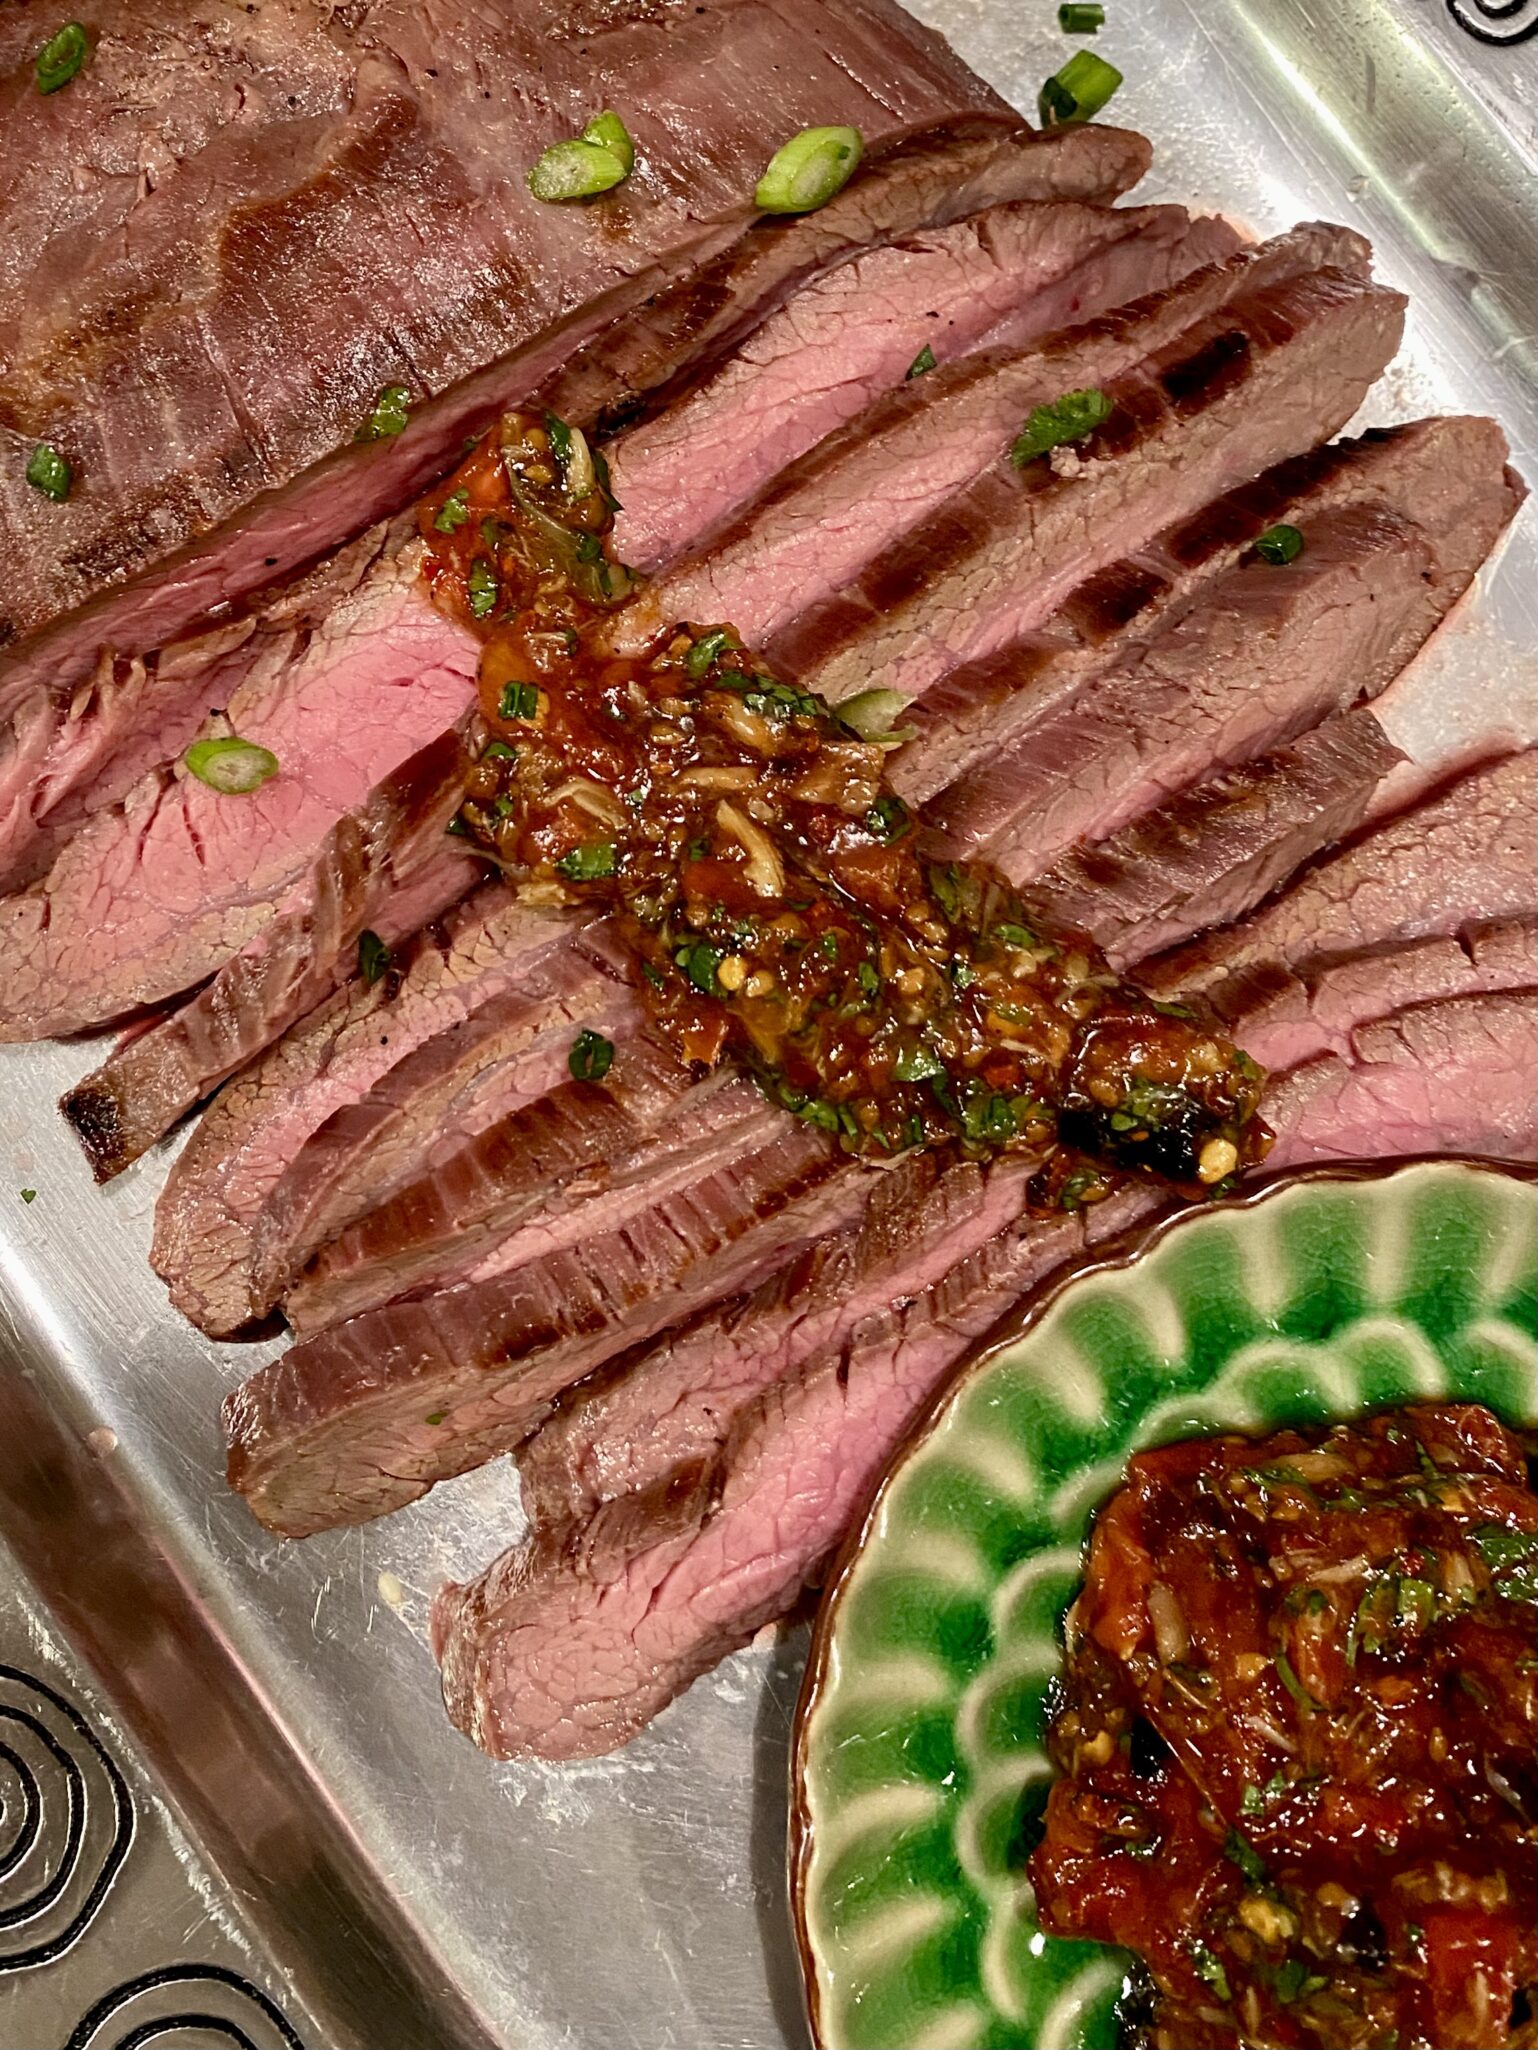
I opted for the family-friendly flank steak, lean but flavorful and a great cut to barbecue.  First, marinate your flank steak in a simple blend of oyster sauce, soy sauce, and oil.  It’s amazing how it flavors the meat.  I have both Chinese and Thai oyster sauce.  I used the Thai version but the Chinese Oyster Sauce by LKK, with the lady and kid in a boat would be perfect and you really don’t need to go out and get Thai oyster sauce which will be much harder to find.  You (West Coast peeps) can find LKK at major grocery chains, Costco, and most Asian grocery stores.

Sauce Me Up

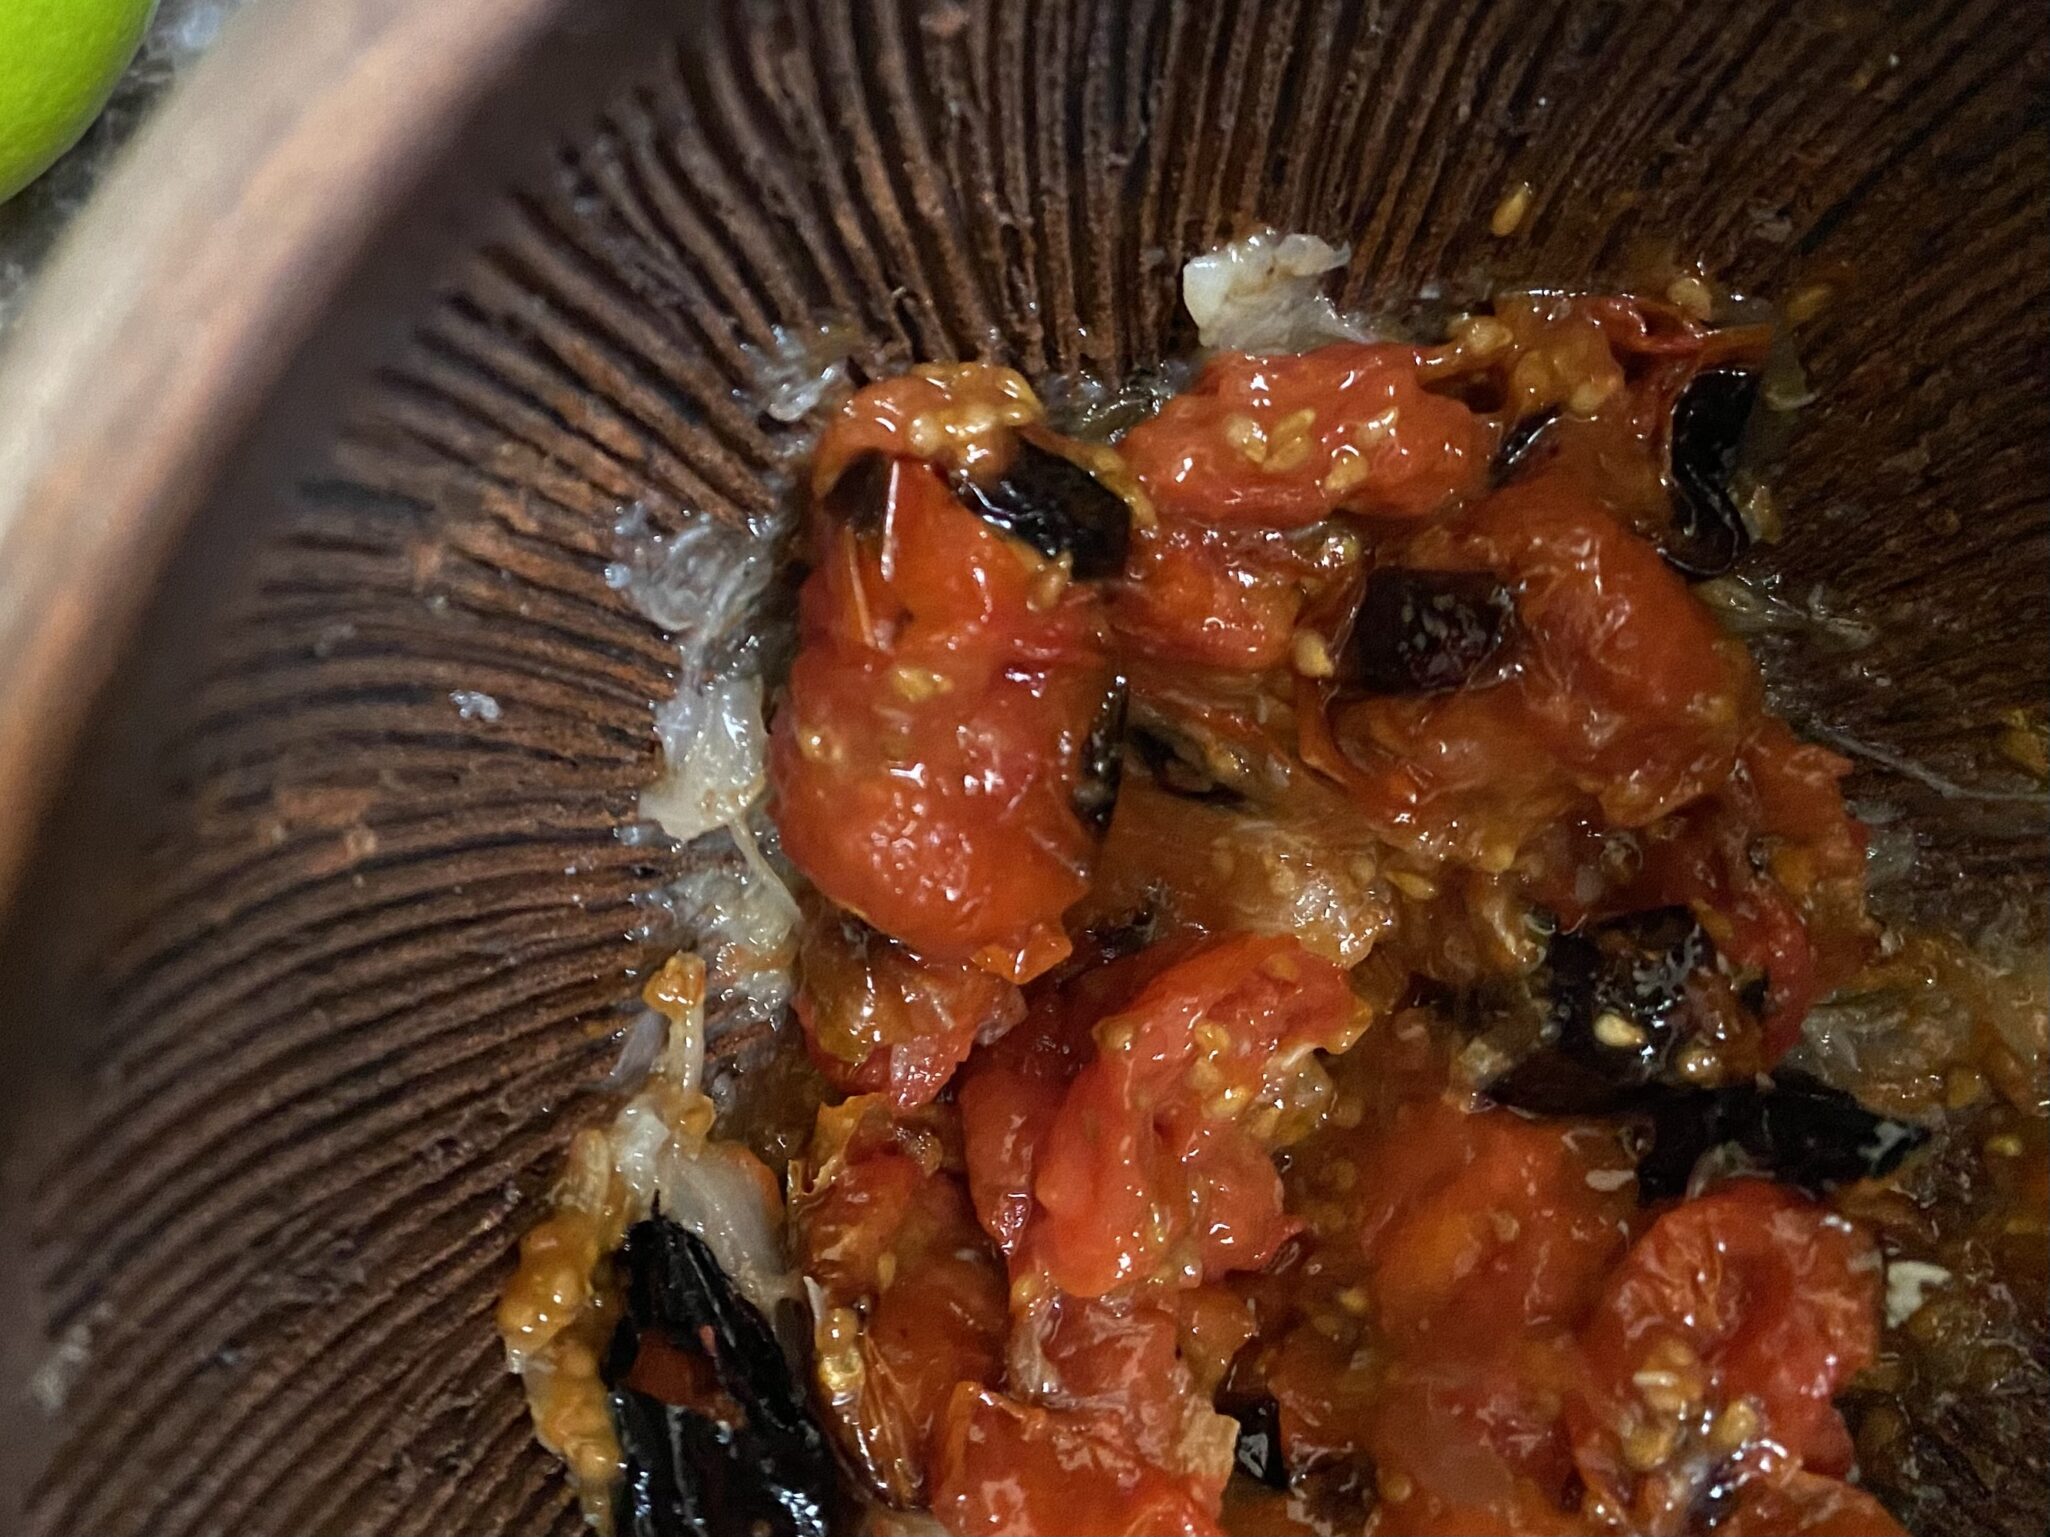
As your meat marinates, make your sauce.  Broil tomatoes, garlic, and shallots until soft with charred spots.  Transfer tomato mixture to a food processor or mortar and pestle (shades of being a pharmacist).  Pulse or pound until the mixture becomes a chunky sauce.  Don’t purée!  Pour the sauce into a bowl and add fish sauce, lime juice, chili flakes (to desired heat level!!), sugar and cilantro. I absolutely love this sauce, so much umami.  I generally double the sauce recipe, it’s that good.

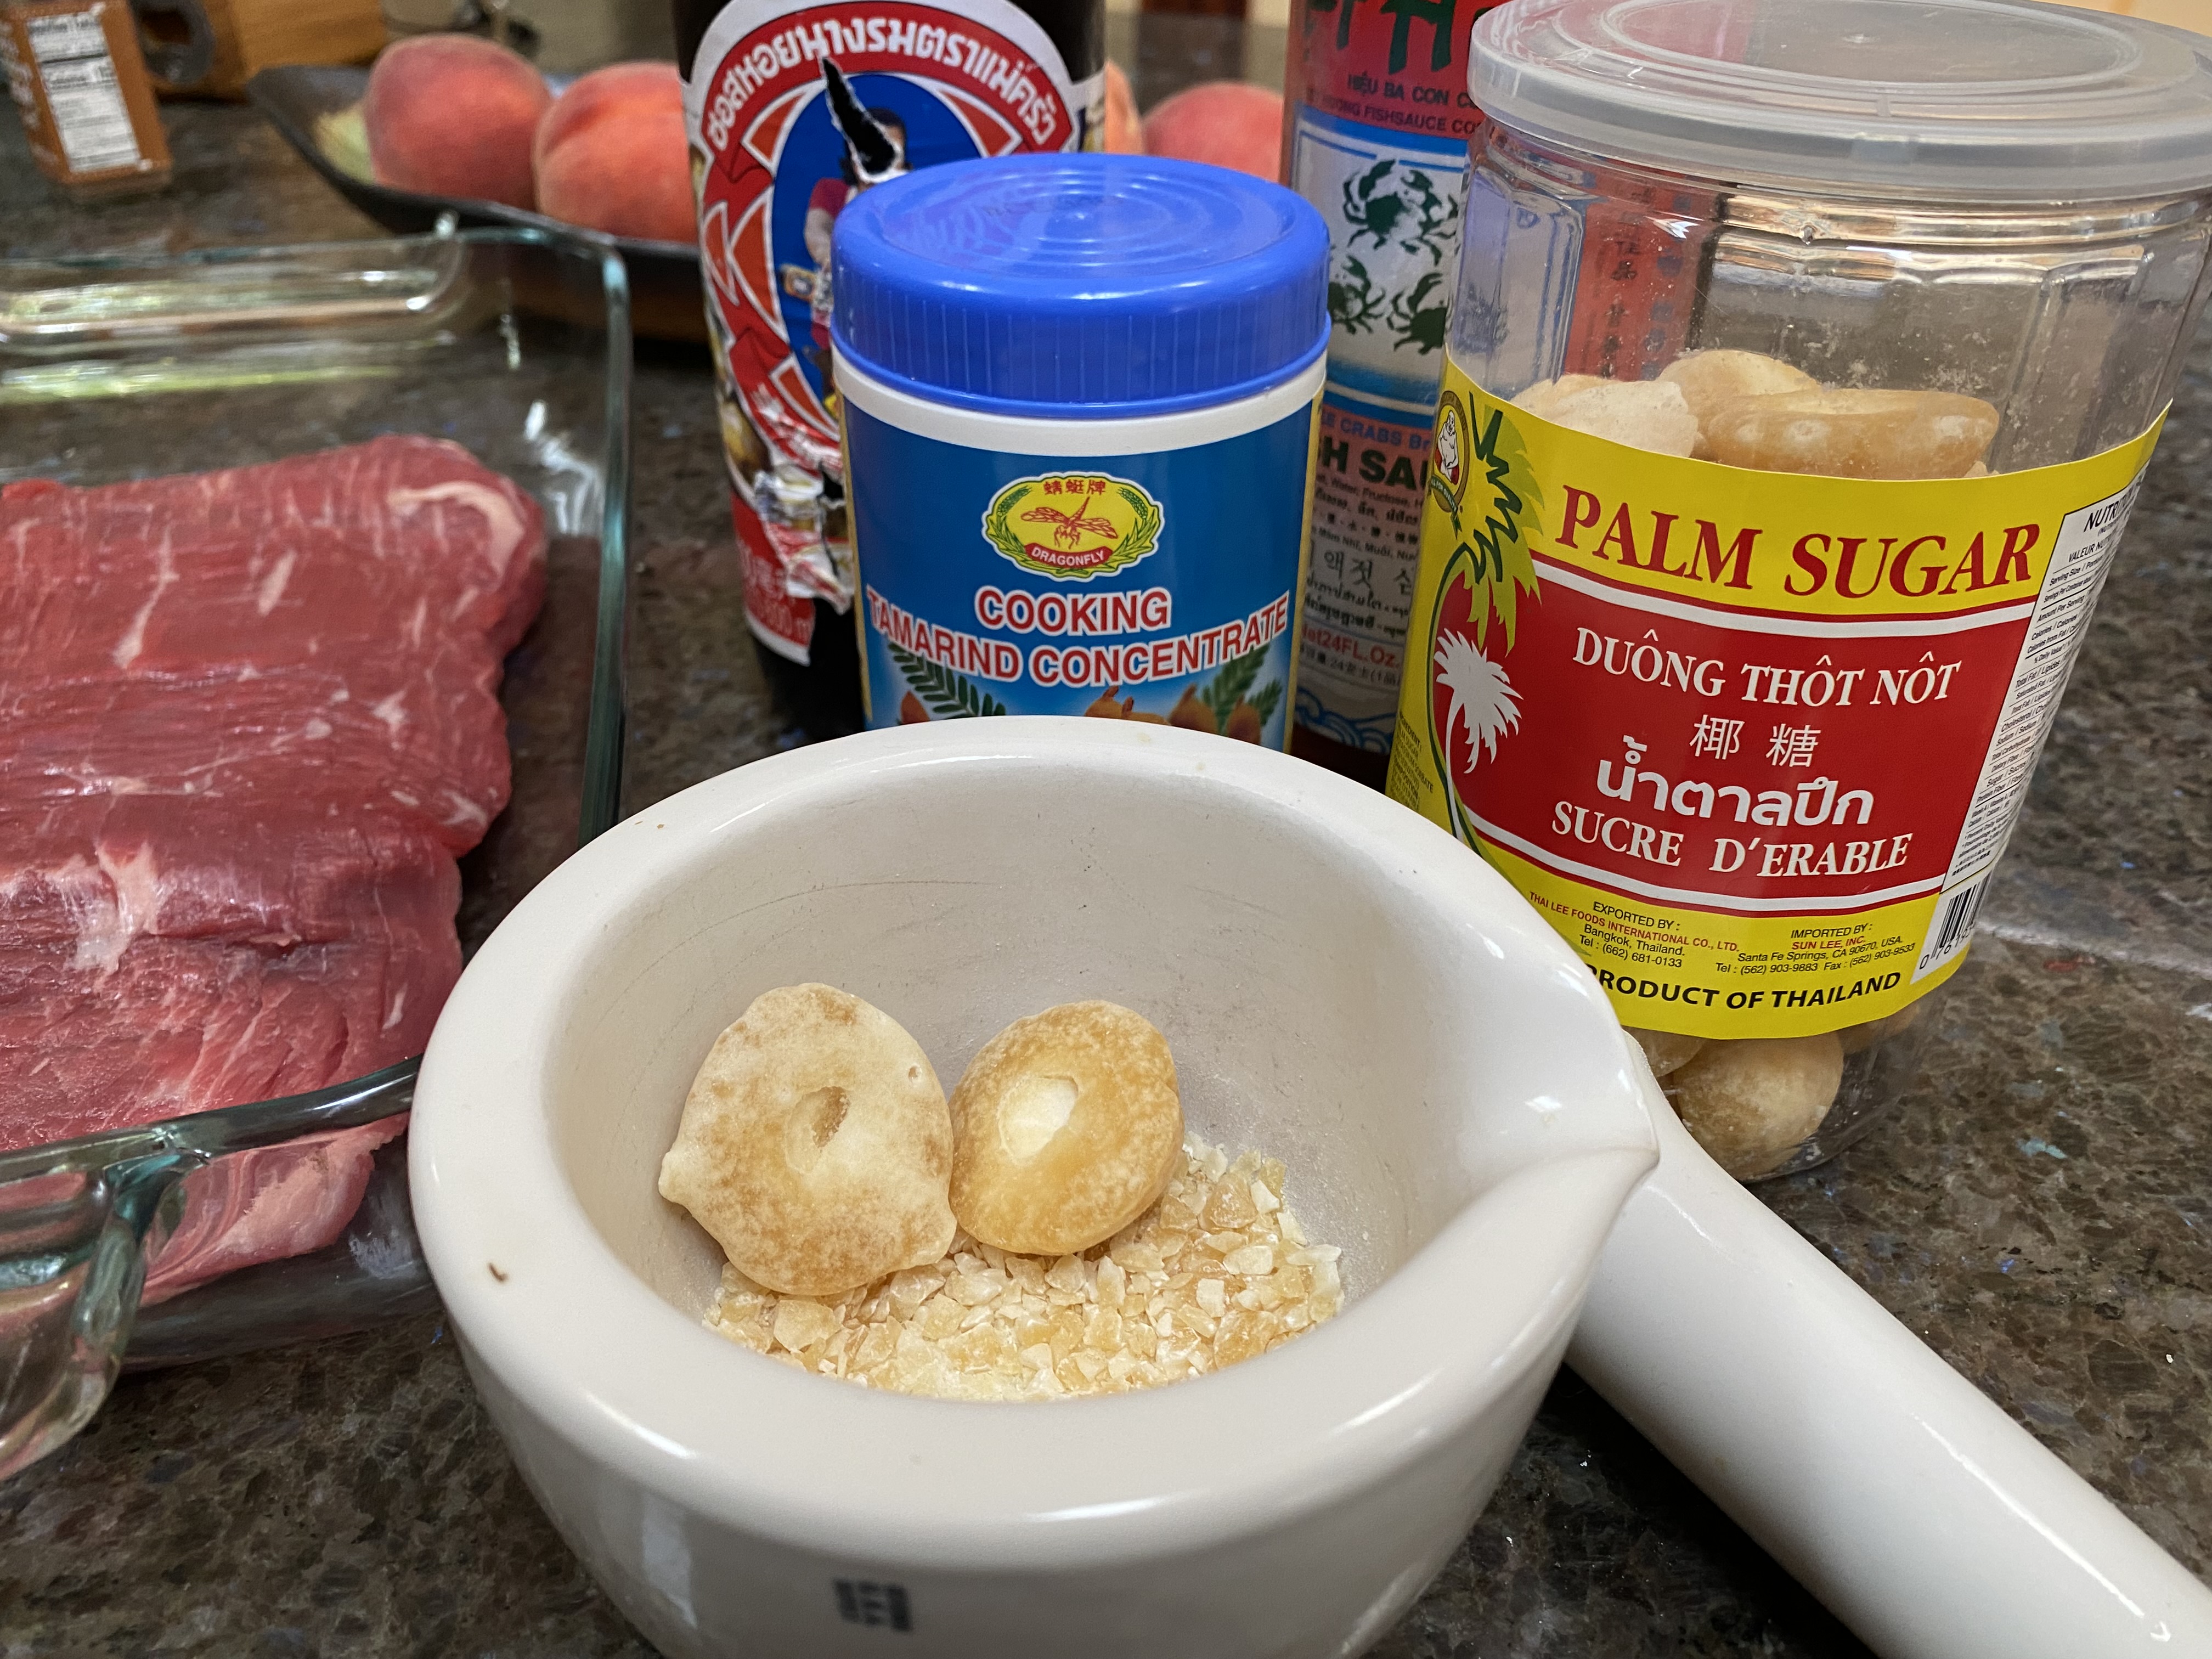
Palm Sugar-feel free to use brown sugar if you don’t have palm sugar.  But if you want to, palm sugar comes in little squares or egg-shaped pieces, very dense.  My recommendation would be to pulverize those little suckers (very cathartic) before using it.  It would take forever and a day to melt.  You’re welcome.

Crying Tiger Beef with Roasted Tomato Sauce

Easy and delicious Thai dish, Crying Tiger Beef. Grilled steak is topped with a spicy sauce made with roasted tomatoes, shallots, and garlic and seasoned with lime juice, fish sauce, red onions, and cilantro.
Course bbq, dinner, main dish
Cuisine Asian, Thai
Keyword cherry tomatoes, Crying Tiger Beef, grilled beef, pad thai
Prep Time 5 minutes
Cook Time 20 minutes

Ingredients

Marinade

  • 1 tablespoons neutral oil
  • 1 tablespoon soy sauce
  • 1 tablespoon oyster sauce
  • 1/2 teaspoon ground white or black pepper
  • 1 flank steak, about 1 ⅔ pounds total This recipe works with steaks too. So if it is date night...2 nice ribeyes would be perfect!

Dipping Sauce

  • 4 ounces cherry tomatoes
  • 1 large shallot (1 oz) halved
  • 3 large garlic cloves
  • 1 tablespoon fish sauce
  • 1 tablespoons fresh lime juice
  • 1 tablespoon red pepper flakes I have never used over 1 teaspoon!
  • 1/2 teaspoon packed light brown sugar or palm sugar
  • 2 tablespoons coarsely chopped cilantro leaves and stems

Garnish

  • 1 tbsp Glutinous or sticky rice, raw optional, but recommended
  • Handful cilantro sprigs coarsely chopped, for garnish
  • sliced cucumbers and tomatoes

Instructions

  • For the beef, in a wide bowl or square pan, stir together the oil, soy sauce, oyster sauce, and pepper. Add the beef and turn to coat all sides.
  • Prepare a medium-high fire in a charcoal grill or preheat a gas grill to medium on one half and medium-hot on the other half. Heat source shold be indirect. Place flank steak in center of grill. Grill about 4 minutes a side for medium rare. Remove from heat. Let meat rest about 5 minutes before slicing.
  • Slice beef against the grain into 1/4-1/2 inch slices then arrange on a serving platter. Sprinkle with the ground toasted rice (optional) and garnish with the cilantro. Serve with the sauce.

Sauce

  • Place tomatoes, unpeeled shallots, and garlic on a small sheet pan and broil, turning often until charred and squishy. This should take about 7-10 minutes.
  • While the beef rests, finish the sauce. Using a mortar and pestle or bowl and a fork, smush the shallots and garlic into a rough paste. Add the tomatoes, blend to form a chunky sauce. Don't puree the tomatoes. Transfer to a serving bowl and stir in the fish sauce, lime juice, pepper flakes, sugar, and chopped cilantro. The sauce should have the consistency of a chunky salsa. Let it sit a few minutes, then taste; add more lime juice, fish sauce, and pepper flakes, if needed. The sauce should taste primarily sour and spicy and then salty with, with a hint of sweetness.
  • You could make this in a food processor, just don't overprocess the sauce! Use the pulse button only to avoid this.

Toasted Rice Powder

  • Place raw glutinous rice in a small skillet over medium-low heat. Swirl pan continuously until rice is golden brown and has a nutty aroma. This will take about 10-15 minutes. Remove from heat and pour into a mortar or small bowl. Set it aside to cool. Once cooled, grind in the mortar or in a small food processor, until rice becomes a powder.
  • Sprinkle this on your meat right before serving.

The traditional sauce is delicious too. It’s a little more difficult finding tamarind.

Tamarind is tangy and adds a sweet and sour flavor profile. You can find it as a paste or pulp to make a paste. Get the paste for convenience.  The other component is toasted sweet rice powder.  You can probably buy this but I always have sweet rice (glutinous rice aka sticky rice) on hand. The raw rice can be toasted on the stovetop and ground in a mortar and pestle or spice grinder.

Crying Tiger Beef with Tamarind Sauce

Course bbq, dinner, lunch
Cuisine Thai
Keyword Crying Tiger Beef, Thai

Ingredients

Marinade for Beef

  • 1 tbsp oyster sauce
  • 1 tbsp fish sauce
  • 1 tsp brown sugar
  • 2 x 200g 7 oz ribeye steaks (or any other steak cut you prefer)
  • vegetable oil for brushing
  • steamed rice or sticky rice to serve

Spicy Dipping Sauce-Nahm Jim Jaew

  • 2 tsp raw glutinous rice also known as sticky rice
  • 1 tbsp tamarind concentrate
  • 3 tbsp fish sauce
  • 1 tbsp lime juice
  • 1 tbsp brown sugar
  • 1 tbsp chilli flakes
  • 1 small red shallot sliced into fine wedges
  • 2 tsp finely chopped coriander cilantro

Instructions

  • Combine the oyster sauce, fish sauce and brown sugar. Pour the mixture over the steaks and use your fingers to massage the marinade all over the steak pieces. Allow to marinate while you prepare the remaining ingredients.
  • For the spicy dipping sauce, toast the rice in a dry frying pan over high heat until golden brown and fragrant (it should smell like popcorn). Use a mortar and pestle or a spice grinder to grind to a fine powder. In a bowl, combine the tamarind, fish sauce, lime juice, sugar, chilli flakes and toasted rice powder. Mix until well combined. Then stir through the shallot and coriander. Transfer to a small serving bowl and set aside until ready to serve.
  • Heat a large heavy-based frying pan over high heat. Brush with oil. When hot, add the steaks and cook for 2-3 minutes, turning the steaks every so often until you get a nice charred colour. Then turn the heat to low and continue cooking (and flipping the steaks) for another 2-3 minutes (for medium rare) or until cooked to your liking. Before slicing, transfer to a cutting board and allow to rest for 3 minutes.
Miso-Honey Chicken with Asparagus Sheet Pan-tabulous!

Miso-Honey Chicken with Asparagus Sheet Pan-tabulous!

Sam Sifton’s What to Cook column in the NY Times is my usual starting point for what should I make for dinner during the week.  I found Yossy Arefi’s Sheet Pan Miso-Honey Chicken and Asparagus in his column a little while ago and bookmarked it.  Like so many others, I have jumped on the sheet pan meal train.  I love a cooking method that includes hashtags like #quick, #easy, and #delicious.  This recipe was simply yummy and had me licking my plate clean at the end.

Da Sauce

The flavor from the marinade manages to hit every note-sweet from honey, and spicy from chili sauce.  Eartiness and salty from the miso.  The ginger and garlic create an added one-two flavor punch.  It is absolutely delicious.  Reserve half of it to serve at the table for those who just can’t get enough of it, like me!

Most of the ingredients for the marinade are items that you probably have in your pantry or fridge, especially if you like Asian cuisine.  For those not familiar with miso-the star of this marinade, miso is a cornerstone in Japanese cooking.  It is made from soybeans that is fermented and it is responsible for that salty, slightly funky flavor and umami.  It comes in two basic types, white and red.  White miso is milder and if I could only have one miso, this would be it.  Here is a primer on miso from Spruce Eats.  Look for it in Asian grocery stores and many of the larger supermarkets.  There really isn’t a substitute so if your local markets don’t carry it, try online.

Improvising for the lack of asparagus, I grabbed a head of cauliflower from my crisper and I was in business.  I prefer bone-in chicken so I slathered the marinade on bone-in, skin-on chicken thighs and opted to roast it.  Roast the chicken and cauliflower in a 425-degree oven for approximately 25-30 minutes until the chicken is crispy and browned, and the cauliflower is tender and golden.  It would be tough to broil bone-in chicken and have it cook through, high-heat roasting works well.

Sheet-Pan Miso Honey Chicken with Asparagus

An easy and delicious one-pan meal. Chicken thighs are marinaded in honey, miso, and soy sauce elevated with the addition of minced garlic and ginger. Delicious!
Course Main Course, Meat
Cuisine Asian-American
Keyword Chicken thighs, gochujang, NYTcooking, sheet pan meal
Prep Time 10 minutes
Cook Time 30 minutes

Ingredients

Marinade

  • 3 tablespoons white miso
  • 3 tablespoons mild honey
  • 3 tablespoons soy sauce or tamari
  • 1 tablespoon rice vinegar
  • 2 teaspoons finely grated fresh ginger
  • 2 teaspoons finely grated garlic
  • 2 teaspoons chile-garlic sauce or other hot sauce
  • 1 tablespoon neutral oil + 1 tablespoon water for marinade

The Stars

  • 1 Pound large bunch asparagus trimmed
  • 2 teaspoons neutral oil for asparagus
  • 1½ to 2 pounds chicken thighs boneless, skinless (although I like leaving the skin on

The Garnish

  • Salt and pepper
  • 2 scallions thinly sliced

Instructions

  • Make the marinade: In a bowl, whisk together the miso, honey, soy sauce, rice vinegar, ginger, garlic, chile-garlic sauce, 1 tablespoon oil and 1 tablespoon water. Refrigerate half the marinade for serving.
  • Place the chicken in a shallow dish or zip-top bag and pour the remaining marinade over the top. Toss the chicken until coated and let marinate in the refrigerator for up to 30 minutes.
  • When you are ready to cook, heat the broiler with a rack set 6 inches below it. Line a large baking sheet with aluminum foil. * See notes for directions to roast chicken instead of broiling.
  • Remove the chicken from the marinade, scraping off and discarding any excess. Place the chicken in a single layer on one side of the baking sheet, with the flatter side up. Place the asparagus on the other side. Drizzle the asparagus with remaining oil, then season the asparagus; toss to coat.
  • Broil until the chicken is cooked through with some charred spots and the asparagus is browned, about 10 minutes.
  • To serve, top the chicken with a drizzle of the reserved marinade and a sprinkle of scallions.
  • Serve with rice, if desired.

Notes

A variety of vegetables can be substituted for asparagus such as bok chop, broccoli, or chard. I had a head of cauliflower in my crisper and thought, why not?  I was in business.  Too lazy to debone the chicken I slathered the marinade on bone-in, skin-on chicken thighs and roasted the chicken and cauliflower in a 425-degree oven for approximately 25-30 minutes until the chicken was crispy and browned, and the cauliflower tender and golden. Just know the bone in chicken will take approximately 35 minutes to roast so cut your vegetables to a size that needs the same amount of time.
Corned Beef & Cabbage (Let’s Hash It Out)

Corned Beef & Cabbage (Let’s Hash It Out)

I feel if I am going to eat a meal that is associated with a holiday I ought to learn a little bit about that particular holiday and its significance to the culture or country of origin.  The extent of my knowledge regarding St. Patty’s Day is corned beef and cabbage.

So Friday as I was pulling my corned beef out of the fridge, I googled St. Patrick’s Day.  In a nutshell, Patrick, before he became a saint, is credited with bringing Christianity to Ireland.  St. Patrick’s Day is the day of his death.  A folktale credits him with driving the snakes out of Ireland, symbolism for pagan religions as there are no snakes in Ireland.

Corned Beef and Cabbage is not the chosen celebratory meal in Ireland but rather came about here in America.  Corned beef and cabbage were both relatively cheap and out of necessity became the meal of choice for the poor Irish immigrants striving to make a new life here.  In Ireland, you are more likely to have Irish Stew and Soda Bread.

Shortcut Corned Beef

I will admit, I make this once a year.  Don’t get me wrong, I love Corned Beef, I just don’t make it at home…except on Saint Patty’s Day.  As a kid, my favorite breakfast was Corned Beef Hash by Mary’s Kitchen.  Yep, hash out of a can, I thought it was delicious.

Two things I did differently this year.  On a whim, I splurged on Wagyu Corned Beef Brisket from Costco.  Second, we pulled out the Instant Pot.  With two unknowns it’s hard to know if the Waygu or the IP was responsible for just how delicious the corned beef came out.  It was tender, moist, and delicious.  A variety of recipes found online served as my guide with a shout-out to Simply Recipes.

  • Various recipes I looked at called for a 2.5-pound chunk of corned beef. I don’t know about you, but after cooking,  it shrinks quite a bit and that wouldn’t be enough, not in my family at least. There would be little left for my fav breakfast hash (not acceptable in my book).  The piece I bought was 4 pounds and fit nicely in my 6-quart Instant Pot.  This was enough for dinner, the next day’s lunch, and a generous skillet of hash for that leisurely weekend breakfast.
  • Rinse corned beef thoroughly before placing it in the pressure cooker, helps keep the salt at bay.
  • Place the corned beef on the metal trivet that comes with the Instant Pot, makes it much easier to lift out when it is done.
  • Add 1 quartered yellow onion and a couple of cloves of garlic to the pot.  Sprinkle the seasoning packet that comes with the corned beef and 1 tablespoon of brown sugar on the surface of the meat.
  • Add 4 cups of liquid to the pot.  It may not completely cover the meat, and that’s okay.  The liquid can be all water, water, and beef stock 1:1, or a can of stout and water.  The Wagyu beef was on the salty side.  So be careful with the stock, use low sodium or homemade.

Let’s Get to the Easy Part

Seal your Instant Pot and set it to high pressure for 85 minutes and go relax, but tell everyone you are making dinner, they’ll never know.

Once the cycle is complete, turn off the Instant Pot and allow the corned beef to natural-release for 15 minutes before taking it out.  If it has not completely depressurized, vent the pot before taking off the lid.  Add your potatoes, carrots, and cabbage (that you prepped while it was cooking, oops, forgot to mention).  Place potatoes and carrots into the pot first, then the cabbage on top. Seal the pot and set a timer for 5 minutes.  Quick release when it is done.

Slice corned beef against the grain.  Serve with honey mustard and veggies on the side or if you are like the Hubster, make a sandwich…yum.  Happy Saint Patrick’s Day!

But What About Breakfast?

I like corned beef, I LOVE corned beef hash.  The remaining corned beef became Sunday breakfast.  I pulled out my cast iron skillet, the remaining beef and potatoes, chopped some onion and bell pepper, bada-bing-bada-boom, hash.

Feel free to add other vegetables or change the proportions.  This can easily be a veggie-focused hash, more potatoes, throw in the leftover cabbage, add some mushrooms…it will be delightful and perfect for a weekend relaxing breakfast.

Beautiful board made by 3jamigos woodworking.

Corned Beef Hash and Eggs

What to do with leftover corned beef? Hash of course!
Course Breakfast, Brunch, lunch
Cuisine American, Irish-American
Keyword cabbage, Corned beef, corned beef hash, potatoes
Prep Time 10 minutes
Cook Time 15 minutes
Servings 4 servings

Equipment

  • cast iron skillet

Ingredients

  • 2 to 3 tablespoons unsalted butter
  • 1 small onion finely chopped (about 1 cup)
  • 1/4 green or red bell pepper or pepper of choice!, chopped
  • 2 to 3 cups cooked corned beef finely diced or chopped
  • 2 to 3 cups chopped cooked potatoes from dinner 🙂
  • Kosher salt and freshly ground black pepper
  • Chopped fresh parsley or scallions
  • Eggs one per serving

Instructions

  • Heat butter in a large skillet (preferably cast iron) on medium heat. Add the onion and pepper and cook a few minutes, until translucent.
  • Add corned beef and potatoes. Spread out evenly over the pan. Increase the heat to medium-high and press down on the mixture with a heat-proof spatula.
  • Do not stir the potatoes and corned beef, but let them brown. If you hear it sizzling, that's a good sign.
  • Use a spatula to peek underneath and see if they are browning. If nicely browned, use the spatula to flip sections over in the pan so that they brown on the other side. Press down again with the spatula.
  • If there is too much sticking, you can add a little more butter to the pan. Continue to cook in this manner until the potatoes and the corned beef are nicely browned.

Egg-a-licious: Your choice, hash is good with eggs cooked any style

  • Or cook eggs like Shashuka. When hash is close to being done, create depressions in the hash and crack an egg into each spot. Cover skillet for a couple minutes until egg is cooked to your liking.
  • Remove from heat, top with chopped parsley or scallions. Season with freshly ground black pepper and salt to taste.
Roasted Chicken & Croutons with Fish-Sauce Butter-Sheet Pan Magic

Roasted Chicken & Croutons with Fish-Sauce Butter-Sheet Pan Magic

I couldn’t help but tweak Eric Kim’s Roasted Chicken with Fish-Sauce Butter title.  I added Croutons to the title because… lets be real, the croutons are the star of this dish.  It reminds me of Roti Roti, a food truck fixture in the Bay Area.  A simple winning formula of chickens roasting on a spit, dripping all that deliciousness onto a bed of potatoes below it.  Well, that’s this dish but with bread and your own oven.

First, roast chicken thighs on a sheet pan (the operative words for an easy meal) in a 450-degree oven.  This gives you crispy skin chicken and a pool of deliciousness aka SCHMALTZ on the pan.  Then toss flakes (yes flakes, more on that later) of bread onto the pan and smoosh it around so it soaks up the chicken fat.  Shove it back into the oven, and fifteen minutes later those bread flakes have morphed into golden, crunchy, umami bombs.

It’s Soooo Good

I divide the dish evenly between me and the hubsters, he gets the chicken,  I get the croutons, yep, 50-50 all the way.

Let’s talk flakes.  You can use any bread you like, sourdough, milk bread, or my favorite, ciabatta.  The key is to tear the bread so you get shards or flakes.  Cubes don’t cut it for this dish, not enough surface area. Try to tear or split the bread to form flakes for ultimate crispness.

The rest is easy-peasy.  Place chicken on a sheet pan, and season with salt and pepper.  Go easy with the salt as the fish sauce has salt. Drizzle olive oil on the chicken and flip each piece around to coat each piece.  Roast for approximately 25 minutes.  I prefer bigger pieces of chicken so the skin crisps without drying out the chicken.  Pull the chicken out, there should be a nice puddle of schmaltz in the pan.  Add the croutons to the pan and toss the bread in the chicken fat.  Slide the pan back into the oven to crisp the croutons and finish the chicken.  If the chicken is cooked through before the croutons, pull them out and continue to bake the croutons.

Meanwhile…

While the chicken and croutons are roasting, make the Fish-Sauce Butter.  The sauce is genius, easy to make, and delish with just four ingredients, fish sauce (I use 3 Crab Vietnamese Fish Sauce), lemon juice, brown sugar, and BUTTER.  Reduce the first 3 ingredients to a syrupy consistency.  When the surface of the sauce is covered with bubbles, turn the heat off and add the chunk of COLD butter to the pan and swirl to create an emulsion.

Leave the chicken and croutons in the pan, drizzle some of the sauce on the chicken and croutons, garnish with cilantro and green onions, and bring the pan to the table.  So easy. Serve the remaining sauce on the side. If you want to be fancy, transfer chicken and croutons to a serving platter.

Accompaniments?  Rice, double carb, is always yummy, or I like serving it with mashed cauliflower.  Another winner from Eric Kim.  Sheet pan magic happening here.

Roasted Chicken and Croutons with Fish-Sauce Butter

From Eric Kim via NYTCooking, roasted chicken thighs, toasty croutons, and a scrumptious, quick sauce made with Vietnamese Fish Sauce, brown sugar, lemon, and butter. The perfect weekday meal.
Course dinner, Main Course
Cuisine Asian-American
Keyword brown butter, Chicken thighs, croutons, fish sauce, oven-baked
Prep Time 15 minutes
Cook Time 35 minutes
Servings 2 servings

Ingredients

  • 4 bone-in skin-on chicken thighs (about 2 pounds)
  • Kosher salt such as Diamond Crystal and black pepper
  • 2 tablespoons olive oil
  • ¾ pound bread crusts removed, bread torn into bite-size pieces about 4 cups;
  • 1 tablespoon dark brown sugar
  • 1 tablespoon fish sauce
  • 1 tablespoon lemon juice
  • 3 tablespoons COLD unsalted butter kept in one piece
  • Cilantro leaves with tender stems for serving
  • scallions or chives, chopped garnish for serving

Instructions

  • Heat oven to 450 degrees. Pat the chicken dry with paper towels and season lightly with salt and pepper. (The fish-sauce butter is plenty salty, so don’t overdo the salt here.)
  • Arrange the chicken skin-side up on a sheet pan and drizzle the oil over the chicken skin, coating it evenly.
  • Roast until the chicken is light gold and the sheet pan is a pool of hot, rendered chicken fat, SCHMALTZ, about 20-25 minutes.
  • Take the sheet pan out of the oven, scatter the bread around the chicken. Using tongs toss gently to coat in the chicken fat.
  • Place the pan back in the oven and roast until the chicken is golden, crispy and sizzling (you’ll hear it), about 15 minutes.
  • While the chicken roasts, combine the brown sugar, fish sauce and lemon juice in a small saucepan and bring to a simmer over medium heat. Cook, occasionally swirling the pan or stirring the sauce with a wooden spoon, until it bubbling vigorously and the mixture has reduced by about half, 2 to 3 minutes.
  • Turn off the heat and add the butter, constantly swirling the pan or stirring with a wooden spoon, until all of the butter has melted and incorporated into the fish sauce mixture. It should be a heavy syrup consistency.
  • To serve, scatter the cilantro and scallions or chives over the chicken and croutons. Spoon some of the fish-sauce butter over each chicken thigh, reserving some to add to each plate for dipping the chicken and croutons while eating, so yummy.

Notes

Roasting chicken thighs in a hot oven is a hands-off way to achieve two of life’s greatest pleasures: crispy skin and golden schmaltz. And you want that chicken fat because it will crisp hand-torn bread into croutons. A bold but balanced fish-sauce butter that you whip up on the stovetop while the rest of the meal takes care of itself in the oven, takes this over the top. Be sure to start with cold butter; the gradual melting of the fat helps thicken the sauce without breaking it.
After making this dish...go get his cookbook, Korean American, another winner.
Chicken Wings and Daikon Nimono + TV for Rainy Days

Chicken Wings and Daikon Nimono + TV for Rainy Days

It’s raining once again in California.  Which is the best excuse to stay home (in sweats), watch a lot of TV, bake and cook.  I started the weekend on a carb bender.  First, I made No-Knead Focaccia from Bon Appetit, it gets a big thumbs up, pillowy, springy, and delicious.  Caveat:  You will have to start a day earlier for said focaccia, 8 hours of resting time. Then I started on Kristina Cho’s Milk Bread from Mooncakes and Milk Bread, also extremely delicious.  Think of it as the Asian version of Brioche, slightly sweet, buttery, rich, and soft.

THEN, I needed a Bake Break

Well, actually, my hips needed a break.  The combination of being a couch potato and baking is to say the least, lethal.  I had to pick one, couch or carbs. Couch won.  Mainly because I started watching a cute, sweet Japanese show on Netflix called Makanai:  Cooking for the Maiko House. In a nutshell, two BFFs go off to Kyoto to become geishas.  One is a total washout but a fabulous cook (thanks to her grandmother) and becomes the Makanai or resident chef for the geisha house.  A role usually held by an older woman.  In each episode, she makes something yummy, often a comforting, homestyle dish.

Well, you can’t sit there watching without a bowl of something delicious.  The cold, wet, weather and The Makanai put me in the mood for Nimono.  Nimono, a family-style dish usually contains protein, vegetables, or tofu that are simmered in seasoned dashi (stock).  I scoured my fridge and found chicken wings and daikon (radish) perfect for nimono.

Start by browning the wings.  I got fancy and grilled them, don’t bother, one more pan to clean. Then add your dashi, seasonings, and sliced daikon and bring to a boil. Cover the nimono with a piece of parchment.  This keeps everything submerged so it cooks evenly.  Then lower the heat and simmer for 15-20 minutes or until the daikon is soft.  Pierce daikon with a knife to test.  Korean radish would work well also.

Meanwhile, as chicken and daikon are simmering, make your eggs.  Use the ramen egg recipe for a soft center yolk.  Cool the eggs and peel.  Place eggs in cold water to chill (so it doesn’t overcook when you put it in the Nimono).

When the radish is soft, Place eggs in Nimono.  Try to submerge them so they absorb some of the flavor of the broth.  Simmer additional 5 minutes.

Garnish with green onions, and or sesame seeds.  Serve with rice, in front of the telly, watching Makanai, or Midnight Diner, or Julie and Julia…

Chicken Wings and Daikon Nimono and Netflix

Simple and quick Japanese braised dish of chicken wings and radish
Course One dish meals
Cuisine Asian, Japanese
Keyword Chicken, daikon, ninono, one pot meal
Prep Time 15 minutes
Cook Time 20 minutes

Ingredients

  • 6-8 Ounce Daikon radish can use Korean radish cut into 1/2 inch rounds
  • 4 Eggs boiled till the yolk is still jammy, see ramen eggs post
  • 8-12 Chickin wings
  • 1 Clove Garlic
  • 2 tsp Instant Japanese soup stock (you will need 1 cup of dashi) or make dashi with packet or Shiro dashi
  • 2 tbsp Sugar
  • 1 tbsp Soy sauce if using dashi packet, increase to 2 T
  • 4 Tbsp Sake
  • 2 Tbsp Mirin

Options

  • Add mushrooms or sliced carrots with daikon if you like

Instructions

  • Make dashi and set aside. You can use the powder Hondashi, or dashi bags, or Shiro Dashi concentrate. For concentrate dilute 1:12 Make 1-1.5 cups
  • Peel and cut the daikon into 1/2 inch slices. Set aside.
  • Sauté the chicken wings approximately 2 minutes a side in a 3-4 quart saucepan. They should be light brown.
  • Add dashi to pot followed by soy sauce, mirin and sake. Add daikon on top. Bring to a boil then lower heat to a simmer. Use an otoshibuta (dropped or parchment lid) while simmering although you can forego this step. Simmer for 15-20 minutes or until radish is soft when pierced with a knife.
  • While chicken is simmering, make ramen eggs or hard boil the eggs just until the yolk is barely set. Peel and place eggs in an ice bath. When nimono is done, add peeled eggs to it and let it simmer another 5 minutes. Make sure the eggs are submerged in the broth.
  • Ladle the Nikon into bowls, garnish with green onions and sesame seeds. Serve with rice and a half or whole egg per person. It's worthwhile making nimono in advance, since it tastes better the next day. Or just make a larger quantity to keep. Reheat before eating at home, or reheat then let cool down again if using for bento. Can be stored in the fridge for 2-3 days.
Mille-Feuille Nabe Blooming Delish!

Mille-Feuille Nabe Blooming Delish!

I’m sure I saw this on TikTok or an IG Reel.  It looked so delicious I knew I was going to make it, if not today, definitely tomorrow.  Jackpot, making it today, why?  As most of you know I stop at grocery stores so often I should be classified as a professional food shopper.  The beauty of being a “pro”, I generally have the ingredients for any dish found on the internet, lol. This is a perfect example, a quick perusal of my kitchen and I was in business.

Thinly sliced pork – check. From Asian Market. I always keep some in the freezer, ALWAYS.

Napa Cabbage – check. Picked up a head at the Hankook Market last weekend, cause you never know when you might need some cabbage…

Mushrooms – check. My fridge qualifies as a certified mushroom farm most days.

Dashi or Broth – check. I pulled my bottle of Shiro Dashi from the fridge. Literally concentrated dashi that you dilute with water, VERY good, stupid easy. For a detailed run down check out Guide to Shiro Dashi

OR I can make Dashi with packets from Japan that I keep squirreled away in my pantry.  Again, VERY good,  a bit more work than Shiro Dashi, still super easy.

I won’t go into making my own Dashi cause that would defeat the dinner in a few minutes mantra.

Korean radish – check.  You don’t need it, I just happen to have some so why not?

Staples – check.  Green onions, sesame seeds, soy sauce S&P…Hello? Would not be caught dead without any of these.

Pot- check. Y’all know I didn’t have to list this but I wanted to mention the tiny Donabe I bought at the MANRESA fire sale.  It gives me JOY.  I also used my gorgeous Staub pot for the family-sized version.

So that’s it, all you need to make this scrumptious, perfect when it is cold and wet outside, quick and easy dish.

Let’s Goooooo!

This is super easy, TRUST ME.  Have I ever steered you wrong?  Start with your Napa Cabbage, wash and separate the leaves.  You only need 1 head of cabbage and you won’t use all of it, unless you are feeding a cast of thousands, then you’re on your own.

Take out your thinly sliced pork, I’m sure this would work with beef also. Use any protein cut for Shabu Shabu or Hot Pot.  I know you are thinking, 🤔, can I use bacon?  My inclination is no, as much as I love bacon, the flavor may be too much and too salty for this Nabe.  But if you are feeling bold, try it.  Definitely REPORT BACK to me!

Layer the pork on the Napa Cabbage, covering most of the leaf. Continue layering until you have a stack of 3-4 leaves.  Cut crosswise into 3-4 sections, and try to match it up with your pot.  Each section should be about 2-2.5 inches in height. Definitely not taller as you will need to cover the pot when cooking.  Continue circling the pot with the sections until you reach the center.  I finished with slices of Korean radish surrounding a bouquet of mushrooms smack dab in the middle, totally optional.  But so good.

To finish, add dashi to barely cover the cabbage, cover, and cook.  Cook for 10-15 minutes, the beauty of thinly sliced meats and veggies.  Dinner is served! BACK to the dashi.  Dashi is a fish-based stock, used in many yummy Japanese dishes.  There are ka-zillions of ways to make dashi.  Skip the traditional and time-consuming options.  I use Shiro-dashi alot.  It is a seasoned concentrated fish stock that comes in a bottle.  Dilute Shiro-dashi 10-12 fold for soups and casseroles, EASY PEASY.  The other way is using dashi packets, kind of like tea bags.  Drop it into the water, let it sit to infuse the flavor from the packets, and presto dunzo.

CAVEAT: The Shiro Dashi is seasoned with salt and sugar while the dashi packets just impart the fish flavor.  You will need to add salt or soy if using the dashi packets.

That’s it!  Serve it up with bowls of hot, steaming rice, maybe fry an egg or if you have Mayak Eggs or Ramen Eggs yum. So damn delicious it is criminal.  Or use the flavorful broth on a lovely bowl of noodles, udon noodles would be delicious.

A Picture is Worth a Thousand Words…check out my Instagram for a reel on Mille-Feuille Nabe!

Mille-Feuille Nabe

Japanese Hotpot with Napa Cabbage and thinly sliced pork belly arranged in layers in a donabe of casserole. Dashi serves as the cooking broth that turns this into a lovely dish perfect for cold weather.
Course dinner, Main Course, One dish meals
Cuisine Asian, Japanese
Keyword Mille-feuille, napa cabbage, Pork Belly, soup
Prep Time 15 minutes
Cook Time 15 minutes

Equipment

  • 1 donabe If you have one, but any casserole type pot will do.

Ingredients

Main Ingredients

  • 1 napa cabbage medium size should do
  • 1-1½ lb Thinly sliced pork belly smaller the pot the less you will need
  • 1 bunch of mushrooms like enoki or shiimeji optional
  • Korean Radish or Daikon, thinly sliced optional

Dashi

  • 1 knob ginger 1 inch, 2.5 cm
  • 5 cups dashi See post for dashi options!
  • 2 Tbsp sake cut in half or omit if using Shiro Dashi
  • 1 Tbsp soy sauce cut in half or omit if using Shiro Dashi
  • ½ tsp kosher salt Diamond Crystal; use half for table salt

Finishing Touches

  • green onions, diced for garnish
  • Chili oil or Shichim Togarashi at the table
  • Rice to serve with hot pot or boil some noodles to have with the flavorful broth!
  • Any kind of eggs-Ramen, Mayak or raw that you crack and cook in the broth

Instructions

  • Remove leaves carefully from the base, wash and drain well. Don’t throw away any leaves that naturally came off while rinsing. We’ll use these leaves later on. If you happen to get a ginormous cabbage cut in half or quarters lengthwise. I usually buy small ones so I use the whole leaf. Pat them dry before next step.
  • Layer the pork belly and napa cabbage by placing one slice between each of the leaves. Cover leaves with pork belly, trim if necessary to fit. Repeat 3-4 times depending on size of pot.
  • Cut each napa cabbage wedge into 3-4 pieces each about 2 to 2½ inches (5-6 cm) long. Each section should not be taller than your cooking pot. Try to keep the layers of napa cabbage and pork belly neatly stacked as you slice.
  • Next, start stacking the ingredients in a donabe, hot pot, or regular 10-inch pot. I used a shallow Staub pot with the grill top. Turn the stacks on their side as you pack them so the pink and green layers are visible. Start from the outer edges of the pot and work your way toward the center. Place the thicker cabbage leaves near the outside edge and the tender leaves in the center. Make sure that you pack the pot tightly as the layers will become loose once the ingredients start to cook.
  • If you don’t have enough layers to pack the pot tightly, consider using a smaller pot or place other ingredients in the center. I Like to stuff enoki mushrooms or shimeji mushrooms in the center. Or use slices of radish to surround the mushrooms.
  • Make you dashi. Don’t reduce the salt If you are using dashi from packets since the napa cabbage will release liquid during cooking and dilute the soup. If using Shiro Dashi that is seasoned omit half the soy sauce and sake. Taste your broth, it should not be too salty.
  • Pour the broth into the pot with the napa cabbage and pork belly. Start cooking on high heat. Once boiling, skim off the foam and fat on the surface using a fine-mesh skimmer. Then, reduce the heat to medium low and cook covered until the napa cabbage is tender and the pork belly is cooked through, roughly 8-10 minutes.

Garnish

  • Garnish with chopped green onion/scallion, have shichimi togarashi (Japanese seven spice) on table or sprinkle on top of dish. Serve while hot with rice or boil up some noodles to serve in the delicious broth!
    I like adding a ramen egg or a Mayak egg t round it out.
Easy as 123 Spareribs

Easy as 123 Spareribs

As I was driving home the other day I called the Hubster and asked “What’s for dinner?”.  The retired guy replied, “I thought you were making dinner”.  Excuse me? Moi?  The person driving home after a full day at WORK?

Fine, I’ll make dinner but you are on cleanup…

A pack of spareribs, cut crosswise into thirds (thanks Asian market), a knob of ginger and bunch of scallions in the fridge-time to make Irene Kuo’s 12345 Spare Ribs from Food52.  The rest of the ingredients are in my pantry, soy sauce, vinegar, rice wine and sugar, that’s all I need. Oh, and my trusty Instant Pot.

I added the step of browning the ribs with ginger and scallions just to give it a flavor boost. Feel free to skip this step and start by putting the ribs and braising liquid in the instant pot without frying. Add a couple of minutes to the cooking time.

Set time for 15 minutes and let your IP do it’s thing. Meanwhile make some rice and veggies, any greens will do nicely.  Give it a couple of minutes before releasing the pressure on your IP. Remove ribs. switch to sauté and reduce sauce until it thickens to a syrupy consistency.  Add the ribs back in and stir to heat and coat them with sauce.

Scoop rice into a bowl, top with the ribs and greens, and garnish with green onions.  Enjoy!

Epilogue

Me? I headed to the couch, turned on the telly, and relaxed while the hubs did the dishes!

The ingredients for these ribs can be found in most Asian markets.  Use Shaoxing Wine (Chinese Sherry) or dry sherry.  Dark soy sauce has added molasses, don’t substitute regular soy sauce which is actually saltier than dark soy.  Favorite brands include Koon Chun or Lee Kum Kee.

Sweet & Sticky Chinese Ribs

Adaptation of Irene Kuo's 1-2-3-4-5 Spare Ribs. Sweet, savory braised ribs, delicious with a bowl of rice. Using a pressure cooker will keep ribs moist and shorten the cooking time.
Course Drinks, Main Course, Meat
Cuisine Asian, Asian-American, Chinese
Keyword Instant Pot, spareribs
Prep Time 10 minutes
Cook Time 18 minutes

Equipment

  • 1 Pressure Cooker I use an Instant Pot

Ingredients

Fry It Up

  • 1 1/2 pounds pork spareribs ask the butcher to cut the slab of ribs crosswise into 3 pieces. You can cut them into individual ribs at home
  • 1 stalk scallion, cut into 3 inch lengths optional
  • 2 slices fresh ginger, smashed optional

Braising Liquid

  • 1 tablespoon dry sherry preferably Shao Xing Wine
  • 2 tablespoons dark soy sauce
  • 3 tablespoons cider vinegar
  • 4 tablespoons sugar
  • 5 tablespoons water

Garnish

  • 1-2 stalks green onions, sliced diagonally in 1/8-1/4" pieces

Instructions

Instant Pot Directions

  • Set Instant Pot on saute'. Once heated add 1 tablespoon of vegetable oil. Toss in ginger and scallions and saute' briefly (30 sec) then add spareribs. Fry until the ribs lose their pinkness.
  • Add braising liquid ingredients. When the liquid comes to a boil, stir well to coat the ribs, turn off saute function, and place lid on Instant Pot.
  • Set IP on high pressure (use Meat setting) and adjust time to 15 minutes. When it is done, wait a couple of minutes before CAREFULLY releasing pressure to your Instant Pot.
  • Remove ribs from pot. Set Instant Pot to saute' and reduce remaining liquid to a thick syrupy sauce. Turn it off and add ribs back into pot, stir to coat the ribs. Spoon ribs onto a serving plate.
  • Garnish with scallions. Serve immediately with rice.

Stovetop Directions

  • Put the ribs in a skillet or saucepan and set it over high heat; add the rest of the ingredients and stir to mingle. When the liquid comes to a boil, adjust heat to maintain a very gentle simmering, and cover and simmer for 40 minutes. Stir and turn the spareribs from time to time.
  • Uncover and turn heat high to bring the sauce to a sizzling boil; stir rapidly until the sauce is all but evaporated. Garnish with scallions. Serve hot with rice.

Notes

Using a pressure cooker not only shortens the cooking time but ensures tender and moist ribs.
Puttin’ On the Ritz…Chicken

Puttin’ On the Ritz…Chicken

This past weekend the hubster went up to Tahoe to do maintenance on our cabin.  So I was flying solo at home with Sammy our dog who has a tough time traveling 😢 these days.

When dinnertime rolled around, I decided to open a bottle of wine and make myself a nice meal.  I had just seen Eric Kim’s recent post for NYTcooking, Ritzy Cheddar Chicken Breast and being a Ritz Cracker fiend, I immediately bookmarked the recipe.  This would be the perfect time to try his recipe.

Competitive Spirit

Aside from Carrot Cake and Good Cookies, if there is a meal that reigns supreme in our house, it is Wes’s Cornflake Chicken.  To be exact, Cornflake Chicken and Cream of Mushroom Soup.  How many of you remember your mom or dad fixing a version of this?  Come on, be honest, we have all had this precursor to Shake and Bake.  Instead of chicken perhaps pork chops?  Gotcha, didn’t I?

Being a card-carrying member of the ridiculous group “I am a foodie” and thus holding an unwarranted disdain for all foods I liked when I was twelve, I have never made cornflake chicken.  To this day, when the kids come home, they will request cornflake chicken or pork chops which Wes is more than happy to fulfill.

Could Eric’s version of chicken, marinated in sour cream, Dijon mustard and rolled in copious amounts of Ritz Crackers and Cheddar Cheese best the gold standard Cornflake Chicken?  I was determined to find out.

Easy Peasy, Chicken Cheesy

The prep for this dish is as easy and quick as Cornflake Chicken.  The chicken breasts are split in half and lightly pounded into cutlets then dropped into a marinade of Dijon mustard, salt, and sour cream which also tenderizes the chicken.

While the chicken marinates make your coating.  Crush a sleeve of Ritz Crackers, grate some sharp cheddar cheese, and season with garlic powder, onion powder, and salt. Next time I might just add more spices, maybe some paprika and thyme.  Finish with a glug of olive oil, which will help the coating stick to the chicken and crisp it.

Roll chicken in crumb mixture, really pressing it in so you have a nice coat.  If you have crumbs left, don’t waste them, sprinkle them on the chicken.

The chicken bakes at 450 (hot, hot, hot) and should only take about ten minutes (boneless, split in half, and pounded means quick cooking).

I made a salad of Romaine, ripe cherry tomatoes (thank you Snook), and Japanese cucumbers (very crispy and delicious) with a simple vinaigrette.

Sat down with a glass of wine and a gorgeous dinner plate in about 30 minutes.  How great is that?  Eric strikes again with another fabulous, easy, dish.  The cracker coating was crispy, cheesy and tangy from the mustard, the chicken was perfectly cooked, moist, and tender and the salad a nice counterpoint.

I know what you are all thinking…does this beat out Wes’s Cornflake Chicken?  Probably not.  Nothing beats a dish from your childhood.  Will I make it again?  Absolutely!

I saved the last 2 pieces of chicken, one for Wes to judge, and one which made an amazing sandwich for lunch…yummos!

Ritzy Cheddar Cheese Chicken Breasts

A quick and easy baked Crispy Cheddar Chicken Breasts
Course dinner
Cuisine American
Keyword baked chicken, cheddar cheese, chicken breasts, easy recipe, ERic KIm, Ritz Crackers, sour cream
Prep Time 15 minutes
Cook Time 10 minutes
Servings 4 servings

Ingredients

Da Marinade

  • ¼ cup sour cream
  • 1 large egg white
  • 1 teaspoon Dijon mustard
  • Kosher salt Diamond Crystal, use at least 1 teaspoon. For reg salt, start with 1/2 teaspoon

Da protein

  • 2 large boneless skinless chicken breasts (about 1½ pounds total)
  • 1 sleeve Ritz crackers about 100 grams
  • 2 ounces extra-sharp Cheddar cheese coarsely grated (about 1 cup)
  • ½ teaspoon garlic powder
  • ½ teaspoon onion powder
  • 1 tablespoon olive oil plus more for greasing wire rack
  • 1/2 teaspoon dried thyme, paprika or chili powder optional

Instructions

  • Position rack in the bottom third of the oven and heat oven to 450 degrees. Place an ovenproof wire rack over a sheet pan. Dab a folded-up paper towel with olive oil and rub it over the wire rack to grease it or use a brush. Place rack in oven to preheat.
  • In a medium bowl, whisk together the sour cream, egg white and Dijon mustard until smooth. Season with salt. Set aside.
  • Lay the chicken flat on a cutting board and carve each breast in half horizontally so you end up with four thin cutlets. Add the chicken to the sour cream mixture, and smear the sour cream all over the chicken.
  • In a large bowl, crush the Ritz crackers into coarse pieces with your fingers. Some crackers will turn to rubble while others turn to dust. Leave some chunks, which will crisp up nicely in the oven. Add the cheese, garlic powder, onion powder and olive oil (add some thyme and or paprika, 1/2 t each if you like) . Season with ½ teaspoon salt and toss until evenly distributed.
  • Hold chicken cutlet by its thinner end, add to the bowl with the crumbs, and using your hands, press the crumbs onto the chicken to create a thick coating. Transfer the breaded chicken to the rack in the sheet pan. Repeat with the remaining cutlets. If you have leftover crumb mixture, sprinkle if on chicken before baking.
  • Bake the cutlets until the outsides are crispy and the insides are no longer pink, 10 to 15 minutes (check at 10!!!). Let the chicken cool slightly so the coating can set, about 5 minutes, before transferring to plates.
  • Serve with with a nice crisp salad!
Jangjorim (Soy Braised Beef 장조림)

Jangjorim (Soy Braised Beef 장조림)

I have a total backlog of recipes I want to share with you and this one is top of the list.  I have made this as many times as I have made Eric Kim’s Quick Grape Tomato Banchan or Ottolenghi’s Charred Tomato and Cold Yogurt (so good) and that is saying a lot.

Do You Banchan?

Jangjorim or Soy Braised Beef can be served as banchan (those yummy little dishes that come with every Korean meal) or as a topping to a rice bowl or in a bento box.

I’m not a salad lover. Well, let me rephrase that, I’m not a salad maker…so much trouble.  But banchan? Worth the trouble, I’ll make a batch of each, keep them in the fridge and pull ’em out for lunch and/or dinner.  They go with everything, rice, noodles, or sammies.  Want a little funkiness in your grill cheese, add kimchi (김치).  Want crunch and spice in your noodles, add spicy cucumbers (오이무침).  Pickled or braised veggies go so well with rice, maybe that’s why I like them.

Koreanbapsang’s recipe for Jangjorim is my starting point.  First step, make the stock to cook the meat.  The stock includes onions, scallions, garlic and Korean radish (mu,무).  The radish gives the dish sweetness, I save the radish to serve with the Jangjorim.  It’s delicious.

Shank-alicious

Next, cut beef into cubes and simmer in the stock.  Use brisket, flank, chuck, or my favorite, shank.  Shank is both flavorful and economical, win-win.  For those not familiar with shank, it comes cut crosswise into pieces with the bone in the center.  Remove the meat from the bone and cut it into pieces. Throw the bones into the cooking broth for extra flavor.  I’ve also used pork shoulder or butt as a substitute with nods of approval from the fam.  After simmering, remove the meat and place it in another pot along with 2.5 cups of the original stock and add the seasonings.  Reserve the radish.  Cook meat on medium heat for approximately 20 minutes.  Then add shishito peppers, boiled, peeled eggs, kelp (optional), and the reserved radish. Cook for another 10 minutes or until meat is tender.

Shishito peppers can be a bit spicy, so if you have little kids or big kids that are spice averse, use bell peppers or Anaheim peppers, and cut into manageable bite-sized pieces.  Cook eggs as you would six-minute ramen eggs.  Chill eggs thoroughly before final braising to avoid overcooking the eggs.  Normally, the eggs are hard-boiled but jammy eggs are my jam.

Jangjorim can be served at room temperature to warm as banchan or over rice.  The meat can be shredded or sliced.  It’s so flavorful, a little bit goes a long way.

I love this dish and hope you will try it!

Jangjorim (Soy braised Beef)

Jangjorim or Soy braised Beef, adapted from Korean Bapsang, is a delicious Korean side dish that works well in a bento box too!
Course Meat, Side Dish
Cuisine Asian, Korean
Keyword Banchan, Korean, shishito peppers
Prep Time 10 minutes
Cook Time 1 hour

Ingredients

Da Stars

  • 1.5 pounds shank meat or beef brisket you can sub pork shoulder or butt
  • 10 to 12 Shishito peppers or other fresh green peppers Use less and cut into halves if using large peppers
  • 3 boiled eggs* peeled

Da Stock

  • 1/2 medium yellow onion
  • 2 stalks scallions white part only save green parts for garnish
  • 6 ounces Korean radish (about 1/4-1/3 of one radish) mu, cut into big chunks
  • 7 cloves garlic
  • 3 slices thin ginger about 1-inch round
  • 1/2 teaspoon whole black peppers or ground peppers to taste

Da Sauce

  • 5 tablespoons soy sauce
  • 2 tablespoons soup soy sauce guk ganjang, 국간장 (or use more regular soy sauce)
  • 3 tablespoons sugar
  • 3 tablespoons rice wine or mirin
  • 1 piece 3-inch square dried kelp substitute a bay leaf

Instructions

  • Cut the beef into 2-inch chunks. This recipe is very flexible. You use brisket or flank. I love beef beef shank which is very economical. It has great flavor and texture. You could even use pork shoulder or butt. Delicious!
  • In a medium pot, bring 8 cups of water and Da Stock ingredients to a boil. Cover and continue to boil for 5 minutes over medium-high heat.
  • Drop the meat into the pot. Bring it to a gentle boil, and remove the scum. Reduce the heat to medium. Boil, covered, for about 30 minutes.
  • Remove the meat. Strain the cooking liquid into a large bowl, and then add 2.5 cups of the liquid back to the pot. (You can save the remaining broth to make a soup or stew later.)
  • Add the meat and sauce ingredients to the pot. Bring it to a boil over high heat. Reduce the heat to medium, and boil, covered, until the meat is tender and the sauce is reduced to about ⅓, about 20 minutes. You can cook longer if the meat is still not tender enough.
  • Add the optional dried kelp, peppers and eggs and continue to boil for about 10 minutes. Discard the kelp, and transfer everything else to an airtight container for storage. Cool before storing in the fridge. Shred the meat and pour some sauce over to serve.
  • Optional: Serve the radish and onions with this dish! Normally, the meat is shredded, and served with shishito peppers and eggs.

Notes

Refrigerate in an airtight container. It will keep for a week. If you want to keep it longer, boil the meat and sauce again after a few days.
The meat will become hard in the fridge. You can soften it by leaving the shredded beef out at room temperature for 20 to 30 minutes, or microwave for about 20 seconds to soften.