Category: Pasta, Rice & Grains

pasta, grains, rice recipes

Roasted Tomato & White Bean Stew (Bean Craving a Good Stew)

Roasted Tomato & White Bean Stew (Bean Craving a Good Stew)

Friday night…my mind was thinking about the upcoming Memorial Day weekend.

The plan, grilling on Monday.  Something classic, burgers, potato salad, strawberry shortcake, the “Summer is finally here” meal.  Saturday’s dinner was taken care of, take-out and delivery from one of the legacy restaurants in SF Chinatown, Kam Po.  A fundraiser for Chinatown Community Development Center combined with helping a Chinatown mom and pop business.  A win-win, I ordered roast duck, crispy skinned pork and bbq pork plates…can’t wait.

What’s for Dinner Tonight?

But it was Friday and I still hadn’t started dinner.  I cooked quite a bit during the week and was admittedly ready for an easy cook meal.   I peered into the pantry hunting for inspiration…hmmm, a couple of cans of white beans. Further rummaging around the kitchen produced cherry tomatoes, a couple of Italian sausages, one lonely onion. Jamie had recently tried a recipe from the NYTimes, Roasted Tomato and White Bean Stew that she gave a hearty thumbs up to on all counts-ease of prep and deliciousness.

I Was In Business

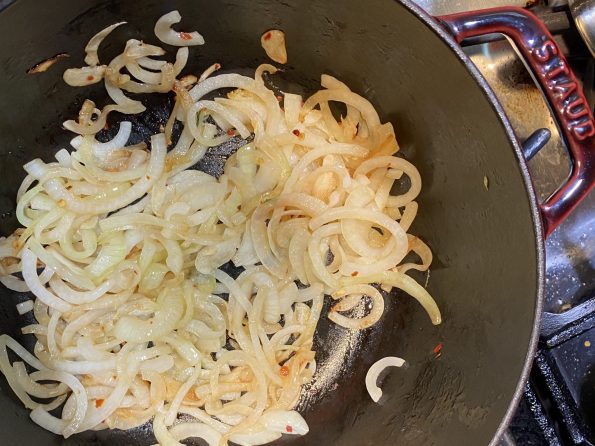
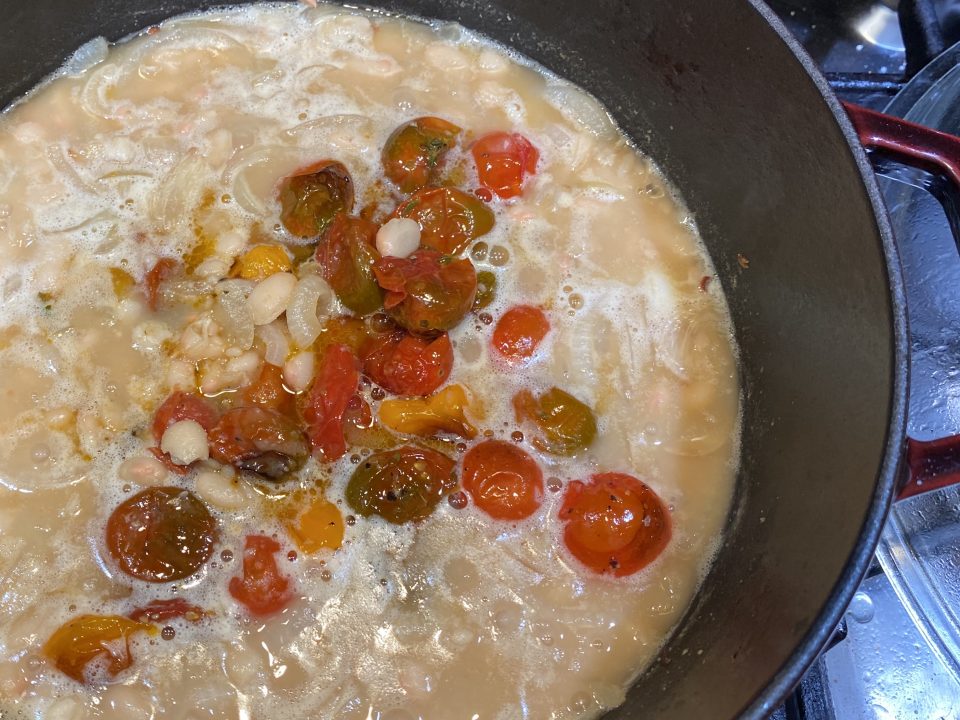
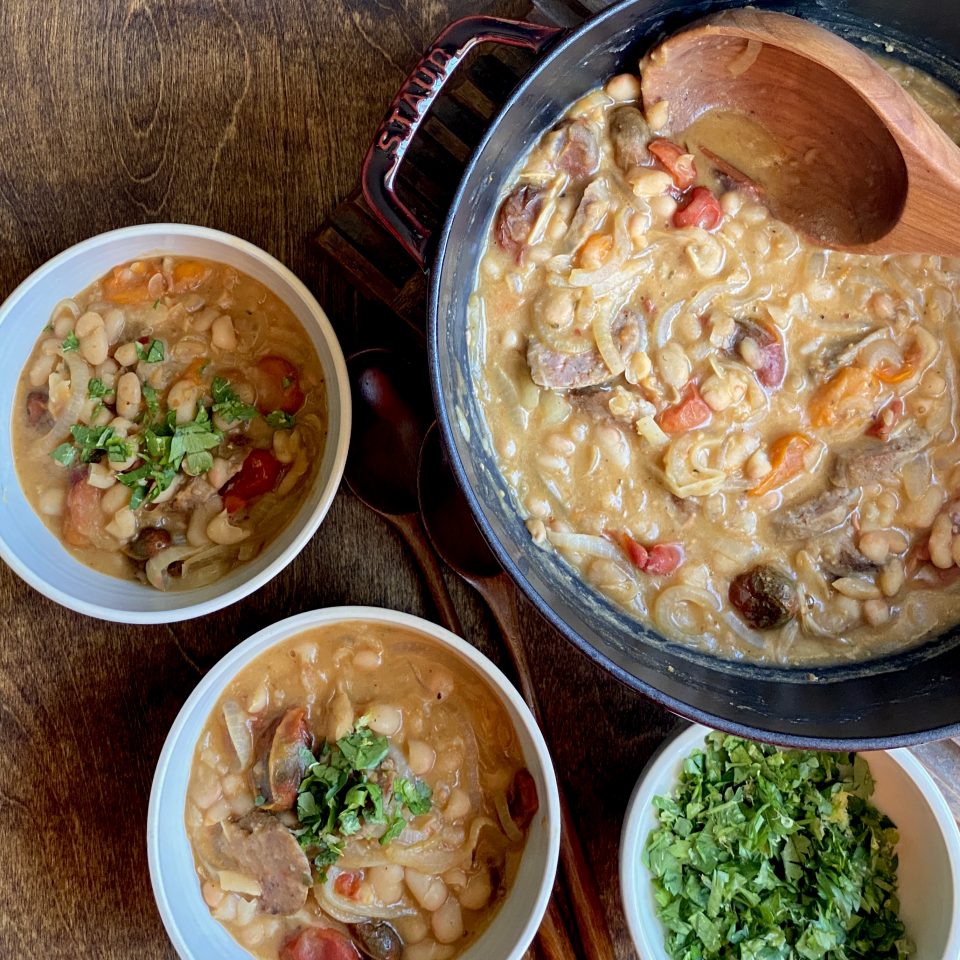
Winner winner beanie dinner.  This dish is simple, quick and so satisfying.  Roast tomatoes in olive oil and thyme which intensifies their flavor and sweetness.  I used a medley of gold and red cherry tomatoes, use whatever you like. While they are roasting, saute’ the onions, garlic, and pepper flakes. Add beans-reserve the liquid from the cans just in case to adjust the consistency of the sauce.  Give the stew a couple of stirs and mash some of the beans with a big spoon to thicken it.  Make sure to scrape all the tasty bits from roasting the tomatoes and add them to the beans along with the tomatoes and their liquid.

Home Stretch

Simmer a couple of minutes and voila’, dinner is served.  This stew is really, really good, the sweetness of the tomatoes and onions, the nice mouthfeel from the beans, yummy, YUMMY, yummy.  I love the garlic and thyme, but I’m wondering if rosemary would work too.  We grilled a couple of Italian sausages, sliced, and added them to the pot right before serving.  You could also just serve them on the side. Grilled shrimp or cod would be a lovely match too.  OR, keep it vegetarian, this stew is so flavorful and satisfying you won’t even miss the protein.  Top it with the parsley and lemon gremolata which adds a herby-citrus zing and you are in business. The Hubs and Jorge don’t like beans but they both admitted that this was delicious.  Now that’s a strong recommendation!

Make this stew the next time you need a quick, easy, hearty meal.  It’s just so tasty!

Looking for other meatless recipes?  This Red Lentil Soup from NYTimes is delicious~~

Print Pin
5 from 2 votes

Roasted Tomato and White Bean Stew

Course Main Course
Cuisine European
Keyword easy, roasted tomato, stew, vegan, White Bean, white bean stew
Prep Time 30 minutes

Ingredients

Garnish

  • ½ cup roughly chopped Italian parsley leaves and tender stems
  • 2 teaspoons lemon zest from 1 large lemon

Stew

  • 2 10-ounce containers cherry or grape tomatoes
  • ¼ cup olive oil plus 2 tablespoons and more for drizzling (optional)
  • 1 tablespoon fresh thyme leaves
  • Kosher salt and black pepper
  • 1 medium yellow onion thinly sliced
  • 3-4 large garlic cloves thinly sliced
  • ½ teaspoon red-pepper flakes
  • 2 15-ounce cans white beans (such as butter or cannellini), rinsed
  • 1 ½ cups vegetable or chicken broth or water
  • 2 Italian sausage optional mild or spicy, your choice

Serve with

  • Flaky salt for serving (optional)
  • Toasted bread for serving

Instructions

  • Heat the oven to 425 degrees. In a small bowl, gently toss together the parsley and lemon zest with your hands until well combined; set aside.
  • In a large baking dish or on a sheet pan, toss the tomatoes with 1/4 cup oil and thyme; season well with salt and pepper. Roast tomatoes until they have collapsed and begin to turn golden around the edges, 20 to 25 minutes.
  • When the tomatoes are almost done roasting, heat 2 tablespoons oil in a large (12-inch), deep skillet or Dutch oven over medium. Add the onion, garlic and red-pepper flakes and cook until the onion is softened and the garlic is fragrant, 4 to 5 minutes. Stir in the rinsed beans and broth and bring to a simmer. With the back of a spoon or spatula, gently smash about ½ cup of the beans so they slightly thicken the broth. If you want a thicker stew, crush some more of the beans. Season with salt and pepper.
  • When the tomatoes are finished roasting, add them directly to the stew along with any juices that have been released. Simmer for 5 to 10 minutes more so the flavors meld; season to taste with salt.
  • Ladle into shallow bowls. Top each serving with some of the lemon-parsley mixture and drizzle with some more olive oil, and season with flaky salt, if you like. Serve with toasted bread.
Cinco De Mayo Dinner in the Time of COVID

Cinco De Mayo Dinner in the Time of COVID

A brief moment of escape from the reality of our world right now to enjoy a Margarita and celebrate Cinco de Mayo.  I got the last bottle of Margarita Mix at TJs and unintentionally created a Cinco de Mayo dinner that looked like an ad campaign for kitchen appliances. Tortilla press for homemade tortillas (so fun), food processor for salsa (so easy), an Instant Pot for Carnitas (so fast), and finally my rice cooker for Mexican Rice (so true, a rice cooker, lol).

I pulled out my tortilla press for a low tech appliance start to stamp those flour tortillas.  I prefer corn tortillas but the fam outvoted me, I didn’t have any Masa Harina anyways. LOL. The King Arthur Flour website was my first stop for a recipe for tortillas.  I found their recipe for Simple Tortillas and I was in business.

The Tortillas

The dough comes together quickly. I used shortening.

The tortilla is simple and contains flour, salt, shortening or oil, and water.  It comes together quickly and is kind of fun to make, especially if you have a tortilla press.  This is a no-brainer fun cooking project with your kids or when without kid but you are abiding by SIP orders for a pandemic.  Find the recipe for Simple Tortillas on King Arthur Flour here.


The dough is divided into 8 pieces. Keep them covered or oiled while you press each flat. This is the tricky part, I tried both a cut-up Ziploc bag and parchment in the press and they still stuck a little.  I ended up dusting each ball of dough with flour to help keep it from sticking.
When the tortilla starts to bubble, flip it over.
Ta-Da! Homemade tortillas are thicker and fluffier than commercial products. These were warm, chewy, and tasty-yum!

Carnitas

Carnitas are probably my favorite taco, burrito, anything filling.  Love em’ and since I had a pound of pork in the fridge and it was Cinco de Mayo. Yep,  no-brainer, Carnitas Tacos for dinner.  Found a tasty recipe on Simply Happy Foodie for small-batch carnitas in a 3 quart Instant Pot. I threw it all in my 6-quart pot which worked fine.  Next time I am doubling or tripling the recipe, that good.

Instant Pot Carnitas

Delicious Carnitas made in half the time in an Instant Pot!
Course Main Course
Cuisine Mexican
Keyword Carnitas in an Instant Pot
Prep Time 15 minutes

Equipment

  • Pressure Cooker or Instant Pot

Ingredients

  • 2 Tbsps Olive or vegetable oil
  • 1 tsp Salt
  • 1/4 tsp Pepper
  • 1 Tbsp Cumin
  • 2 tsp Chili Powder
  • 1 tsp Smoked Paprika or reg
  • 1 tsp Oregano
  • 1 tsp Coriander Powder
  • 1/8 tsp Cayenne Powder use 1/4 tsp or more for spicier
  • 1 to 1-1/2 lbs Pork Shoulder / Pork Butt * cut in 3" chunks
  • 1/2 small Onion chopped
  • 1 Bay Leaf
  • 1/2 Cinnamon Stick about 2-3 inches long
  • 4 cloves Garlic finely chopped or minced
  • 1/2 cup Orange Juice or Pineapple Juice

Instructions

  • Combine oil, salt, pepper, cumin, chili powder, paprika, oregano, coriander powder, and cayenne pepper in a medium size bowl. Mix well.
  • Add the pork to the spice mixture and toss to cover all of the meat with the mixture.
  • Press Saute button on Instant Pot. If you can adjust the heat, use high or more on your pot. When display reads “Hot” add the meat. Cook until browned on all sides, but not done. Remove from pot and set aside.
  • Add onion, bay leaf, and cinnamon stick and cook until onions are tender, stirring occasionally and scraping the bottom of the pot to deglaze (get those brown bits off the bottom) Add a small amount of water to help the deglazing.
  • Add the garlic and cook for a few seconds, stirring constantly.
  • Add the pineapple juice or orange juice and stir.
  • Add the meat back in to the pot and just nestle it down into the juice (it won't be covered).
  • Place the lid on the pot and set the Steam Release Knob to Sealing.
  • Cancel the Sauté function by pressing Cancel
  • Press the Pressure Cook button and set the time to 30 minutes.
  • When the cooking cycle has ended, let it sit for 15 minutes. It will start naturally releasing the pressure.
  • Turn the steam release knob to Venting and release any remaining steam/pressure. There may not be any left, and that's okay. When the pin in the lid drops down it is safe to open the lid.
  • BEFORE you stir, take a spoon or a small measuring cup and skim off the extra fat that is on top and discard. It's a lot easier doing it this way than pouring it into a fat separator!
  • Stir the meat and transfer just the meat to a sheet pan with sides or ovenproof dish. Reserve sauce. Using two forks, shred the meat and spread on baking sheet.
  • Broil the carnitas to get those nice crispy bits. Slide them under the broiler until they reach the desired crispness. Watch carefully it will go fast!
  • Garnish with sour cream, salsa, cilantro, diced white onions or green onions, avocado, and serve with those warm delicious homemade tortillas.

The Salsa

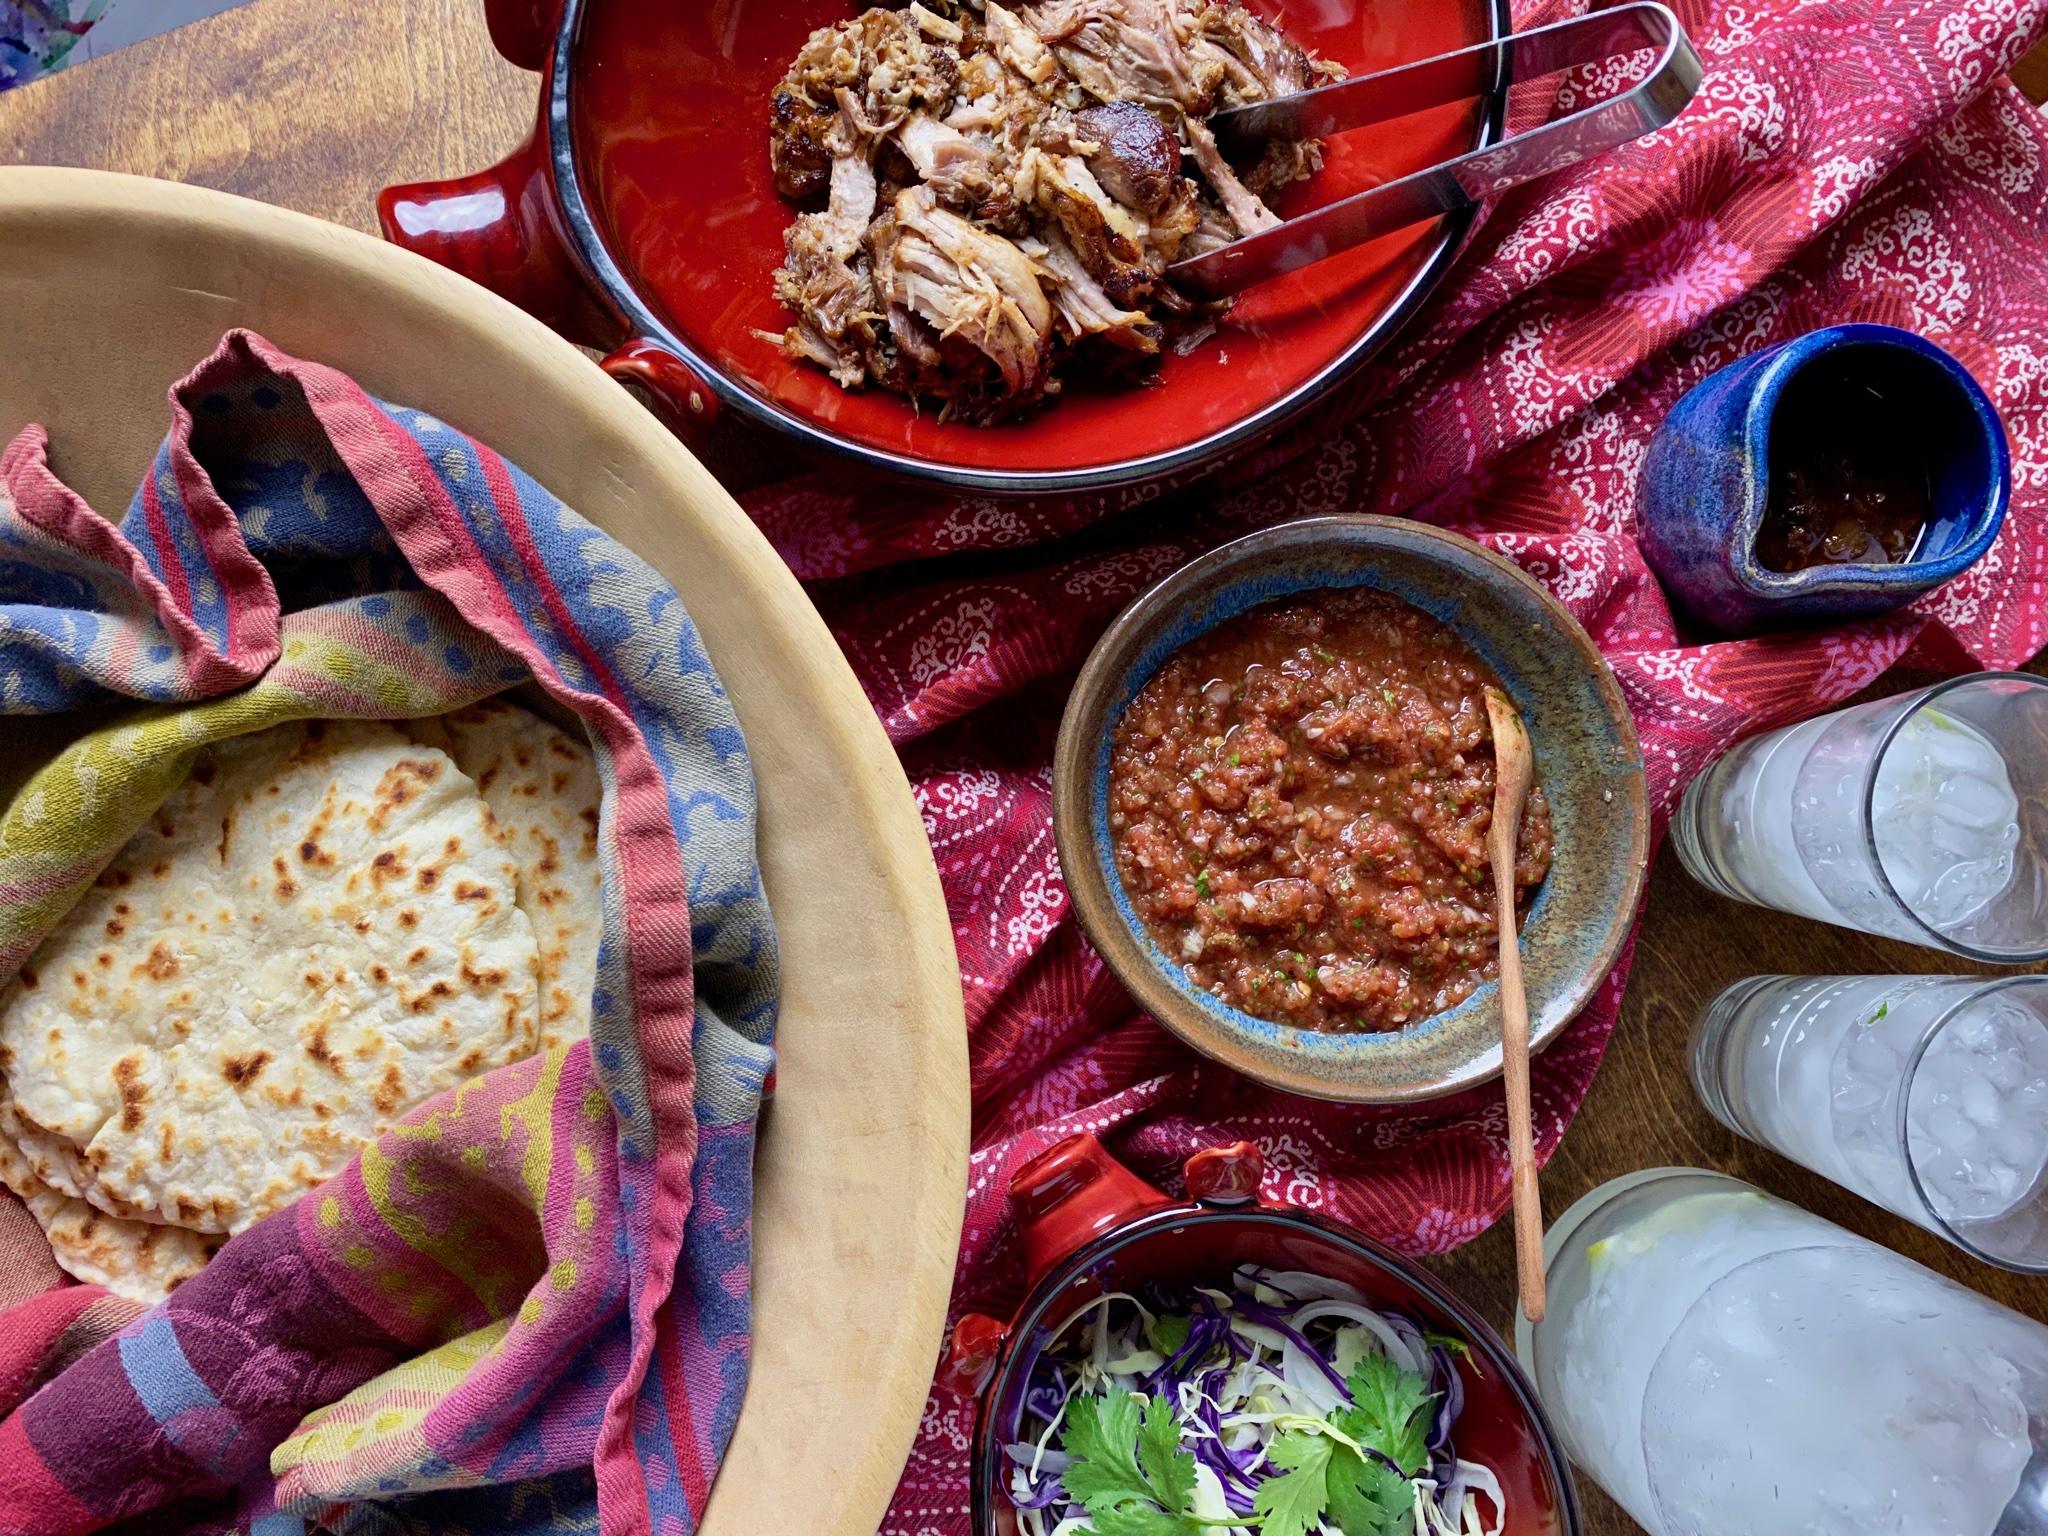
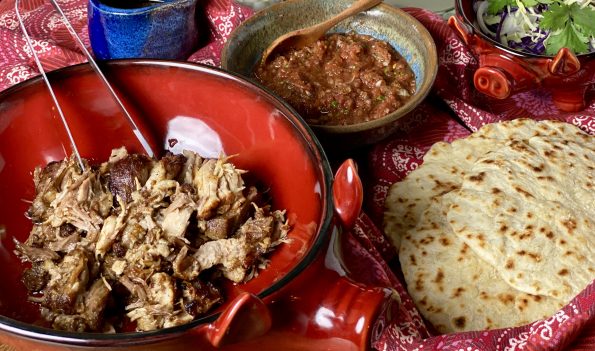
A quick and super easy salsa that starts with Fire-Roasted Tomatoes in a can!  I posted this for Cinco de Mayo a couple of years ago.  It is my go-to salsa.  Find it here!


Mexican Rice

I adapted this recipe from Mexican Everyday by Rick Bayless.  It is right up my alley since it is made in a rice cooker, the only way I know how to make rice.  It’s easy and delicious.  I use half of the quick salsa to make Mexican Rice, and the rest to serve.

Mexican Red Rice

Classic Mexican Red Rice made in a rice cooker, so easy, so delicious
Course Side Dish
Cuisine Mexican
Keyword Meican Red Rice, Rice Cooker
Prep Time 10 minutes
Cook Time 40 minutes

Equipment

  • Rice Cooker

Ingredients

  • tbsp vegetable oil or olive oil
  • cups white rice
  • 1 cup homemade quick salsa commercial salsa will work also
  • 1 cup chicken broth
  • salt to taste start with 1/2 tsp
  • cups frozen peas optional
  • 1 /2 can roasted chilis 4oz you know the mild kind in the little cans, optional
  • 1-2 cloves garlic finely chopped
  • 1/2 tsp ground cumin

Instructions

  • Heat a medium (3 quart) ovenproof saucepan over medium heat.
  • Add the oil. When it is hot add garlic and fry for 1 minute to soften. Add rice and stir frequently until the grains of rice turn from translucent to milky-white – don’t worry if some of them brown.
  • Pour sauteed rice mixture into rice cooker pot.
  • Add the salsa, chicken broth, chilis, ½ tsp salt and cumin. Set to cook.
  • Fluff the rice and mix in the peas. Adjust the salt to taste, then serve
Do You Tteokbokki? Spicy Korean Rice Cakes

Do You Tteokbokki? Spicy Korean Rice Cakes

‘My fondest memories of traveling abroad, not surprisingly, revolve around food.  It started when my parents sent me on a summer exchange program in Taiwan for Chinese American college kids.  While our parents envisioned us hard at work learning Mandarin and Chinese culture, we were sneaking out to the night markets to eat, hooking up with newfound friends, and in general, having a good time.  A documentary made about the program says it all, Love Boat Taiwan.  My introduction to a whole new world of food, culture, and fun.

From the food stalls in Taipei long ago to the markets in Seoul and Osaka most recently; I have feasted on oyster omelets and dumplings (Xiao Lung Bao), Gimbap (Korean rice rolls), Galguksuk (hand-cut noodles), Hotteok (rice pancakes with sweet or savory fillings) and tteokbokki (rice cakes in a sweet and spicy sauce).  I have sampled Takoyaki (Fried Octopus fritters), Kaarage (fried chicken), Gyoza (Potstickers), and Manju (rice cakes) from tiny makeshift kiosks, so delicious.  A trip after college found me relishing the variety of Hawker Fare food in Singapore. Nonya, Indian, Muslim, Chinese dishes all in one spot. Who hasn’t drooled over the Hainanese Chicken enjoyed by Rachel and Nick in Crazy Rich Asians, all cheap and delicious.  Street markets are soul food.  Homey, simple, flavorful dishes remind me of family gatherings around the dinner table.

But, it’s not just about the food, it’s about getting a taste of daily life and culture-sitting next to that businessman as he hurriedly slurps his noodles down before going back to work  Watching the vendors entice their next customer with their hand-pulled noodles or steaming dumplings. Or amusedly watching school children clamoring for their afterschool snack of gimbap or bao from the corner vendor.

That’s My Favorite Part of Traveling

Dreaming about our travels last year has me hungry for the delicious street food we discovered. We took in a baseball game in Incheon and in place of traditional fries and hot dogs, we enjoyed Tteokbokki and KFC (Korean Fried Chicken).  The Tteokbokki, spicy, sweet, and chewy was served on sticks with cute little hot dogs.  I love watching baseball, it reminded me of watching a minor league game, lots of zaniness, fans with broomsticks, and cheerleaders to egg them on.  The icing on the “rice”cake was the food and walk-up music for each batter.

Crazy Fun Baseball Game in Korea

I’ve taken to hunting for recipes to make these tasty tidbits and I found, Korean Bapsang, an absolutely great site with a treasure trove of Korean recipes that are easy to follow and 정말 맛있다 (really delicious)!

You can buy rice cakes and fish cakes in most Asian markets as well as the other needed spices. I didn’t have fish cakes for a batch, so I chose the next best thing in my pantry, SPAM.  Don’t laugh, it was pretty good!  Cook the rice cakes in an anchovy stock or water seasoned with Gochugaru (chili powder), Gochujang (chili paste), and corn syrup.  Fish cakes, cabbage, and onions round out the dish.   It takes all of 15 minutes to make.  A perfect snack while watching a Giants game or my favorite K-drama.

The Recipe

Tteokbokki - Sweet & Spicy Rice Cakes

Tteokbokki, a popular Korean snack, are rice cakes in a spicy-sweet sauce found at street markets, fast food kiosks and baseball games!
Course Appetizer
Cuisine Asian
Keyword Korean Snack, Rice Cakes, Tteokbokki
Prep Time 5 minutes
Cook Time 15 minutes
Servings 4

Ingredients

  • 1 pound tteokbokki tteok 떡볶이 떡 about 24 3-inch long rice cake pieces - See note.
  • 1 sheet eomuk 어묵 fish cake - aka oden or SPAM! or Japanese fishcake
  • 4 ounces green cabbage yangbaechu 양배추
  • 1 - 2 scallions optional
  • 3 cups anchovy broth or water or any fish broth/dashi
  • 3 tablespoons Korean red chili pepper paste gochujang 고추장
  • 1-2 teaspoons Korean red chili pepper flakes gochugaru 고추가루 preferably finely ground)
  • 1 tablespoon soy sauce
  • 2 tablespoons sugar or use 1 tablespoon if you like it less sweet
  • 1 tablespoon corn syrup
  • 1 tablespoon minced garlic

Instructions

  • Make fish broth if using. Soak the rice cakes for about 20 minutes if hardened or refrigerated. Cut the fish cake, cabbage, and scallions into about 2-inch long pieces.
  • Add the anchovy broth (or water) to a large pan. Stir in the sauce ingredients. Bring it to a boil over medium high heat, stirring to dissolve the red chili pepper paste (gochujang).
  • Add rice cakes, boil until the rice cakes become very soft and the sauce is thickened, about 8 - 10 minutes. Stir frequently so the rice cakes don't stick to the bottom of the pan.
  • Add cabbage, green onions (optional) and fish cakes. Continue to boil, stirring constantly, for an additional 4 - 6 minutes. Depending on your rice cakes, it may need more time to reach a desired level of softness. Add more broth or water as necessary. Taste the sauce, and adjust the seasoning if needed. Serve immediately.

Notes

You can find tteokbokki rice cakes fresh, refrigerated, or frozen at Korean markets. Locally made fresh rice cakes are the best ones to use, but good quality refrigerated ones are okay too. Try avoiding frozen ones if you have other options.
 Tteokbokki doesn't reheat well in the microwave. Reheat any leftovers, along with a little bit of broth or water, in a small pan over low heat.
Don't have eomuk use the Japanese fish cakes-kamaboko or even surimi (imitation crab legs).
Jack Mac and the Cheese Attack (Crazy Good Mac & Cheese)

Jack Mac and the Cheese Attack (Crazy Good Mac & Cheese)

Happy National Cheese Day!  Any excuse to make a family favorite, mac and cheese.  I love mac and cheese. I unabashedly admit as a kid, I looked forward to the blue box of Kraft’s “Cheese and Macaroni”.  Pure marketing genius, neon yellow orange sauce. As I got older, my taste grew more sophisticated, the blue box was cast aside in favor of Stouffer’s Mac and Cheese from the freezer section of my supermarket, student life-student food. Come on, you can tell me, your college self loved Stouffer’s too.

When I had kids, my mac and cheese world expanded.  Being one of those crazy moms, I vowed to keep, processed foods and fast foods to a minimum.  I made macaroni and cheese from scratch and avoided my childhood favorites like Twinkies and Ho Hos.   I look back and think maybe I went a little overboard. But I’m pretty sure their time in college more than made up for the lack of processed and fast foods when they were little.

So I spent a lot of years making Mac and cheese from scratch.  I tweaked it to try to make it a little healthier by using 2% cheddar cheese, 2% milk, and substituted broth for some of the dairy. It was perfectly…

Adequate.

Now that the kids are adults, pasta all day everyday is a thing of the past.  Mac and cheese has moved to occasional status-holidays, first day of winter, bowl of comfort day, or of course, National Cheese Day.

You know what that means…

Calorie laden, luscious, ooey-gooey, make you wanna slap your momma, no holds barred, damn delicious mac and cheese.

I adapted a recipe I found on the blog site, Chunky Chef, it’s BEASTLY GOOD.  Soft macaroni, (no al dente noods please), super cheesy (6 cups of cheese in this bad boy), gooey (one of those cheeses is mozzarella), rich (no 2% cheese or milk was involved in the making of this), porkalicious (bacon makes everything better), and just because I can, a crispy, topping of butter toasted Ritz crackers crumbs.  Yes, I went there.

Expect to run a marathon after eating this mac and cheese.  Immediately after.

Start with making a classic bechamel by melting butter, adding flour for a roux and then gradually adding half and half and milk.  You will end up with a sauce that is kind of thick but still pourable.  Add copious amounts of hand-shredded cheese to this and season generously with salt and pepper, and a pinch of cayenne pepper.  Catch the hand shredded?  Yes, don’t start with pre-shredded cheese which has “stuff” added to it so it doesn’t stick together.

Add the macaroni to the sauce, give it a good stir and layer half of the pasta in a buttered 9×13 casserole.  Spread half of the remaining cheese on it and make another layer. Top with remaining cheese and buttery toasted crumbled Ritz crackers.  Bake 15 minutes so the cheese gets all melty and amazing. Serve as soon as possible.

Let’s go crazy…

Infinite possibilities to add your own stamp to this:

To the sauce:

Cayenne or smoked paprika

Mustard for a tangy hit

To the dish before baking:

Add diced chilis to spice it up

Crumbled bacon or pulled pork would be awesome

Shellfish- crab, lobster, shrimp so decadent

For the macaroni:

Substitute blanched or roasted cauliflower for some of the pasta or all of it if you want

Or add your favorite veggie, I like broccoli or mushrooms

File this recipe in the not so back of your mind for the next time you have a hankering for mac and cheese.

Creamy Homemade Baked Mac and Cheese

Course Main Course, Side Dish
Cuisine American
Keyword Crazy good mac and cheese
Calories 657kcal

Ingredients

  • 1 lb. dried elbow pasta
  • 1/2 cup unsalted butter
  • 1/2 cup all purpose flour
  • 1 1/2 cups whole milk
  • 2 1/2 cups half and half
  • 4 cups grated sharp cheddar cheese measured after grating
  • 1 cup mozzarella shredded Measured after grating
  • 1 cup grated Gruyere cheese measured after grating
  • 1/2 Tbsp. salt Or T Kosher salt
  • 1 tsp black pepper
  • 1/4 tsp. paprika or smoked paprika
  • 1/2-1 Tsp Cayenne pepper

Instructions

  • Preheat oven to 325 degrees F and grease a 3 qt baking dish (9x13"). Set aside.
  • Bring a large pot of salted water to a boil. When boiling, add dried pasta and cook 1 minute less than the package directs for al dente. Drain and toss with a bit of butter to keep from sticking.
  • Grate cheeses and toss together to mix, then divide into three piles. Approximately 3 cups for the sauce, 1 1/2 cups for the inner layer, and 1 1/2 cups for the topping.
  • Melt butter in a large saucepan over MED heat. Sprinkle in flour and whisk to combine. Cook for approximately 1-2 minutes, whisking often. Slowly pour in about 2 cups of the milk/half and half, while whisking constantly, until smooth. Slowly pour in the remaining milk/half and half, while whisking constantly, until combined and smooth.
  • Continue to cook over MED heat, whisking constantly, until thickened.
  • Stir in spices and 1 1/2 cups of the cheeses, stirring to melt and combine. Stir in another 1 1/2 cups of cheese, and stir until completely melted and smooth.
  • In a large bowl, combine drained pasta with cheese sauce, stirring to combine fully. Pour half of the pasta mixture into the prepared baking dish. Top with 1 1/2 cups of grated cheeses, then top that with the remaining pasta mixture.
  • Coarsely crush Ritz crackers. Set aside. Melt 1 T butter in a pan. Add cracker crumbs and saute until toasty brown. Kinda optional.
  • Sprinkle the top with the last 1 1/2 cups of cheese and cracker crumbs.
  • Bake for 15 minutes, until cheesy is bubbly and lightly golden brown.

Notes

See comments in post.
Mac and Cheese can be made ahead:
Make as directed (but do not bake), transfer to baking dish and cool completely. Cover tightly with foil and refrigerate 1-2 days ahead.
Before baking, let dish sit on counter for 30 minutes.
Bake at recipe temperature for 25-35 minutes, until hot and bubbly.

Cheesy White Bean Tomato Bake

What to do with all that leftover cheese from your scrumptious mac and cheese.  Note to self, never buy your cheese from Costco, New York Times Cooking to the rescue.  Easy-check. Quick-check. Uses up some of that extra cheese-check. Delicious-check. A riff on Korean Cheesy Corn, this is great dish for a happy hour, lunch paired with a green salad or late night munchie attack. 

This dish is as easy as beans from a can.  Really.  

Taking my cue from NYT Cooking I tweaked the recipe, a lot.  Not as much as everyone else judging from the comments, but enough to make it my own.  I doubled the tomato paste, threw in a sprig of rosemary, sautéed shallots and diced red bell pepper along with the garlic and last but not least, added some bacon. You don’t have to.

Make it your own-add nothing, add everything-sausage, spinach, kale (never me), or use different beans.

Yum.

The Rice Stuff-Sticking with Tradition (Gnaw Mai Fan)

The Rice Stuff-Sticking with Tradition (Gnaw Mai Fan)

My favorite dish at Thanksgiving, excluding dessert, is dressing.  I adore bread stuffing.  My Mom’s version is delicious.  It’s a pretty traditional bread dressing with the one Asian tweak of dried oysters added to it.  I asked my mom to write her recipe down…and she did!  Thank goodness, since she rarely cooked from recipes and relied on the look, taste, adjust method.

As much as I love her bread stuffing, I never get to make it!  I am immediately “voted off the island” if I suggest anything but the Chinese contribution to Turkey Day-Sweet Rice Stuffing or Gnaw Mai Fan.  My fam LOVES Sweet Rice Stuffing and it just wouldn’t feel right if it were missing from the Thanksgiving table.

My oldest lives in the city and has started his own tradition of having Friendsgiving with his co-workers.  I made a batch of Sticky Rice (recipe here!), walked him through roasting the turkey and the rest was up to him.

TWEAKS

I’m not a big fan of super sticky rice so I use a combination of 50% long grain rice and 50% glutinous sweet (sticky) rice.  But if you like sticky rice change the proportions to 3 cups glutinous rice and 1 cup long grain.

If you are feeling ambitious, here is a quick and easy recipe for the char siu (bbq pork)  It adds a touch of sweetness to the rice.

This would be a perfect gluten-free choice for bread stuffing.  The “Rice” Stuff.  There are gluten-free soy sauces and substitutes for oyster sauce, gluten-free mushroom soy or fish sauce would work well.

Happy Thanksgiving!

(Hiyashi Chuka – Ramen Salad) Swept Away By A Summer Ramence Summer Madness #2

(Hiyashi Chuka – Ramen Salad) Swept Away By A Summer Ramence Summer Madness #2

TAs temps edged upward this past week, I began thinking about cold noodle dishes to counter the heat. One of our favorite ramen joints in San Jose features a summer noodle salad that the hubster loves. This prompted me to think it was time to add a cold ramen dish to my repertoire.  I perused one of my favorite sites, Just One Cookbook, and found a classic Japanese cold ramen dish, Hiyashi Chuka.  Bingo, I was off to the races.  At first glance, it seemed very similar to my Somen SaladThe dressing has soy sauce, sesame oil, sugar, and rice vinegar, for instance.  A big difference is Hiyashi Chuka starts with a thicker, more substantial ramen noodle.

Summer Ramence

The dish is eye-candy, the noodles are hidden by a colorful palette of toppings including julienned pale green cucumbers, orange-tinged crab leg, slivers of green onions, pink honey ham and shreds of fried egg.  Cold noodle salads like this refreshing and delicious Hiyashi Chuka are perfect for summer potlucks, picnics and pool parties.  I hope you will add it to your summer rotation.

The Skinny on Noods

Both fresh or dried noodles work in this dish.  I like using fresh ramen or lo mein. If you can get a hold of ramen noodles by Sun Co. from Hawaii, get it. This brand supplies the bulk of ramen houses in the US. and has a really nice chew or consistency.  In a pinch, you could use linguine or spaghetti but my first choice would be an Asian noodle. If you are gluten-free, rice or yam noodles would be a good substitute.  Confused about the multitude of Asian noodles out there? Here is a great Asian noodle primer from Serious Eats.

Dressing It Up

The dressing is on the sweet side so I would start with two tablespoons of sugar, taste and add more if desired.  You can use Ponzu, a citrus soy sauce, instead of soy sauce. Toppings can be ANYTHING you like or have on hand.  Keep in mind you want the play between sweet and salty, crunchy and soft. I like cucumbers, honey ham, imitation crab, egg, corn, and tomatoes. Don’t like imitation crab?  Use bay shrimp or splurge on real crab.  You can substitute honey turkey, shredded chicken (leftover soy sauce chicken would work really well) or char sir (bbq pork) for the ham. I leave out the lettuce sometimes or substitute shredded cabbage.  I love a good sprinkling of chopped scallions and cilantro.  Oishii!

HIYASHI CHUKA (COLD RAMEN)

A delicious, refreshing cold noodle salad that is perfect for summer!
Course Main Course, Salad
Cuisine Asian
Keyword japanese, Noodle, Ramen, Salad, sesame
Prep Time 45 minutes
Cook Time 10 minutes
Servings 8 Servings

Ingredients

Dressing

  • 6 Tbsp soy sauce Any all purpose soy like Kikkoman will work, or substitute half with Ponzu for a hint of citrus
  • 4 Tbsp sugar Adjust to taste! Start with 2 tablespoons
  • 3 Tbsp rice vinegar
  • 2 Tbsp sesame oil
  • 2 Tbsp water
  • 1 Tbsp white sesame seeds roasted/toasted
  • ¼ tsp ginger grated
  • ½-1 tsp la-yu, optional Japanese chili oil

Egg crepe, shredded

  • 2 large eggs beaten
  • 2 tsp sugar
  • ¼ tsp salt kosher or sea salt; use half if using table salt
  • neutral flavor oil vegetable, canola, etc

Toppings

  • 1/4-1/2 pound Bay shrimp
  • 1 Persian/Japanese cucumbers or 1/3 English cucumber, julienned
  • 1 iceberg lettuce shredded, or use romaine lettuce
  • ½ Tomato cut into wedges, or cherry tomatoes quartered
  • 3-4 slices Honey Ham Sub bbq pork, or honey turkey, Canadian bacon, julienned
  • 4-6 imitation crab meat kanikam or splurge and use real crab, or fish cake, shredded or julienned
  • 1/2 cup Kaiware radish sprouts or green onions, chopped

Other toppings

  • Poached chicken or leftover soy sauce chicken shredded, in place of ham
  • Julienned carrots
  • dried wakame seaweed
  • shredded nori seaweed kizami nori

Noodles

  • 2 package fresh ramen noodles 12 ounces each substitute dry ramen noodles, or Lo-mien

Garnish

  • 1 Tbsp white sesame seeds roasted/toasted
  • Japanese karashi hot mustard optional
  • pickled red ginger beni shoga or kizami beni shoga, optional

Instructions

  • Combine dressing ingredients in a medium bowl and whisk together. Set aside or if made in advance, store in fridge.
  • For eggs, make thin egg crepes and cut it into thin strips. Heat oil in non-stick pan over medium heat. Pour the egg mixture into the pan, tilt & swirl pan to distribute egg. Like making a crepe. Cook until set and flip egg over. You will have a few brown spots, but should be predominantly yellow. Slide crepe onto a plate and reserve. When it is cool enough you can roll the egg crepe up and cut it into thin strips.
  • You can use large prawns if you like, but I like using bay shrimp which generally come precooked. Easy peasy.
  • Cut all the topping ingredients as directed.
  • For the noodles, bring a pot of water to a boil and add the noodles. Separate the noodles before dropping into water. Cook according to package directions. Drain the water and rinse the noodles to remove starch. Allow noodles to cool completely. Chill in fridge if desire. Place noodles in a serving bowl and mix half of dressing into noodles.
  • Place all the toppings and pour the remaining dressing on salad before serving. Serve with karashi hot mustard and pickled ginger on the side, if desired. Refer to pics, ingredients are usually arranged in a radial pattern on top of the noodles.
Bi Bim Bap It! Homecoming in Seoul

Bi Bim Bap It! Homecoming in Seoul

Off to see Jorge in Korea!

Do you have a bucket list of things to do when traveling, if so, what’s yours? I’d love to know.  Here’s ours when we travel:

FIRST DAY- a tour of the city on bikes.  It’s a great way to get an overview of the city you are visiting and get a bit of exercise (guilt-free eating for the day, yay!)  It does have it’s heartbeat quickening moments when you ride in traffic and every big city in the world has traffic.  But we have biked in Rome, London, Boston, DC, Paris, and Seoul without mishap, just a couple of choice words from drivers.  But hey, I get that here too.

SPORTS:  We have watched rowing on the Thames, soccer in Italy, and now baseball in Korea and Japan.  BOSS, so much fun and gives you a taste of the folks that live there.

EATS:  Street food, hole-in-the-walls, local joints, my kinda food.  Ok, occasionally, a meal that breaks the bank.

I push the envelope sometimes with my search for local food.  I have waited in line for 90 minutes for Egg Tarts in Macau, meandered down small alleys looking for Won Ton Soup in Hong Kong or Okonomiyaki in Osaka.  Unfortunately, the combination of spotty maps and my non-existent sense of direction means a lot of wandering around and spewing expletives at my phone when looking for those food gems. Good thing my family loves me, or at least I think they do.

HOME COOKING:  Do you get tired of eating in restaurants?  Miss your kitchen? Take a cooking class!  We have made pasta and gelato in Florence and now homemade kimchi, seafood pancake-pajeon and Bi Bim Bap in Seoul.

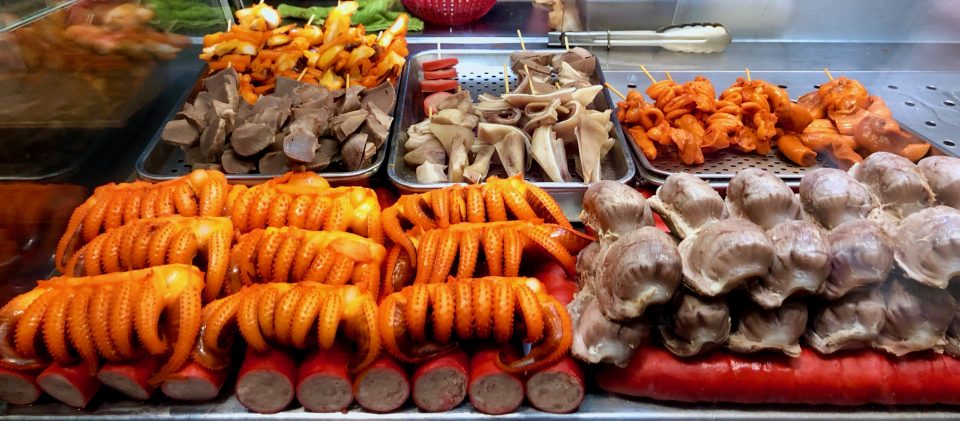
Early morning at a local street market

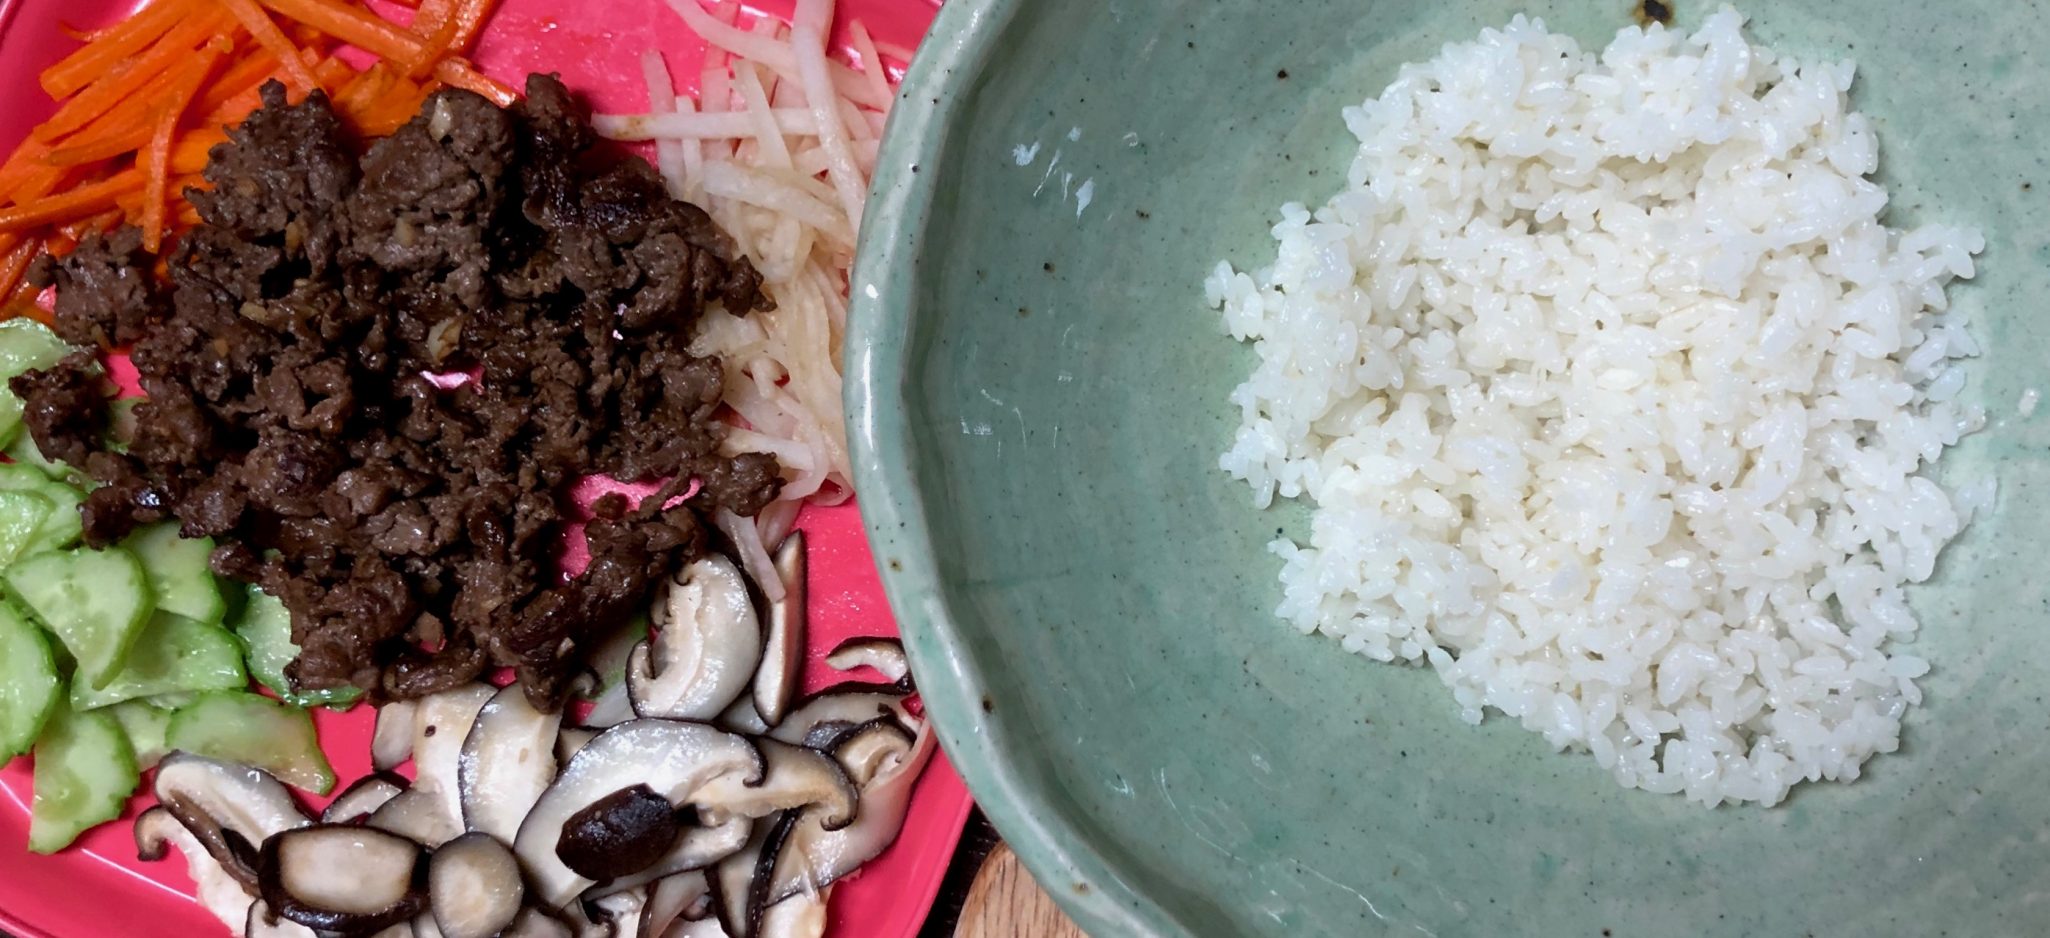
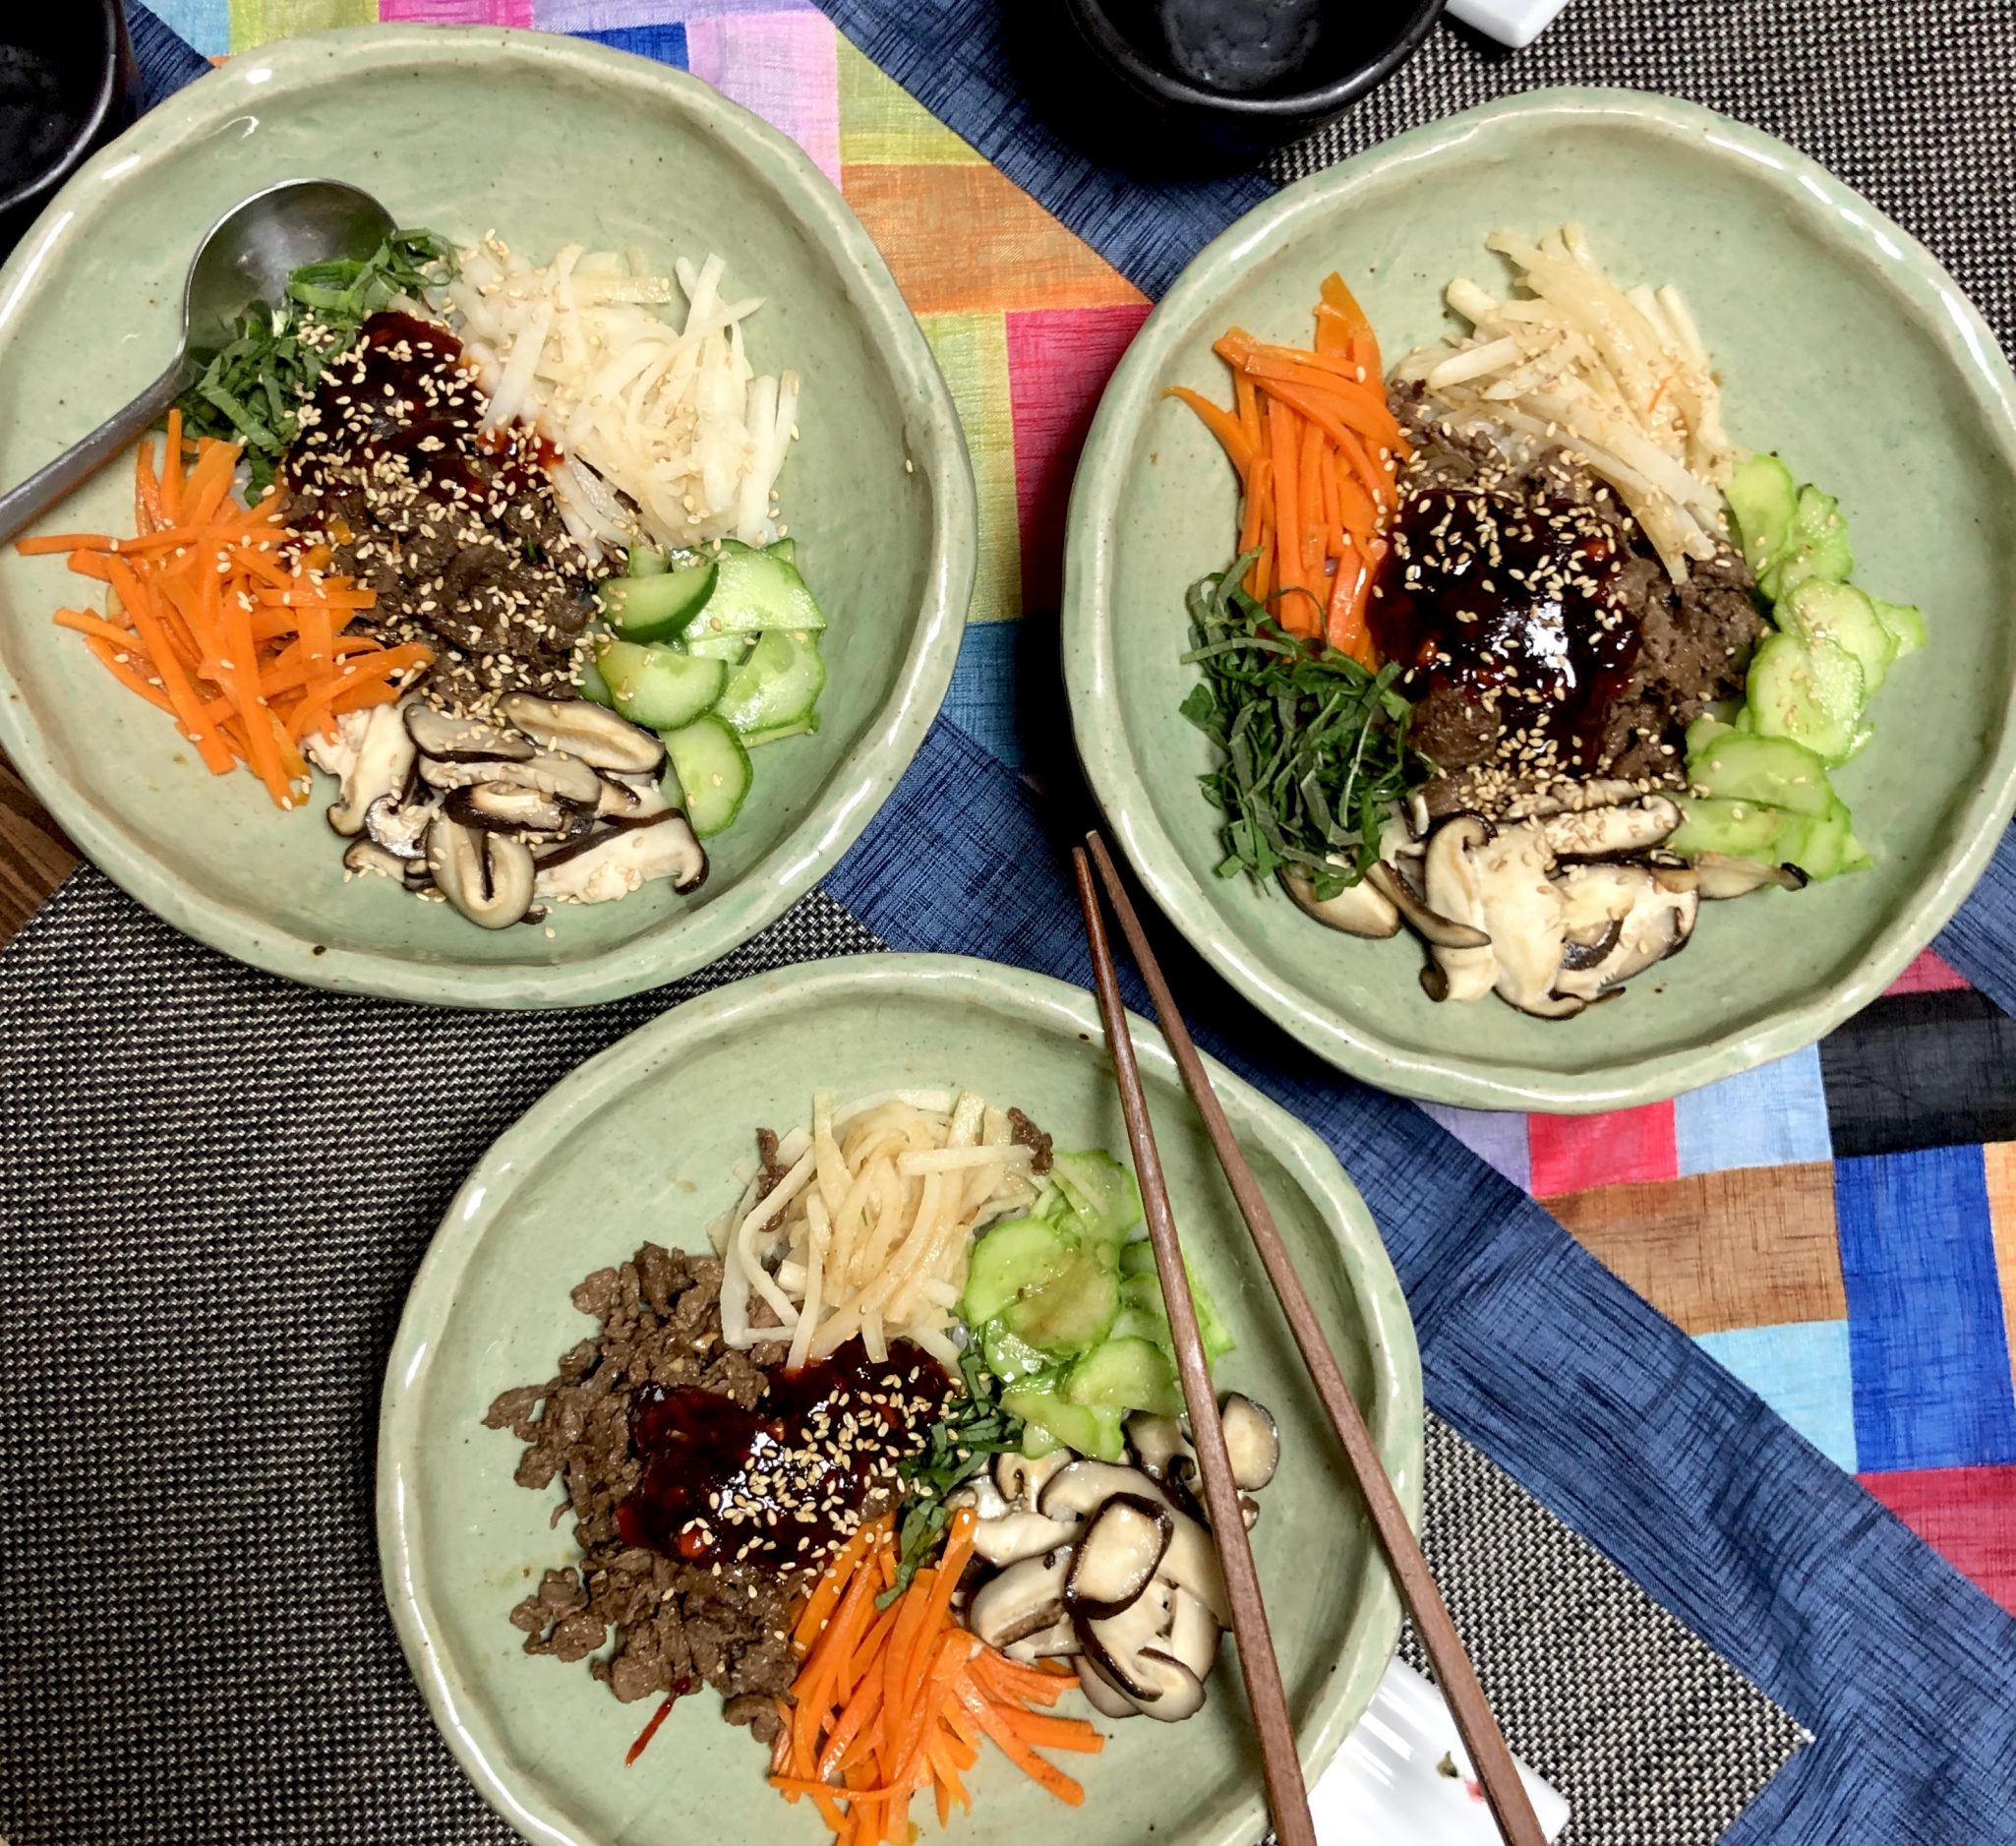
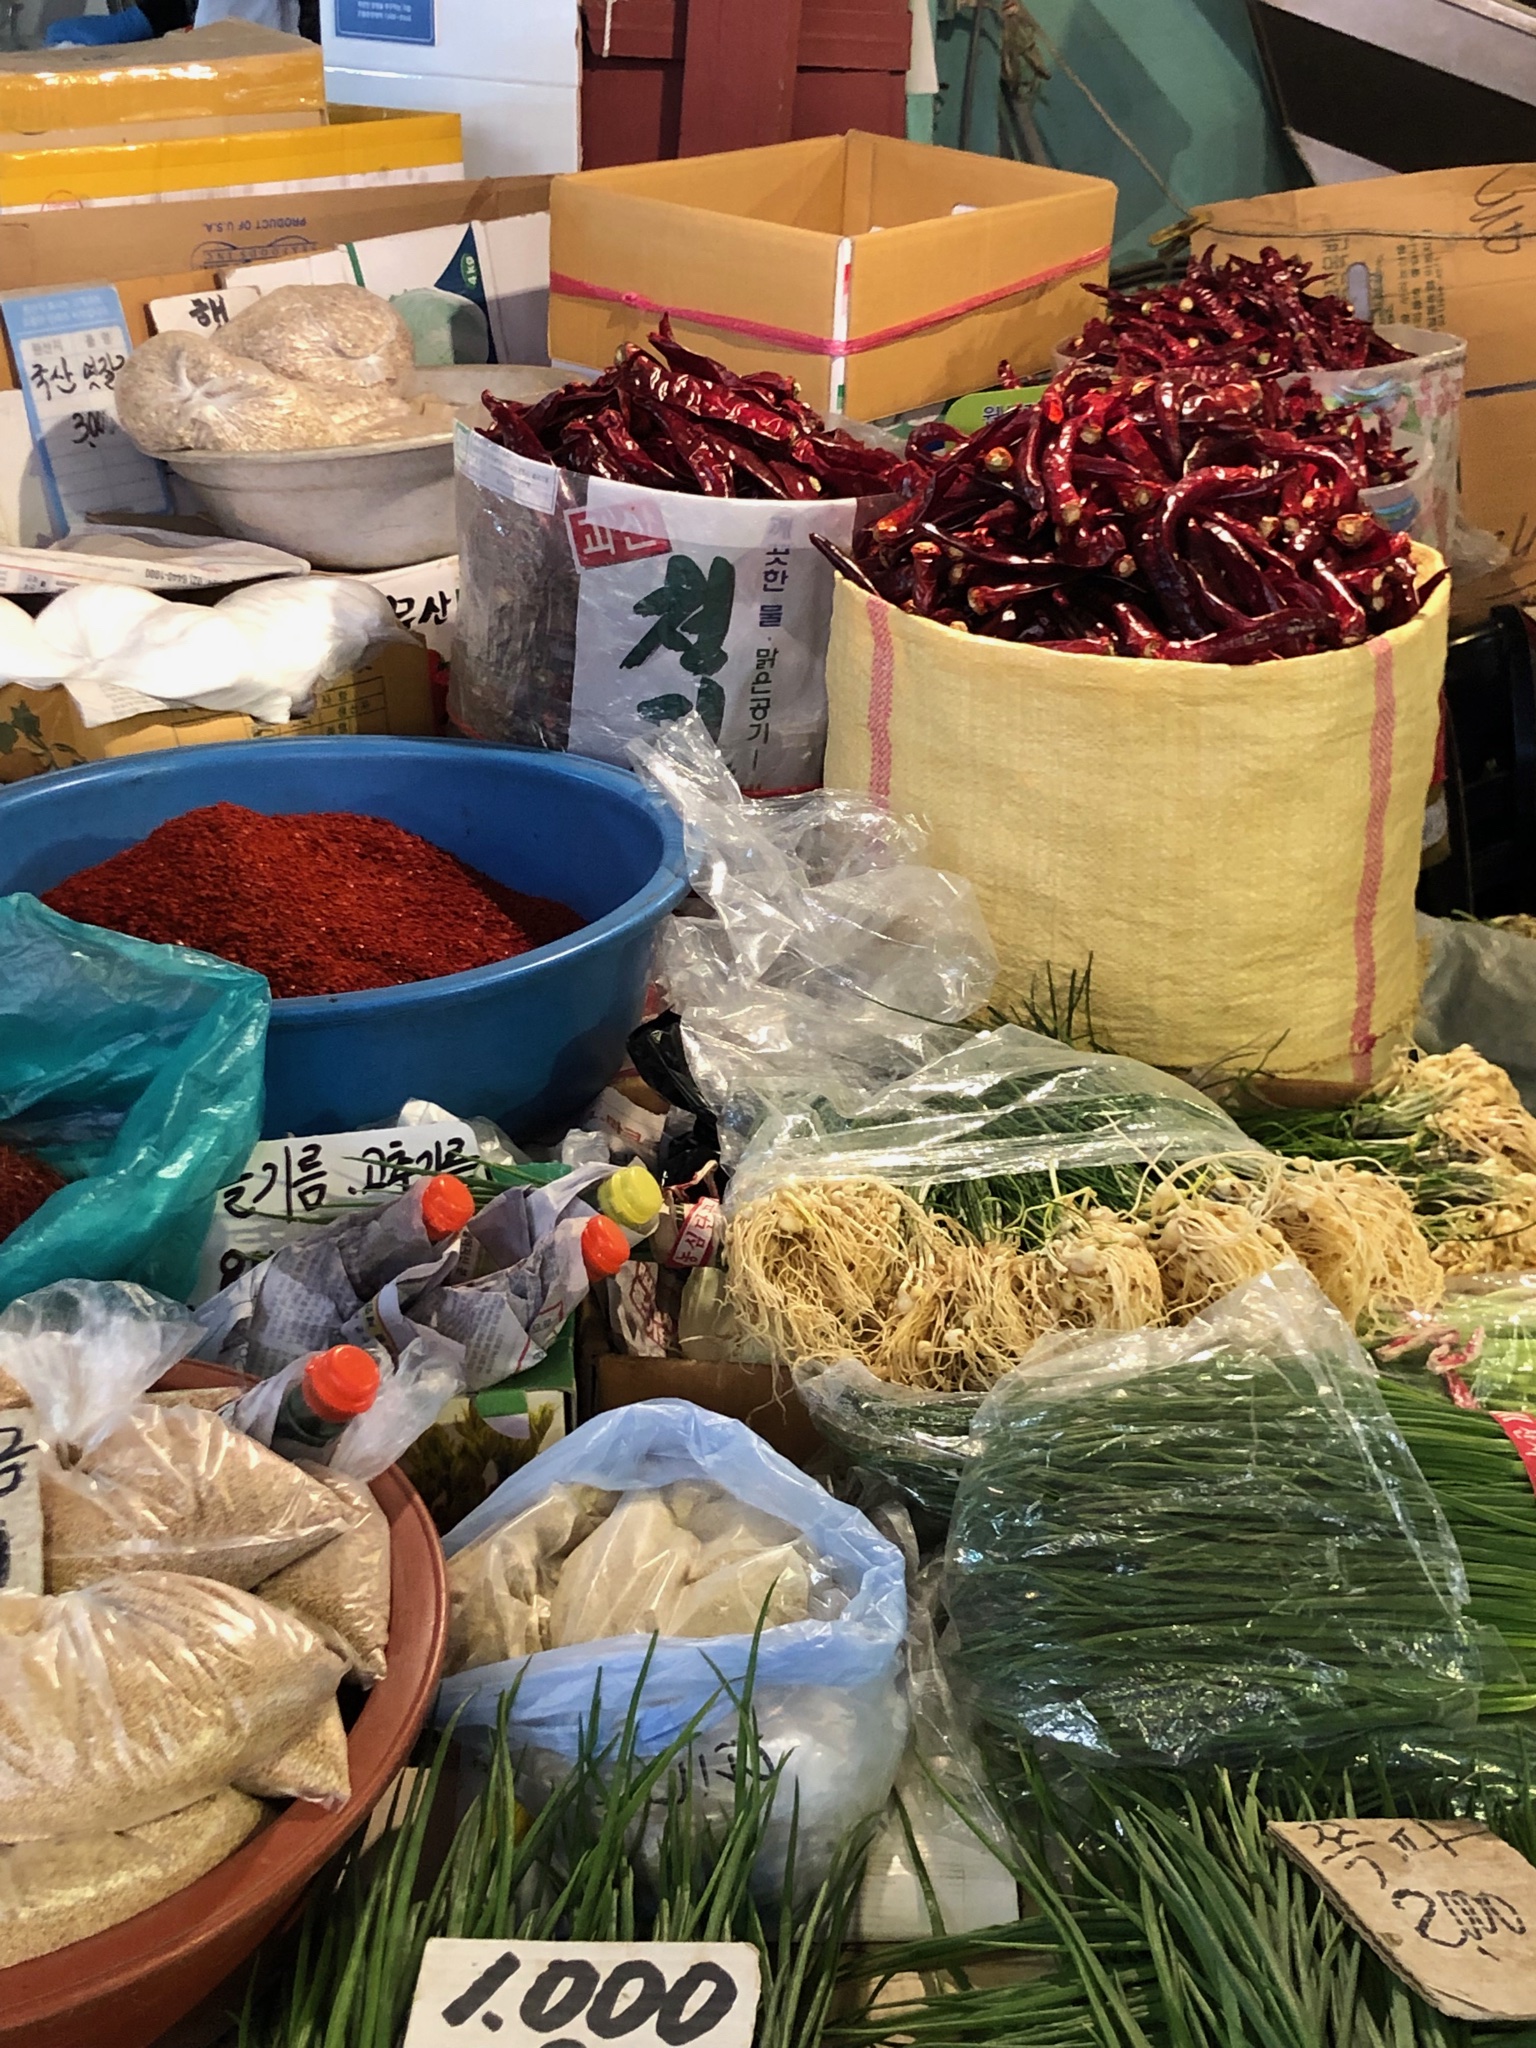
Our cooking class with Joungy began with a visit to the market to buy ingredients, a Korean Veggie primer!

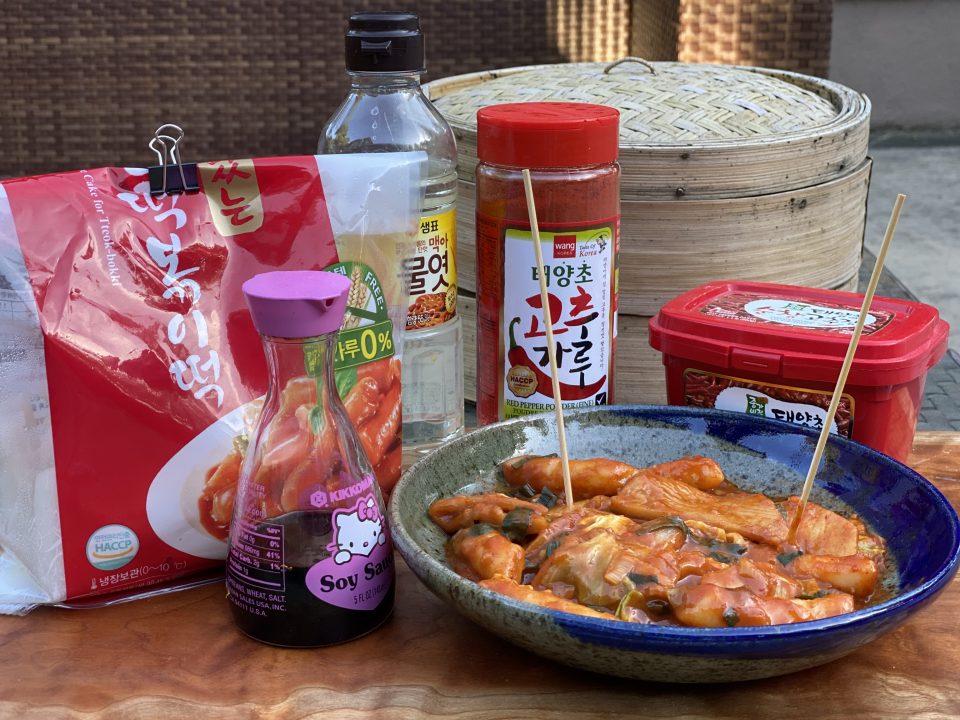
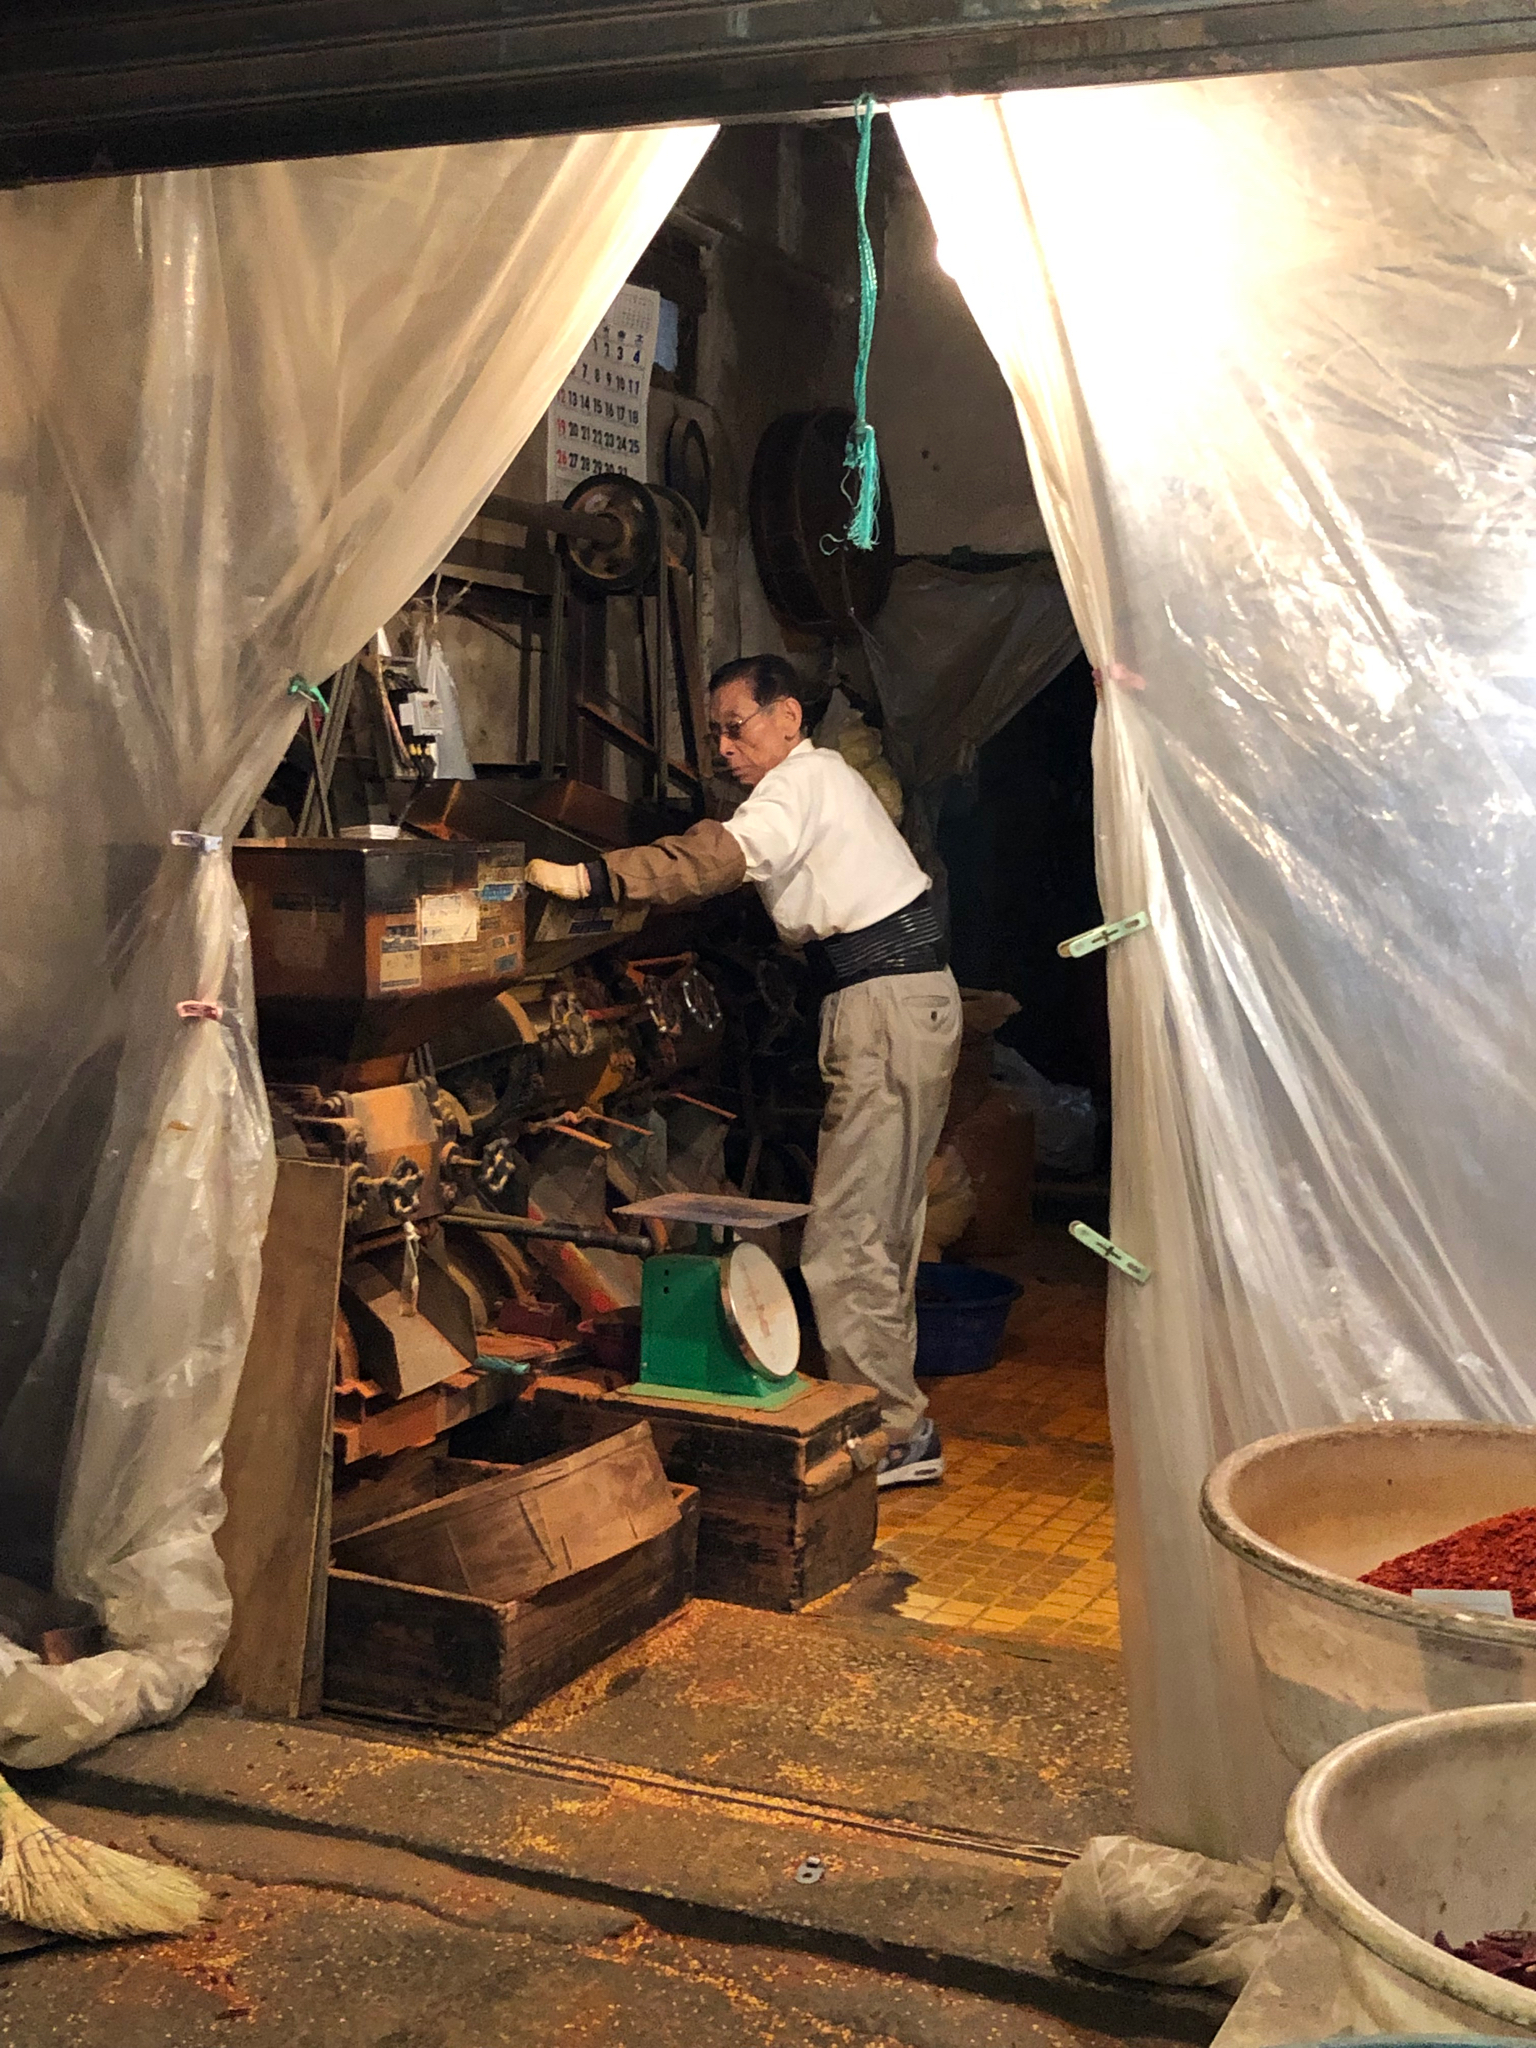
I was mesmerized watching this gentleman grind chili peppers into Gochugaro powder.

We made Seafood Pancakes or Pajeon, fresh kimchi, and my favorite bowl meal, Bi Bim Bap.  Bi Bim Bap starts with a pile of fluffy, warm rice and topped with julienned carrots, cucumbers, squash, spinach, mushrooms, yesterday’s banchan, seasoned beef or chicken.  You get the picture, you can use anything you desire for toppings.  For Joungy’s class, we had a wonderful array of veggies, carrots, cucumbers, daikon, shiitake mushrooms, shredded beef and a chiffonade of Perilla leaves.  Delicious!

The secret to her Bi Bim Bap is the extra attention given to the sauce.  Her Gochujang paste included corn syrup, a bit of soy sauce, and chopped garlic, stir-fried briefly. This brought the sauce to a new level.

Season each component, stir-fry, and place on top of the rice in neat little separate piles-kid-friendly, lol.  Top your masterpiece with a sprinkling of sesame seeds and a dollop of sauce.  It’s colorful, delicious, easy to prepare, flexible…what more could you ask for?  If you can’t find Perilla leaves, garnish with chopped green onions are good too.

A great primer for Bi Bim Bap can be found at My Korean Kitchen which has instructions to season the blanched bean sprouts and spinach.

Bi Bim Bap (Korean Mixed Rice)

Korean Rice Bowl, Easy to Make and Delicious!
Course Main Course
Cuisine Asian
Keyword Bi Bim Bap, Korean, Rice Bowl
Prep Time 20 days
Cook Time 45 days
Servings 1 serving

Ingredients

Bi Bim Bap Rice (proportions for 1 bowl)

  • 50 gm thinly sliced beef
  • 1 clove garlic finely chopped
  • 1/2 t brown sugar
  • 1 t corn syrup
  • 1/2 t salt
  • 1 T soy sauce
  • 1/2 t sesame oil
  • 2 fresh shiitake mushroomes, thinly sliced
  • 1/2 carrot, julienned
  • 1/4 c daikon, julienned or bean sprouts
  • 1/8 t pepper powder Gochugaru
  • 1 handful spinach leaves or sub 1/4 cup thinly sliced zuchinni or Persian cucumber
  • 5 perilla leaves aka sesame leaves can sub shiso leaves, julienned
  • vegetable oil for frying, 1/2 T for each vegetable
  • 2 cups Cooked white rice I use a rice cooker, its your call how to cook the rice!

Ingredients for Sauce for servings

  • 5 T Gochujang chili paste
  • 2 T Corn syrup light
  • 3 cloves garlic
  • 1 T brown sugar
  • 1/2 T vegetable oil

Instructions

For Sauce

  • In a nonstick skillet, add oil and chopped garlic. Turn heat onto medium high. Saute until garlic is brown color, don't burn!
  • Add remaining ingredients for sauce and stir over medium low heat for approximately 5 minutes. Set aside.

For Vegetables and Rice

  • Cooked medium grain white rice
  • In a small bowl combine soy sauce, brown sugar, corn syrup, pepper powder and chopped garlic. Add beef and stir to combine.
  • Stir fry each vegetable-mushroom, carrot, daikon, separately until tender crisp. Season with salt to taste. Place each vegetable on a platter, keep separate. Stir fry mushrooms in 1/2 T sesame oil, remaining vegetables can be saute in 1/2 T vegetable oil or a blend of sesame oil and vegetable oil
  • If using bean sprouts or spinach, blanch in hot water until tender crisp about 1 minute
  • Stir fry beef until cooked through.

Building Your Bowl

  • Divide hot rice between 3-4 bowls
  • Place vegetables in bundles around the bowl in a radial pattern. Place beef in the center.
  • Garnish with sesame seeds and perilla leaves and approximately 1 T sauce for each bowl. Place extra sauce in a bowl and serve along side bowls.
  • Optional (mandatory for me): Fry an egg for each serving, sunnyside up, and place on top of beef

Notes

Bi Bim Bap and creative expression.  The only absolutes for Bi Bim Bap is the rice and the sauce.  You could sub brown rice in place of white rice, but you need rice. The recipe from Joungy's class goes the extra mile by sautéing the red pepper paste with garlic and seasonings.  You could use Gochujang straight out of the jar, but the cooked sauce is really tasty.
Use whatever vegetables your little heart desires.  Great way to use extra Banchan you boxed from K-bbq the night before.  Why not? 

So good!  Bowled over by Bi Bim Bap!

Bowled Over, Udon Want to Miss My Newest Obsession (Udon)

Bowled Over, Udon Want to Miss My Newest Obsession (Udon)

Hang on to your hats, imagine Times Square, with all its neon signs and flashing lights dedicated solely to FOOD.  Yep, that’s the only way I can describe the Dotonbori area of Osaka.  Swarms of people, whose sole purpose is to find all things delicious to eat.  A giant 3-D crab, or shrimp or potsticker over the door of a dining establishment making it easy to figure out their specialty.  The delicious aromas swirling around, changing with every step as they walk by tempura houses, ramen joints, crab feasts and yakitori vendors.

Welcome to Crazy Town for food

Yep, we bit.  Drawn by the people, hypnotized by the lights, we ate our way down the street.  We tasted Takoyaki, octopus cakes, (not really cakes, I just couldn’t bring myself to call them balls).  Think Ebelskiver with octopus bits.  We munched on skewers of yakitori, sampled matcha and black sesame soft serve and found taiyakis, fish-shaped cakes filled with red beans.

Udon want to miss the noodles

Our last stop was the perfect cap for the evening.  Walking back to our hotel we found a local shop in Namba with a trio of old cooks serving up delicious udon noodles.  We decided what toppings we wanted on our noodles, slipped our yens (=TWO DOLLARS A BOWL) into the machine, and handed the tickets to the chef.  Minutes later 3 hot steaming bowls of udon were placed in front of us.

Unlike ramen, the noodles are much thicker with a definite chew.  The broth is flavorful but clear and light, fish-based, different than the rich, heavy broth that you find with ramen.  Toppings are simple-fried tofu (abura-age), a raw egg that cooks in the steaming hot broth, a single tempura shrimp, or a clump of shredded seasoned beef and a sprinkling of green onion.  We slurped our noodles and tipped the bowls to spoon out the last drops of broth.  You’d think we hadn’t eaten all day.  Ha!


Oyako-Udon combo set

Thus My Obsession with Udon Began…

As soon as I got home plus 12 hours of catch-up sleep, I pulled out my copy of Japanese Soul Cooking by Tadashi Ono.  A gem of a book on homey Japanese comfort food.  I flipped to the udon section and then I was off to the market to look for ingredients.  I had purchased a delicious Dashi base in Tsujiki Market in Tokyo, perfect for my udon.  To make your own Dashi here is a great primer from Just One Cookbook. OR, Kikkoman makes a soup base Hon Tsuyu that makes a pretty good dashi broth base.

Working down my list, next the udon noodles. Udon comes fresh, frozen, and (if you can’t find fresh or frozen udon) dried.  Sigh, just not the same.  I also found abura-age or fried tofu skin which is used to make Kitsune Udon. The fried tofu skins are flattened and seasoned with soy sauce and placed on top of the udon.  Really delicious, and substantial enough for a satisfying vegetarian bowl of udon. It can be difficult to find abura-age though and in that case, Inari-age, seasoned deep-fried tofu pouches used to make Sushi Rice balls, is a convenient and easy substitute.  No need to season, just plop them on top of the cooked noodles.  Confused about tofu? Serious Eats’s Tofu primer is your ticket.  The carnivore in me though, bought some thinly sliced beef (sukiyaki beef is perfect) to make Niku Udon, yummo.

Making udon is very approachable.  It’s perfectly acceptable to start with a broth made from Dashi bags and pre-made noodles.

Udon Ingredients

Travel to Eat

People travel to buy clothes and souvenirs, I buy food, Dashi, Furikake’, Soba Boro cookies…yep, travel driven by food.

Studying up, here’s the scoop, on udon.

I used Dashi packets to make the Tsuyu.  This is your base,  add soy sauce and mirin to flavor the Tsuyu.

Optimally, use Sanukiya noodles, most likely found in the frozen section of your favorite Asian market.  The noodles are a bit firmer and hold up well.  The pre-cooked noodles only take a couple of minutes to separate and heat in hot water, presto-dunzo.  There are Korean versions of Udon noodles too, and they are very good.

Toppings for udon can be as simple as an egg, gently poached for the raw egg-squeamish, Abura-age, tempura, fishcake, or really ANYTHING you feel like putting on your noodles!

Kitsune Udon

Simple, satisfying, soulful, best describes a bowl of Udon, thick, slurpable, noodles, in a clear broth.
Course noodles, one bowl meal, One dish meals
Cuisine Asian
Keyword Kitsune, Udon
Prep Time 20 minutes
Cook Time 10 minutes

Ingredients

Abura-age (Tofu)

  • 1 package Abura-age or 4 Abura-age

For Simmering Abura-age:

  • 3/4 cup dashi soup stock
  • 2 Tbsp. sugar
  • 1 Tbsp. soy sauce
  • 1 Tbsp. mirin

For Soup:

  • 5 cup dashi soup stock
  • 3 Tbsp. mirin
  • 2 Tbsp. soy sauce
  • Salt adjusting the amount of salt to your preference

Noods and Garnishes

  • 4 packages pre-boiled udon noodles
  • Optional: 4 slices kamaboko fish cake for topping
  • green onions, sliced

Instructions

  • Heat dashi, mirin, sugar, and soy sauce in a medium pan and bring to a boil. Adjust the flavor with salt as you like.
  • Simmer aburaage in the soup on low heat until the liquid is almost gone. Set aside.
  • Boil water in a large pan and heat udon noodles as indicated in the package.
  • Drain the udon and divide into four bowls.
  • Pour the hot soup over udon noodles.
  • Top with seasoned aburaage and kamaboko slices.
  • Garnish with green onions

OR buy the more readily available Inari age or seasoned tofu pouches and just plop those straight into your bowl. Inari age is the fried tofu pouches used to make Inari Sushi

    Or the carnivore delight…

    Niku Udon

    Udon Noodles topped with stir fried seasoned beef and onions.
    Course Soup
    Cuisine Asian
    Keyword japanese, Noodle, soup, Udon
    Prep Time 20 minutes
    Cook Time 15 minutes
    Servings 4 servings
    Author Adapted from Japanese Soul Food

    Ingredients

    Niku Ingredients

    • 1/4 cup sake
    • 1/4 cup sugar
    • 1/4 cup soy sauce
    • 1 pound sukiyaki beef or thinly sliced flank steak, ribeye
    • 1/4 yellow onion, thinly sliced optional

    Soup

    • 6 cups udon tsuyu*
    • 4 bricks fresh or frozen udon noodles can substitute dried Sanuki Udon
    • 1-2 green onion thinly sliced
    • Shichimi togarashi

    Udon Tsuyu

    • 6 cups dashi
    • 1/2 cup mirin
    • 1/2 cup Usukuchi soy sauce light soy sauce
    • 1/2 - 1 teaspoon salt or to taste

    Instructions

    Tsuyu

    • Prepare broth and keep warm.

    Beef

    • Combine sake, sugar and soy sauce in a bowl and stir well. Add beef and mix together, coating meat well. Marinade beef for 10 minutes.
    • Preheat dry non-stick skillet or well seasoned wok/iron skillet. If including onion, saute onion slices just until soft before adding the beef. Add beef and marinade to skillet. Spread beef in skillet to cook evenly. Cook over high heat until beef has lost its pinkness and most of liquid has evaporated, approximately 5 minutes. Remove from heat and set aside.

    Udon Noodles

    • Bring large pot of water to a boil. Add each packet of noodles. gently spread noodles out. When water comes back to a boil, the noodles are done. Drain well and divide among bowls.
    • Pour hot broth over noodles. Divide beef among bowls, garnish with green onions and shichimi togarashi. Serve immediately.
    Two Pho-One Deal (Pho Ga Noodle Soup & Chicken Noodle Salad)

    Two Pho-One Deal (Pho Ga Noodle Soup & Chicken Noodle Salad)

    Last week I posted a teaser on Instagram and FB of a really quick version of Pho Ga, Vietnamese chicken rice noodle soup. “In less than an hour, you will be sitting down to a steaming hot, delicious bowl of noodles. Recipe post tonight!”

    Sorry, stuff happens and I am a procrastinator by nature.  Tonight is NOW, finally (my humble opinion, worth the wait).

    I found the recipe for the quick and easy Pho in the Los Angeles Times.  I LOVE that paper.  When I lived in LA I religiously read the Wednesday Food Section (sometimes the front page but never the sports page-my dislike for the Dodgers never waned).  Some of my favorite recipes and stalwarts in my repertoire are from the LA Times.  I’m adding not only this Pho Ga Soup but a little gem that was tagged onto the end, a delicious chicken noodle salad, Phở Gà Trộn, made from the same ingredients, soooo good.  I almost like it more than the Pho Ga.  You can find the recipe and notes for Pho Ga Tron HERE.  Both recipes are from Andrea Nguyen, Asian cookbook author extraordinaire.

    Back to the Pho Ga.  Aside from going out to your favorite hole in the wall for pho, making pho at home is a weekend project. Making it after a long commute, on a weekday, ridiculous!  But a couple of shortcuts and whaddya know…nothing better than a delicious bowl of noodles after a horrendous commute.

    Shhhh…The secret is to start with pre-made broth.  If you have homemade-grrrrreat, if not, low sodium canned or boxed broth works well. Toasted coriander seeds, green onions, and ginger are added to the broth along with chicken, cilantro stems and salt. While the broth simmers for about 20 minutes, prep your noodles and garnishes.  Boom, you have just doctored stock into a perfectly respectable, delicious, chicken soup for pho.  For garnishes, I usually have cilantro, mint, green onions or Thai basil and limes on the table.  Don’t forget to put out the Siracha and Hoisin Sauce!

    Quick Chicken Pho (phở gà nhanh)

    Course Main Course, Soup
    Cuisine Asian
    Keyword Pho Ga
    Prep Time 10 minutes
    Cook Time 25 minutes
    Total Time 35 minutes

    Ingredients

    • 3⁄4 inch piece ginger
    • 2 medium-large green onions
    • 1 bunch cilantro sprigs
    • 1 1⁄2 teaspoons coriander seeds
    • 1 whole clove
    • 3 1⁄2 to 4 cups low-sodium chicken broth
    • 2 cups water
    • 2 6- to 8-ounce boneless, skinless chicken breast or thigh reserve one for noodle salad
    • 1⁄2 teaspoon fine sea salt
    • 5 ounces dried narrow flat rice noodles such as banh pho, rice stick or pad Thai noodles
    • 2 to 3 teaspoons fish sauce
    • 1⁄2 teaspoon organic sugar or 1 teaspoon maple syrup (optional)
    • Pepper optional
    • 1/4 thinly sliced red onion optional for broth
    • 2-3 dried shiitake mushrooms optional for broth

    Garnishes

    • sliced green onions
    • chopped cilantro
    • Thai basil leaves leave on stem
    • fresh mint leave on stem
    • bean sprouts
    • lime wedges

    Instructions

    • Peel then slice the ginger into 4 or 5 coins. Smack with the flat side of a knife or meat mallet and set aside. Thinly slice the green parts of the green onion to yield 2 to 3 tablespoons, and set aside to use as a garnish. Cut the leftover sections into 2- to 3-inch lengths, bruise, then add to the ginger.
    • Coarsely chop the leafy tops of the cilantro to yield 2 tablespoons; set aside to use as a garnish. Set the remaining cilantro sprigs aside.
    • In a 3- to 4-quart pot, toast the coriander seeds and clove over medium heat until fragrant, 1 to 2 minutes. Add the ginger and bruised green onion sections. Stir until aromatic, about 30 seconds.
    • Remove the pot from heat for about 15 seconds to briefly cool, then pour in the broth. Add the water, cilantro sprigs, chicken, and salt. (optional, add mushrooms and red onions) Bring to a boil over high heat, then immediately then lower the heat to gently simmer for 20-25 minutes.
    • While the broth simmers, soak the rice noodles in hot water until pliable and opaque. Drain, rinse, and set aside.  Test your noodles, they should be soft and pliable but still have a slight bite.
    • After 10-12 minutes of simmering, the chicken should be firm and cooked through (press on it and it should slightly yield). Transfer the chicken to a bowl, flush with cold water to stop the cooking, then drain. Set the chicken aside until cool enough to handle, then shred into bite-size pieces. You will only need 1 chicken breast for the soup.  Reserve second one for noodle salad. If you don't plan on making the salad, use only 1 piece of chicken. 
    • When the broth is done simmering, strain it through a fine-mesh strainer into a medium pot.  Discard the solids. You should have about 4 cups broth. Season with fish sauce and sugar, if needed, to create a strong savory-sweet note. If using red onion you may not need sugar.
    • Bring the strained broth to a boil over high heat. Put the noodles in a noodle strainer or mesh sieve and dunk in the hot broth to heat and soften, 5 to 60 seconds. Lift the noodles from the pot and divide between the 2 bowls.
    • Reduce the heat to keep the broth hot while you arrange the chicken on top of the noodles and garnish with the chopped green onion, cilantro, and a sprinkling of pepper. Taste for seasoning. Return the broth to a boil and ladle into the bowls.
    • Extra broth can be refrigerated or frozen. You will need 1/2 cup of broth for the noodle salad.

    Notes

    Each serving: Calories 457; Protein 33 grams; Carbohydrates 70 grams; Fiber 2 grams; Fat 6 grams; Saturated fat 1 gram; Cholesterol 72 mg; Sugar 2 grams; Sodium 1,363 mg