Category: Recipes

Recipes I’ve tried and sometimes modified that I think you should try!

Game of Scone: The Tea Wedding

Game of Scone: The Tea Wedding

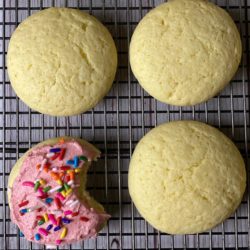
My go-to scone recipe is an adaptation of Dorie Greenspan’s Cream Scone.  I love these and have made countless of variations using dried fruit, fresh fruit, citrus peel.  It is my go-to scone recipe.  Her scones are buttery, sweet, and tender.  I often throw in dried wild blueberries and lemon zest or during the summer, bits of fresh ripe peaches.  Scrumptious.  There is enough sweetness and moisture that these scones can be eaten without accouterments. But feel free to slather a bit of butter and jam on them if you like.  They are little triangles of buttery perfection, but…

They’re just not English Tea Scones

I love High Tea, almost as much as I love having a hot dog with all the fixings at a Giant’s baseball game.  The boys and I went to Hong Kong before COVID and High Tea at the Peninsula Hotel in Hong Kong (think Crazy Rich Asians) was on our bucket list.

I savored the entire experience-the surroundings, the impeccable service, fine china, my boys in jackets and slacks, an array of delicious bite-sized morsels, and of course dainty tea scones with clotted cream and jam.  It was scrumptious.

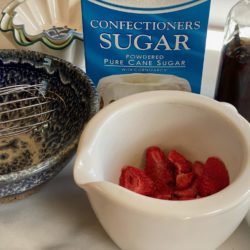
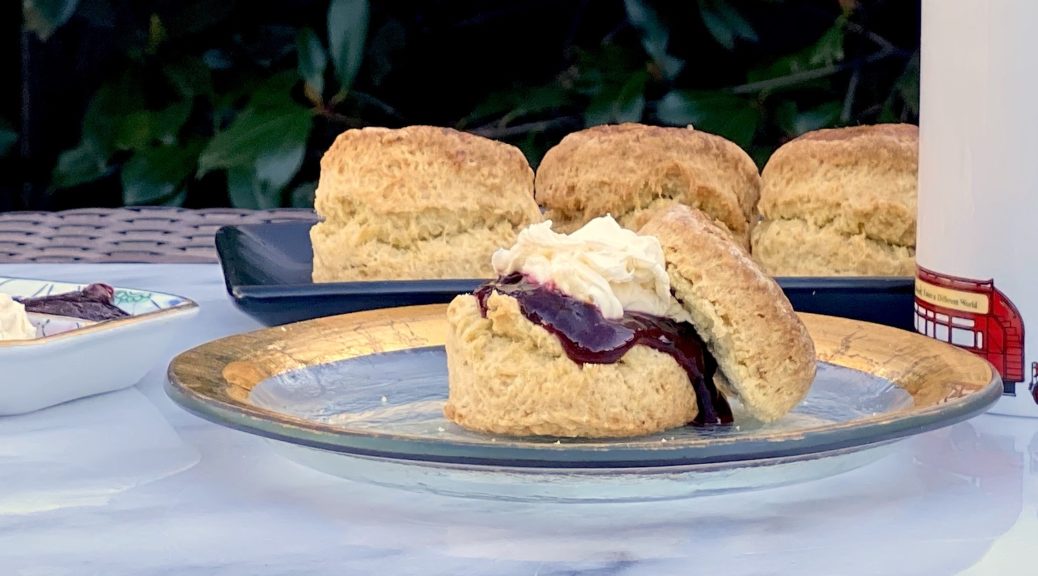
Lady and Her Pups’ meticulous recipe for Classic English Scones popped up on my feed, I knew I had to try them.  Her video and blog post for her scones are so detailed, you can’t go wrong.  The texture of her scones is spot-on, light, and crumbly the perfect foil for clotted cream and jam.  With that first bite, I found myself sitting at the Peninsula with the boys leisurely sipping on a cup of hot Darjeeling Tea, savoring my scone with clotted cream and strawberry preserves.Ingredients for English Tea Scones

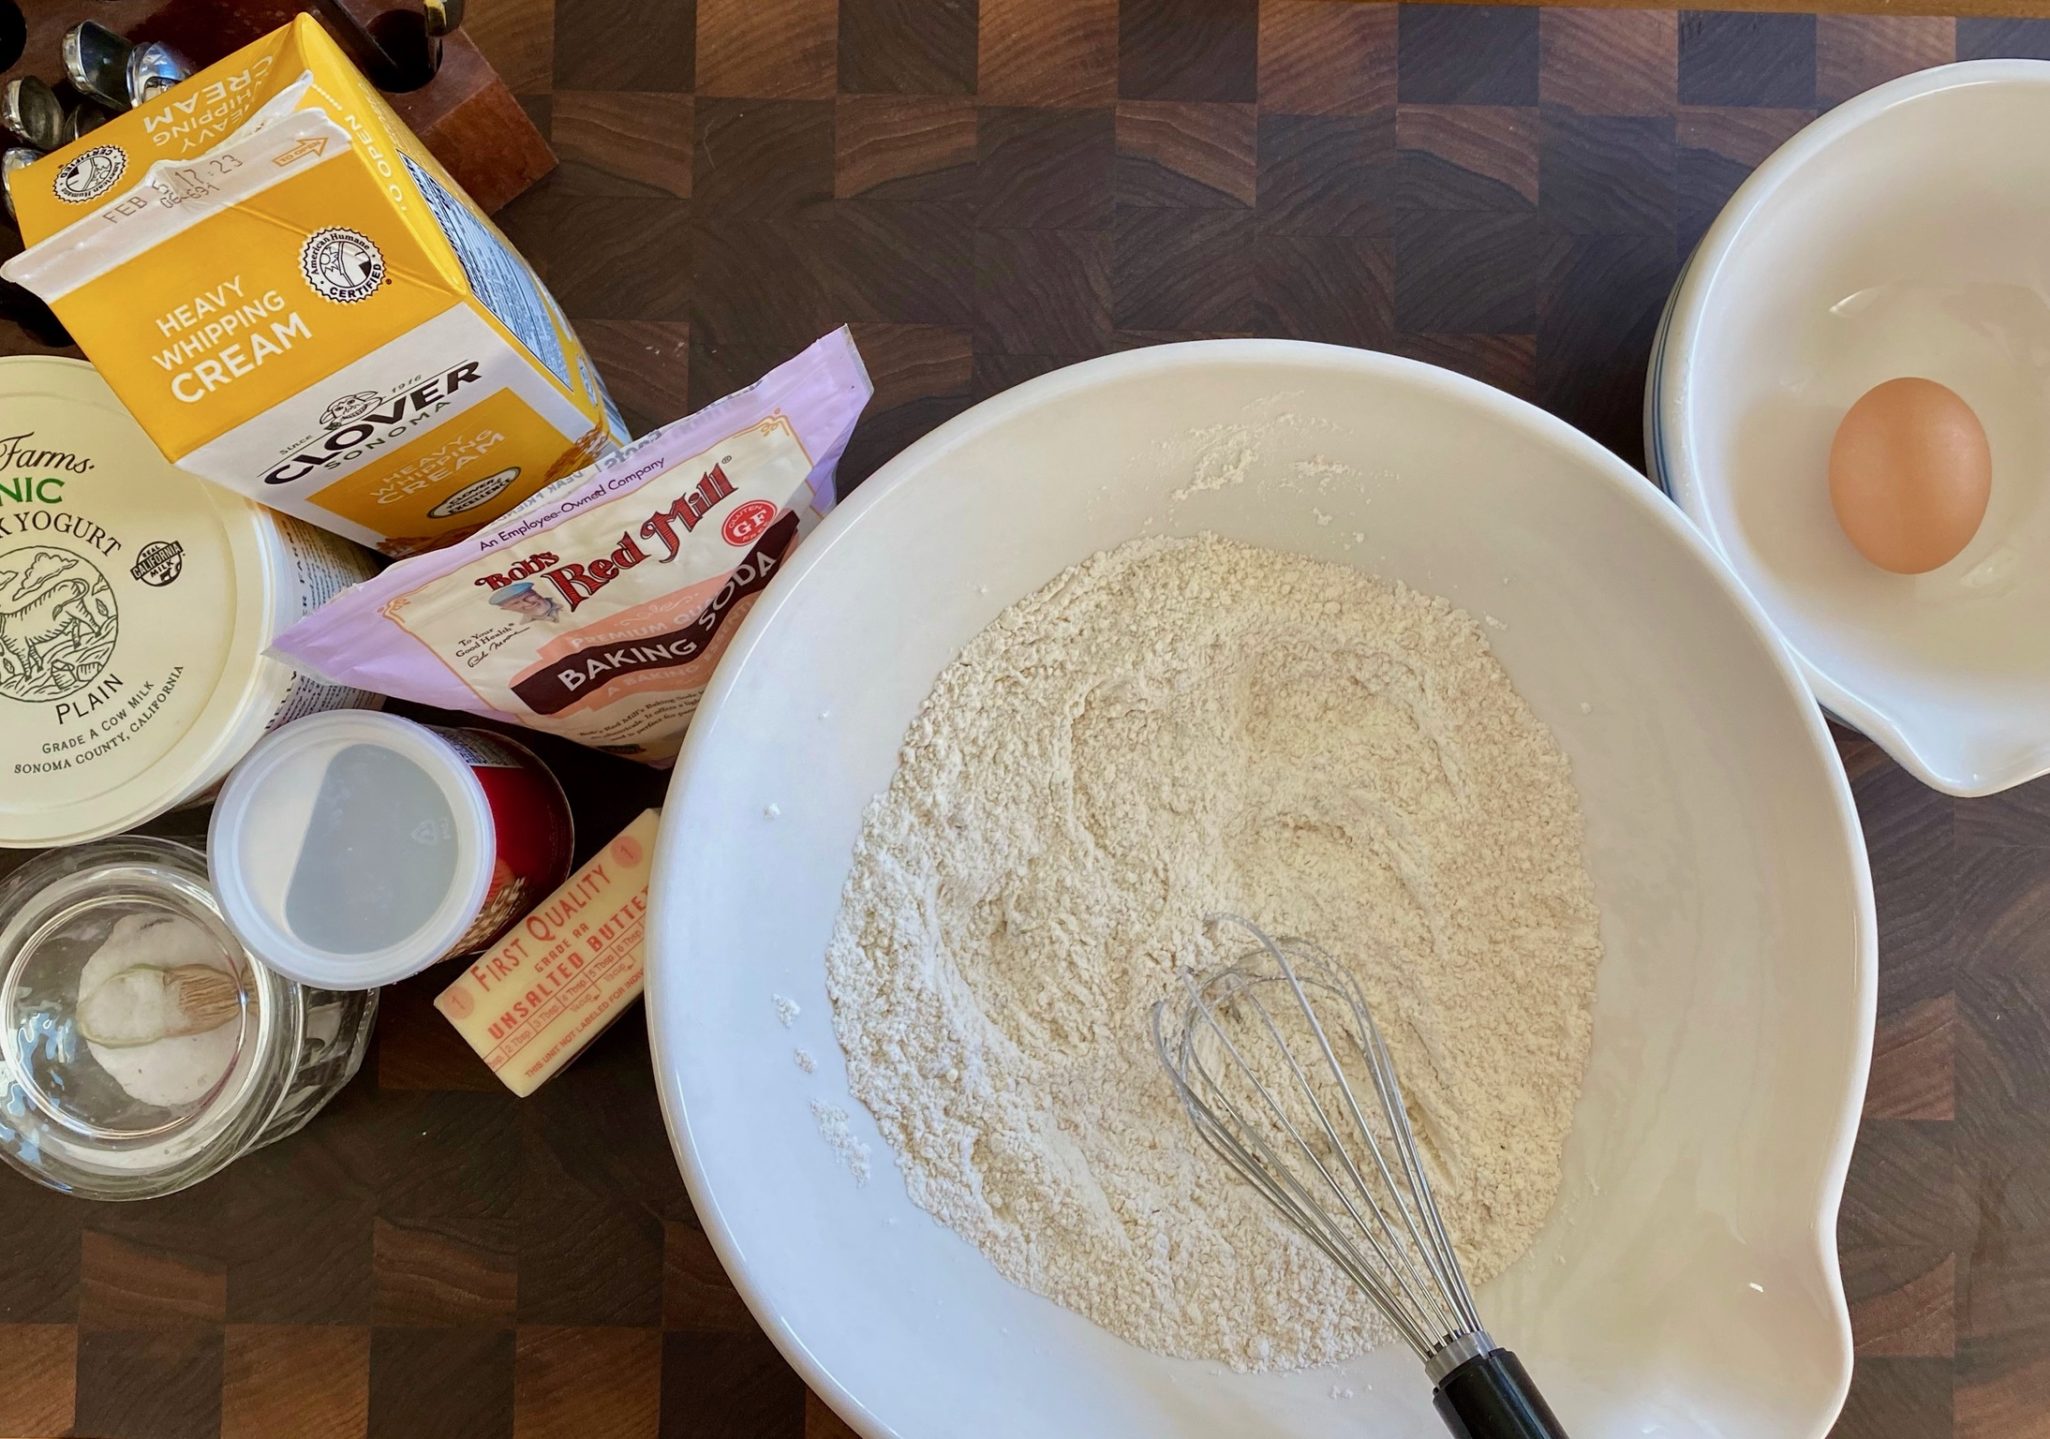
Game of Scones: The Rules

I encourage everyone to watch the video on how to make these scones but if you don’t…here are the highlights…

English scones are not as buttery and a little drier than American scones.  Why? Because you are going to slather copious amounts of clotted cream or butter, jam, or lemon curd on your English scones, Silly.

Brown sugar adds both flavor and color.  Substitute granulated sugar for the brown sugar for a lighter-colored scone.

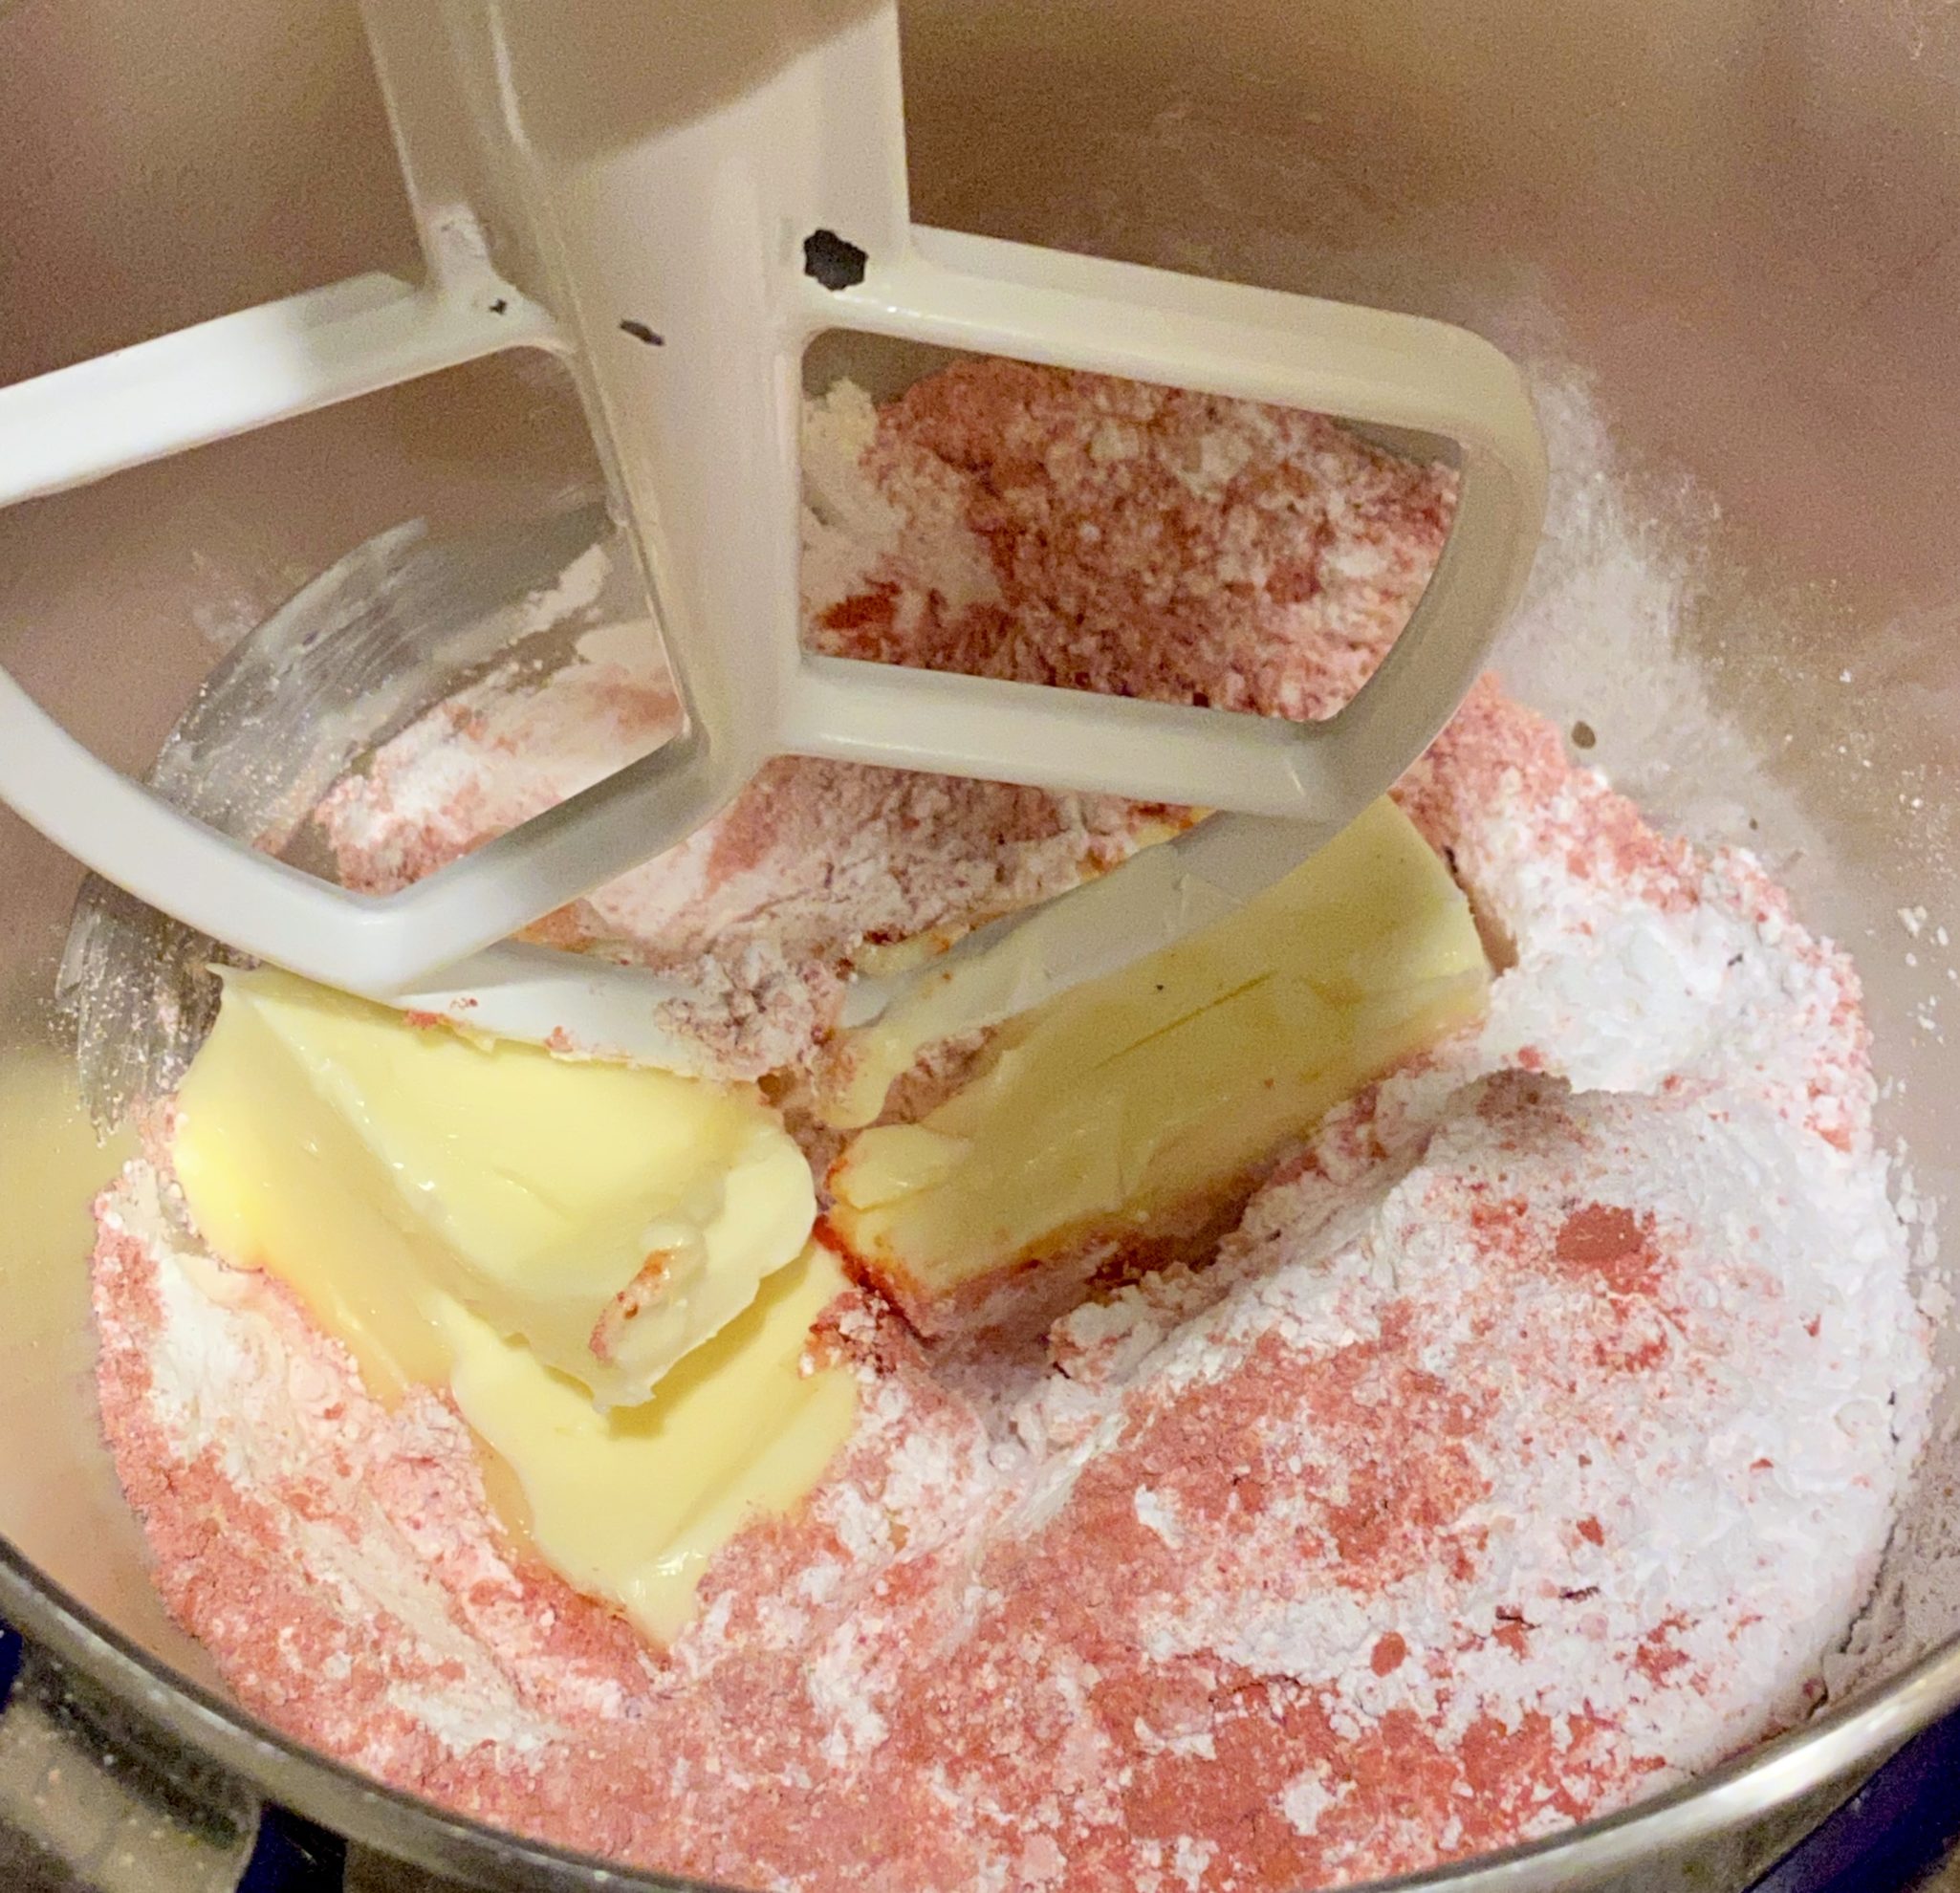
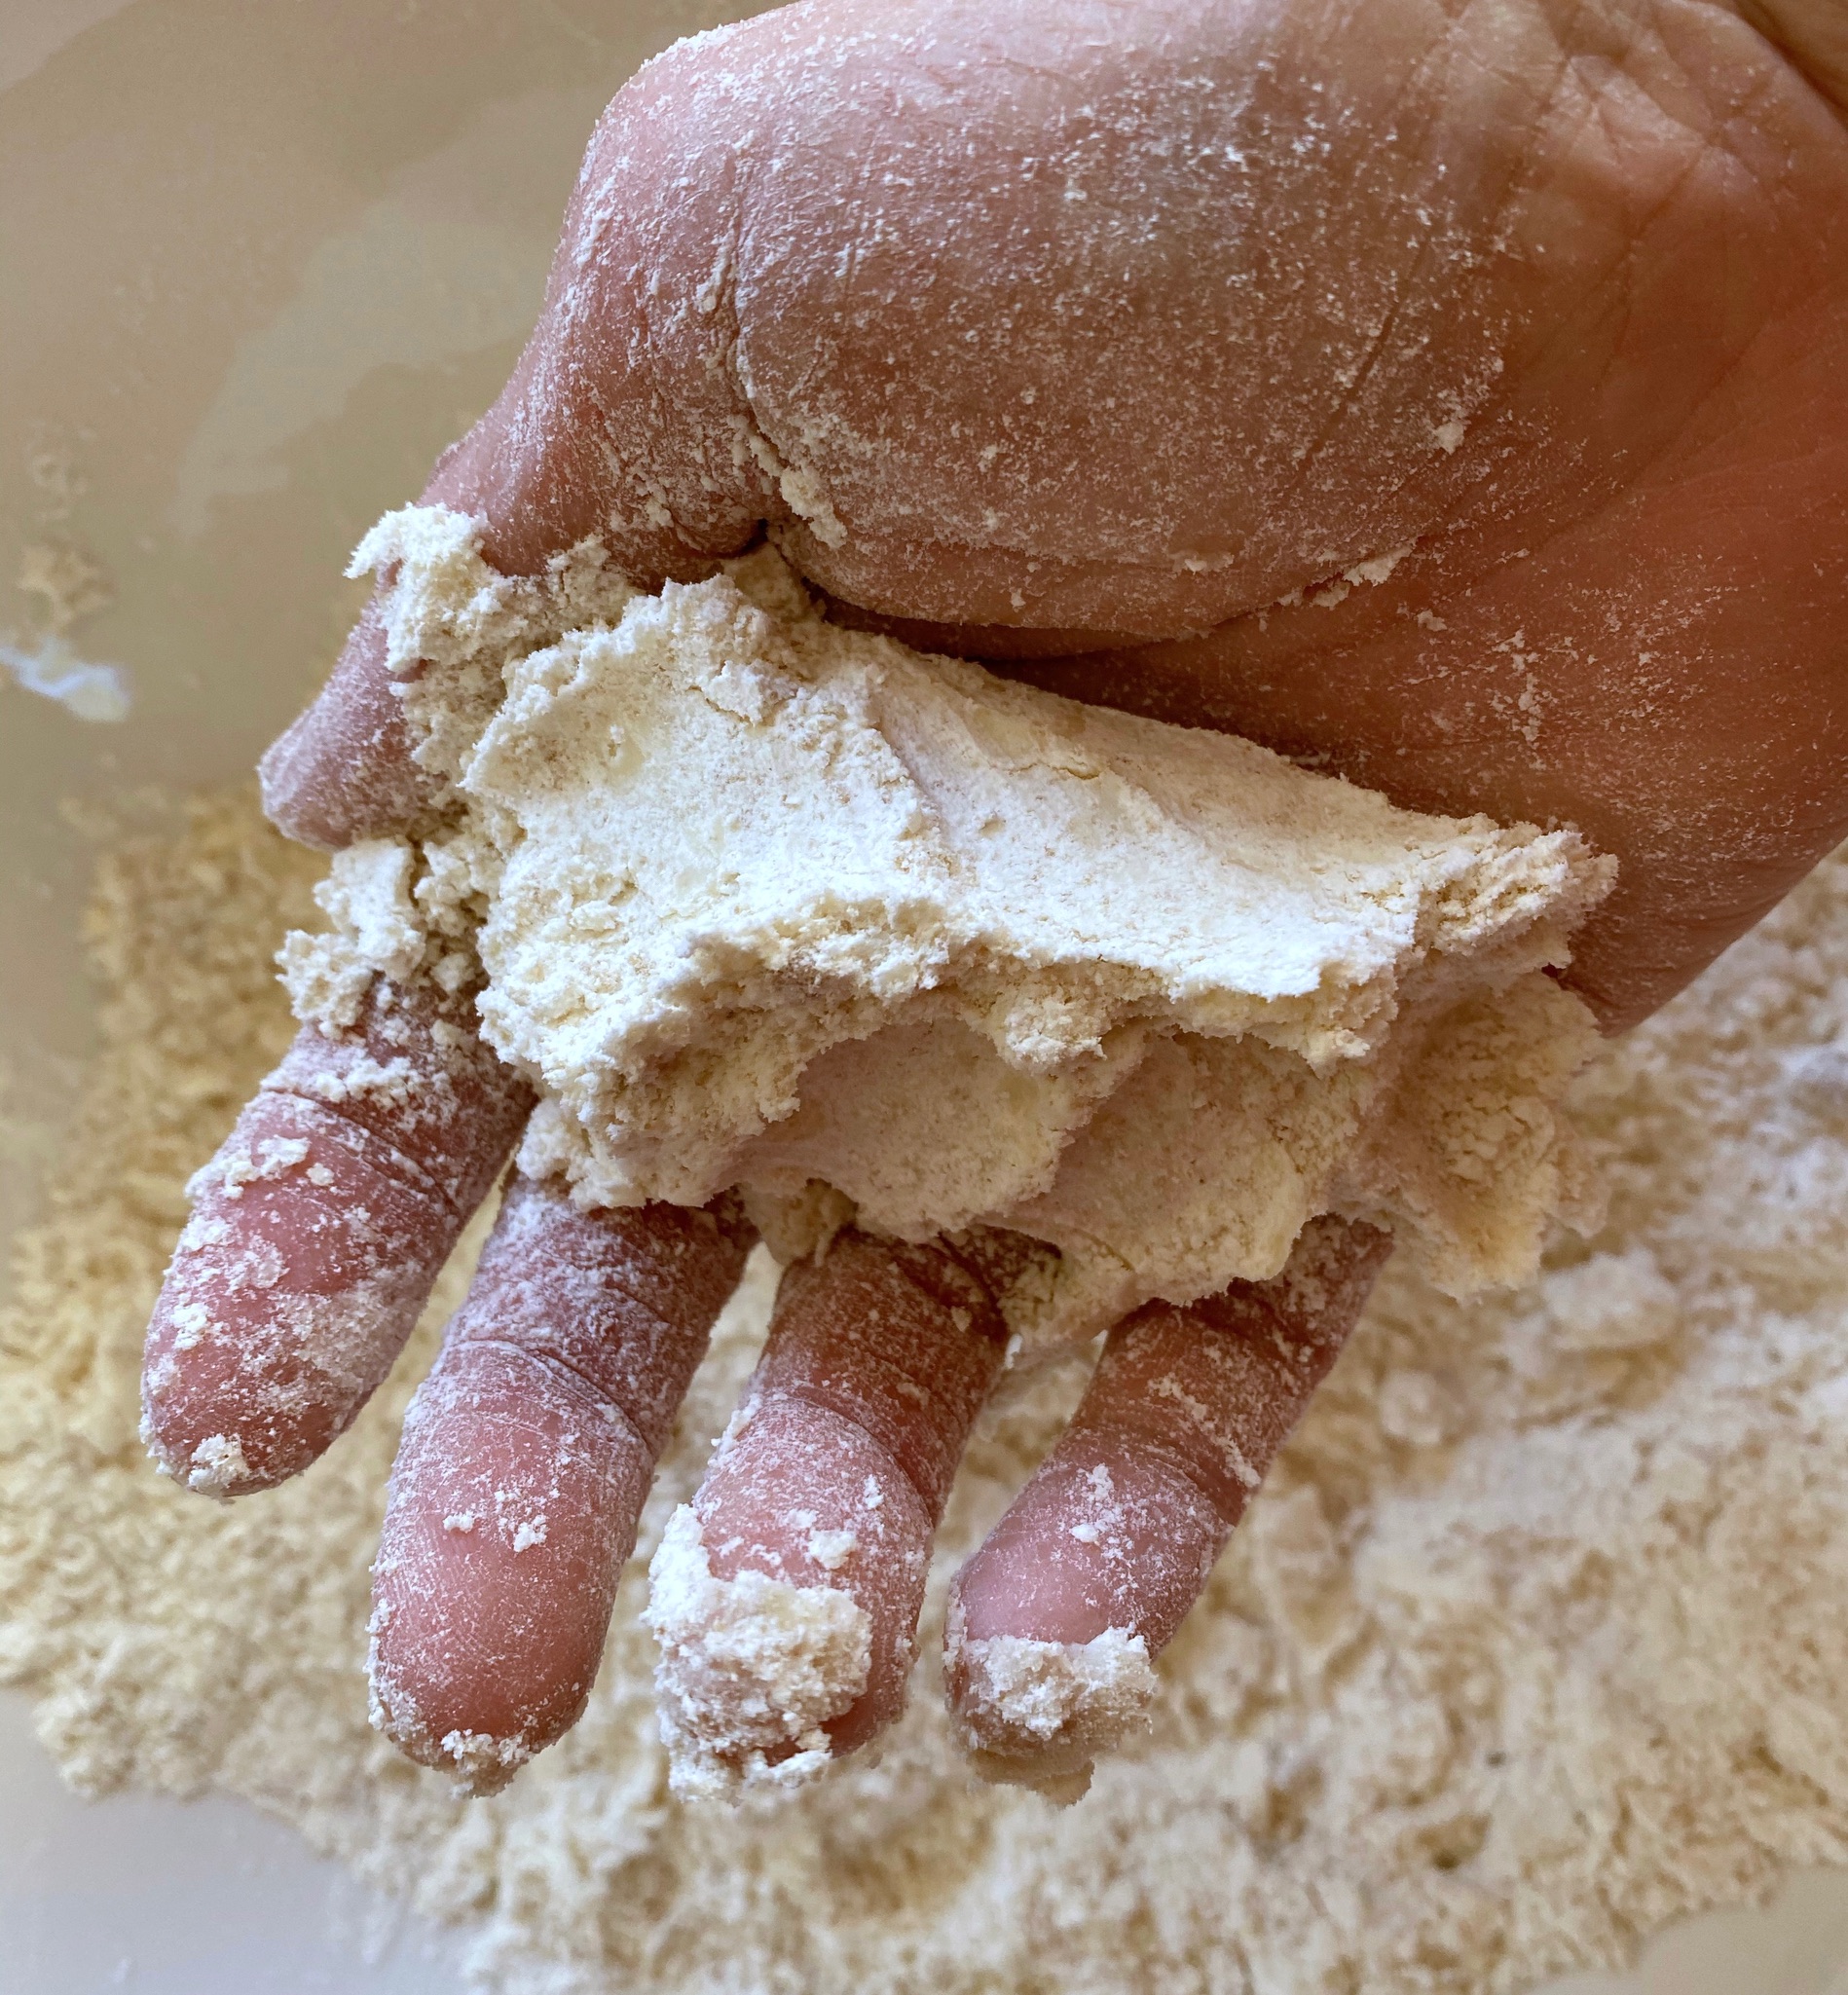
Work in the butter, you should not have any pea-size bits of butter, mixture should resemble a coarse meal.

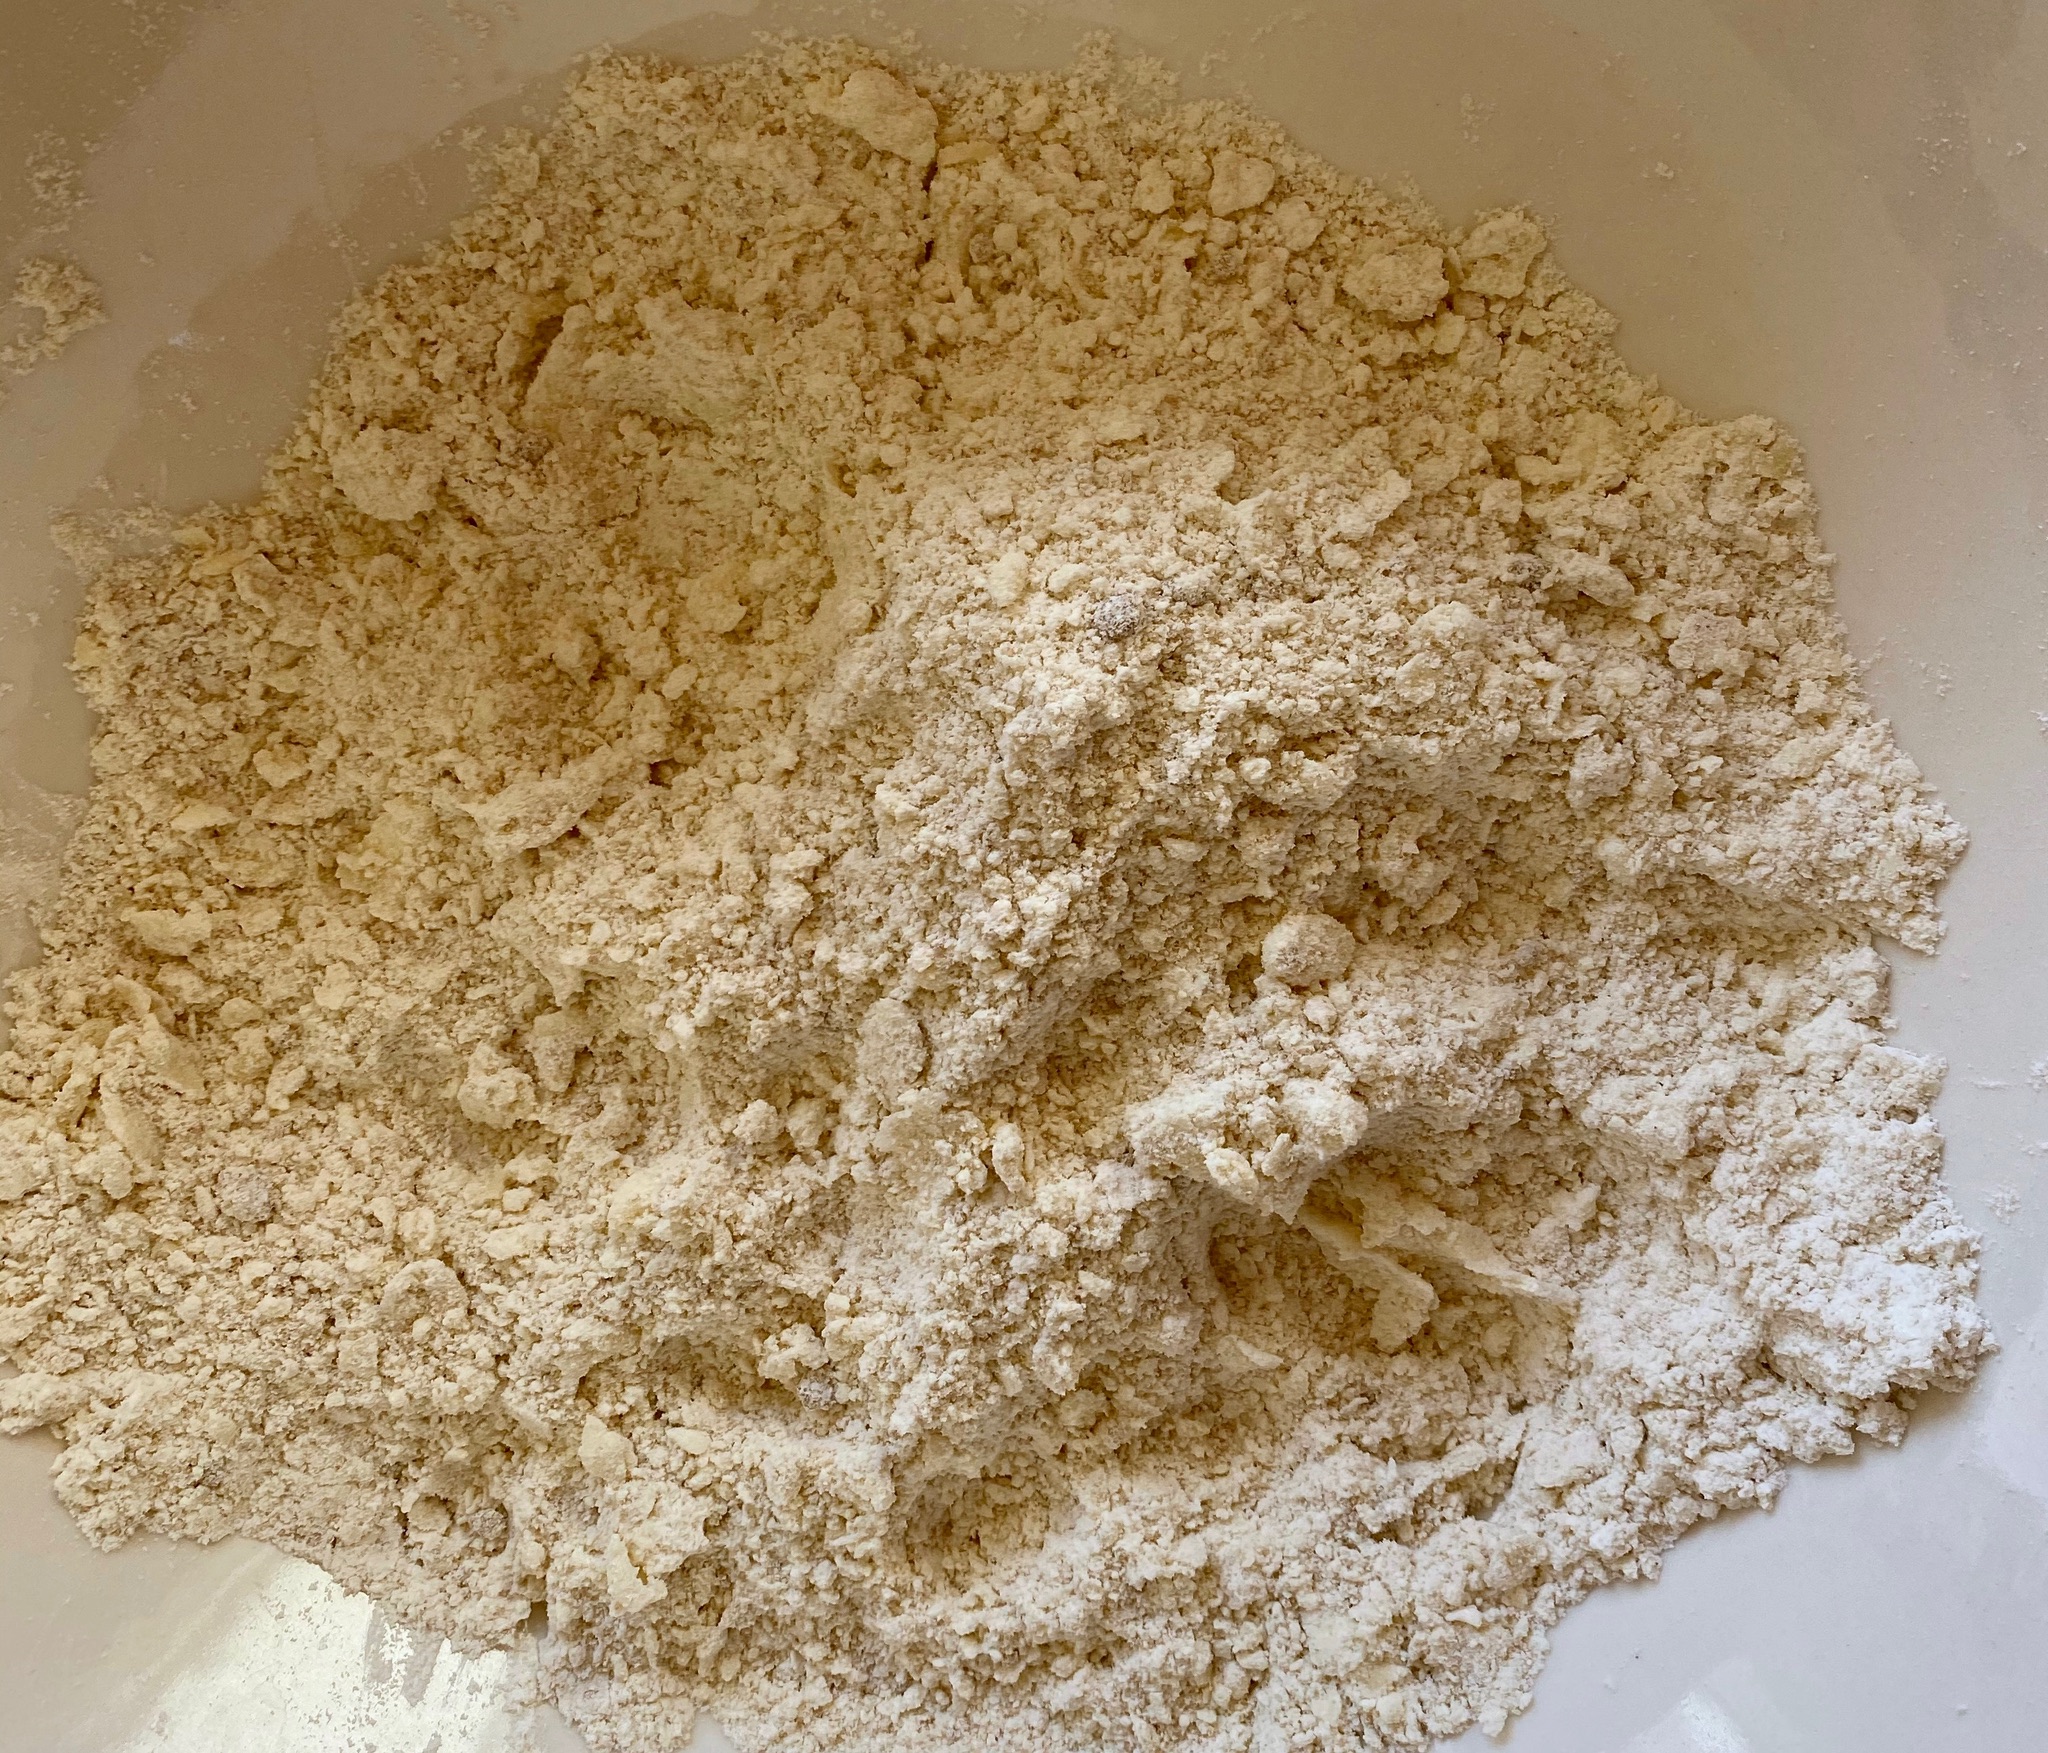
Squeeze the flour-butter mixture together, if it clumps you are ready to add the liquid.

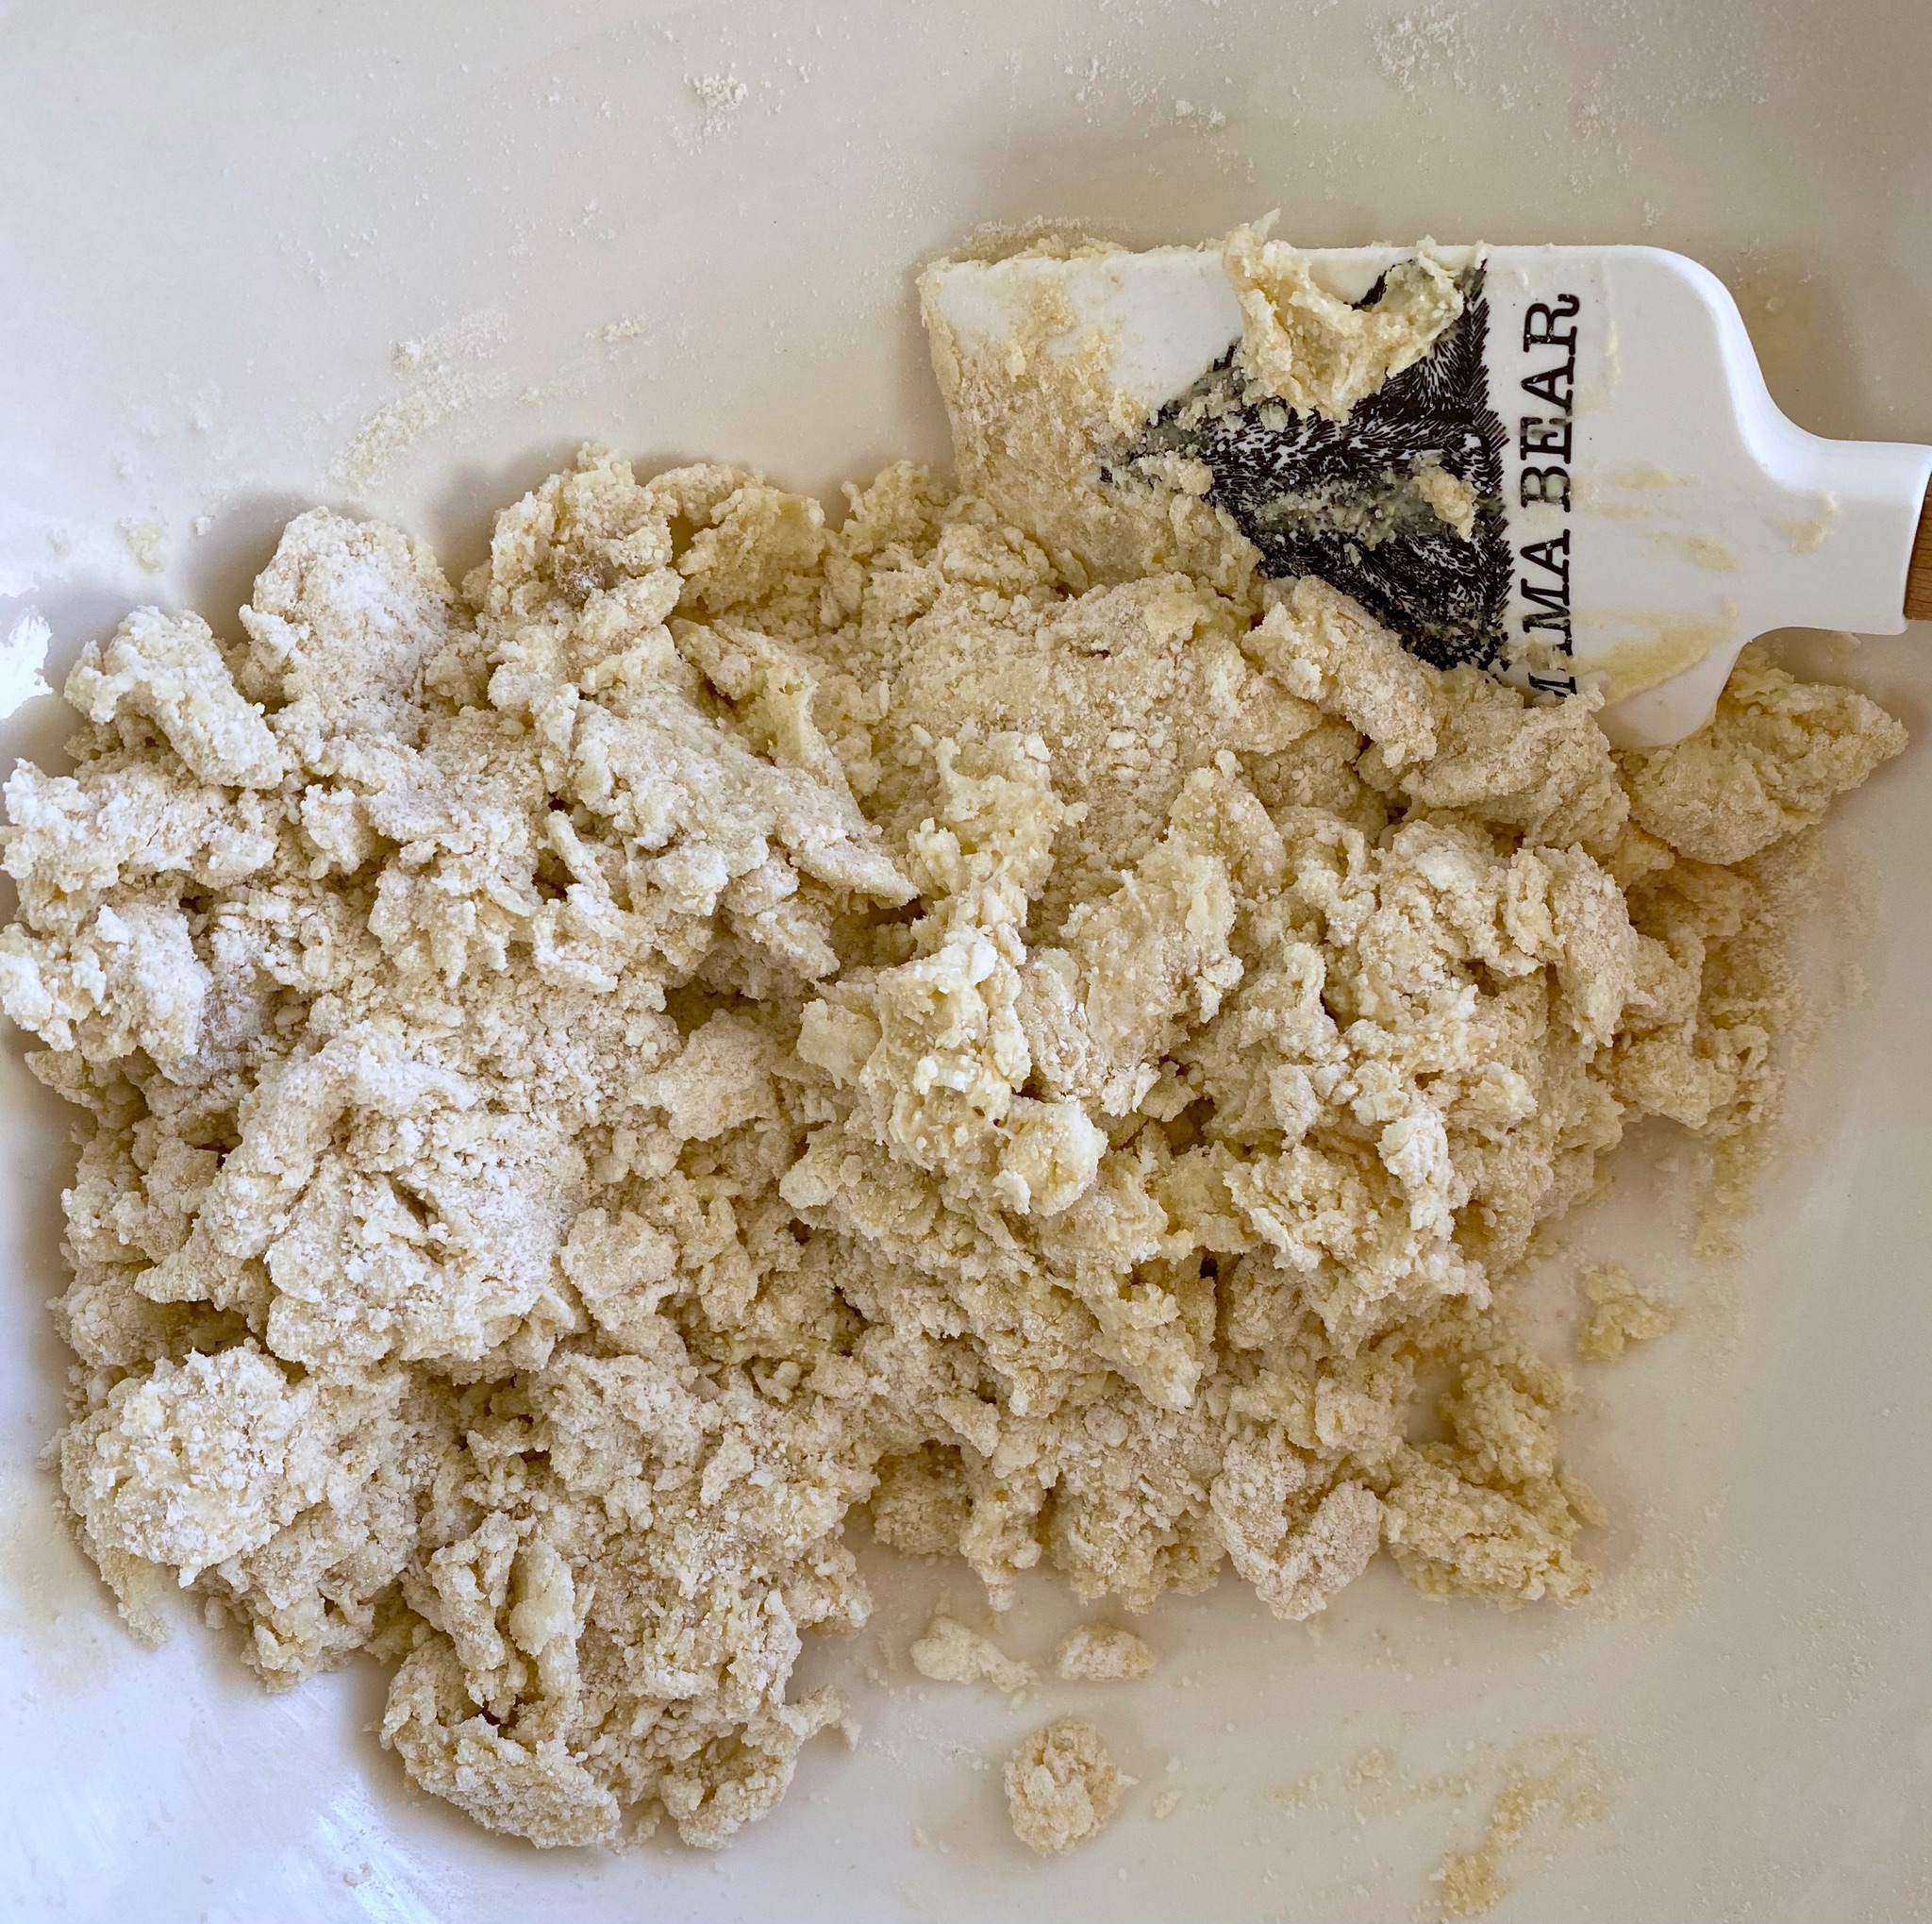
A combination of heavy cream and yogurt is used as the liquid this provides moisture and fat.  More butter would weigh down the dough.  The dough will be shaggy after adding the liquid ingredients.  It’s ok, it will come together as you knead the dough.

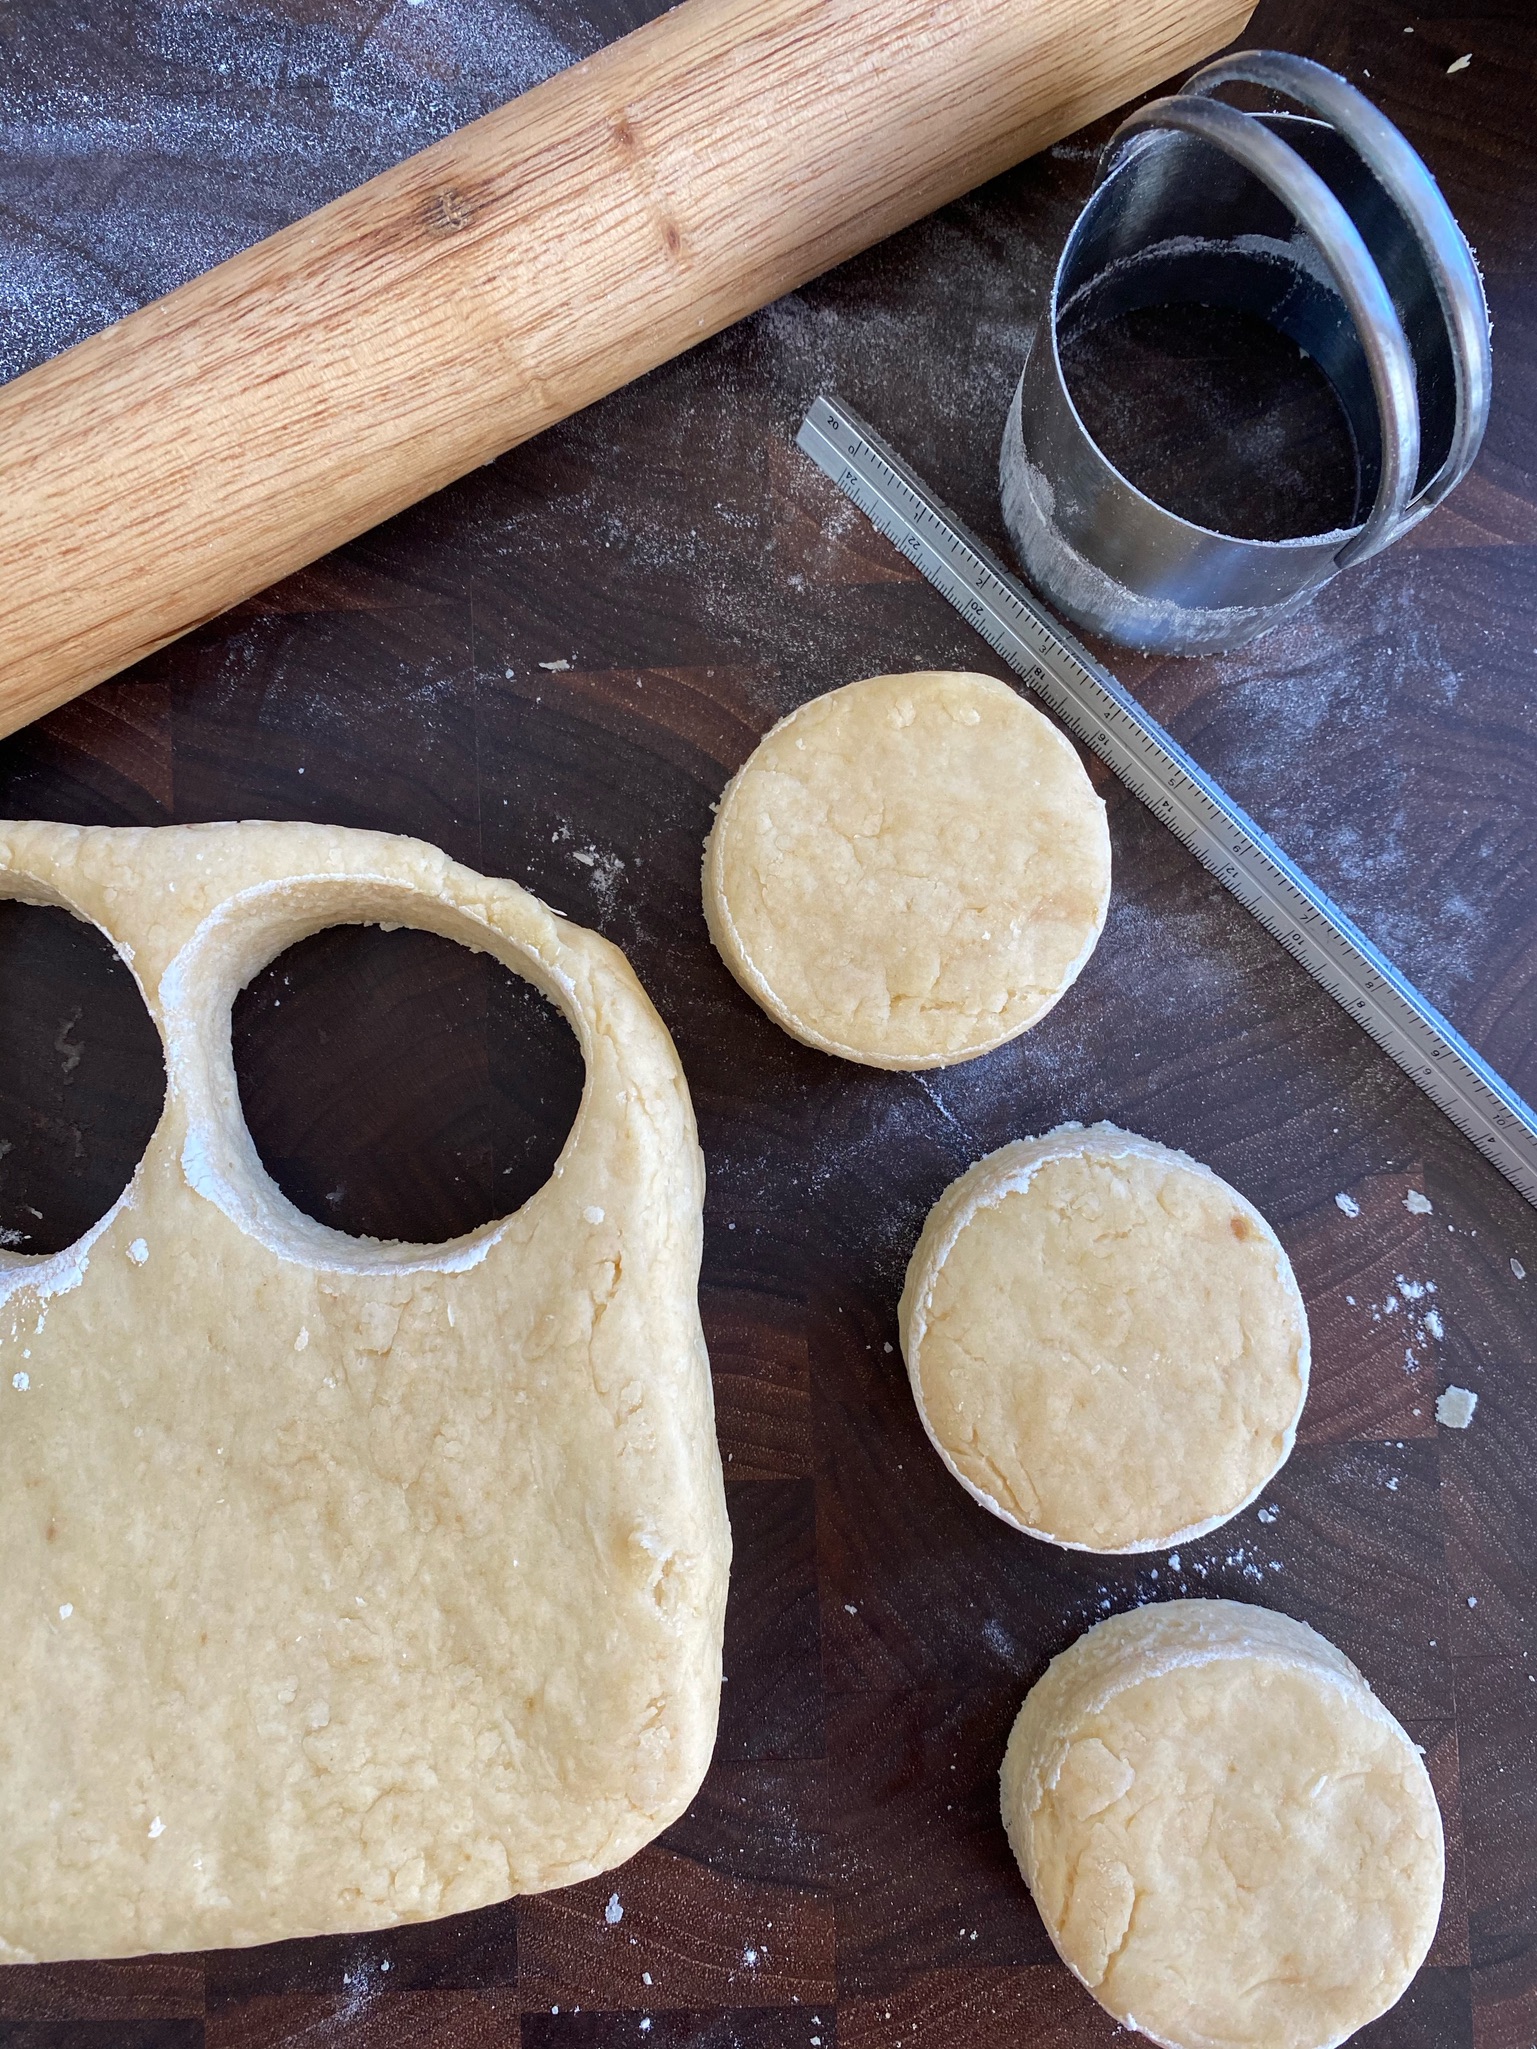
Roll dough to 1.125 inches thickness, any less and the scones will be too flat.

Keep scones small and dainty, use a cookie cutter no more than 2 inches in diameter.  When cutting, press down without twisting as that would cause the scone to rise unevenly.

The dough will need to rest before baking so the flour has time to absorb the liquid.

Double egg wash, the secret to shiny tops.

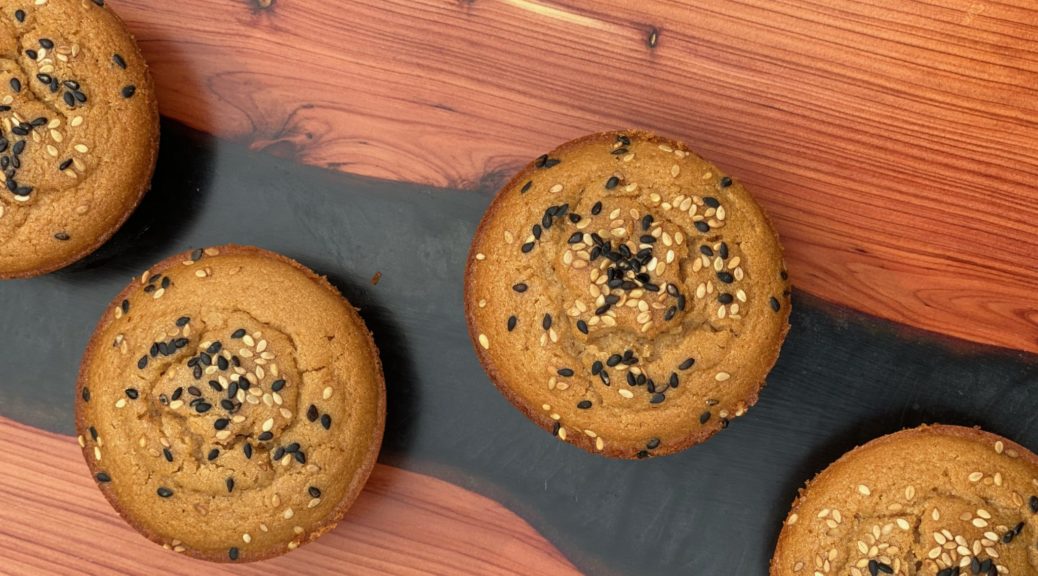
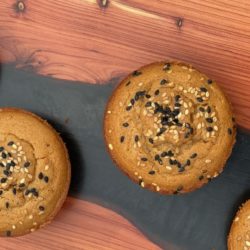
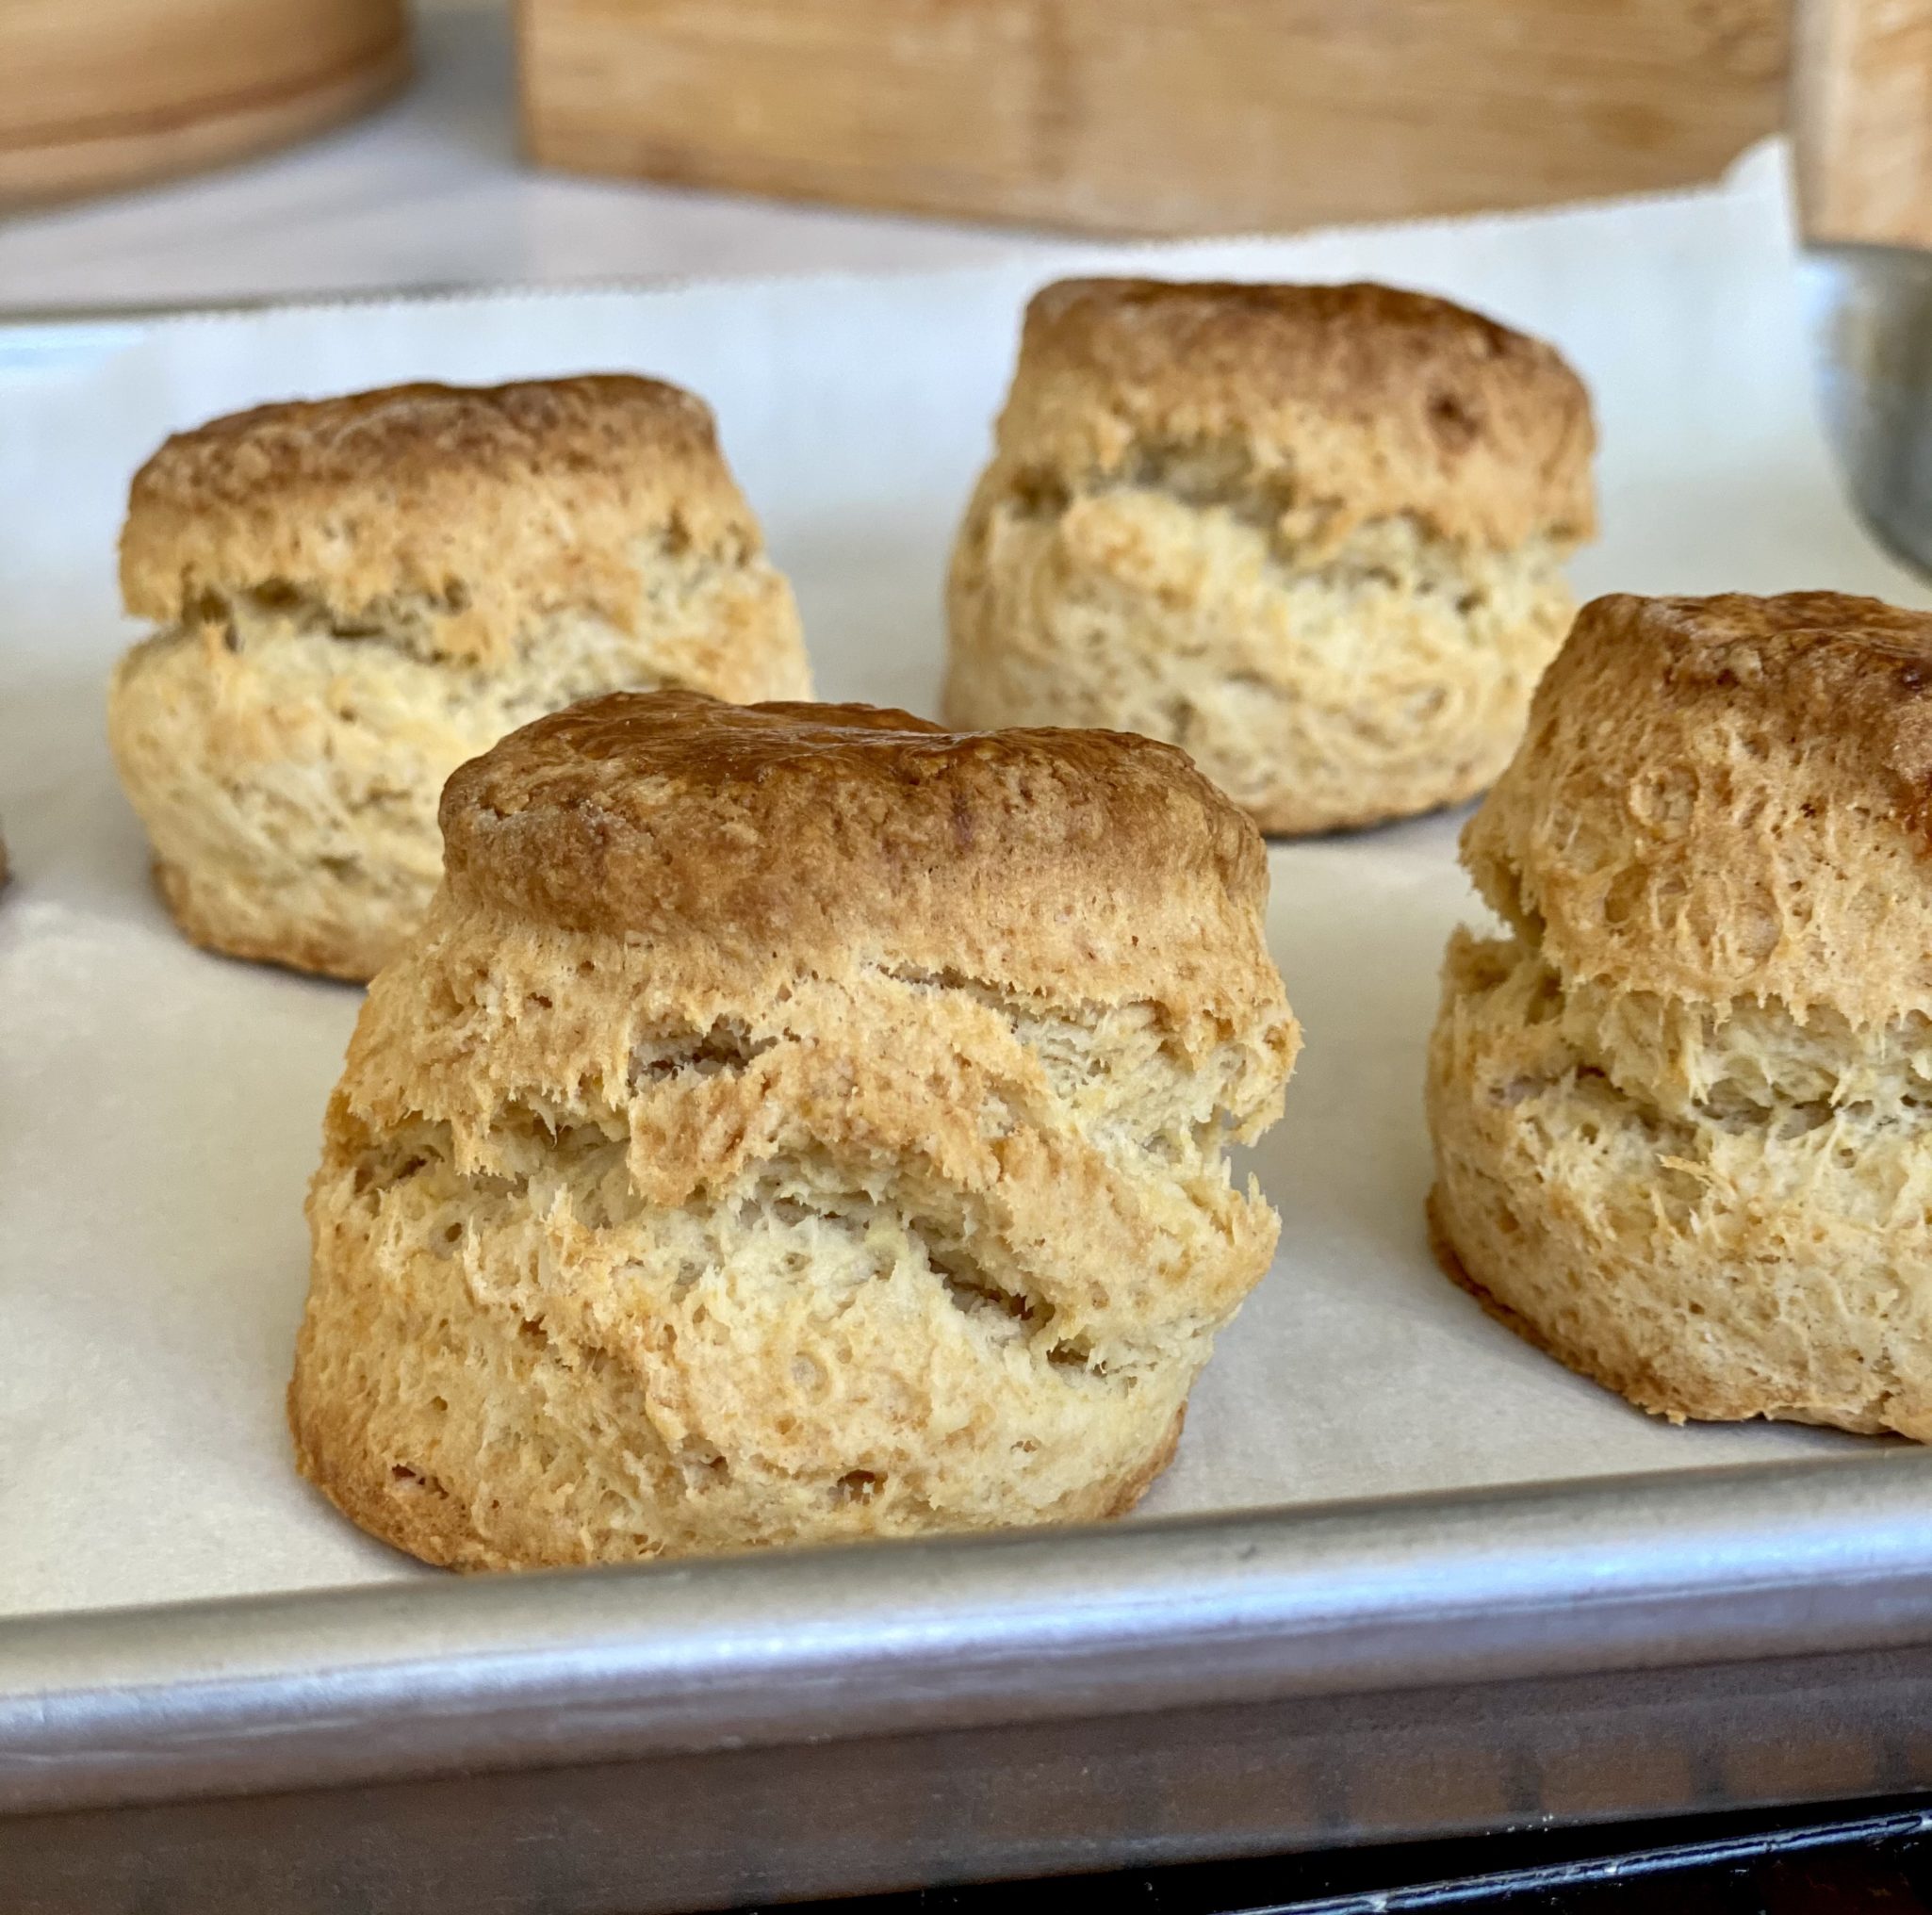
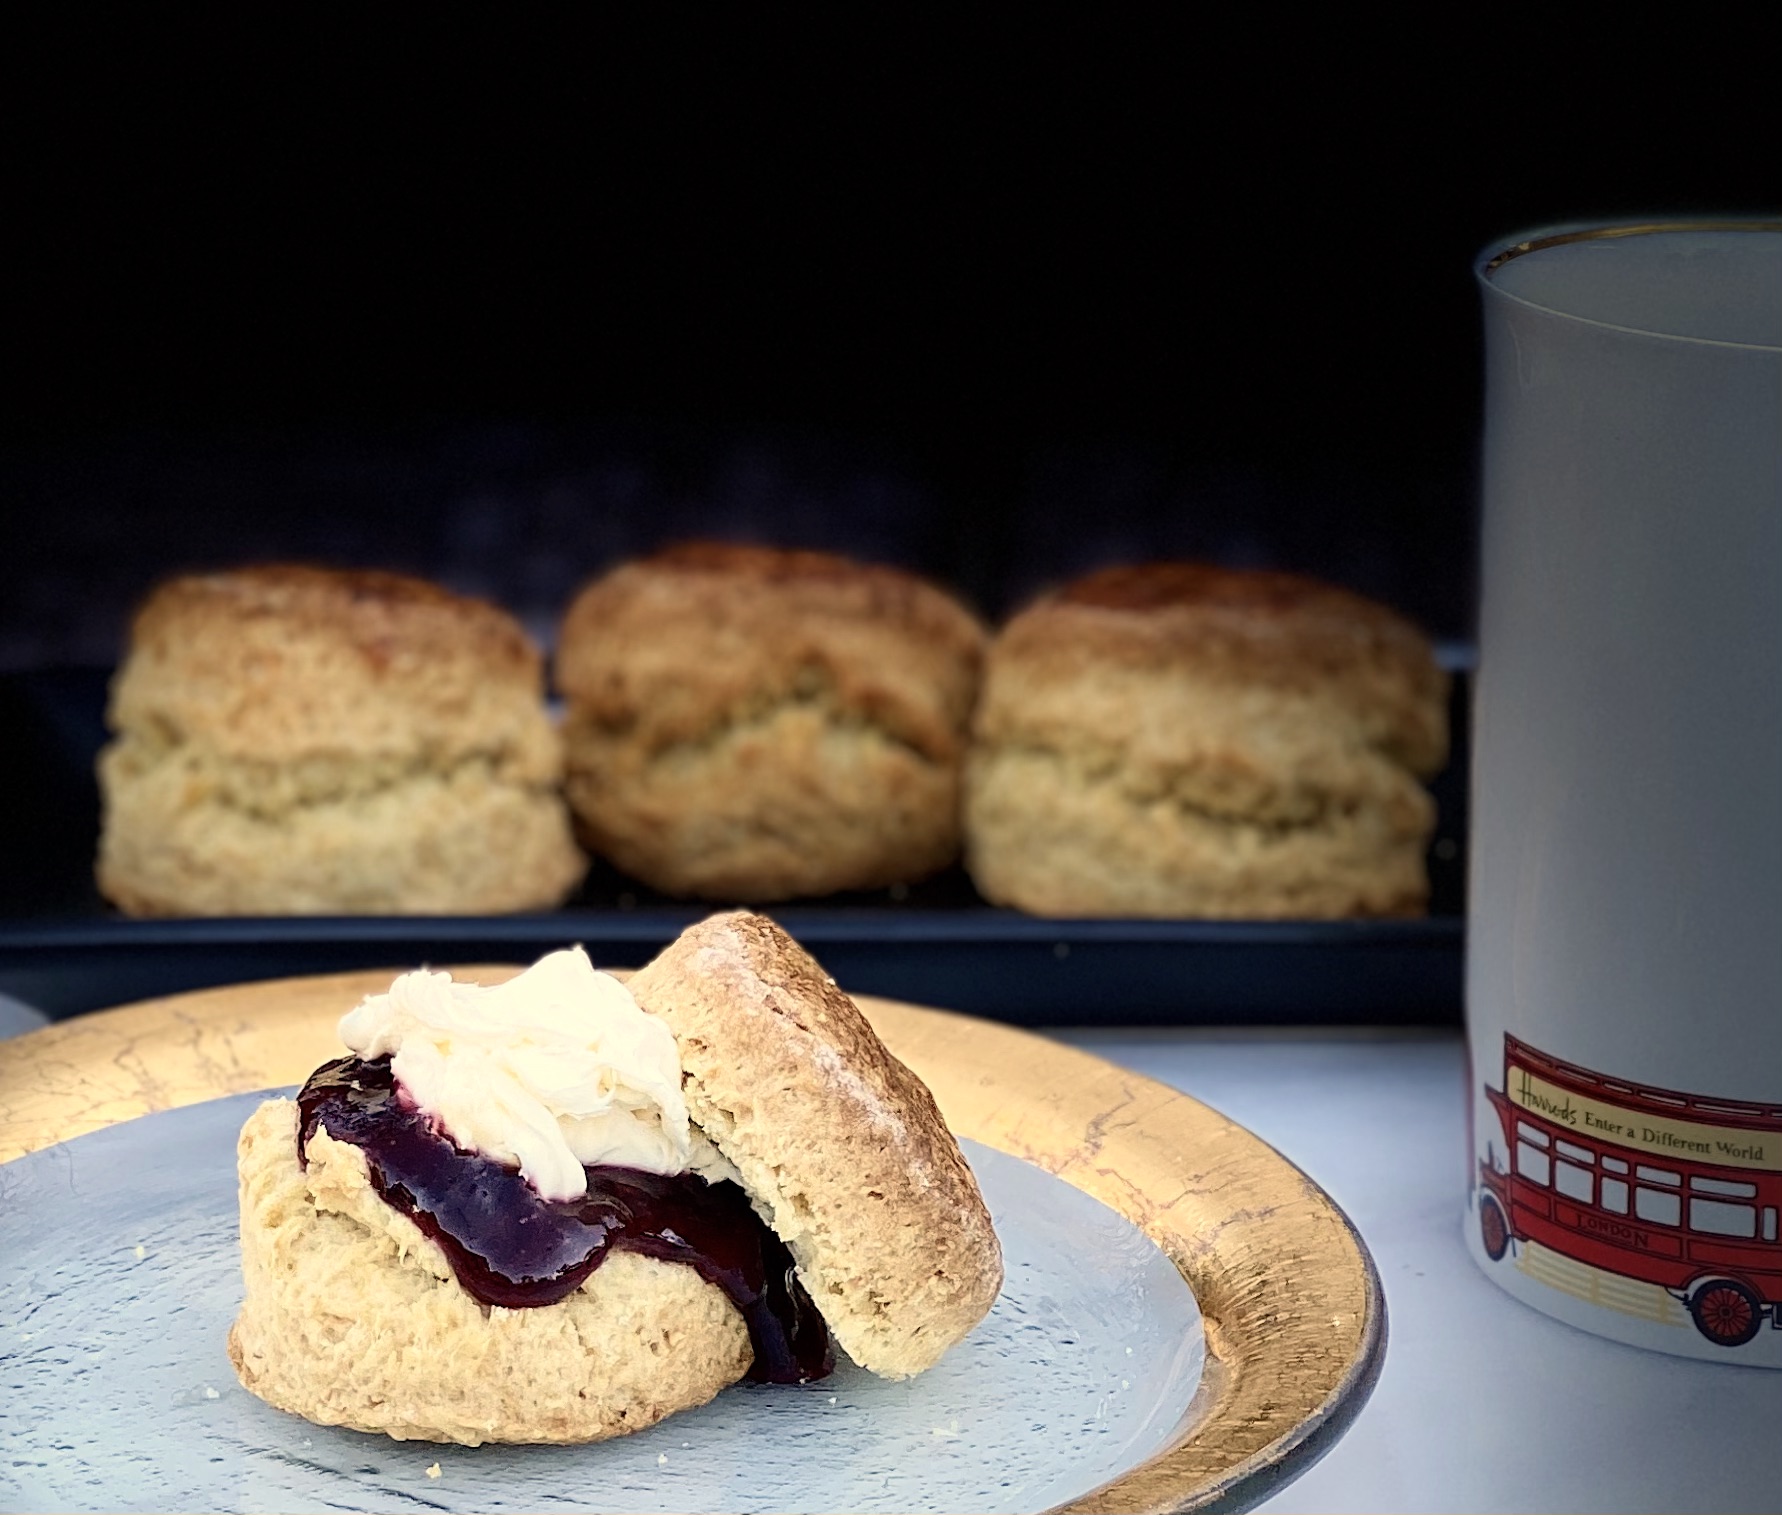
These scones should have a crack around the circumference (classic).  This is the perfect spot to split your scone.  Then get ready to spread the clotted cream and jam on both halves!  Yum!

Now go bake some scones!

English Tea Scones

Classic English Tea Scones from Lady and Her Pups
Course Biscuits and scones
Cuisine British
Keyword English Tea Scone, scone, Tea
Prep Time 30 minutes
Cook Time 15 minutes

Ingredients

WET INGREDIENTS

  • 1 large egg
  • 3 tbsp plain yogurt 45 grams, not Greek-style, regular
  • 3 tbsp heavy cream 44 grams

DRY INGREDIENTS

  • 2 cups AP flour 240 grams
  • 1 tsp baking powder
  • 1/4 tsp baking soda
  • 3 tbsp light brown sugar 40 grams. You can substitute granulated sugar
  • 1/2 tsp fine sea salt
  • 5 tbsp unsalted butter, diced 70 grams

Instructions

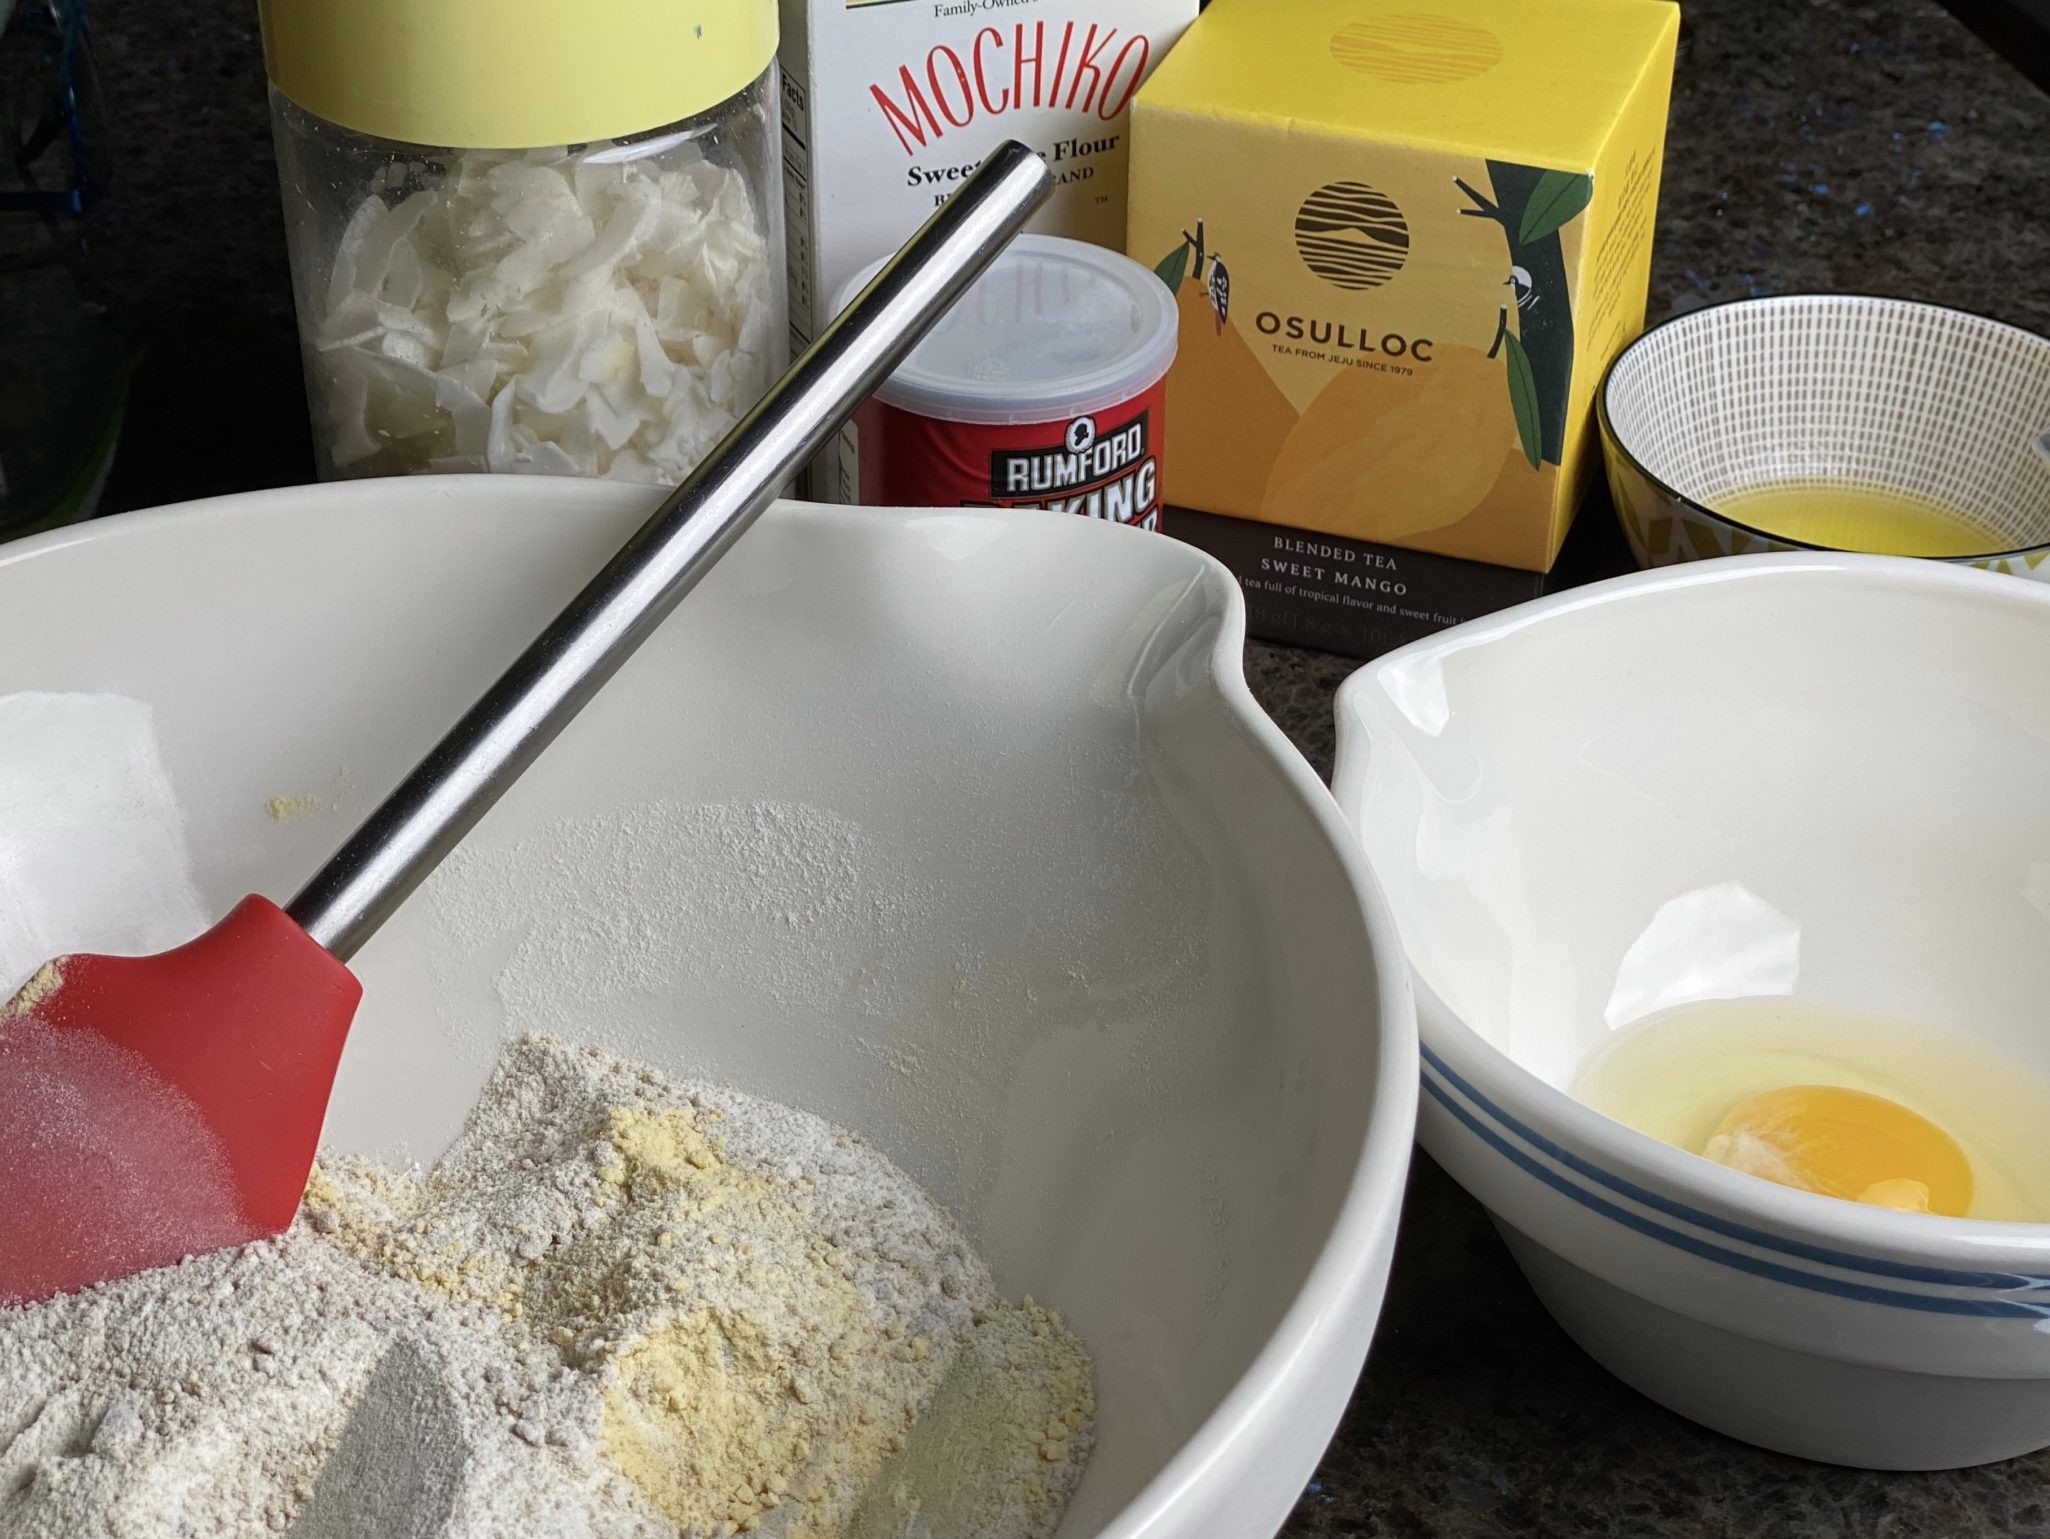
  • Crack the egg into a small bowl and whisk until smooth. Transfer 1 tbsp of the beaten egg into another cup and set aside. This will be the egg wash (do not add water). Then whisk the plain yogurt and heavy cream with the remaining egg until even. Set aside.
  • In a large bowl, whisk together flour, baking powder, baking soda, light brown sugar and fine sea salt. Add the unsalted butter, use your fingers to rub the butter evenly into the flour until NO SMALL LUMPS OF BUTTER ARE LEFT, and the flour resembles yellow cornmeal.
  • Add all the wet ingredients into the flour mixture. Use a spatula to fold and mix everything together until no loose flour are left in the bowl, then use your hands to knead the dough a few times until everything comes into a ball.
  • Transfer the dough onto the counter, no need to dust with flour. Continue to knead the dough a few more times until it is on just until the dough has a TINY BIT OF RESISTANCE WHEN YOU PUSH IT DOWN. If the dough sticks to the counter, use a pastry cutter to scrape it off, do not flour board. The dough should look even but not as smooth as a bread dough.
  • Now dust the dough with a little flour to prevent sticking, and roll it out into 1-1/8 inch thickness. Press the flat side of the dough scraper on top of the dough to make sure it's flat and level. Use a 2 inch round cutter to press down into the dough. DON'T twist, then gently push the dough out onto a parchment-lined baking sheet without making large dents or making the dough too lopsided. Dip the cutter into some flour and tap on the edge to get rid of excess flour, and cut again.
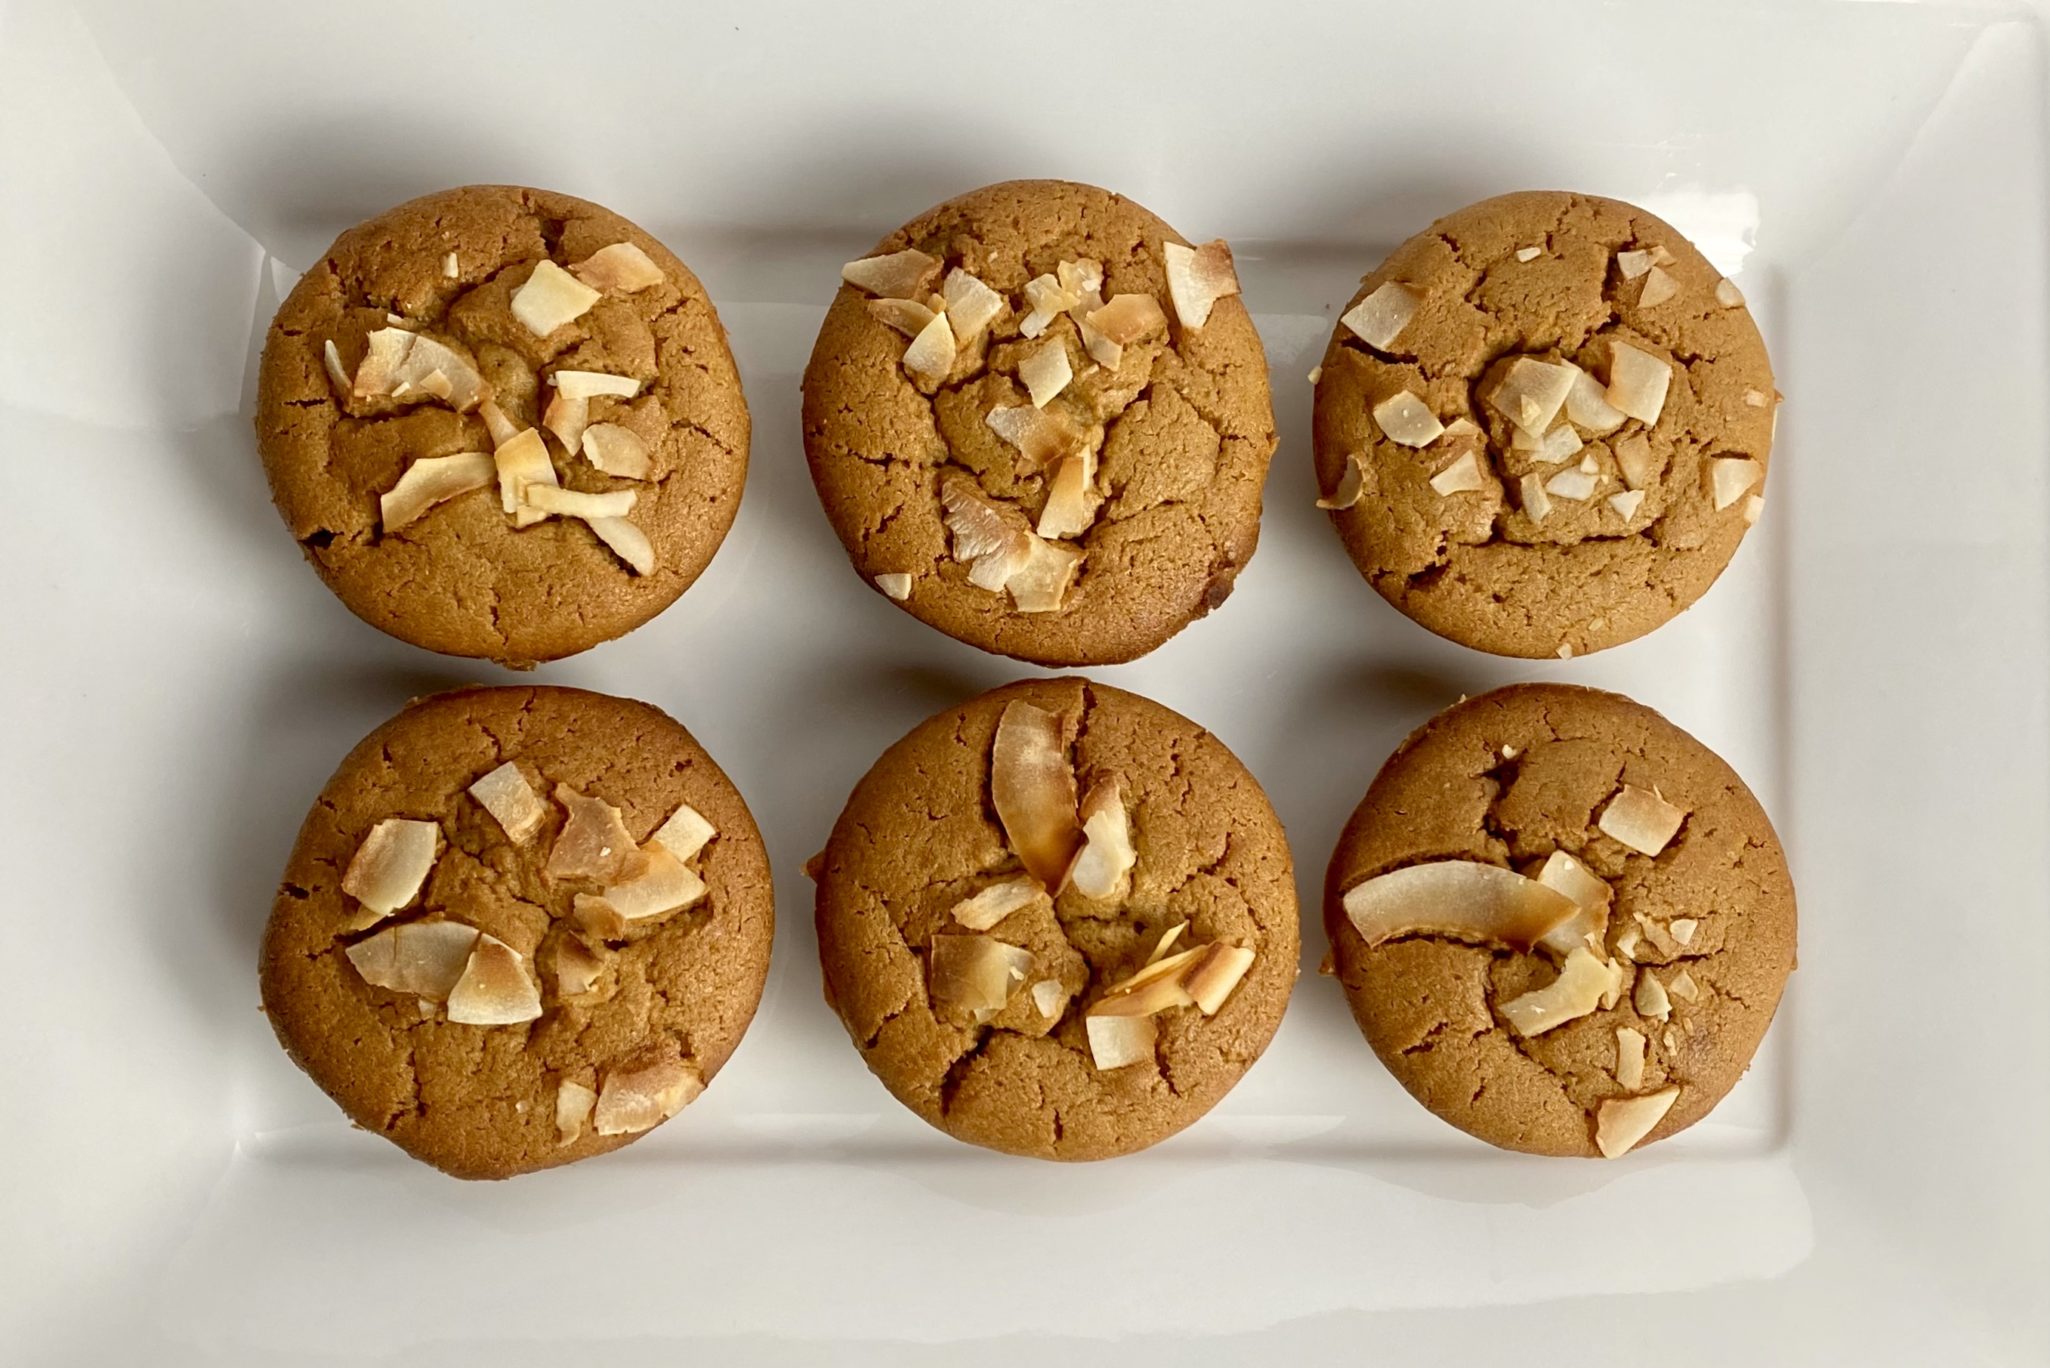
  • Squeeze the remaining dough back together into a ball without big cracks, roll and cut again. Repeat until you use all of the dough. You should have 7 to 9 scones.
  • Brush the reserved egg wash on the top surface of the biscuits, save the egg wash. Place sheet in the fridge for 30 to 40 minutes UNCOVERED. Meanwhile, preheat the oven on 420 F. Right before baking, brush a second layer of egg wash on the top of the scones. This double layer gives the scones a shiny finish.
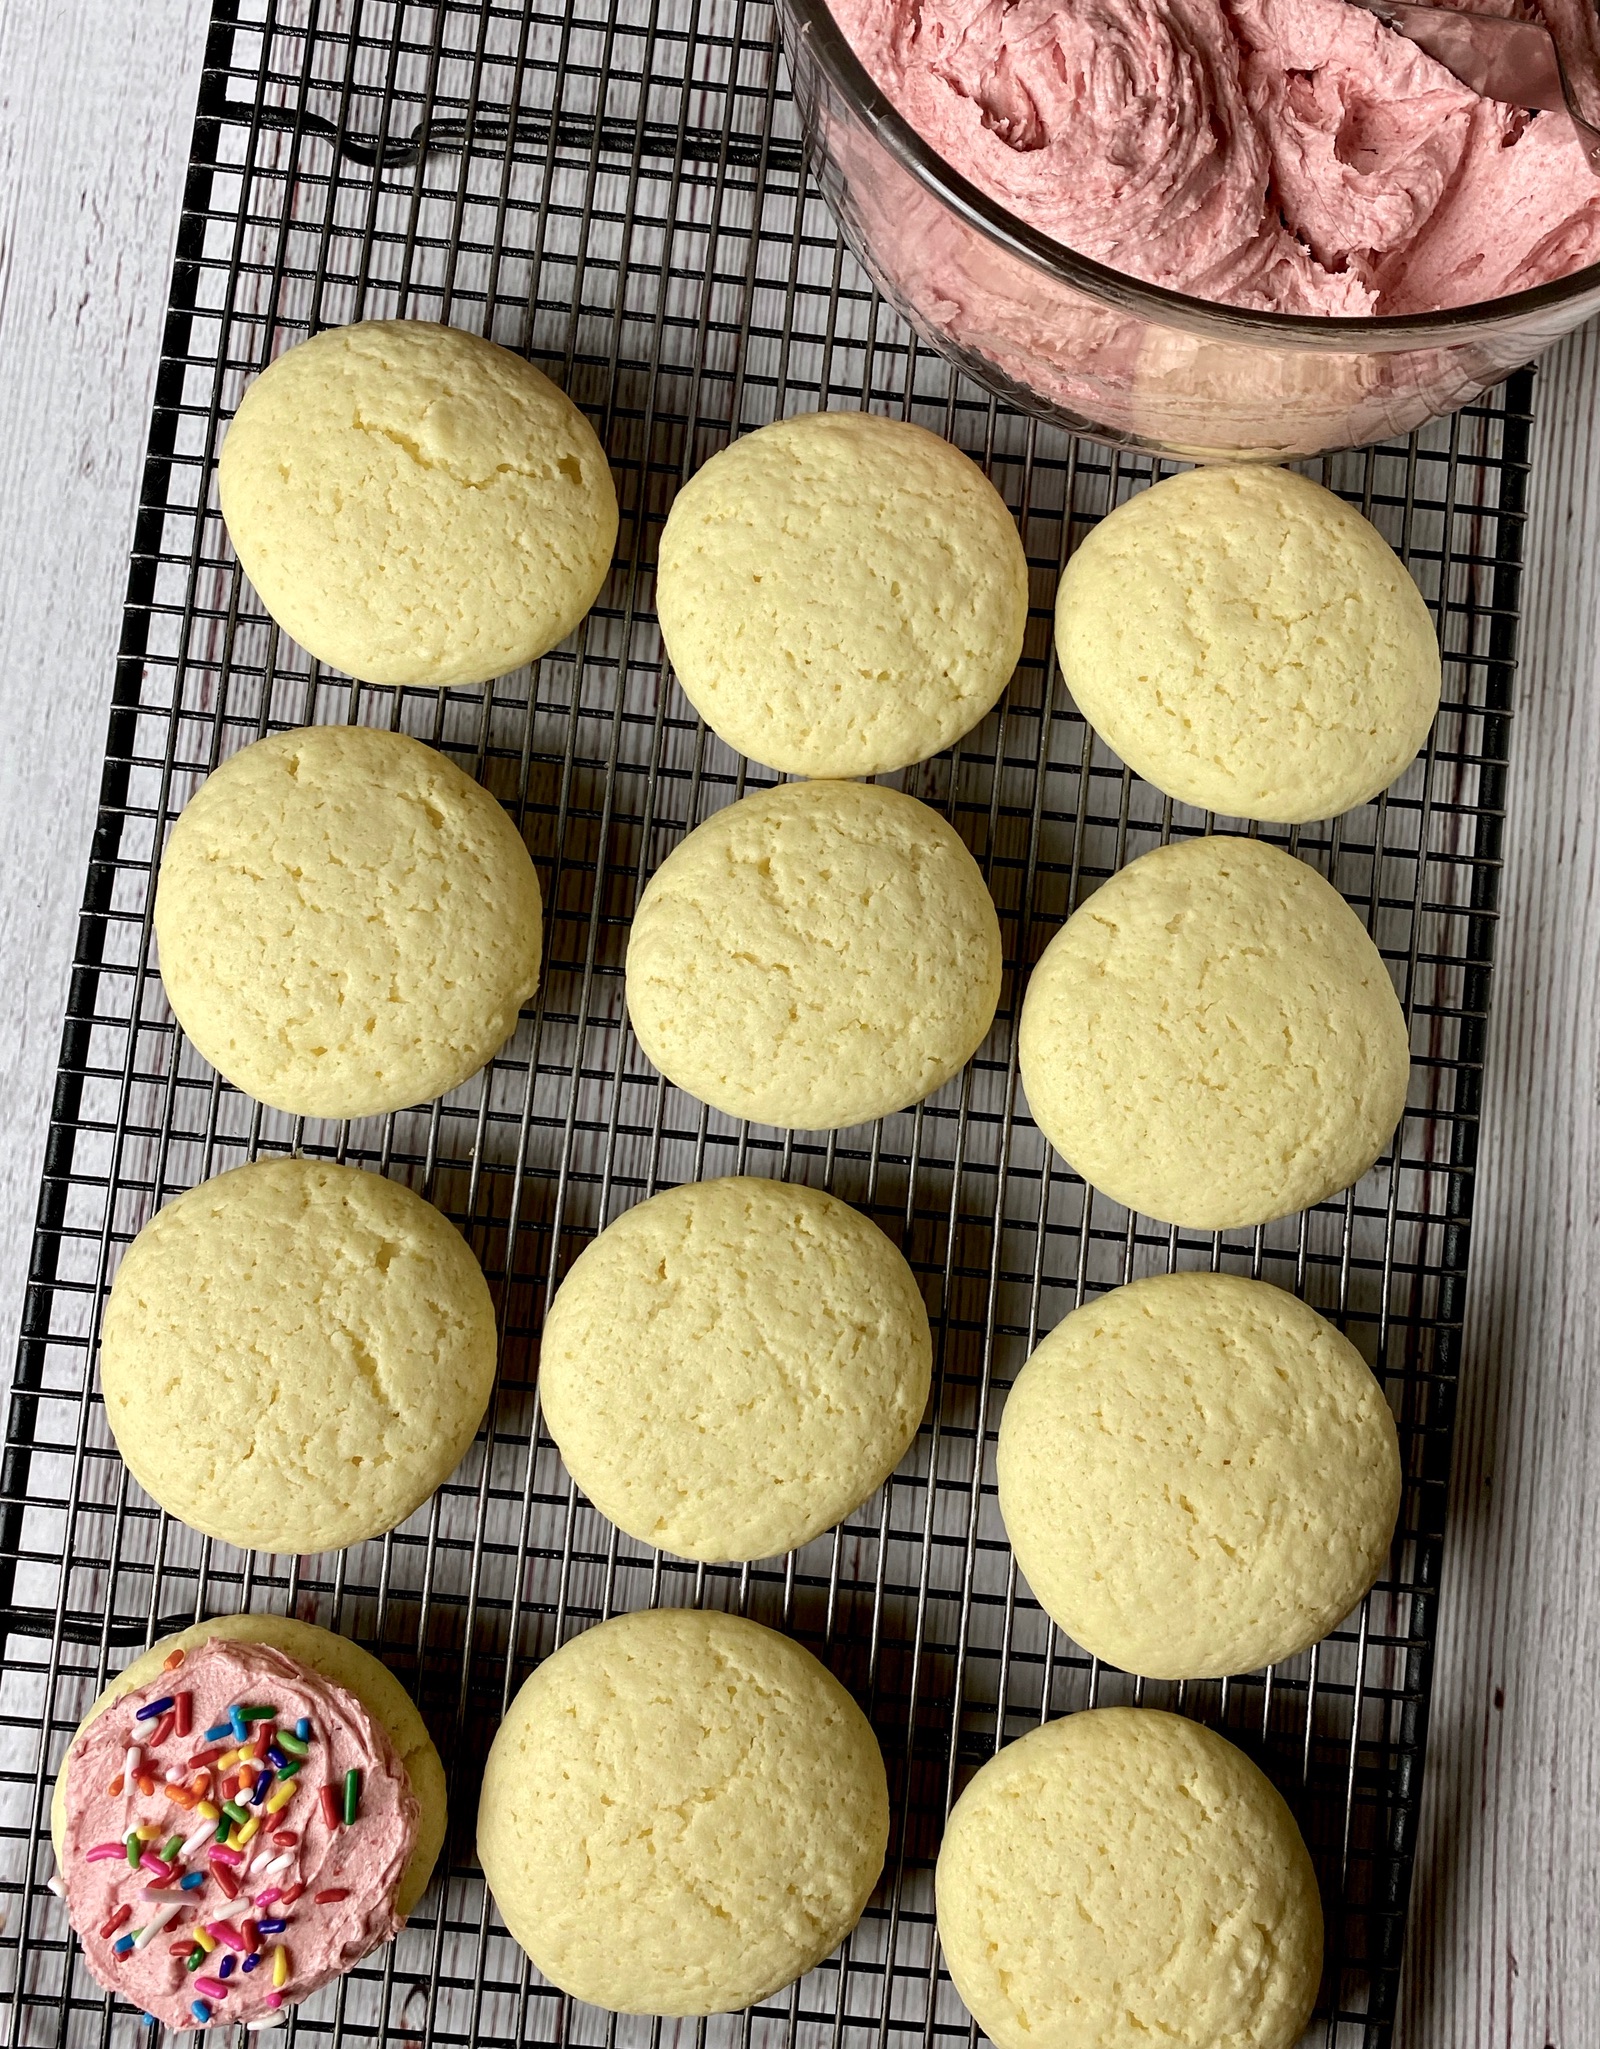
  • Bake on the middle rack of the oven for 10 minutes, then turn OFF the oven, and leave the biscuits inside for another 5 minutes to finish cooking. Transfer onto a cooling rack and serve warm with clotted cream and jam-required. In a pinch, you can serve with lemon curd in place of the cream and jam.
Mandu-Welcome to MDU-Marvel-ous Dumpling Universe

Mandu-Welcome to MDU-Marvel-ous Dumpling Universe

I love dumplings, right up there with bowl food, soul food.  In my world, Jeopardy has a couple of categories including “Things You Eat with a BOWL and SPOON” and “Dumplings of the World”.  It seems every culture has a dumpling that defines comfort, soul food.  Ravioli, Momos, Mandu, Gyoza, Pelmeni, Pierogi…the list is endless.  Dumplings are a labor of love, and labor-intensive.  Maybe that’s why dumpling making is a joint effort with family and friends on occasions that bring us all together.  Despite Covid, we did manage to have a small dumpling-making session to usher in the Lunar Year of the Ox (immediate family only and outside).

Bittersweet Gathering

Every year for the past too many to count years I look forward to New Year’s Day celebrations with family and friends.  I pack up a tray of holiday cookies and head to my brother’s for their annual New Year’s celebration which includes making mandu of course.

The kitchen table is set up with bowls (more like vats) of mandu filling and stacks of wrappers surrounding the bowls.  Everyone takes a shift wrapping mandu.   It’s a lively table, as everyone chatters away while folding mandu.  The folded mandu are lined on trays sprinkled with cornstarch, like little sentinels waiting for their marching orders on a winter’s day.  Some are destined for the pot of boiling water on the stove-immediate gratification, while the rest are loaded into freezer containers for everyone to take home.

I look forward to seeing family and friends that I don’t see very often.  We pick up right where we left off the previous year.  Catching up on the comings and goings, the kids, vacation highlights, reconnecting as if it were only yesterday we last saw each other.  This is what I miss most from this past holiday season due to COVID isolation.

My brother canceled their annual New Year’s Day celebration due to COVID and then my sister-in-law’s mother passed away.  It was during the holidays we would normally see her.  My kids affectionately called her Halmoni (grandmother in Korean) mimicking their cousins.  Born in Seoul, she came here to complete her medical training to be a pediatrician.  She was part of a generation of remarkable woman that defied the odds and norms of her time.  What I will remember most was her kindness and generosity of spirit.  She always greeted you with a warm embrace and a beautiful smile.  Her soft-spoken demeanor and gentleness belied the tenacity and determination she must have had to accomplish all that she did.

I thought of her as I prepped the filling for our own little New Year’s Dumpling-making session.  I was immediately transported to my brother’s kitchen table, sitting with her and my mom, laughing, talking, and of course, wrapping mandu.  She will be sorely missed.

We made two fillings, Mom’s Won Tons and Kimchi Mandu in the morning before our designated wrappers arrived (my kid).  I started with mom’s tried and true wonton filling, a delicious mixture of shrimp, pork, water chestnuts, scallions, shiitake mushrooms, and seasonings.  We use it not only for wontons but for fried egg dumplings, and as a filling for steamed squash or tofu. Skip the wonton wrapper and make meatballs for a tasty addition to soup or congee.  Mom’s universal filling, the best.

I adapted the recipe for Kimchi Mandu from Korean Bapsang (my go-to Korean food site).  I wanted a vegetable-centric filling that still had a bit of meat in it.  This one was perfect.  Not gonna lie, the filling is not a walk in the park and requires time to make.  My advice is to make the mandu filling the day before.

For Kimchi Mandu, you will need the following:  Firm tofu, dried sweet potato noodles, ground beef or pork or combo, onions, scallions, kimchi, bean sprouts and seasonings. Gather the ingredients and then the “fun” begins.  Blanch bean sprouts, drain & smoosh tofu, rehydrate & cut noodles, dice green & yellow onions, mince ginger and garlic, shred kimchi and THEN, add to meat.

WHEW, lots of prep but so WORTH IT.  Wontons and mandu freeze beautifully so all this work will give you a freezer full of quick, last-minute, delicious meals.

Folding Mandu in the Cartoon Universe

That’s a Wrap

Most of the time (and I mean MOST), we use commercial wrappers for our dumplings.  Look for round wrappers for potstickers or mandu at Asian markets.  A link to the Oregonian shows 6 ways to fold dumplings!  If you are feeling ambitious do try to make your own.  It’s pretty easy and requires only 4 ingredients.  The wrappers are flavorful, tender with a nice snap like hand-pulled or knife-cut noodles.  Totally worth the effort (homemade wrappers get the “nood” here).

Serve mandu, steamed with a dipping sauce, fried, or boiled.  A steaming hot bowl of Galbitang  (Beef Short Rib Soup) with mandu and rice cakes ushered in the new year for us.  Delish!

Kimchi Mandu (Kimchi Dumplings)

Delicious dumplings made with ground pork or beef, kimchi, noodles, tofu and onions.
Course Appetizer, One dish meals, Soup
Cuisine Asian
Keyword dumplings, mandu
Prep Time 1 hour
Cook Time 15 minutes

Ingredients

Filling

  • 2 ounces dangmyeon sweet potato starch noodles soaked in warm water for about 30 min or until soft
  • 1 cup packed finely chopped kimchi
  • 8 ounces tofu firm
  • 10 ounces mung bean sprouts sukju namul (숙주나물)
  • 1/2 medium yellow onion minced
  • 2 to 3 scallions diced, or use garlic chives
  • 10 ounces ground pork or beef or blend of both meats
  • 1 tablespoon minced garlic
  • 1 teaspoon finely grated ginger or juiced
  • 1 tablespoon sesame oil
  • 2 tablespoon soy sauce
  • 1 tablespoon gochugaru adjust to taste
  • salt to taste about 1/4 teaspoon
  • pepper to taste about 1/8 teaspoon
  • 40 dumpling wrappers slightly thick

Instructions

  • Drain and squeeze water out of tofu. Using a cheesecloth or kitchen towel to squeeze water out.
  • Finely chop the kimchi and squeeze out excess liquid by hand. Use an older kimchi which has more flavor.
  • Blanch the bean sprouts in boiling salted water (2-3 min) should still be crisp, drain, chop and squeeze out water.
  • Finely chop the noodles. Finely chop the onions and drain off excess water. Finely chop the scallions or garlic chives.
  • Combine all the filling ingredients in a large bowl. Mix well by hand. Stir in one direction to filling feels a littlle sticky.
  • Place one heaping teaspoonful to a tablespoon of the filling on a wrapper. Wet the edges of the wrapper with water or egg wash and seal tightly, push the air out with your fingers. shape into a half-moon shape. Then, bring the two ends together, apply water or egg wash to one end and press tightly to create a round shape. Repeat this process until all the filling/wrappers are used.
  • Kimchi mandu can be steamed for about 10 minutes in a steamer (12 minutes if frozen). Make sure to line the steamer with parchment paper or cabbage leaves to prevent mandu from sticking. You can also boil the mandu. Place dumplings in boiling water, bring it back to boil, adjust heat so it keeps a nice boil. When the dumplings float to the surface they are almost ready, boil another 30 seconds and remove from pot.
  • Note, you can cook a tablespoon of filling by boiling or frying to taste for seasonings.

Notes

Tips for freezing: Freeze the dumplings on a tray with the pieces not touching for about an hour, and then store them in a freezer bag.
Buta no Kakuni (Japanese Pork Belly) Skin in the Game ブタの角煮

Buta no Kakuni (Japanese Pork Belly) Skin in the Game ブタの角煮

Bowl + Spoon = Soul Food

My favorite equation, like Eat = MC(squared), which, in my book, stands for M-meat, C-Cooked & Crazy delish.  After trying several Chinese pork belly recipes I switched gears and made Japanese style braised pork belly, Buta no Kakuni.  Pork belly simmmered in a soy sauce-sugar mixture until the pork is meltingly tender and suffused with a sweet-salty flavor.

One of our frequent stops pre-Covid was a Ramen joint in Saratoga called Kahoo (sadly gone).  While the rest of the fam ordered bowls of delicious ramen and Karaage (fried chicken), I would order their Buta no Kakuni and a bowl of rice.  The pork was soft, unctuous, and tender. It literally jiggled when the pork is placed on the table.  A soft boiled egg sits, nestled in the pork, and ups the richness and decadence of the dish.  I would spoon the pork with some of the sauce on the rice and break the soft-cooked egg over the top so it oozed over pork and rice, it’s divine.  Finish with a side of greens like bok choy or broccoli (gotta have something healthy in the bowl) and this is a bowl made in heaven.

The Lowdown

Start with a slab of pork belly with the skin on.  Yep, skin on.  Pork belly with skin can be found in most Asian Markets.  The skin is Ah-mazing.  The braising turns the pork skin into this silky smooth, melt-in-your-mouth layer striated with flavor-infused meat. If pork belly was a dance it would be the perfect tango.  Splurge, look for pork belly with skin.  Not gonna lie, this is dish is not on the New Year’s resolution list so enjoy in moderation.  The dish is so flavorful that a little goes a long way.  Drizzle the sauce over the pork and rice and pair it with lots of greens.  You can also use Boston Butt or shoulder, which would still be delicious, just not porkfect.

Instantly Easier

Pull out your Instant Pot for this dish (adapted from Sylvia Wakana).   The pressure cooker shortens the cooking time and simplifies the process a little.  Cut the pork belly into 1.5-2 inch chunks, brown them in your IP, add water, ginger, scallion and shiitake mushrooms (optional) seal the pot, set the cooking time 35 minutes, and let the pot do its thing.  I add dried shiitake mushrooms just for a bit more umami, you could use dried anchovies or bit of dashi instead). Release the pressure at Drain pork and remove aromatics.  Rinse the pork and place it back into the cleaned Instant Pot bowl.  Add sauce ingredients, seal and set for another 10-15 minutes depending on size of pieces.

I like to make Buta no Kakuni in advance so I can stick it in the fridge and chill it.  When it is time to eat, I skim off the fat that has now congealed (making it easy to remove), throw a couple of ramen style eggs into the pot, and reheat the pork.  The flavors have saturated the pork, you have skimmed the fat to make it a bit healthier…win, win, time to enjoy!

Garnish with slivers of green onions, sesame seeds and a dash of Shichimi (Japanese Chili powder) for a little kick.  I have been sprinkling Momofuku Spicy Salt to finish my dishes, pretty yummy!

This is blustery weather, stay inside, curled up on the couch food. Enjoy.

Instant Pot Buta no Kakuni (Braised Pork Belly)

Buta no Kakuni, Japanese Braised Pork Belly made in an Instant Pot. Tender and delicious chunks of pork in a sweet-salty sauce. Served over rice is down home Asian Soul food..
Course Main Course
Cuisine Asian
Keyword buta no kakuni, Instant Pot, japanese, Pork Belly, Rice Bowl
Prep Time 10 minutes
Cook Time 1 hour 15 minutes

Equipment

  • Instant Pot

Ingredients

  • 2 lbs pork belly skin on cut into 1-1/2 to 2 inch cubes
  • 3 green onions washed and crushed with flat part of knife to release flavor
  • 1 inch ginger peeled and sliced
  • 3 dried shiitake mushrooms Shhhh, don't tell my mom, I don't soak them beforehand, I just throw them in the pot.
  • 1 tbsp oil
  • water for cooking the pork belly
  • Sauce
  • 1/2 cup water
  • 1/2 cup soy sauce
  • 1/2 cup sake
  • 1/2 cup mirin
  • 1/4 cup sugar
  • 4 soft or hard boiled eggs just cooked enough so you can peel each egg. yolk should be runny
  • green onions diced for garnish

Instructions

  • Prep ingredients: Cut pork belly into 2" x 2" cubes (or as close to that as you can get depending on the type of pork belly you have).
  • Press the "Sauté" function on your Instant Pot and set to high (or "More"). Heat the oil and sear the pork belly a little bit to render some of the fat from the pork belly.
  • Drain fat that has rendered out, pour enough water into the pot to cover the pork belly. Add in sliced ginger, green onions and shiitake mushrooms.
  • Cover and lock the lid. Press the "Cancel" button to stop the sauté. Press "Manual" to use the pressure cooker function. Set cook time to 35 minutes.
  • When it is finished, carefully move steam handle to the venting position to let out the steam until the float valve drops. Once depressurized, remove the lid carefully. Pour contents into a strainer/colander to drain the water. Discard aromatics. Rinse the pork belly under warm water.
  • Put the pork belly back into the Instant Pot and add the sauce ingredients. Press the "Sauté" function and set it to "More." Stir the pork and sauce mixture to combine, bring to a simmer for a minute (just enough to burn off the alcohol). Press "Cancel" to stop the sauté. Cover and lock the lid. Press "Manual" and set the cooking time for 10-15 minutes depending on size of pieces.
  • When it's finished cooking, carefully push the steam release handle to the venting position to let out the steam until the float valve drops (you can also let the pressure release naturally). Once depressurized, remove the lid carefully.
  • Press the "Sauté" and put it on "Less" (or low) to bring to a low simmer. Add in your soft or hardboiled eggs. Simmer until sauce is reduced slightly (couple of minutes).
  • Place 2-4 pieces of the pork on top of a bed of rice, drizzle generously with sauce. Garnish green onions. Split egg in half and place along side pork. Serve with greens of choice, bok choy, cabbage, your choice.

Notes

If you make this ahead of time, chill pork and skim off the fat before reheating.  I know it makes me feel better!  Place eggs in the pork & sauce to absorb some of the flavor from the braising liquid.  Take them out to skim the fat and add them back in when reheating.
Chocolate Mochi Donuts (I Want MO Mochi)

Chocolate Mochi Donuts (I Want MO Mochi)

Just Another Mochi Monday

I have been eyeing the Chocolate Mochi Donuts from Snixy Kitchen for quite a while.  This past dreary, rainy week was the perfect time to finally give the recipe a go.  If you have jumped on the mochi band wagon like me,  you are familiar with mochi donuts.  It is a delicious gluten-free, baked not fried (a la Third Culture Bakery), donut alternative.

Mochi donuts are delightfully chewy and springy.  If you live in the Bay Area you might have found yourself standing in line for hours at the Modo Donuts’ pop-up at Mitsuwa Market.  You could easily make a couple of batches of mochi donuts in the time you stood in line.  These donuts, like Hawaiian Butter Mochi or Mochi Muffins, start with Sweet Rice Flour.  My go-to brand is Mochiko by Koda Farms, pretty widely available.  Bob’s Red Mill also has SWEET rice flour  (do NOT use plain Rice Flour) that you can find at Whole Foods.

PSA: If you like to bake, especially yeast breads, get a scale. You’re welcome.

These Chocolate Mochi Donuts are so easy to make.  If you make brownies in a bowl with a wooden spoon, this is the mochi equivalent.  Besides the sweet rice flour, the rest of the ingredients are probably sitting in your pantry, cocoa, dark chocolate, butter, and eggs.  Okay, you need coconut milk too, which you may not have on hand-Asian markets and most larger supermarkets carry coconut milk (unsweetened, not the cocktail kind). Snixy Kitchen topped her donuts with chocolate icing and matcha icing.  I opted for a strawberry icing made with freeze-dried strawberries (damn delicious) instead of Matcha. Sprinkles are a no brainer-everybody likes happy donuts.

My next batch of donuts will be a black sesame chocolate donut and yes, there will be a next time and I won’t wait for inclement weather to make them.

The Icing on the Donut

Commit this to memory, FREEZE-DRIED FRUIT.  Yep, previously known only to cereal eaters and backpackers, it is my favorite way to add flavor and color to desserts.  I used freeze-dried strawberries from TJ’s for the icing on these donuts and was pleasantly surprised at the vibrant color and flavor of the glaze.  I actually liked it more than the chocolate icing.   Grind the fruit in a mortar and pestle (if you are a pharmacist by trade like me, lol), or smoosh it with a rolling pin.  You can use a food processor but that’s no fun.  Add the fruit “dust” to powdered sugar and milk, and bada bing, bada boom-strawberry icing.  You are limited only by the variety of fruits that are freeze-dried. I frosted half the donuts with chocolate icing for the classic chocolate-on-chocolate donut, and half with the Strawberry Icing.  Finish the donuts with sprinkles, jimmies, chocolate curls, whatever your little heart desires cause that’s how we roll or sprinkle.

So, if you want something a little different, or need a dessert for gluten-intolerant friends or family-make these donuts.  Not in the mood for chocolate? Try Butter Mochi Muffins, or Peanut Butter Mochi from Two Red Bowls, or Mango Mochi Muffins all fabulous options.

Don’t have a donut pan because you don’t have an addiction to kitchenware like me?  This totally works as muffins.  You will need to bake muffins a little longer, I’m guessing 40 minutes but definitely check often with that first batch to figure the optimal baking time.

Chocolate Mochi Donuts

Delicious gluten-free chocolate donuts made with mochi, sweet rice flour!
Course Dessert
Cuisine Asian-American
Keyword donut, Gluten free, Mochi, mochi donut
Prep Time 15 minutes
Cook Time 32 minutes

Ingredients

  • ¼ cup unsalted butter, melted and cooled, plus more for greasing pans 2 ounces
  • 2 cups mochiko sweet rice flour (different from "white rice flour" or "brown rice flour") 320 grams
  • 1 cup organic dark brown sugar (see note) 200 grams
  • ¼ cup cocoa powder or sub in 1/4 cup ground black sesame seeds for a chocolate black sesame version! See note.
  • 2 teaspoons baking powder
  • ½ teaspoon kosher salt
  • 1 13.5-13.66- ounce can full-fat coconut milk see note
  • 2 large eggs room temperature
  • 2 ounces bittersweet chocolate 60-70%, melted and cooled
  • teaspoons vanilla extract
  • Optional for garnish: flaky salt, black sesame seeds, shaved chocolate

Instructions

  • Preheat oven to 350°F and place the oven rack in the middle of the oven.
  • Generously grease the sides and top of two non-stick donut pans with soft butter. (Alternatively, you can bake these as muffins - the batter for 1 muffin is the same amount as for 1 donut).
  • In a medium bowl, whisk together the sweet rice flour, dark brown sugar, cocoa powder or black sesame powder, baking powder, and salt.
  • In a large mixing bowl, whisk together the melted butter, coconut milk, eggs, and vanilla extract. Pour in the melted cooled chocolate and mix until smooth.
  • Add the dry ingredients to the wet ingredients and mix until completely combined.
  • Divide the batter among the 12 donut cavities of the prepared donut pans, filling each one all the way to the top edge.
  • Bake 32-35 minutes until the top is set and the donut gently springs back when poked with a finger. It might not spring back as much as a muffin: do not bake any longer than 35 minutes. The donuts crisp up as they cool and if you continue baking them, they'll get ROCK HARD on the outside. If you like your donuts a little gooey, bake 30-31 minutes.
  • Let cool 10 minutes in the pan, then transfer to a wire rack to cool completely before glazing.
  • Prepare the glaze just before you're ready to glaze the donuts because it will firm up as it sits.

Notes

This recipe is easily halved, makes 6 donuts and 1 muffin.
If making a full recipe, transfer the batter to a Ziploc bag and cut off a corner.  Pipe the batter into the rings.  Easy peasy.
For the chocolate black sesame version, sub in 1/4 cup ground black sesame seeds instead of cocoa powder. Grind up the black sesame seeds in a coffee grinder, small blender jar, or small food processor until fine like a powder. Balck sesame powder can be found in Asian Supermarkets also.
You can also bake these as muffins. The batter for 1 muffin is the same amount as for 1 donut – Bake for ~45 minutes, check to not overbake!

Strawberry Icing or Glaze

Icing made with freeze-dried strawberries, tasty and vibrant
Course Dessert
Cuisine Asian-American
Prep Time 5 minutes

Ingredients

  • 2 cups powdered sugar divided
  • ½ cup freeze dried strawberries*
  • ½ teaspoon vanilla extract
  • ¼ cup milk
  • dash salt
  • Sprinkles, chocolate curls, decorating sugars, Jimmies

Instructions

  • Combine powdered sugar, salt and freeze-dried strawberries in the bowl of a food processor. Process for a minute or two or until strawberries are powderized. Alternatively, use a motar and pestle or rolling pin to pulverize strawberries. Add powdered to sugar and continue with next step.
  • Pour mixture into a medium-size bowl. Add milk and stir until smooth, adding more milk by 1/2 teaspoonfuls if glaze is too thick to spread. If too thin, add a bit more powdered sugar.
  • The icing will set so make this wile the donuts are cooling.
  • Spread quickly on donuts and sprinkle with toppings before it sets.

Chocolate Icing or Glaze for Donuts

Chocolate on Chocolate Donuts With Sprinkles
Course Dessert
Cuisine American
Keyword Chocolate Icing
Prep Time 10 minutes

Ingredients

  • 2 ounces bittersweet chocolate 60-74%, melted and cooled
  • 2-2½ tablespoons milk or coconut milk
  • 1 cup powdered sugar sifted
  • ¼ teaspoon vanilla extract
  • ¼ teaspoon salt

Instructions

  • Combine melted and cooled chocolate with 1 tablespoon milk, powdered sugar, and vanilla extract. Add remaining milk, a splash at a time, just until it's smooth enough to glaze. It should be thick enough that when you swirl it, the swirl stays for a few seconds then collapses back into itself.
  • It will firm up as it sits, if it's too thin, let it sit for a few minutes and give it another stir. If it's too thick, add a bit more milk or zap it in the microwave for a few seconds to loosen it up.
  • Vary the type of chocolate, milk, semi-sweet, bittersweet and don't forget the sprinkles

Notes

Recipe can be esily halved
Taiwanese Pork Belly Rice Bowl (Lu Rou Fan-卤肉饭)- In Hog Heaven!

Taiwanese Pork Belly Rice Bowl (Lu Rou Fan-卤肉饭)- In Hog Heaven!

Continuing my virtual traveling by cooking, I’m imagining myself in Taipei right now.  I have not been back to Taiwan in ages and yet I find myself thinking about Taipei and my visit so long ago.  Growing up in San Francisco the majority of Chinese are from Hong Kong and the Guangdong (Canton) region.  I was fortunate enough in college to spend a summer in Taipei (yes, on the Taiwan Love Boat Trip).  I sampled  Shao Lung Bao, Oyster Egg Omelets, Popcorn Chicken, Beef Noodle Soup, and Red Bean Shaved Ice while wandering around the night markets.  Everything was so delicious, different from Cantonese food, and yet familiar at the same time.

Bowl Food is Soul Food

If you have followed 3jamigos, you know I have an obsession with bowl food and eating with a spoon.  The Taiwanese dish Lu Rou Fan 滷肉飯 falls squarely in this category.  In fact, this iconic dish was the basis for Taiwanese Turkey Rice, a favorite bowl I posted around Thanksgiving.  Shreds of turkey garnished each bowl of Lu Rou Fan.  People liked the turkey garnish so much, it got its own gig, Turkey Rice, the spin-off.

Back to Lu Rou Fan.  Season diced pork belly with star anise, cinnamon, and aromatics like garlic, shallots, and ginger,  are braised in a soy sauce and sugar mixture until it is melt-in-your-mouth tender.  Place a generous scoop of the braised pork, half of a hardboiled egg, and greens on top of a bowl of steamed rice.  Grab your spoon and dig in, bowl food is soul food.

After surveying different sites for Lu Rou Fan, my version is a mash-up of recipes I found.  The non-negotiables are pork, ginger, shallots, garlic, and a sauce flavored with star anise, soy sauce, sugar, and rice wine.  Start with pork belly cut into approximately 1/3 inch slices then diced.  Thick slab pork belly can be found in most Asian grocery stores.  I also add ground pork to the diced pork belly for a saucier texture, like a ragu’. Shiitake mushrooms are used to pump up the umami as does dried shrimp.  Shrimp is optional, if you decide to use it, soak and finely mince it before adding.  I have mentioned my lack of affinity for star anise, so I use only one clove and add a cinnamon stick instead.  If you like star anise feel free to use two.  Last but not least…

Pull Out the Instant Pot!

The pressure cooker reduces the effort and time to making Lu Rou Fan, a win-win.  Saute’ pork, add the aromatics and liquid, and 30 minutes later your Lu Rou Fan is ready for the finishing touches.  How easy is that? Make this dish a day in advance to allow the flavors to meld and to chill the Lu Rou.  Skim the solidified fat off before serving.

Finishing Touches

When the pressure cooker is done, release pressure and set the pot to saute bring the pork mixture to a boil, and reduce to desired consistency OR if the sauce is not thick enough, add a cornstarch water mixture to thicken. You want lots of sauce to drizzle on your rice so do not reduce too much.

The star of this dish is the succulent, saucy pork belly dancing on the main stage of rice but there are supporting actors.  Hard-boiled eggs often accompany Lu Rou Fan.  Boil, peel, and place eggs in the pork sauce after it has finished pressure cooking.  While the sauce thickens, the eggs will absorb the color and flavor of the pork.  The eggs will be hard-boiled, so for those who have come to love six-minute ramen eggs-this ain’t it.  Use soft-boiled instead of hard-boiled eggs to add to the sauce for a less-cooked egg.  Or cook six-minute eggs ramen style and use this in place of the hard-boiled eggs.  It’s your bowl of goodness, do what you want.  Serve with greens such as seasoned cucumbers, or steamed bok choy or broccoli.  Garnish with green onions and more fried shallots. YUMMY.

Taiwanese Pork Belly Rice (Lu Rou Fan)

Another Soul Food Bowl, made a little quicker in an Instant Pot. Braised pork belly seasoned with soy sauce, garlic, ginger, star anise and shallots. Delicious over rice or noodles. Comfort food.
Course Main Course, Meat
Cuisine Asian
Keyword Lu Rou Fan, Taiwanese Pork Belly Rice
Prep Time 20 minutes
Cook Time 45 minutes

Equipment

  • Instant Pot

Ingredients

  • 1 lb skin-on pork belly diced into 1/3 inch pieces
  • 1/4 lb ground pork
  • 1 tbsp vegetable oil or shallot oil
  • 3 slices ginger
  • 2 tbsps shaoxing wine
  • 2 tbsps dark soy sauce
  • 1 tbsp regular soy sauce
  • 1/4 cup fried shallots or onions
  • 1 shallot, finely diced
  • 4 cloves garlic chopped (1.5 tbsp)
  • 1 star anise
  • 2-3 dried shiitake mushrooms soaked until mushrooms are softened, remove from water andnreserve soaking liquid, dice mushrooms
  • 1 tbsp dried shrimps chopped OPTIONAL
  • 1 stick cinnamon or 1/2 tsp ground cinnamon
  • 2 tbsp rock sugar or brown sugar (30gms rock sugar_
  • 2/3 cup hot water or reserved liquid from mushrooms
  • Soy sauce /salt to taste
  • fried shallots and green onions garnish
  • 2 eggs hardboiled or cooked Ramen style

Instructions

  • Turn on the "sauté" function of the pressure cooker, press "adjust" once to switch to "more" for browning.
  • Once the oil is hot, add pork belly and give it a stir so that it's not sticking to the bottom. Saute' just until pork belly starts to brown, add ground pork. Let pork cook until it loses its pinkness and the liquid evaporates.
  • Add ginger, shallot, garlic, saute briefly before adding soy sauces, Shaoxing wine, cinnamon, star anise, rock sugar, shiitake mushrooms, and fried shallots. Mix it well and add reserved mushroom liquid or hot water. Cover with the lid.
  • Turn on the "manual" function, set the timer to 25 minutes. Allow 10 minutes before release of pressure and opening. Skim off the fatty oil from the top.
  • If the sauce seems too thin, turn on the "sauté" function, and "adjust" to "more" to thicken and darken the pork belly. Saute to desired sauce thickness and color. Season with light soy sauce or salt to taste. Alternatively, taste sauce after opening the pot. If it has enough flavor but is thin, mix 1 tbsp cornstarch with 2 tbsp water. Add to mixture and bring to a boil to thicken sauce.
  • Ladle the braised pork over rice with some sauce. Top with an egg* and greens of choice. Garnish with green onions and more fried shallots.

Egg

  • Generally, eggs are hardboiled, peeled and added during cooking..which makes a very hard-boiled egg. I like ramen eggs or runny eggs
  • Boil eggs to just past soft boiled stage. See post for link to ramen eggs. Have eggs peeled and ready to go when pork is finished cooking. Add to pork and allow to sit in sauce until you are ready to serve. Cut eggs in half and place 1/2 in each bowl of rice.

Notes

Use skin-on pork belly as the skin becomes tender, juicy and flavorful after absorbing all the flavors from spices and soy sauce. 
Use leaner ground pork (e.g. pork shoulder) as a substitute if the pork belly is too fatty. But really, you don’t need a ton on your rice.  Reduce the cooking time accordingly.  
Mango Mochi Muffins Triple M Play

Mango Mochi Muffins Triple M Play

More Mochi Madness

One of the most popular posts on 3Jamigos is Muffin been the Mochi that Caught My Eye (Butter Mochi Muffins)  I stumbled upon the original recipe on Snixy Kitchen, a gorgeous site focused on gluten-free baking and cooking.  For good reason this recipe is popular, the muffins are chewy, dense, moist and delicious.  I decided I needed to expand my horizon and try different flavorings for the mochi muffins.  A quick search yielded an array of flavors folks have tried, ube, chocolate, and milk tea.

The Milk Tea Muffins from Match Berry Kitchen caught my eye.  I love Milk Tea, apparently, so do lots of people judging by the number of Boba places in the South Bay.  The proverbial Newton’s apple epiphany popped in my head, tea, mango, coconut, hmmm.  I thought Mango Sticky Rice, one of my favorite desserts, could I morph it into a mochi muffin?

Let’s Do This

I pulled out a box of Mango Tea I had bought in Seoul, freeze-dried mango chips from TJ’s, coconut milk and a box of Sweet Rice Flour.

The beauty of Mochi Muffins is they are REALLY easy to make.  A bowl, a spoon, or spatula, and you are in business.  You can crush the mango pieces with a rolling pin or drop it in a mini food processor or blender.  If you don’t have coconut milk you can use evaporated milk, or regular milk.  I like coconut milk, especially with mango.  I brewed a strong cup of mango tea, and combined it with coconut milk, butter, and egg.  By using mango tea, the flavor is very subtle, you could use mango juice or puree for a more pronounced flavor or fold in bits of fresh mango (baking time will be on the long side due to moisture from the fruit).  Add wet ingredients to the dry, stir a couple of times, done.  Literally, 5 minutes of prep and then into the oven.

The batter is pourable, use either a scoop or pour into buttered muffin tin cups.  Fill to within 1/8 inch from the top.  This will make approximately 8 muffins, not too many.  Garnish with coconut or with sesame seeds., both give an extra layer of texture. I used flaked coconut since I did not have shredded which I would have preferred.  Baking time is in the range of 32-35 minutes.  Shorter baking time insures a gooey, chewy texture while baking the muffins longer would make them cakier and less chewy.  Your choice.

Another gluten-free winner!

Mango Mochi Muffins

Course Breakfast, Dessert
Cuisine Asian-American
Keyword mango, Mochi, mochi muffin, muffin
Prep Time 15 minutes
Cook Time 35 minutes

Ingredients

  • 1 cup of Mochiko sweet glutinous rice flour
  • 1/2 cup of golden cane sugar
  • 1 tsp baking powder
  • 2 tbsp ground freeze-dried mango
  • 2 tablespoons or 1/8 cup of unsalted butter and a bit extra for greasing the muffin pan
  • 3 Mango flavored teabags
  • ~ 1/2 cup of coconut milk reg or light
  • 1 large egg
  • 1 tablespoon of condensed milk
  • Muffin pan

Instructions

  • Preheat the oven to 350 degrees Fahrenheit and grease the muffin pan with a little bit of melted butter
  • Steep tea bags in 1/2 cup of boiling water for 10 minutes then drain excess liquid from the tea bags and take them out
  • Add coconut milk until you have 3/4 cup of milk+tea.
  • Combine Mochiko, sugar, ground mango and baking powder in a large mixing bowl
  • In a separate bowl melt the unsalted butter then stir in the egg, condensed milk and coconut milk tea mixture, blend ingredients thoroughly.
  • Combine the dry and wet ingredients and whisk till the mixture has no lumps
  • Scoop or pour the mixture into the wells of the muffin pan
  • Bake in the oven for 32-35 minutes then remove and let cool for around 30 minutes before taking the muffins out of the pan

Notes

If you want the muffins to be sweeter, add more condensed milk
If you want the muffins to have a stronger tea taste, increase the number of tea bags for the steeping step
For a crispier bottom use a metal muffin pan or bake the muffins for longer
Mochi muffins are best stored at room temperature in an air-tight container or freeze and reheat.
For mango madness, add diced fresh mango to batter
Definitely try different flavors. For milk tea, use black tea bags, omit mango powder. There are an array of freeze-dried fruits available including raspberry, strawberry and blueberry.
Grilled Shrimp & Skirt Steak-Surf and Turf Time!

Grilled Shrimp & Skirt Steak-Surf and Turf Time!

The one consolation to the pandemic for us (which goes to show just how fortunate and entitled we are), my kids came home at various times for extended stays.  I’ll admit, having been empty-nesters for awhile, it took some adjusting but it was nice.  Despite finding ourselves falling back into the “parent-child” trap, conversations were much more introspective for all of us.

Surf and Turf

Dinner the night before the last J moved back to the City was a family favorite we haven’t done in quite awhile, a variation of Surf and Turf.  Grilled Rosemary Garlic Shrimp and Hoisin BBQ Skirt Steak.  Both are simple to make and delicious.

So the surf and turf started with skirt steak grilled on the bbq.  It’s so stupid easy I’ll just include the recipe here.  It is a one to one mixture of Hoisin Sauce and your favorite barbecue sauce.  Slather it all over the meat and allow to marinade for a couple of hours. That’s it.  You can pump it up with minced garlic and a bit of soy sauce if you like. Throw it on the barbie and grill to medium rare, done.  You could use Flat Iron, or Flank Steak (texture is pretty different though). Be forewarned, skirt steak is no longer an “economical” cut, yikes!

Shrimp Primer

In Asian cookery, leaving the shrimp shells on when cooking is a given.  My dad always told me to buy shrimp with the shells on, they taste fresher and more flavorful.  The shells seem to absorb the seasonings.  The way to eat them is to suck all the flavor off the shell-on shrimp and then peel the shrimp and eat it.  With deep-fried shrimp, you can actually eat the shells, it’s crispy, crunchy and delicious.  A favorite dish my dad would make, don’t chuckle, Ketchup Shrimp.  It’s roots are Cantonese. Shell on shrimp are stir-fried with aromatics like ginger and garlic and finished with Ketchup.  The flavor profile is sweet, salty, a hint of tart and it is quick and easy. I can remember happily munching on the shells, yums.  I bet these could be thrown on the grill too.

This grilled shrimp recipe is from Epicurious by way of the sadly defunct Gourmet magazine.  It’s been a favorite in our house for a long time, I think it will become a favorite in yours too.  

I deveined and removed the legs from the shrimp, leaving the shell and tail intact. The garlic is chopped and mashed with coarse salt and added to olive oil along with minced rosemary.  Please try to use fresh rosemary, its so fragrant or substitute fresh herb of choice like oregano, thyme, lemon zest and smoked paprika.

Allow the shrimp to marinade for 4-6 hours.  The beauty of this dish, you can make it year-around!  In the summer, throw it on the barbecue.  In the winter, like NOW, I use a stove top pan and grill 3-4 minutes a side until the shrimp turns color.  Serve with lemon wedges.  Good and easy.

GRILLED ROSEMARY GARLIC SHRIMP

Delicious and easy recipe for grilled shrimp
Course Appetizer
Cuisine American
Keyword garlic, Grilled shrimp, rosemary
Prep Time 15 minutes

Ingredients

  • 1/4 cup finely chopped garlic mashed to a paste with 1 teaspoon coarse salt
  • 2 tablespoons minced fresh rosemary leaves plus sprigs for garnish
  • 16 shrimp about 10-16 per pound jumbo or large
  • lemon wedges as an accompaniment
  • 3 tbsp olive oil plus oil for brushing shrimp

Instructions

  • In a large bowl stir together garlic, minced rosemary, and 3 tablespoons oil and add shrimp. Marinate shrimp, covered and chilled, at least 4 hours.
  • To grill, thread 4 shrimp on each skewer and brush with additional oil. Grill shrimp on an oiled rack, set about 5 inches over glowing coals, 3 to 4 minutes on each side, or until just cooked through.
  • Alternatively, grill in a hot well-season ridged grill pan, covered, over moderately high heat 3 to 4 minutes on each side, or until cooked through.
  • Garnish shrimp with rosemary sprigs and serve with lemon wedges.

Notes

If grilling outdoors, thread shrimp on skewers. The original recipe calls for putting shrimp on skewers, that's too much work for me!
Substitute herbs- use oregano or thyme, smoked paprika, 
For an Asian flavor profile mince garlic and ginger and add basil or cilantro.

Enjoy!

Red Cooked Pork 红烧猪肉, Sweet Relief

Red Cooked Pork 红烧猪肉, Sweet Relief

This post has been sitting on the back burner for a while, the majority of the time because I kept tinkering with the recipe.  The other reason for its relegation, Jamie and I have been on a tear baking cookies and desserts for the holidays.  It was time to circle back to this post-take a breather from all things sweet.  So here it is, a post on one of my favorite dishes, Red Cooked Pork

I grew up eating Chinese food 5-6 days a week.  Every meal more often than not featured pork.  Ground pork was steamed into a delicious patty with salted egg or simmered in soups.  Slices of pork were stir-fried with greens or with tofu and brown bean sauce for a quick meal.  Every Chinatown deli strategically displays a whole pig, slow-roasted to perfection, it’s amazing-crunchy, crackly skin and succulent, juicy, tender meat enticing shoppers into the store.  It goes toe to toe with any southern barbecued pork.  I make my own Crispy Roasted Pork, it’s not hard and not to worry, you don’t have to roast an entire pig! Yes, pork is king in Chinese cuisine.

Why pork?

The pragmatic, economical choice.  Pigs eat almost anything and don’t require grazing land, important in an agrarian society like China.  Pork can be steamed, boiled, baked, braised, fried, roasted-probably the only thing we don’t do is make it into ice cream-not surprising for lactose intolerant Asians.  Almost every part of the pig is used or consumed.  Ears, feet, snout, are pickled, braised, or fried.  The fat is turned into lard, the blood is congealed and eaten…you get the picture.

And the obvious answer, it’s DELICIOUS.

I am hooked on Chinese Red Cooked Pork which uses pork belly.  Now, don’t go Ewww, what do you think bacon is?  Yep, thin slices of pork belly given a nifty name so jillions of people will eat it.  Asian dishes often use pork belly in uncut slabs, in thick slices, cubed or diced.  Red Cooked Pork is a classic dish, every Sichuan family passes down grandma’s recipe for Red Cooked Pork or 红烧猪肉.  My go-to recipe comes from a favorite cookbook, A Common Table.

The easiest place to find pork belly is at your local Asian markets.  In particular, Chinese markets carry ALL things pork.  The pork belly is butchered into thick slabs-with or without skin, or into thin, medium, thick, or super thick slices.  Korean markets also offer a variety of pork belly cuts to grill, stir-fry, or braise.

I could be wrong but there really isn’t a Cantonese version of Red Cooked Pork.  Versions of red-cooked pork can be found in  Sichuan,  Shanghai, and Hunan where Chairman Mao’s Red Cooked Pork with chili peppers and aromatics is iconic.

The Tinkering Begins

If I am making Red Cooked Pork for buns (bao) to be eaten like a sandwich, I use the wide thick slices.  For rice bowls and noodle bowls, I like cubed or diced pork belly.  Either way, the KEY is long, slow cooking.  You can’t cut corners or the meat will not be meltingly tender.  Keep vigil over the braising liquid, adding water if needed.  There is a point where the meat will seem tender but dry and paradoxically you need to cook it longer to breakdown the fibers so the meat gives up and becomes this oozy delicious bite. That is pork-fection.

I’m not a big star anise fan, so I only use 1-star anise and add a cinnamon stick in place of additional star anise.  Feel free to play with the amounts.  The recipe calls for granulated or raw sugar, I prefer rock sugar.  I searched for an equivalence and all I found is a one-inch piece of rock sugar is approximately 1 tablespoon of sugar.  Crushed into smaller pieces, that 1 inch chunk was about 1.5 tablespoons of rock sugar.

Caramelize the pork in the sugar water mixture.  Add aromatics, soy sauces, water, and braise for 1.5 to 2 hours until pork is tender.

Serve over rice and with greens such as poached lettuce or bok choy.

Red Cooked Pork Belly, Sesame Slaw, and Gochujang Mayo for my Asian version of a BLT Burger.  How did I not win our annual burger cook-off?

Print Pin
5 from 1 vote

Red Cooked Pork adapted from A Common Table

Iconic Chinese Dish, Red Cooked Pork is pork belly slowly braised in soy sauce, sugar and aromatics until meltingly tender. Delicious over rice or in bao.
Course Main Course
Cuisine Asian
Keyword braised, Chinese, easy recipe, Pork Belly, red cook pork
Prep Time 20 minutes
Cook Time 3 hours

Ingredients

  • 2 pounds pork belly or pork shoulder cut in 3/4- to 1-inch (2- to 2.5-cm) chunks
  • 1/4 cup granulated sugar substitute rock sugar 3 tablespoons (50-75 gms) or to taste
  • 2 tbsp water to caramelize sugar
  • 2-3 cups water for braising liquid
  • 3 to 4 scallions cut on the diagonal into 2-inch (5-cm) lengths (about 1/4 cup sliced)
  • 3 to 4 garlic cloves smashed, or 1 tablespoon minced garlic
  • 1 inch piece ginger root sliced into 6 to 8 circles
  • 1 whole star anise 0-3 pods, your choice
  • 1 stick cinnamon
  • 1/3 cup Shaoxing rice wine dry sherry, or sake
  • 3 tablespoons light or thin regular soy sauce 生抽, NOT low sodium
  • 3 to 4 teaspoons dark soy sauce 老抽

Instructions

  • Bring a large pot of water to a boil over medium-high heat. Add the pork and gently boil for about 10 minutes, skimming off any scum as it forms on top of the water. Drain the pork and rinse to remove any remaining scum.
  • In a large wok or cast-iron skillet over medium-high heat, combine the sugar and 2 tablespoons water and stir until it dissolves. Tilt the wok or skillet to swirl the mixture, without stirring, just until it bubbles and begins to turn slightly darker in certain spots, 4 to 5 minutes. Be sure to watch it carefully so that the sugar doesn’t burn as the sugar can turn from brown to black in seconds.
  • Add the pork and cook it with the caramelized sugar, stirring frequently, until the pork is browned and smells fragrant, about 4 minutes.
  • Add the scallions, garlic, ginger, star anise and cinnamon, toss for 1 to 2 minutes to give the aromatics a quick cook. Add the rice wine, both soy sauces, and enough water to cover the pork, about 2 to 3 cups. Stir to combine and then cover and ever-so-gently simmer the pork over low heat until tender for approximately 2 hours. Stir every 15 to 20 minutes to prevent scorching and to make sure there is still enough liquid. Add water if the level gets too low.
  • Once the pork is tender, take a look at the cooking liquid. If you prefer a thicker sauce, transfer the pork to a plate, return the heat to medium-high, and simmer, uncovered, until the sauce reduces to the desired consistency, 10 to 15 minutes. Be careful not to reduce the sauce too far as you’re going to want enough sauce to go over the pork and rice. Taste the sauce and, if desired, adjust with more soy sauce or sugar. Spoon the pork and sauce over rice.
  • Serve over rice. Place pork on top of rice and drizzle a small bit of sauce over the cubes.

Pork Buns

  • Cut pork belly into 1-4 to 1/2-inch thick slices approximately 2-2.5 inches in width instead of cubes. Proceed with braising instructions.
  • Serve sliced pork with steamed Chinese buns. Garnish with green onions and cilantro.
Grocery Store Cookies! Sprinkle a Little Holiday Cheer

Grocery Store Cookies! Sprinkle a Little Holiday Cheer

My favorite holiday cookie of the season is Eric Kim’s  (check out his site, wonderful essays,  beautiful writing) Lofthouse Style Grocery Store Cookie.  It’s surprising since I am not a fan of those ubiquitous cookies with the toothachingly sweet, artificial tasting frosting and eye-popping sprinkles.  But his homemade rendition looked so appealing, I had to try them.

Eric’s homage to the grocery store cookies is part of NYTcooking’s week-long video series on Holiday Cookies.  He takes the concept of the grocery store cookie and creates a small-batch, no preservatives, all-butter, cream cheese, tender cakey-cookie topped with a sweet, slightly tart raspberry buttercream.  The only resemblance to the supermarket cookie is the sprinkles on top!

These cookies are simply DIVINE

The directions are straight forward and if your ingredients are at room temperature, a bowl and a wooden spoon are all you need to make these cookies. How easy is that?  But you can be lazy like me and use your stand mixer, especially for the frosting.

Though hand mixing the dough is very doable, if time is short, go ahead and bust out your Kitchen Aid mixer.  Combine cake flour and baking powder in a small bowl and set aside.  Cream butter, cream cheese, salt, and sugar at medium speed until fluffy.  Add the eggs and vanilla extract (yes, 1 tablespoon) and beat mixture on medium for approximately 1 minute to aerate and incorporate sugar.  Reduce mixer speed to stir or low setting and add flour mixture.  Mix just until flour is incorporated.  The dough will be very very soft. Toss the bowl into the fridge for 15 minutes to chill the dough so it is easier to scoop.

Use a two-tablespoon ice cream scoop to measure out the dough.  Scoop all of the dough and place it on a pan that will fit in your freezer.  Place the pan in the freezer to chill the dough (min 10-15 minutes).  Do not skip this step, makes the dough much easier to work with, keeps it from spreading, and gives the flavors time to meld.

Frosting Goodness

While the dough is in the freezer, make the frosting.  Freeze-dried fruit is the magic that provides both color and flavor to the frosting- it is this tweak that provides the spark in this cookie.  The recipe calls for raspberry but strawberry, blueberry or mango freeze-dried fruit would work. I like raspberry not just for flavor but for color, it gives the frosting a hot pink happy glow.  Freeze-dried fruit can be found at Trader Joe’s, Whole Foods, and Target.  Grind the fruit into a powder in a mini food processor or place in a Ziploc bag and use a rolling pin to pulverize it.  Sift to strain the seeds out of powder.  The frosting is sweet, tart, and fruity, just delightful.

Combine the softened butter, fruit, vanilla, salt, and sugar in a mixing bowl.  Blend on low speed until the ingredients are mixed together then increase the speed to high and beat until light and fluffy, a couple of minutes, and about double in volume.  Set aside.

Take the cookies out of the freezer and roll them into balls (eminently doable thanks to freezing). Place each ball on a parchment-lined cookie sheet 2-3 inches apart.  If the dough gets too soft or sticky to work with,  return it to the freezer.  Flatten each to approximately two inches in diameter and one-inch thickness.  Bake 13 to 15 minutes or just until the edge starts to color, don’t over bake.  You will be rewarded with a tender, buttery, light cakey-cookie with a wonderful vanilla punch.

The Finale:  Cookie + Hot Pink Frosting x Sprinkles = Happy

Swirl a generous amount of the frosting on each cookie and then SPRINKLE-FY each one.  These cookies are so indescribably good, put them on your BAKE THESE COOKIES list now. 

Ladies and Gentlemen, I give you the 2020 Holiday Cookie Box!

Eric Kim's Grocery Store Cookie

Remember Lofthouse Cookies from the Supermarkets? Every little league game, school bake sale featured those sprinkle adorned, frosting laden, cakey cookies in the plastic trays. Imagine a homemade, luscious, delicious, version.
Course cookies
Cuisine American
Keyword Grocery Store Cookie, Lofthouse Cookie, sprinkles, Supermarket
Prep Time 30 minutes
Cook Time 15 minutes

Equipment

  • Small sheet pan that will fit in your freezer I have a side by side so sadly a regular-sized cookie sheet will not fit
  • Cookie sheets
  • 2 Tablespoon Ice cream scoop #40 the size of the scoop will be on it somewhere! Sometimes on the handle or the rim of the scoop, even on the little thing-a-ma-jigger that pushes the dough out of the scoop

Ingredients

Cookie

    Da Dry Stuff- Combine in small bowl and set aside

    • 2 ¼ cups cake flour (285 grams)
    • 2 teaspoons baking powder

    Da Wet Stuff

    • ½ cup unsalted butter (115 grams) 1 stick, at room temperature
    • 3 ounces cream cheese (85 grams) at room temperature
    • 1 cup granulated sugar (200 grams)
    • ½ teaspoon kosher salt
    • 2 large eggs at room temperature
    • 1 tablespoon vanilla extract

    Frosting

    • 1 cup freeze-dried raspberries (30 grams) finely ground in a food processor or spice grinder
    • 1 cup unsalted butter (225 grams) 2 sticks, at room temperature
    • 2 cups confectioners’ sugar (245 grams)
    • 1 teaspoon vanilla extract
    • Pinch of kosher salt

    Da Bling

    • Multi-colored Sprinkles Happy dust!

    Instructions

    • Make the cookies: In a large bowl, using a spoon, cream the butter, cream cheese, sugar and salt until smooth and fluffy. Add the eggs and vanilla extract, and whisk to incorporate some air and to dissolve the sugar crystals, about 1 minute. Stir in the flour and baking powder until just incorporated.
    • Heat oven to 350 degrees and line two rimmed sheet pans with parchment paper. Using two spoons or a cookie scooper, plop out 2-tablespoon/50-gram rounds spaced a couple of inches apart. (You should get about 7 to 8 cookies per sheet pan.) Place the sheet pans in the freezer for 15 to 20 minutes until the dough is no longer sticky and easier to handle.
    • While the dough chills, make the frosting: In a fine-mesh sieve set over a medium bowl, sift the ground raspberries, using a spoon to help pass them through, until most of the ruby-red powder is in the bowl and most of the seeds are left behind in the sieve. (Discard the seeds.)
    • To the bowl, add the 1 cup butter, confectioners’ sugar, vanilla extract and salt and, with an electric hand mixer, mix on low speed until the butter absorbs the sugar. Then, turn the speed up to high and beat until the frosting doubles in size, about 2 minutes, scraping down the sides of the bowl with a rubber spatula to ensure all the ingredients are incorporated. Transfer the frosting to a small container, cover tightly, and set aside. (You should have about 2 cups of frosting.)
    • Remove the sheet pans from the freezer. Roll the chilled dough into even balls and flatten them slightly with your fingers so they’re about 2 inches wide and 1 inch high. Bake the cookies for 13 to 15 minutes, rotating the pans and switching racks halfway through, or until they no longer look wet on top, are still light in color and spring back to the touch. They will puff up and crack slightly. Let cool completely on the sheet pan. (They will continue to cook as they sit.)
    • Using a butter knife or offset spatula, frost each cooled cookie with the raspberry frosting and adorn with the sprinkles.