Category: Breakfast Eats

Breakfast foods you can have any time!

Mayak Eggs to Momofuku Eggs-Eggtraordinary

Mayak Eggs to Momofuku Eggs-Eggtraordinary

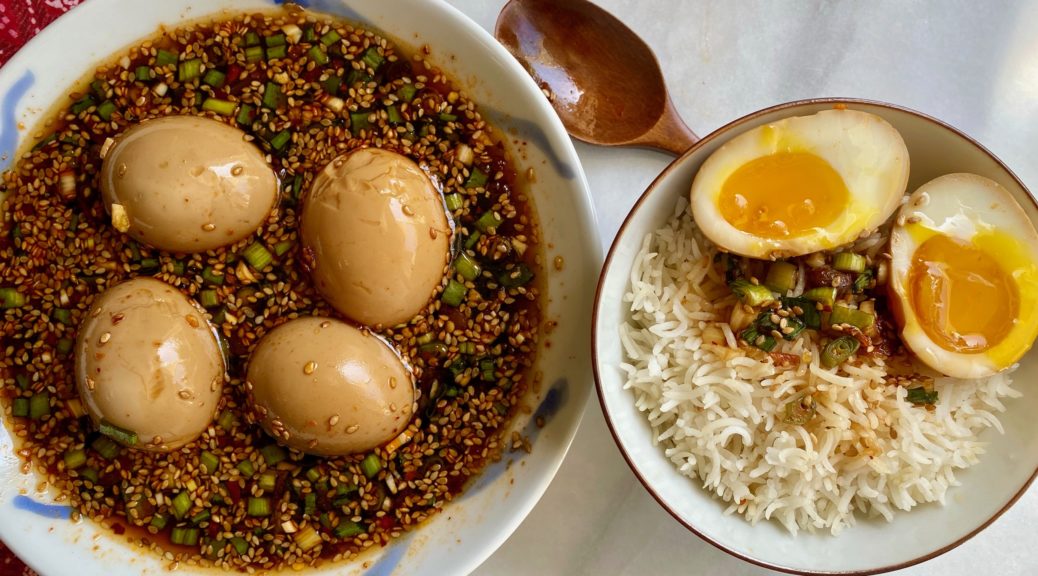
Originally this post was going to just be about the latest Korean craze, Mayak Eggs (마약계란).  Tik Toks, Reels, IG Stories, folks “egging” everyone on to try Mayak Eggs.  The eggs are cooked Ramen Style (we’ll get into that later) and soaked in a bath of soy sauce, sweetener, chilis, garlic, and green onions.  Yep, pretty darn tasty, a flavor explosion of sweet, salty, spicy, and garlicky.

Egg-a-Licious

Ramen Style eggs are cooked in a pretty specific way.  Bring water to a boil and carefully drop your eggs in the boiling water. Let them boil for 6 minutes before immediately plunging them into an ice bath to stop the cooking.  The end result is a soft-boiled egg, where the egg white is cooked through but still tender and the yolk is just beginning to set around the edges. The center of the yolk is oozy, unctuous, and scrumptious, perfect in a bowl of ramen.

I have a confession to make…

I didn’t cook my Mayak Eggs this way.  A couple of years ago, (you all know I LOVE kitchen gadgets right? Donut pan, meat grinder, Instant Pot….) I bought an egg cooker.  Yep, a good for only one thing gadget, cooking eggs.  So I used it for my Mayak Eggs.

Well, I am not going to tell you to go buy an egg-cooker (don’t do it) so I needed to make Six Minute Ramen Eggs for myself.  I still had Mayak Eggs in the fridge so I decided to make Dave Chang’s Momofuku Ramen Eggs.  His recipe was part of Food52’s 10 all-time favs, so this was an easy call.

6 Things You Need to Know

  • Both these recipes are incredibly EASY.
  • Both are riffs on a soy sauce-based brine to flavor the eggs
  • Plan to make them in advance as the eggs need to sit in the brines for awhile
  • Mayak means drug in Korean.  Yes, they are addicting-that good
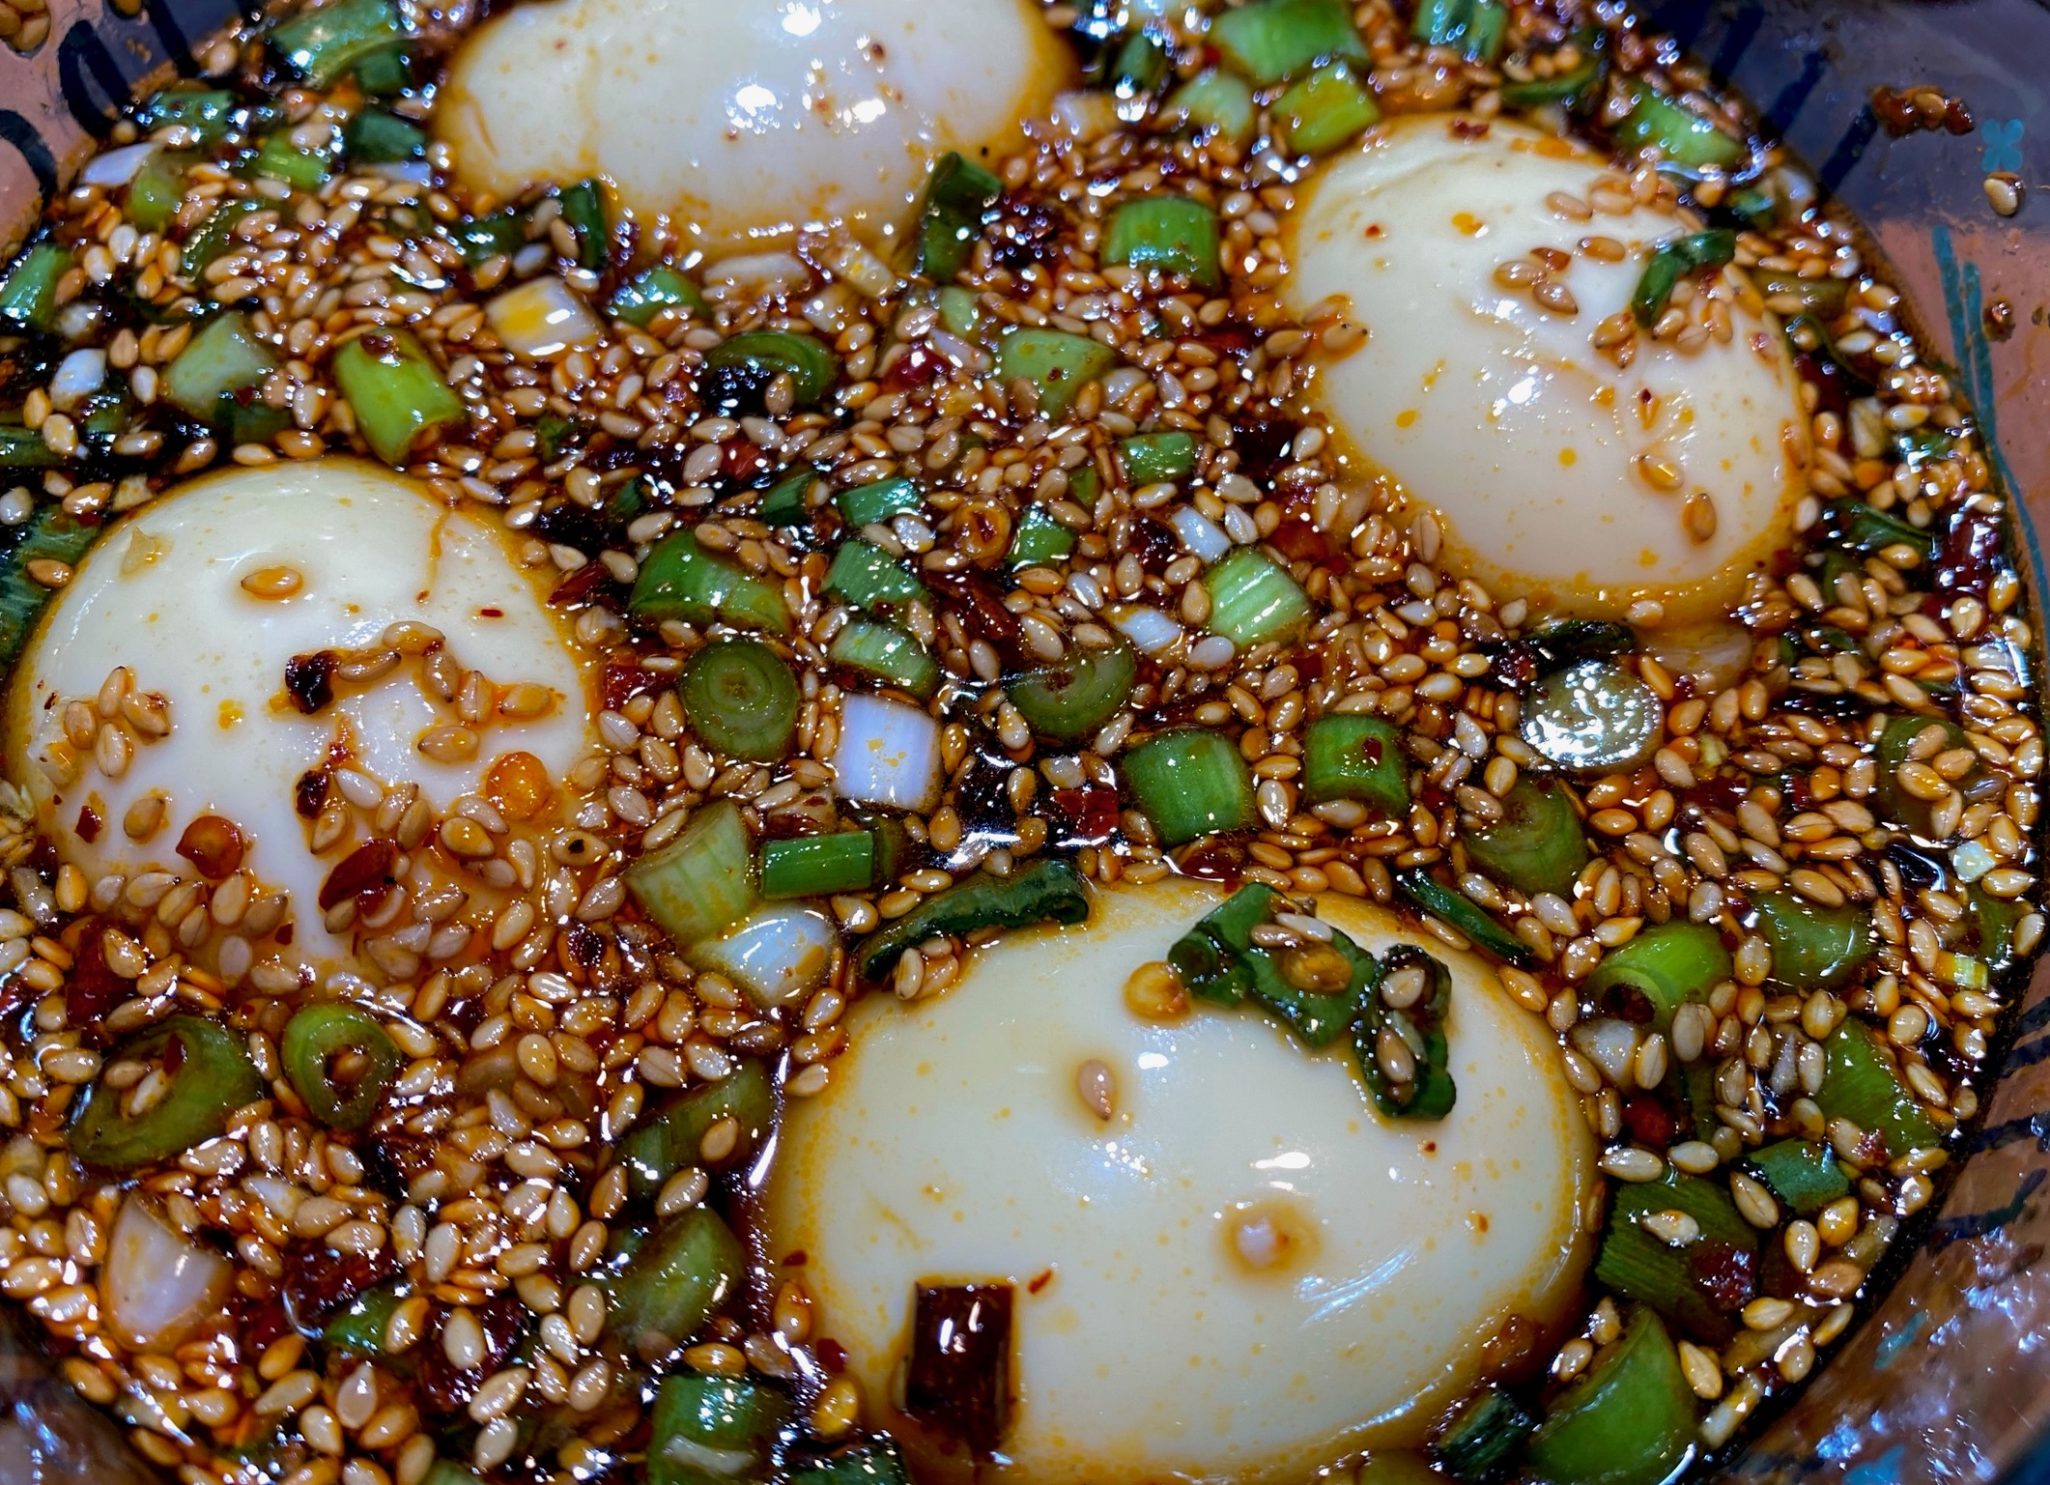
  • The longer the eggs are left in the brine the more color and flavor they will absorb

I saved the best for the last…

  • The hardest, most frustrating THING will be peeling those damn eggs!

Key points before the deep dive into the unappealing task of peeling.

Do You Mayak?

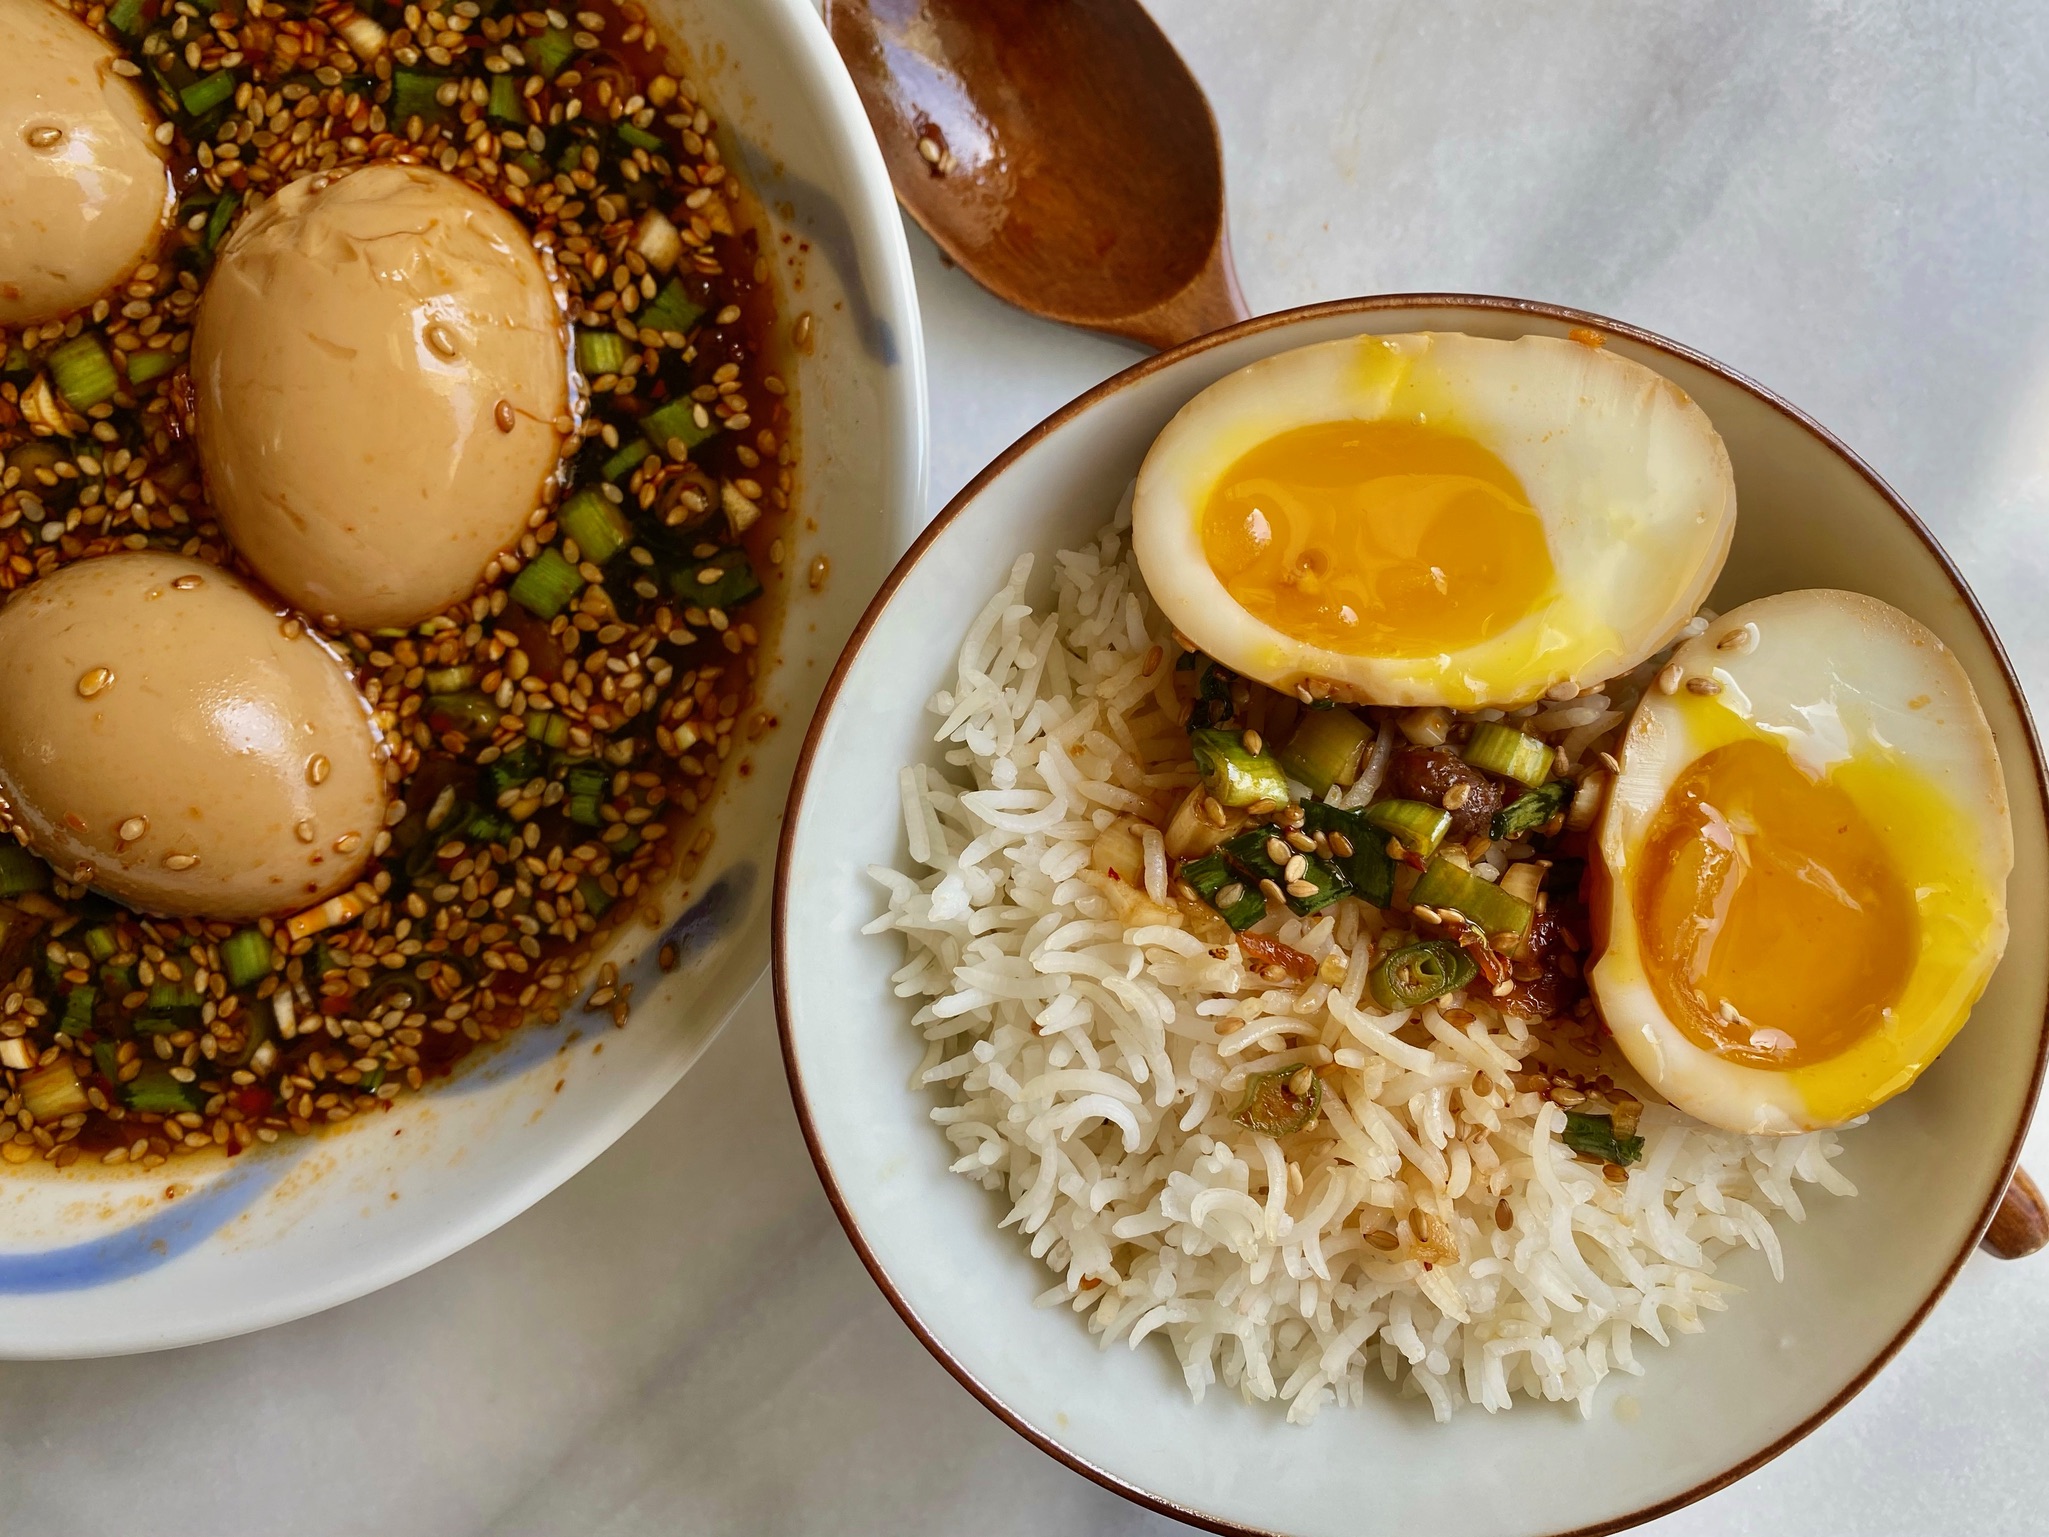
The sauce for the Mayak Eggs is delicious on rice or noodles. The soy sauce and sweetener (you can use corn syrup, rice syrup, or honey) balance each other so it is okay to leave the eggs in the brine/sauce to store.  The aromatics, garlic, chilis, scallions pump up the flavors in the sauce and take the eggs to a whole new level.  Absolutely delish.  Mayak Eggs can be served as a banchan (side dish) or as a topping on a bowl of rice (my fav) or noodles.  I tossed one in my bowl of Congee, along with a splash of the sauce this morning.  Delicious.

For less spicy eggs, de-seed and/or de-vein the chilis or reduce the number of chilis.  You can definitely play with this sauce and make it your own.  Add a little fish sauce for a briny flavor or a Ponzu instead for citrus notes.  Go crazy, it’s all good.

Dave is a Good Egg

Momofuku Eggs are closer to a traditional ramen egg. Not only great with ramen or Udon, but also delicious as part of a rice bowl like Taiwanese Pork Belly Rice Bowl or Buta no Kakuni (Japanese Pork Belly) or Simple Minced Pork BowlThe brine is salty.  Marinade your eggs for no more than 4 hours and use a low-sodium soy sauce.  Once made, the eggs can be stored sans sauce in an airtight container.  For a sweeter egg, add another tablespoon of sugar.

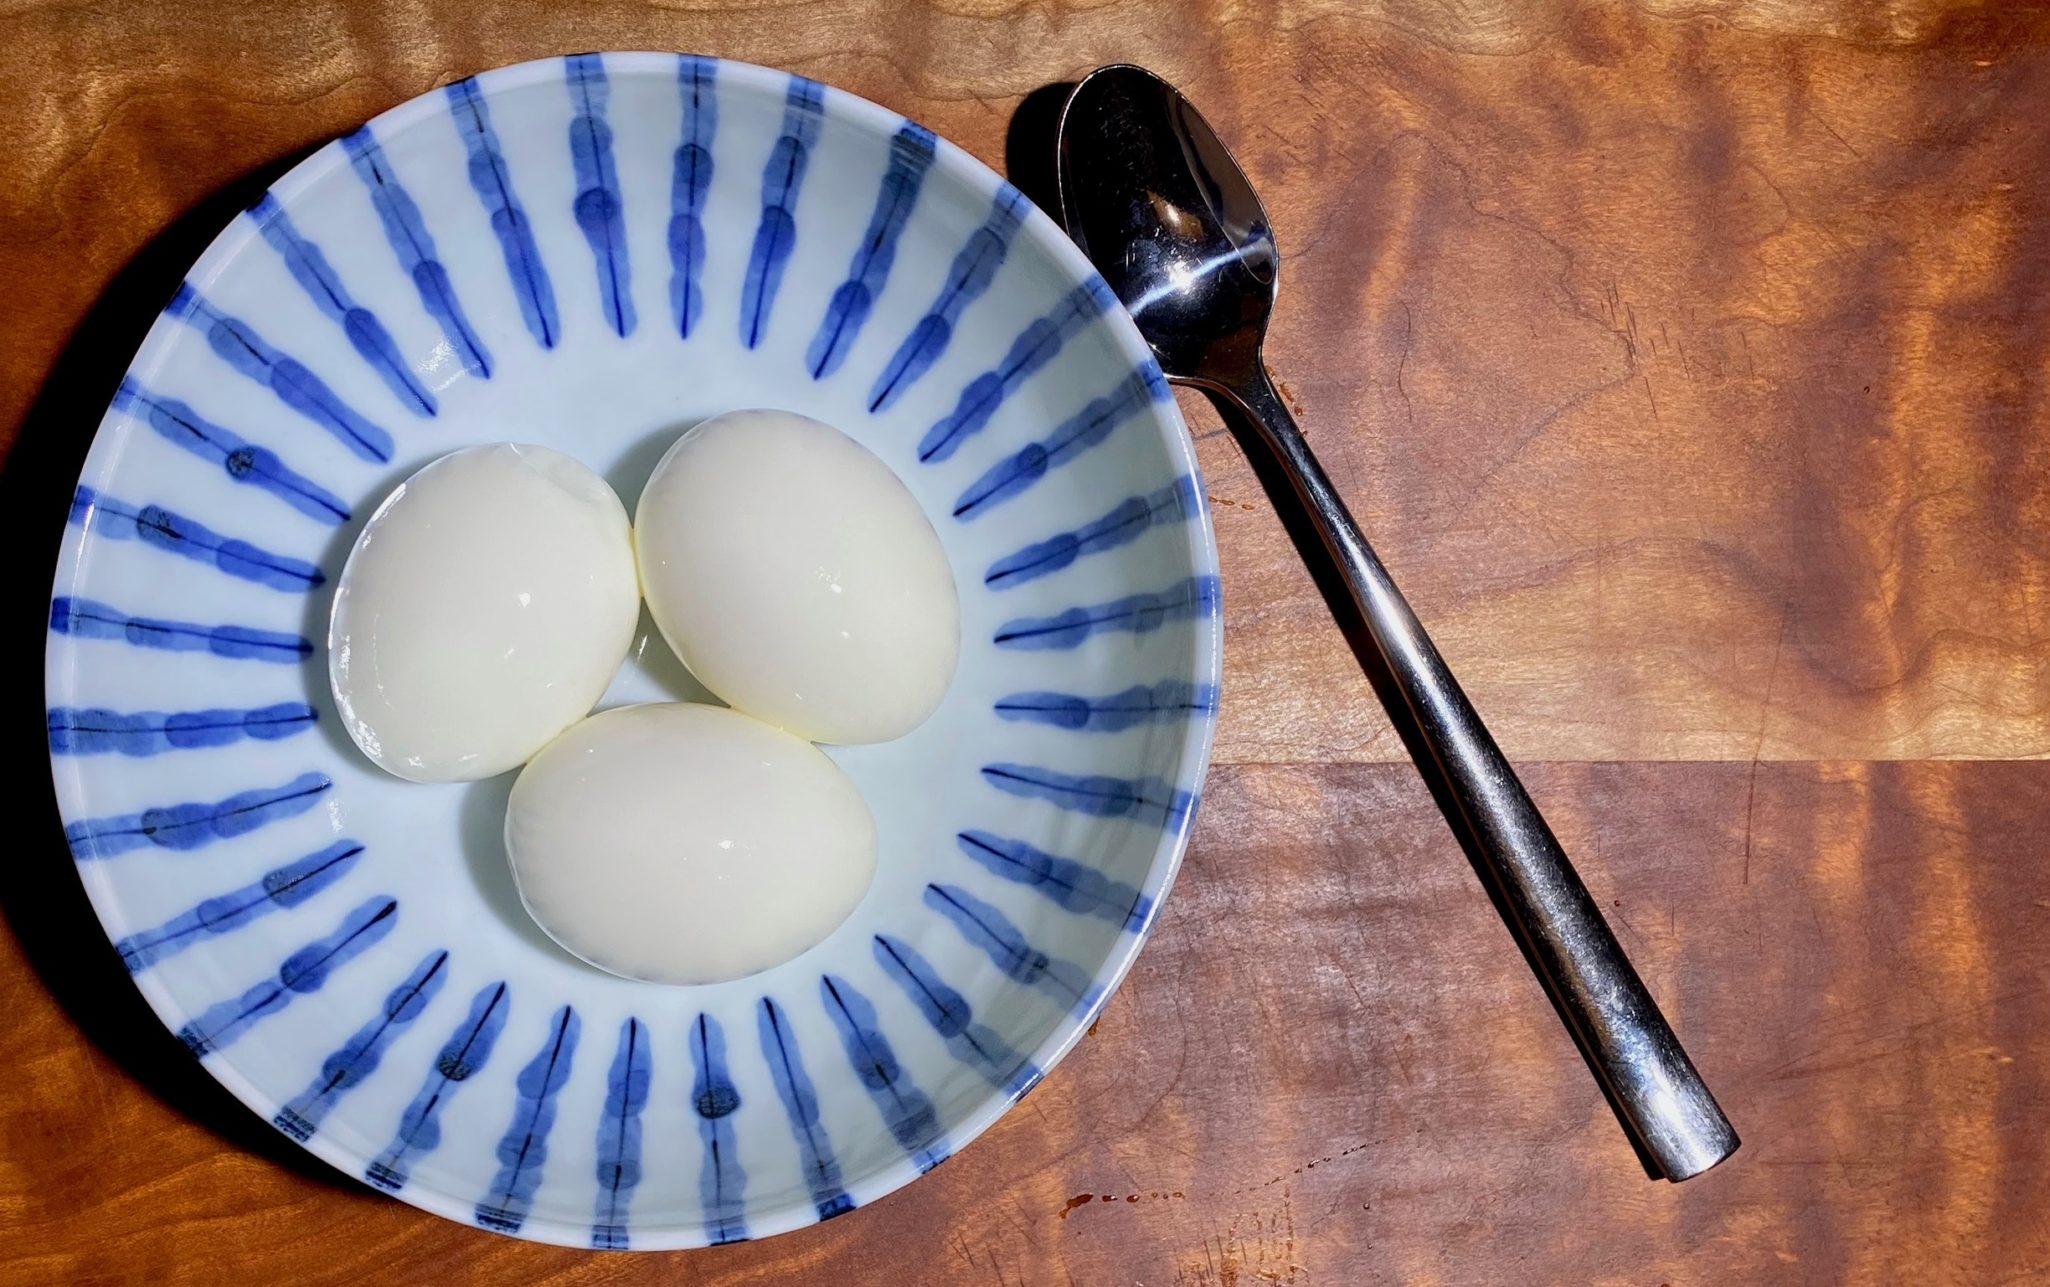
It’s the Big Egg…Here’s the Hard Part…Peeling

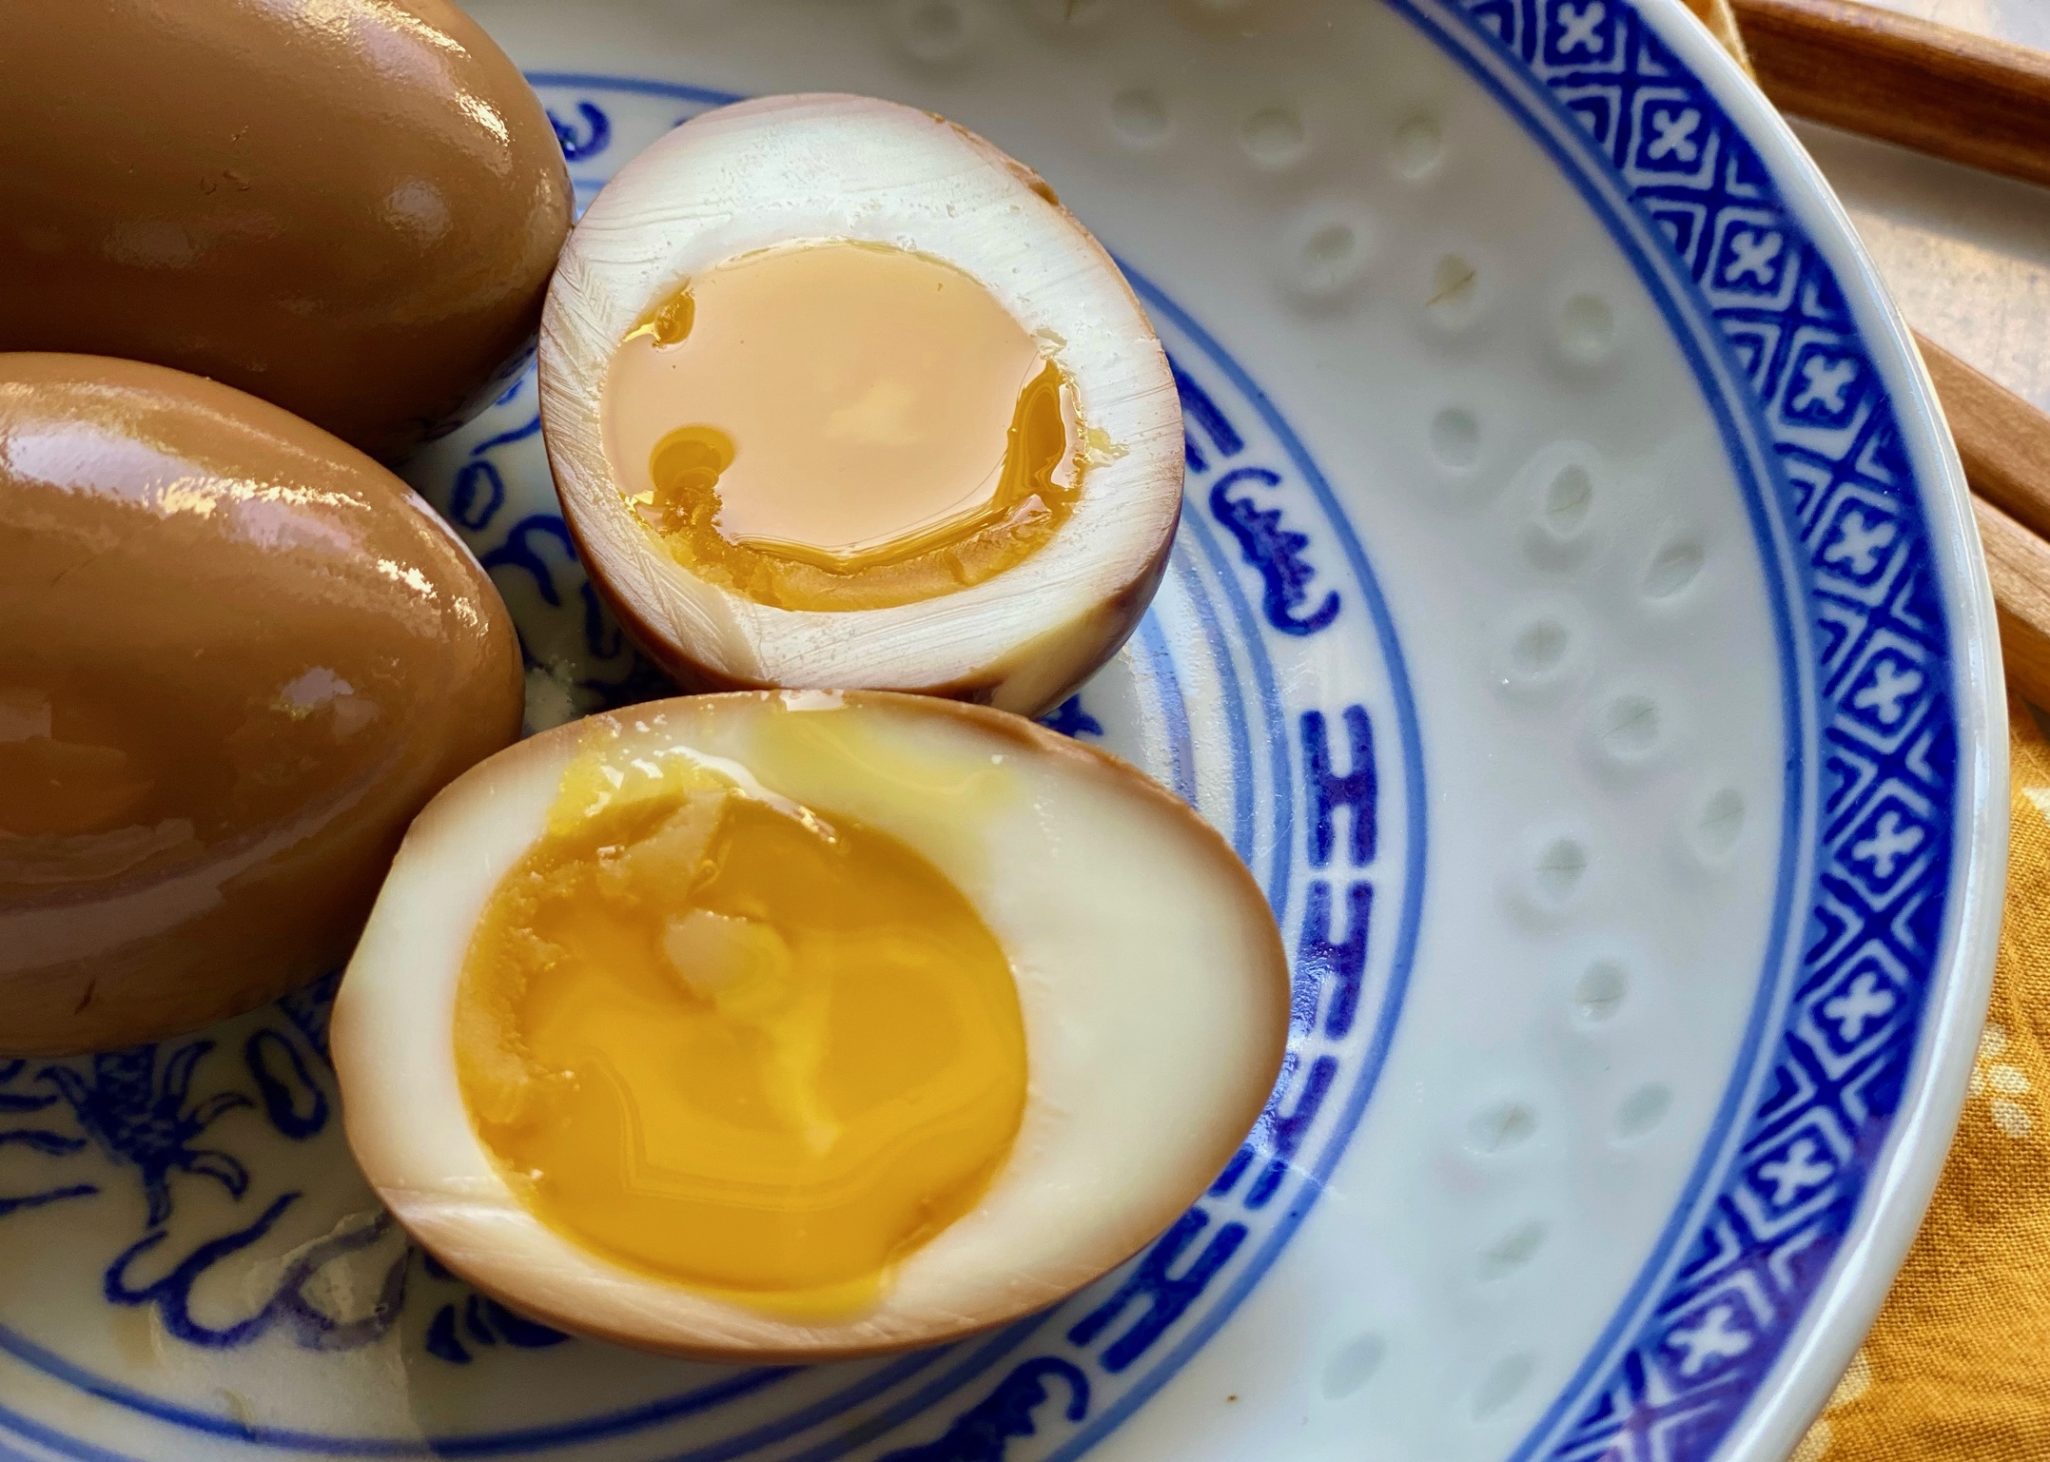
The goal is to end up with a smooth, pristine, beautiful egg…after peeling it.  The eggs are a little softer than a hard-boiled egg adding another layer of difficulty. Peeling without leaving little divots in the eggs, not an easy task.

  • Boil enough water such that the water level is one inch over the eggs.
  • Add 1 tablespoon vinegar and 1 teaspoon salt to the water. ( I see just as many recipes that don’t include this-optional)
  • When the water comes to a boil, carefully lower the eggs into it.
  • For the first minute of boiling, stir the eggs around the pot, this helps center the yolk.
  • Boil (not crazy boil, gentle rolling boil) for 6 minutes for a runny yolk, an additional minute for a jammy egg.
  • Have an ice bath ready to transfer the eggs into.
  • Allow eggs to cool for 5 minutes in the ice bath.
  • Crack the eggshell by tapping on it with a spoon.  Carefully peel the eggshell off along with the membrane between the shell and egg.  It helps to peel the egg in water or under running water.
  • Invert your teaspoon so the bottom is facing you, and slide it under the eggshell and membrane, lift the spoon to separate the shell from the egg.
  • Rinse any shell fragments off eggs and place them in brine.  Done!

Mayak Eggs

Delicious and easy, Mayak Eggs are the perfect rice or noodle bowl accompaniment
Course Appetizer, Main Course
Cuisine Asian, Asian-American
Keyword appetizer, egg, Mayak eggs, momofuku egg, ramen egg
Prep Time 10 minutes
Cook Time 6 hours
Servings 6 servings10

Ingredients

Cookin' Da Eggs

  • 4-6 eggs room temperature
  • 2 tsp salt
  • 1 tbsp white vinegar

Da Marinade

  • 1/2 cup soy sauce I use Sempio 701 Soy Sauce for this dish
  • 1/2 cup water
  • 1/2 cup rice syrup corn syrup or honey
  • 3 garlic cloves chopped
  • 3 to 4 green onions chopped
  • 1 green chili chopped (optional)
  • 1 red chili chopped (optional)
  • 1 tbsp sesame seeds

Instructions

Cookin Da Eggs

  • Heat enough water to cover 6 eggs by 1 inch in a pot. Add salt and vinegar and bring it to a rolling boil. Using a slotted spoon add eggs to water. Cook the eggs for 6 minutes for runny yolk or up to 10 minutes (Nooo, don't do it!) for hard-boiled eggs. While eggs are cooking, make a water bath of ice and water in a medium-size bowl. When the eggs are done, Immediately transfer them to the ice water bath. Cool for 5-7 minutes before peeling.

Da Sauce (marinade)

  • Combine soy, water, and sweetener and stir to blend. Add garlic, green onions, chilies and sesame seeds, stir.
  • Peel the eggs carefully without damaging them (easier said than done) and place in an air-tight container. Pour the sauce mixture over the eggs, cover and store in a refrigerator for at least 6 hours to overnight before serving.
  • It will last 5 to 7 days in fridge!
  • Drizzle with sesame oil! Serve with hot steamed rice.

Momofuku Marinated Ramen Egg

Momofuku 6-minute eggs perfect topping on ramen or by itself as a snack
Course Appetizer
Cuisine Asian
Keyword egg, ramen egg
Prep Time 5 minutes

Ingredients

  • 6 tablespoons warm water
  • 1 tablespoon sugar addtional tablespoon for a sweeter egg
  • 2 tablespoons sherry vinegar
  • 3/4 cup soy sauce low-sodium or Tamari
  • 4-6 large eggs

Instructions

  • In a medium bowl, whisk together the water and sugar to dissolve the sugar, then stir in the sherry vinegar and soy sauce.
  • Bring a large pot of water to a boil. Carefully put the eggs into the boiling water and cook for exactly 6 minutes and 50 seconds, stirring slowly for the first 1 minute. Meanwhile, fill a large bowl with cold water and ice. When the eggs are done, transfer them to the ice bath.
  • Once the eggs are cool, (5-7 minutes) peel them in the water. See notes above.
  • Transfer the eggs to the soy sauce mixture and marinate in the fridge for at least 2 hours and up to 4 hours, making sure they are completely submerged or occasionally rotate eggs.
  • Remove the eggs from the sweet and salty marinade. You can save the soy sauce mix for another round of eggs, if you wish. Refrigerate eggs in a tightly sealed container.
Game of Scone: The Tea Wedding

Game of Scone: The Tea Wedding

My go-to scone recipe is an adaptation of Dorie Greenspan’s Cream Scone.  I love these and have made countless of variations using dried fruit, fresh fruit, citrus peel.  It is my go-to scone recipe.  Her scones are buttery, sweet, and tender.  I often throw in dried wild blueberries and lemon zest or during the summer, bits of fresh ripe peaches.  Scrumptious.  There is enough sweetness and moisture that these scones can be eaten without accouterments. But feel free to slather a bit of butter and jam on them if you like.  They are little triangles of buttery perfection, but…

They’re just not English Tea Scones

I love High Tea, almost as much as I love having a hot dog with all the fixings at a Giant’s baseball game.  The boys and I went to Hong Kong before COVID and High Tea at the Peninsula Hotel in Hong Kong (think Crazy Rich Asians) was on our bucket list.

I savored the entire experience-the surroundings, the impeccable service, fine china, my boys in jackets and slacks, an array of delicious bite-sized morsels, and of course dainty tea scones with clotted cream and jam.  It was scrumptious.

Lady and Her Pups’ meticulous recipe for Classic English Scones popped up on my feed, I knew I had to try them.  Her video and blog post for her scones are so detailed, you can’t go wrong.  The texture of her scones is spot-on, light, and crumbly the perfect foil for clotted cream and jam.  With that first bite, I found myself sitting at the Peninsula with the boys leisurely sipping on a cup of hot Darjeeling Tea, savoring my scone with clotted cream and strawberry preserves.Ingredients for English Tea Scones

Game of Scones: The Rules

I encourage everyone to watch the video on how to make these scones but if you don’t…here are the highlights…

English scones are not as buttery and a little drier than American scones.  Why? Because you are going to slather copious amounts of clotted cream or butter, jam, or lemon curd on your English scones, Silly.

Brown sugar adds both flavor and color.  Substitute granulated sugar for the brown sugar for a lighter-colored scone.

Work in the butter, you should not have any pea-size bits of butter, mixture should resemble a coarse meal.

Squeeze the flour-butter mixture together, if it clumps you are ready to add the liquid.

A combination of heavy cream and yogurt is used as the liquid this provides moisture and fat.  More butter would weigh down the dough.  The dough will be shaggy after adding the liquid ingredients.  It’s ok, it will come together as you knead the dough.

Roll dough to 1.125 inches thickness, any less and the scones will be too flat.

Keep scones small and dainty, use a cookie cutter no more than 2 inches in diameter.  When cutting, press down without twisting as that would cause the scone to rise unevenly.

The dough will need to rest before baking so the flour has time to absorb the liquid.

Double egg wash, the secret to shiny tops.

These scones should have a crack around the circumference (classic).  This is the perfect spot to split your scone.  Then get ready to spread the clotted cream and jam on both halves!  Yum!

Now go bake some scones!

English Tea Scones

Classic English Tea Scones from Lady and Her Pups
Course Biscuits and scones
Cuisine British
Keyword English Tea Scone, scone, Tea
Prep Time 30 minutes
Cook Time 15 minutes

Ingredients

WET INGREDIENTS

  • 1 large egg
  • 3 tbsp plain yogurt 45 grams, not Greek-style, regular
  • 3 tbsp heavy cream 44 grams

DRY INGREDIENTS

  • 2 cups AP flour 240 grams
  • 1 tsp baking powder
  • 1/4 tsp baking soda
  • 3 tbsp light brown sugar 40 grams. You can substitute granulated sugar
  • 1/2 tsp fine sea salt
  • 5 tbsp unsalted butter, diced 70 grams

Instructions

  • Crack the egg into a small bowl and whisk until smooth. Transfer 1 tbsp of the beaten egg into another cup and set aside. This will be the egg wash (do not add water). Then whisk the plain yogurt and heavy cream with the remaining egg until even. Set aside.
  • In a large bowl, whisk together flour, baking powder, baking soda, light brown sugar and fine sea salt. Add the unsalted butter, use your fingers to rub the butter evenly into the flour until NO SMALL LUMPS OF BUTTER ARE LEFT, and the flour resembles yellow cornmeal.
  • Add all the wet ingredients into the flour mixture. Use a spatula to fold and mix everything together until no loose flour are left in the bowl, then use your hands to knead the dough a few times until everything comes into a ball.
  • Transfer the dough onto the counter, no need to dust with flour. Continue to knead the dough a few more times until it is on just until the dough has a TINY BIT OF RESISTANCE WHEN YOU PUSH IT DOWN. If the dough sticks to the counter, use a pastry cutter to scrape it off, do not flour board. The dough should look even but not as smooth as a bread dough.
  • Now dust the dough with a little flour to prevent sticking, and roll it out into 1-1/8 inch thickness. Press the flat side of the dough scraper on top of the dough to make sure it's flat and level. Use a 2 inch round cutter to press down into the dough. DON'T twist, then gently push the dough out onto a parchment-lined baking sheet without making large dents or making the dough too lopsided. Dip the cutter into some flour and tap on the edge to get rid of excess flour, and cut again.
  • Squeeze the remaining dough back together into a ball without big cracks, roll and cut again. Repeat until you use all of the dough. You should have 7 to 9 scones.
  • Brush the reserved egg wash on the top surface of the biscuits, save the egg wash. Place sheet in the fridge for 30 to 40 minutes UNCOVERED. Meanwhile, preheat the oven on 420 F. Right before baking, brush a second layer of egg wash on the top of the scones. This double layer gives the scones a shiny finish.
  • Bake on the middle rack of the oven for 10 minutes, then turn OFF the oven, and leave the biscuits inside for another 5 minutes to finish cooking. Transfer onto a cooling rack and serve warm with clotted cream and jam-required. In a pinch, you can serve with lemon curd in place of the cream and jam.
Just Peachy Cream Scones

Just Peachy Cream Scones

Ripe for the Picking

Peaches and nectarines are showing up at the farmer’s market in full force now. Summer is in full swing and the delicious scent of summer fruits-peaches, melons, and berries permeate the air. Even with my COVID mask on I catch whiffs of the heady aroma of vine-ripened fruit.  

I came home with way too many peaches and nectarines of course. After eating more than a couple out of hand I decided it was time to change it up.  I saw a recipe in the NYT for a peach loaf bread but that would mean having the oven on for a very long time, way too hot for that.  How about scones?  I can make Dorie’s Cream Scones and throw in peaches in place of currants and fortunately, they bake in a jiffy. 

Dorie’s Cream Scones is my go-to recipe, I have made it with dried cranberries and orange zest, dried blueberries and lemon, or freeze-dried strawberries.  It lends itself well to variations. But fresh fruit?  A little trickier.  I diced the skinned peach and placed it in the freezer while I made the dough.  I used one cup of diced peaches which is conveniently about 1 peach. 

Partially freezing the peaches (don’t use commercially frozen peaches, those have too much liquid), prevents the peaches from getting smooshed when you fold them into the dough.  I tossed them in when I added the liquid to the dry ingredients but it would be better to add the liquid, blend it to a shaggy mess, then add the peaches as you bring the dough together.

Pearls of Sconedom

Fresh fruit is less focused in sweetness and flavor than dried fruit.  I liked the peaches but they would benefit from a couple of “flavor amplifiers”.  Next time I will add a teaspoon of vanilla or 1/2 teaspoon of almond extract to the dough.  I was lazy so I did not put a wash on the scones.  My bad, do not skip this. Brush an egg-wash or heavy cream on the scones before baking and sprinkle them generously with turbinado or sparkling sugar.  This adds both crunch and sweetness.  Another variation to jazz these scones up, finely diced candied or crystallized ginger would be ah-mazing, use about 2 tablespoons.  

Make these scones an hour or two before you serve them. I like them at room temperature, the flavor, and texture set up nicely.  They are often served warm too, just not my preference.  Scones are drier than biscuits which means they are perfect with a spoon of jam and dollop of clotted cream-scone heaven.  If you don’t have clotted cream, you can use creme fraiche, mascarpone, or butter.

Whaddya waiting for, go make some scones!

Dorie Greenspan's Cream Scones

Dorie's classic cream scones with fresh peaches
Course Biscuits and scones, Breakfast, Dessert
Cuisine American, British
Keyword Cream Scones, Dorie Greenspan, Scones
Prep Time 20 minutes
Cook Time 22 minutes

Ingredients

Dry Ingredients:

  • 2 cups all-purpose flour
  • 2 Tablespoons granulated white sugar
  • 1 Tablespoon baking powder
  • 1/2 teaspoon salt
  • 5 Tablespoons unsalted butter chilled & cut into small pieces

Wet Ingredients:

  • 1 large egg
  • 2/3 cup heavy whipping cream
  • 1 tsp vanilla extract optional

Adds:

  • 3/4-1 cup fresh fruit-peaches, nectarines, strawberries, berries larger fruit-diced and left to drain on a paper towel while making dough.

Egg wash:

  • 2 tbsp heavy cream or egg wash
  • turbinado or sparkling sugar

Accompaniments

  • jam or preserves serving
  • clotted cream substitute creme fraiche or mascarpone

Instructions

  • Center a rack in the oven and preheat the oven to 400°F.
  • Line a baking sheet with parchment
  • In a small bowl, stir the egg, cream and vanilla (if using) together.
  • Whisk the flour, sugar, baking powder and salt together in a large bowl.
  • Drop in the butter and, using your fingers, toss to coat the pieces of butter with flour. Quickly, working with your fingertips or a pastry blender, cut and rub the butter into the dry ingredients until the mixture is pebbly.
  • Pour the egg, cream and currants over the dry ingredients and stir with a fork just until the dough, which will be wet and sticky, come together. Don't overdo it. Still in the bowl, gently knead the dough by hand, or turn it with a rubber spatula 8 to 10 times.
  • You can also use a food processor. Place dry ingredients in bowl, pulse 1-2 twice to mix. Add butter and pulse 5-6 times until mixture looks like crumbs. Add egg/cream and pulse to dough just begins to clump. Do not overmix! Take mixture out of processor bowl, fold in peaches and shape dough into circles, proceed as below.
  • Lightly dust a work surface with flour and turn out the dough. Divide it in half. Working with one piece at a time, pat the dough into a rough circle that's about 5 inches in diameter, cut it into 6 wedges and place it on the baking sheet.
  • Brush scones with heavy cream and sprinkle with sugar
  • Bake the scones for 20 to 22 minutes (start checking at 15 min) or until their tops are golden and firm. Transfer them to a rack and cool for 10 minutes before serving, or wait for them to cool to room temperature.
  • The scones can be frozen on the baking sheet as the cut wedges, then wrapped airtight. Don't defrost before baking- just add about 2 minutes to the baking time.
  • Serve with jam and clotted cream or butter

Notes

Great combinations include:
Sub dried blueberries and lemon, add 1 tsp lemon zest
Sub dried cranberries and orange add 1-2 tsp orange zest
Sub fresh fruit for currants:
blueberries, strawberries
cut fruit-partially freeze diced fruit before adding to dough

Lemon Icing

  • 1 cup (120gconfectioners’ sugar
  • 3 Tablespoons fresh lemon juice (about 1 large lemon)

A Dish For All Seasons (Bread Pudding)

A Dish For All Seasons (Bread Pudding)

The What

I LOVE bread pudding.  Sweet or savory, made with almost any kind of bread-from bagels to brioche, enveloped in a custard of eggs and milk, the epitome of comfort food.  Each spoonful is a revelation, crispy, crunchy outside and meltingly soft custard-like inside, YUM, it’s so good.

The Why

I’m guessing bread pudding was born out of economics, a way to not waste day-old bread. Who was that frugal genius?  It’s everything a dish should be-comforting, multi-textured, versatile, simple, and most of all amazingly delicious.

The Who

My favorite recipe is a mash-up of a Mark Bittman recipe in The New York Times and one from Bon Appetit, Apple-Raisin Bread Pudding.  That’s the beauty of bread pudding, it lends itself well to additions and changes.  Play with this recipe and make it your own.  I even have a rift for a Tres Leches Bread Pudding, yep, so many variations, so little time.

The How

It’s super versatile, I have used french bread, challah, brioche, or ciabatta.  If I want a richer dish I replace part of the milk with half-half (25-50%) or add 1-2 additional eggs for a more custard-like pudding.  I have added apples in the fall, berries, or peaches in the summer, dried fruit when my fruit basket is empty or folded in homemade preserves …  For you chocoholics, throw in a handful of chocolate chips.  You get the picture, this is a slam dunk.  For Thanksgiving,  a savory bread pudding with mushrooms, peppers, and Parmesan will grace our table, it has become an annual holiday tradition.

Toast the cubes in the oven at 350 degrees for 7-10 minutes

The Pay-Off

My kids would clean their rooms and do their chores for bread pudding, especially if I added a scoop of vanilla ice cream on top. Yep, a fam-favorite for many reasons.

Adapted from Simple Bread Pudding by Mark Bittman

Who doesn't love a simple, comforting dessert-bread pudding!
Course Breakfast, Dessert
Cuisine American
Keyword bread., eggs, Simple Bread Pudding
Prep Time 10 minutes
Cook Time 35 minutes
Total Time 45 minutes

Ingredients

  • 2 cups milk replace 1/2 with half-half for a richer pudding
  • 2 tablespoons unsalted butter (1/4 stick) more for greasing pan
  • 1/2 cup sugar for a sweeter pudding use 3/4 cup
  • 1 teaspoon vanilla extract
  • Pinch salt
  • 1/2 loaf sweet egg bread like challah or brioche cut into 1.5-2-inch cubes (about 5 to 6 cups)
  • 2 eggs, beatened Like itt custardy? Add an extra egg

Optional Fruit Add-Ins Replace 1/2 cup of bread with any of the following

  • 1 apple peeled and cored, cut into 1/2 inch dice. Granny Smith for tart, Golden Delicious for sweet.
  • 1 cup fresh blueberries

Instructions

  • Heat oven to 350 degrees.
  • Butter a 2-quart baking dish and fill it with cubed bread (8x8 or 9x9 square pan will work)
  • Toast cubed bread pieces in 350 degrees oven for 10 minutes. This is an optional step. If you do toast bread, definitely soak the cubes before baking.
  • In a small saucepan over low heat, warm milk, butter, vanilla, sugar and salt. Continue cooking just until butter melts; cool.
  • Add eggs to cooled milk mixture and whisk; pour mixture over bread. Let sit for abot 30 minutes so the bread can soak up the egg mixture. This makes a more custard like pudding.
  • Bake for 30 to 45 minutes, or until custard is set but still a little wobbly and edges of bread have browned. Serve warm or at room temperature.

Tweaks

  • Like cinnamon add 1/4 teaspoon to egg mixture.
  • In place of fruit use 1/4-1/2 cup jam or preserves, dot pudding, distributing evenly
  • Sprinkle bread pudding with cinnamon before baking. For a crunchy top, sprinkle top with 2 tablespoons cinnamon sugar before baking. (To make your own cinnamon sugar, combine 1/2 cup granulated sugar with 2 T cinnamon)
  • Golden raisins work well in this bread pudding too!

Midwest Made Banana Bread

Midwest Made Banana Bread

Yes, I tried yet another banana bread recipe.  Unlike biscuits, I am not in search of the best banana bread in the universe.  I LIKE the recipe I have for banana bread.  AND yet, like Pavlov’s Dogs, I see a banana bread recipe and I get an overwhelming urge to try it.  Go figure.  Such was the case with Shauna Sever’s banana bread recipe from her book Midwest Made.

In my defense, her BB (please, can I just abbreviate for expedience) was getting rave reviews on Food52 and I did have overripe bananas. I have baked a couple of goodies from the book and all were pretty darn good.  Her Donut Loaf was a big hit with family and friends as were the jam bars.  The book is filled with recipes that are familiar, comforting, and delicious. Treats we have all grown up with, brownies, cookie jar gems, cobblers, and pies-desserts with roots in the Heartland. Right now that’s what it is all about…

Comfort in the Time of COVID-19

The book is a gem and perfect for the times.  If you would like a copy, I have links to Indie Bookstores that could really use your patronage.  In Los Angeles please order from Now Serving LA, and in the Bay Area, Books Inc. (Free delivery!).  A little further away, the iconic institution, Powells City of Books is also delivering (free shipping).  I’m not sure if Omnivore Books in the City has it in stock, but they have a fantastic selection of cookbooks, check it out.  They are also taking orders, shipping, or curbside pick-up.

Back to Banana Bread

What sets Midwest Made’s BB is a crunchy, sweet, coat of sugar on the top of the bread.  Novel.  You wet your fingers and rub the sugar around until it gets clumpy and scatter them on the BB batter.  This creates the crunchy top of the bread, genius.

The loaf comes out of the oven picture-perfect.  The bread has a nice texture with the added crunch of sweet topping.  My bottle of rum was missing in action, a victim of Shelter In Place perhaps, too bad,  the Rum might have cut some of the sweetness or made the flavor a little more complex.  Next time I would add Rum or nuts to the recipe to balance the sweetness.

The recipe uses oil as the fat which makes it super easy and quick to throw together.  The dry ingredients are combined and folded into the wet.  Try not to overmix (mantra), the batter will be lumpy and pourable.  This is essentially a one-bowl, one spoon or spatula, recipe.  How easy is that?

Pour the batter into a 9×5 loaf pan and make the sugar topping.

I would add chopped pecans or walnuts to the batter or the sugar topping.  The sugar is the kicker.

I was amazed that the sugar didn’t melt into the batter but remained formed and crunchy.

I liked this recipe and would make it again but does it replace my Best Damn Banana Bread recipe, probably not.

The Only Banana Bread You’ll Ever Need from Midwest Made

Course quick breads
Cuisine American
Keyword Banana Bread
Prep Time 15 minutes
Cook Time 1 hour 10 minutes
Servings 10 servings

Ingredients

  • 1 3/4 cups mashed very ripe bananas
  • 3/4 cup plus 2 tablespoons firmly packed dark brown sugar
  • 1/2 cup vegetable oil
  • 1/3 cup well-shaken buttermilk at room temperature
  • 2 large eggs
  • 1 tablespoon dark rum optional
  • 1 teaspoon pure vanilla extract
  • 2 cups plus 2 tablespoons unbleached all purpose flour spooned and leveled
  • 1 teaspoon baking powder
  • 1 teaspoon baking soda
  • 1/2 teaspoon fine sea salt
  • 3 tablespoons granulated sugar for sprinkling
  • 1/2 cup pecans or walnuts chopped

Instructions

  • Position a rack in the lower third of the oven and preheat it to 325-degrees F. Spray a 9x5-inch loaf pan with nonstick cooking spray and line it with parchment paper with a couple of inches overhang on 2 opposite sides.
  • In a large bowl, stir together the mashed bananas, brown sugar, oil, buttermilk, eggs, rum (if using) and vanilla.
  • In a medium bowl, whisk together the flour, baking powder, baking soda, and salt. Pour the dry ingredients into the wet and fold until just blended. Pour the batter into the prepared pan.
  • Place the granulated sugar in a small bowl. Dampen your fingertips with water and work them into the sugar until it just begins to look like snow-if you pinch some, it should just barely hold together. Sprinkle the dampened sugar over the batter, aiming to get it clumped up together in spots.
  • Bake until a toothpick inserted into the center of the cake comes out clean, 60 to 70 minutes. Let cool for twenty minutes in the pan, then use the parchment paper to help lift the loaf out of the pan and cool completely on a wire rack. Store any leftovers in an airtight container for up to 5 days.


Knot Your Average Bunz (Sweet Chocolate and Cinnamon Knots)

Knot Your Average Bunz (Sweet Chocolate and Cinnamon Knots)

Hello my fellow social distancers

It is I again, your resident baking aficionado (J A M I E). I hope you all are staying away from other humans. Queue the joke about how that’s how I normally live my life!!!! The other day (or whenever my mother decides to post the recipe) I wrote a post about no-knead bread that is AMAZING (if you have tried it please post a pic on IG-you might win a prize!)

Today, I am here to write a piece about kneaded bread.

In times of great stress, I turn to TV and baking. I had a particularly tough week at work a few months back, and I showed up on Friday with two pies in hand. One of the most calming shows I watch is Great British Bake Off. Honestly, if you are reading this blog, you don’t need an introduction. Anyways, after a  l o n g week of WFH and meetings, I decided to combine my two stress relievers and try a recipe from one of the GBB contestants. I chose Steven’s sweet chocolate and cinnamon knots because

1) Steven is great

2) They looked amazing

3) Who doesn’t like cinnamon and chocolate?

4) Here is the link to Steven’s post, he is British.  Lucky for you I’ve watched a lot of GBB so I can help with the Queen’s English, lol. Steven’s Sweet Chocolate and Cinnamon Knots

Here are some of my thoughts below:

W O W. This bread is beautiful. I think it might be the prettiest thing I’ve baked. AND the best part—it also tastes DELICIOUS. Definitely worth the trip or TWO (thnx Whole Foods for turning me away) grocery stores at 7 am this morning. Side note: Whole Foods is actually doing this cool thing where they only let 60 year-olds and up (where is my mom when I need her, lol) shop from 7 am – 8 am. I think it’s really great, except for the fact that the Whole Foods employee told un-caffeinated, at 7 am me that I looked like I was 16. Rude.

The dough is light and sweet, with just enough texture to it that I don’t feel like I’m eating air. On its own, it’s great. The perfect bread to drizzle with honey. But even better yet, the recipe calls for stuffing chocolate and cinnamon sugar into the center of the dough before you bake it off. After proofing and baking, the chocolate melts into spirals throughout the bread, permeating every bite with a rich flavor. I know, not a great job of describing this—hey, it’s been a long week of WFH—so just trust me on this one.

One thing that was a bit hard for me was getting the proofing time correct. The recipe calls for dividing the dough into 4 equal pieces; each piece is woven separately into its own knot. As you can guess, it takes a bit of time to finagle the dough into place, so the amount of time the first knot was proofed was about 15-20 min longer than the last. If you are going to try these, I might suggest baking the knots in 2 batches, so you can optimize the proof for each bun. (Lol, can you tell that I’ve been writing too many work emails? “I might suggest…” Just do it, people.

Another difficult thing about these bunz was—you guessed it—the weave pattern. When I first looked at this recipe, I was a bit intimidated by the intricate pattern of the dough.

Don’t be discouraged, trust me.

While the recipe’s instructions are clear as mud, there are a lot of resources online that are helpful. Just google Winston knots, and you will find a lot of sites that show you a step by step process for braiding dough. The difficult thing about this was getting enough chocolate and cinnamon sugar in the buns. After weaving the dough together, you flip over the bun and place your filling in the center. Then use the ends of the strands to seal the filling into the bun, making sure to pinch any holes in the dough that might allow the filling to leak out during the bake. When I was stuffing my dough, I was worried about disrupting/flattening the pattern on the top, so I went pretty conservative with the chocolate. WRONG.

Stuff that bad boi UP.

Proofing the dough the second time will unflatten the buns.
Ok, this post is now way too long. Make this bread, you’ve got the time.

For your viewing pleasure and to help with the process, PICS and a video I found on YouTube that is PRICELESS

The Jamie Way of tying Knots Bunz

Knead dough for 7-10 minutes until smooth and elastic. Place it in a bowl and cover it with saran. Set for 1 hour (double in size) then punch it down and turn it out onto a floured board.

Divide dough into 4 equal pieces. Cover three pieces, take the remaining piece and divide it into 6 equal pieces. Roll each piece into strands approximately 12.5 inches long. They should be equal in size.  To shape the knots: Place 3 strands of dough in a line on the worktop in front of you, at a minus 45-degree angle and fairly close together. Gently pinch the 3 together in the middle. Now place the other 3 strands on top at a 45-degree angle – to form an ‘X’ shape – and pinch together in the middle as before.

Fold the 3 strands at the top left down over the center point and onto the counter to the far right of the strands already there. Lightly shift the 3 strands at the top right downwards so they sit alongside the other strands.

Fold the 3 strands at the top left down over the center point and onto the counter, to the far right of the strands already there. Gently shift the 3 strands at the top right downwards so they sit alongside the other strands.

Pass the set on the far left under the 2 middle ones then back over the last one it went under and into line again. Then take the far-right set and put it under the twisted 2 in the middle then back over the last one it went under and into line.

The last photo, flip knot over and place on the counter. Scatter a quarter of the chocolate chunks down the center of the knot. Mix the sugar with the cinnamon and sprinkle a quarter on top of the chocolate. Bring the long ends of the strands up and over the filling and pinch them together, then gently fold in the sides (try to keep the knot as neat as possible) and pinch the dough together to seal in the filling. Turn it over again, right side up, and gently shape into a neat ball with your hands. Transfer to the lined baking sheet. OMG, okay its super yummy. WORTH trying. REPEAT with the rest of dough.

FINALLY, HERE IS THE RECIPE., You’re welcome

STEVEN’S SWEET CHOCOLATE & CINNAMON KNOTS

These Winston-knot bread rolls are made by braiding together three strands of a soft, sweet enriched dough – filled with dark chocolate and cinnamon sugar.
Course Breads
Cuisine British
Keyword Sweet Chocolate and Cinnamon Knots
Servings 8 servings

Ingredients

For the dough:

  • 500 g strong white bread flour plus extra for dusting (Bread Flour)
  • 5 g fast-action dried yeast from a 7g sachet (Instant)
  • 60 g unsalted butter softened, diced
  • 40 g caster sugar granulated sugar
  • 7 g salt
  • 2 medium eggs at room temperature, beaten
  • About 225ml full-fat milk lukewarm (whole milk)

For the filling:

  • 50 g dark chocolate broken into chunks
  • 4 tsp light muscovado sugar sub light brown sugar
  • 1 tsp ground cinnamon
  • 1 medium egg beaten, for glazing, use any size egg

Instructions

  • Step 1 To make the dough: weigh the flour into a large mixing bowl, or the bowl of a stand mixer, and mix in the yeast with your hand. When thoroughly combined, add the butter and rub into the flour with the tips of your fingers until the mixture resembles fine crumbs. Mix in the sugar and salt then make a well in the centre of the mixture.
  • Step 2 Pour the beaten eggs and 3⁄4 of the lukewarm milk into the well. Using your hands or the dough hook attachment of the mixer on its slowest speed, gradually work the flour into the liquids to make a soft but not sticky dough – slowly adding as much of the remaining milk as needed.
  • Step 3 Knead the dough thoroughly – for 10 minutes by hand on a lightly floured worktop, or for 7 minutes if using the dough hook (on its slowest speed) – until very smooth and elastic. Return the dough to the bowl (if you kneaded by hand) then cover with cling film or a snap-on lid and leave on the worktop to prove for about an hour or until doubled in size.
  • Step 4 Uncover then punch down the risen dough with your knuckles to deflate it. Turn out onto the worktop, very lightly dusted with flour, and knead into a ball. Then weigh the dough and divide into 4 equal portions. Cover 3 portions loosely with cling film and divide the other portion into 6 equal pieces. Using your hands, roll each piece on the worktop into a neat, even sausage 12.5 inches long. Try to use as little extra flour as possible for dusting your hands and the worktop – adding too much extra flour will make the dough tough and dry.
  • Step 5 To shape the Winston knots: arrange 3 sausages of dough in a line on the worktop in front of you – at a minus 45-degree angle and fairly close together. Gently pinch the 3 together in the middle. Now place the other 3 strands on top at a 45-degree angle – to form an ‘X’ shape – and pinch together in the middle as before. Fold the 3 strands at the top left down over the centre point and onto the worktop – to the far right of the strands already there. Gently shuffle the 3 strands at the top right downwards so they sit alongside the other strands.
  • Step 6 Arrange the 4 sets of strands closer together so they are lying side by side and slightly apart, so you can plait them. Pass the set on the far left under the 2 middle ones then back over the last one it went under and into line again. Then take the far-right set and put it under the twisted 2 in the middle then back over the last one it went under and into line.
  • Step 7 Flip the knot over on the worktop. Scatter a quarter of the chocolate chunks down the centre of the knot. Mix the sugar with the cinnamon and sprinkle a quarter on top of the chocolate. Bring the long ends of the plait up and over the filling and pinch them together, then gently fold in the sides (try to keep the plait as neat as possible) and pinch the dough together to seal in the filling. Turn the plait over again, right side up, and gently shape into a neat ball with your hands. Transfer to the lined baking sheet.
  • Step 8 Repeat with the other 3 portions of dough to make 4 neatly plaited round loaves – these knots take a lot of practise and patience to get right! Set them well apart on the baking sheet, slip the sheet inside a large plastic bag and slightly inflate the bag so the plastic doesn’t stick to the dough. Leave on the worktop to prove for about 1 hour, until doubled in size – take care not to over-prove the dough, or let the temperature become too hot, as the breads will lose their shape. Towards the end of the rising time, heat the oven to 425°F
  • Step 9 Uncover the loaves and carefully brush with beaten egg to glaze. Bake in the heated oven for about 20–23 minutes until a good golden brown. Transfer to a wire rack and leave to cool.

I’m Just a Bread Machine and I Won’t Knead for Nobody But You (Maple Buttermilk Bread)

I’m Just a Bread Machine and I Won’t Knead for Nobody But You (Maple Buttermilk Bread)

The COVID-19 stay at home policy has me pulling out my mixing bowls, pots, and pans.  Cooking and especially baking keeps me busy and helps calm the COVID-19 jitters.  I find myself gravitating towards comfort foods and foods from my childhood.  The first thing that came to mind was bread.  Who doesn’t like the aroma of baking bread?  Is there a more perfect food than fresh warm bread, slathered with butter and a dollop of jam?  Apparently I am not alone.  Who knew that all those pictures of empty shelves at the supermarkets were of the flour aisles.

After scavenging a couple of stores, I found the last two bags of King Arthur Flour on the shelf at Whole Foods (sorry, I was THAT person) and packets of yeast at Raley’s.  I settled in under the #stayhome mandate (totally cool with it) and started my carb bender, I mean bread baking.

I made two loaves of bread, best described as polar opposites.  Both are incredibly easy but for really different reasons.

The first loaf a Buttermilk Maple Loaf comes from Lora Brody’s Bread Machine Cookbook, a book I picked up waaaay back in the day when I bought a bread machine.  The Maple Buttermilk Loaf was my go-to recipe in the book.  Great for toast, sammies, crumbs or croutons.  It has a nice flavor and the texture of classic sandwich bread.  Pretty much the bread you grew up with soft, tender, slightly sweet-yummy. Perfect for Peanut Butter  and Jelly, Fried Baloney Sammies and Tuna Fish with Chips Sandwich, the stuff of childhood. Perfect for these times.

And it couldn’t be easier, that is, as long as you still have that bread machine hiding in a closet or corner of your pantry, or call your mom, she probably has one packed away, probably in your old bedroom.

So drag that puppy out and make yourself some bread.  Literally, dump, push the button, comeback in a few hours, bam, a loaf of freshly baked bread.  Like magic. The kneading, the proofing, the resting, all take place in your bread machine.  All the rage, back in the day.  Did you buy too many berries in your moment of frenzied grocery shopping?  Make this super easy and delicious berry jam to go along with your freshly baked bread!

The second loaf is a No-Knead Bread, more like an artisan bread, almost as easy to make, and totally swoon worthy.  Find the post here.

My machine is an old Panasonic that makes 1.5 pound loaves.  Which means really TALL bread, lol. I may be crusty, but I don’t like the crust from machine made loaves.  I cut my slices into squares and keep the scraps for bread crumbs, croutons and for Sammy, he adores bread.

Maple Buttermilk Bread

Easy, delicious homemade Maple Buttermilk Bread made in your bread machine! Pefect for sammies!
Course Side Dish
Cuisine American
Keyword Maple Buttermilk Bread
Prep Time 5 minutes
Cook Time 3 hours 30 minutes

Equipment

  • Bread machine, lol

Ingredients

  • 3 Cups unbleached white flour
  • 4 tablespoons powdered buttermilk
  • 1 teasoon salt
  • 1 Tablespoon butter
  • 3 tablespoons plus 1 teaspoon pure Maple Syrup*
  • 1 Cup water
  • 2 1/2 teaspoons yeast

Instructions

  • Dump* all the ingredients in the machine except the yeast**, program for Basic Bread. Push the button. Comeback in 3.5 hours. Let bread cool so it is easier to cut.
  • *Refer to your machine directions for order of ingredients.
  • **If your machine has a separate yeast reservoir, place yeast in that.

Stay home, stay well.

A Tale of Two Pancakes and Sushi

A Tale of Two Pancakes and Sushi

Nothing beats coming home.  Though we had a blast on our trip to Korea and Japan, it always feels good to open the front door, drop the bags and sleep in my OWN bed!  Aaaaahhhh, bliss.

What else is nice, hmmmmmm

HOME COOKING

Yep, time to get back in my kitchen and make a mess.  I envisioned our first day back, a big pot of rice soup (congee), kick up our feet, and flip on the telly to catch up with the Warriors and Sharks.

But before going home we spent our last day in Japan running around Osaka looking for early morning sushi, soufflé pancakes and Michelin starred Instant Ramen.  We went 2 for 3, couldn’t find the Instant Ramen which was just as well since I couldn’t fit much more in my suitcase anyway.

Breakfast of Champions

At 6:30 am we found ourselves sitting in a small sushi place at the Osaka Fish Market, Endo Sushi.  Surprisingly, we were not alone nor the first ones there.  To make it easy, there is a set menu of sushi flights.  Each flight focus was different, shellfish, fish, tuna.  Fresh and delicious we ordered a set each, then another, then another to share.  Not a bad way to start the day.

My Happy Place

From there we headed back to town.  It was only 8:30.  Yes, enough time to find soufflé pancakes, the current rage.  So we head to Happy Pancake which doesn’t open until 10AM.  First in line baby, uh-huh.  The perks of getting up early.

Happy Pancakes with butter and syrup.  Number two on the bucket list, checked off.

Light, fluffy, souffle-like, and EGGY.  Now, this might be your cup of tea…but for me, they were just way too eggy tasting, reminded me of a French omelet.  Y’all, if I wanted eggs, I would have ordered eggs. I hear there is a joint in Stonestown in San Francisco, and after a three-hour wait, you can try them…Me?  Nah.  I want real pancakes.

When we finally made it home, top on my breakfast bucket list (or due to my screwed up time-clock, dinner bucket list), PANCAKES of course.  I pulled out my current favorite cookbook, A Common Table by Cynthia Chen McTernan of the blog Two Red Bowls and flipped to her recipe for Buttermilk Mochi Pancakes.

Her little tweak is genius.  Using half all-purpose flour and half sweet rice flour, you end up with a light fluffy pancake with a nice, subtle, chew or elasticity and a tiny hint of that rice/mochi flavor.  It’s not eggy.  It’s pancakey!  I love it.  It’s delicious.  If you are a fan of the latest rage..mochi donuts and muffins, you’ll love these griddlecakes.

It’s an easy batter to whip up.  I did stray from the recipe a bit.  I decided to whip the egg white and gently fold it into batter.  The recipe calls for just adding in the unbeaten egg white, but whipping the whites hopefully, adds air and lightness to the batter so I took the extra step.

Mix wet ingredients with dry ingredients just to incorporate.

Whip egg white  until soft peaks and gently fold into batter

CHEAT tip: Use an ice cream scoop to dole out the batter.

If you use a non-stick pan, you won’t need oil or butter on your pan.

These babies are so badass.  You need to try them.  If you don’t have sweet rice flour, use 100% AP flour, you’ll get perfectly respectable traditional pancakes but really, get yourself some sweet rice flour.  You’ll thank me, plus you now have rice flour to make her delicious Peanut Butter Mochi.

Buttermilk Mochi Pancakes

Course Breakfast
Cuisine American
Keyword Butttermilk Mochi Pancakes
Prep Time 15 minutes
Cook Time 10 minutes
20 minutes
Servings 3

Ingredients

  • 1/2 cup 63gm all-purpose flour
  • 1/2 cup 70gm sweet rice flour like Mochiko Blue Star
  • 1 tablespoon sugar
  • 1 teaspoon baking powder
  • 1/2 teaspoon baking soda
  • 1/4 teaspoon salt
  • 1 large egg separated
  • 1/2 cup Greek yogurt whole yogurt
  • 1/2 cup milk of your choice I used 2%, I also warmed the milk before combining milk, butter and egg
  • 2 tablespoons unsalted butter melted and cooled, plus more for the pan and for serving
  • maple syrup or syrup of your choice for serving

Instructions

  • In a medium bowl, whisk together the flours, sugar, baking powder, baking soda, and salt.
  • Separate egg, reserve egg yolk in small bowl. Place egg white in a medium small bowl and whisk until soft peaks are formed.
  • Add the egg yolk, yogurt, milk, and melted butter, and stir until just incorporated.
  • Gently fold egg white into batter.
  • Heat a 10-inch or 12-inch cast-iron or nonstick skillet over medium flame until a drop of water sizzles when it hits the pan. Lightly grease the skillet with butter (or flavorless vegetable oil), or if using a non-stick pan, forego greasing.
  • Use a measuring cup or a large ice cream scoop to drop 1/4 cup batter onto the pan.
  • When the edges of the pancake look dry and bubbles begin to form in the center, approximately 2 minutes, flip and cook on the second side until lightly golden, 1 to 2 more minutes.
  • Remove to a plate and repeat with the remaining batter. If desired, use an ovenproof plate (or a metal rack on a baking sheeand place the finished pancakes in the oven on its lowest heat setting to keep them warm while you cook the rest.
  • Serve immediately, with butter and maple syrup.

Notes

Add rice flour to your pancakes for a delightful twist! The rice flour adds a bit of elasticity and flavor while the pancake is still tender and fluffy. The best of both worlds for these mochi pancakes!

Yeh! A Delicious Chocolate Marzipan Scone Loaf

Yeh! A Delicious Chocolate Marzipan Scone Loaf

I recently added the cookbook Molly on the Range to the 3Jamigos shop.  I couldn’t resist, the Kindle edition is going for a buck ninety-nine. That’s just ridiculous, you can’t even get a cup of joe for that.  Molly on the Range has been out a couple of years and every now and then it would dance across my feed.  I’d think, cute book from that blogger, My Name is Yeh, and keep going.  Fast forward a couple of years, and well whaddya know, her book took off and she has a television show, Girl Meets Farm.  Overachiever, just kidding…but it piqued my interest so I got a copy.  I started reading… Julliard trained percussionist, city girl who moved from Chicago to the Big Apple to a farm in North Dakota. Huh?

Well, the book is delightful. Her writing is warm, friendly, and spunky.  Her photos make me hungry and the drawn illustrations are a really nice touch.  I love cookbooks that tell a story.  Just like A Common Table, the recipes are the icing on the cake and the cake is the delicious stories of family, friends, and discovery.

Her riff on a Midwest tradition the “hot dish”,  a casserole with wild rice or some sort of starch, canned cream soup, and frozen veggies   Come on now, who didn’t grow up with a casserole that started with Cream of Mushroom or Chicken Soup, hmm, hmm, good.  Her version is a made from scratch, a chicken pot pie filling topped with loads of tater tots.  SOUNDS GOOD TO ME.  As much as I love pie crust, I do have a soft spot for tots.

Plus, she had me laughing with “You cover the bitch with Tater Tots”.  Cute with attitude, I like that.

But before trying the classic hot dish, another one of her recipes beckoned my baker side, Dark Chocolate Marzipan Scone Loaf.  Whaat? Scone loaf?  Yep, scone dough baked in a loaf pan. The texture is much like a scone, buttery, crumbly, not too sweet, PERFECT with coffee or tea.  The kicker? Little chunks of marzipan provide a burst of sweet almond flavor in each bite tempered by the bitterness of dark chocolate.  Like a rumble in your mouth.  Soooo good.

Chocolate and Marzipan Loaf

The dough is a snap to put together.  Dry ingredients go into your food processor, pulse cold chunks of butter into the flour mixture. Pour butter-flour mixture into a bowl with marzipan and chocolate chunks.  Stir in eggs, cream, and extracts just until combined. Don’t overmix and keep ingredients cold (just like biscuits and scones).  Scoop the dough into a loaf pan, gently shaping it so the dough is even.  Sprinkle the top with sugar and bake. Before you know it you’ll be sitting down enjoying a delicious slice of chocolatey-almondy scone bread.  Yum!

Dark chocolate Marzipan Scone Loaf

Course Dessert
Cuisine American
Keyword Dark chocolate, marzipan, quick bread, scone loaf
Prep Time 20 minutes
Cook Time 45 minutes
Total Time 1 hour 5 minutes
Servings 8 servings

Ingredients

  • 7 or 8 ounces marzipan chopped into ½-inch pieces
  • 1 tablespoon powdered sugar
  • ½ cup dark chocolate chips
  • 2 cups flour plus more for dusting
  • 1 tablespoon baking powder
  • ½ teaspoon kosher salt
  • 2 tablespoons sugar plus 1 teaspoon
  • ¾ cup cold unsalted butter cut into ½-inch cubes
  • 2 large eggs
  • ½ cup buttermilk or heavy cream
  • ½ teaspoon vanilla extract
  • ½ teaspoon almond extract
  • Jam for serving

Instructions

  • Preheat the oven to 400ºF. Line an 8 x 4-inch loaf pan with parchment paper, allowing 1-inch wings to hang over the edges on the long sides.
  • In a large bowl, toss together the marzipan and powdered sugar to coat. Add the chocolate and set aside.
  • In a food processor, combine the flour, baking powder, salt, and 2 tablespoons of the sugar and pulse to combine.
  • Add the butter cubes and pulse until the butter is the size of peas. Add this to the bowl with the marzipan.
  • In a small bowl, whisk together the eggs, buttermilk or cream, and extracts and add to the dry ingredients. Use a spatula to stir just until combined.
  • Pour the mixture into the prepared loaf pan and spread it out evenly.
  • Sprinkle the top with the remaining 1 teaspoon sugar and bake until golden brown on top and a toothpick inserted into the center comes out clean.
  • Begin checking for doneness at 40 minutes.
  • Cool in the pan on a wire rack for 10 minutes. Remove to the rack to cool completely.
  • Slice with a serrated knife and serve with jam.