Category: Munchies

finger foods, appetizers, happy hour, cheese boards

Just Another Mochi Muffin (Guava!)

Just Another Mochi Muffin (Guava!)

Yes, my romance with mochi muffins continues.

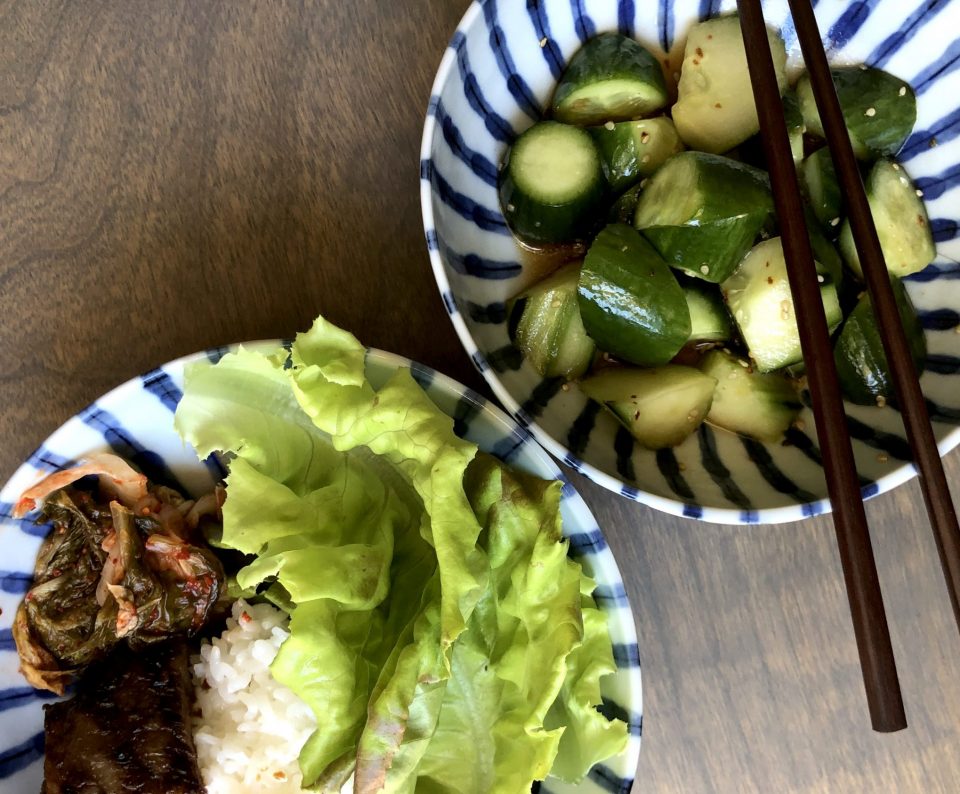
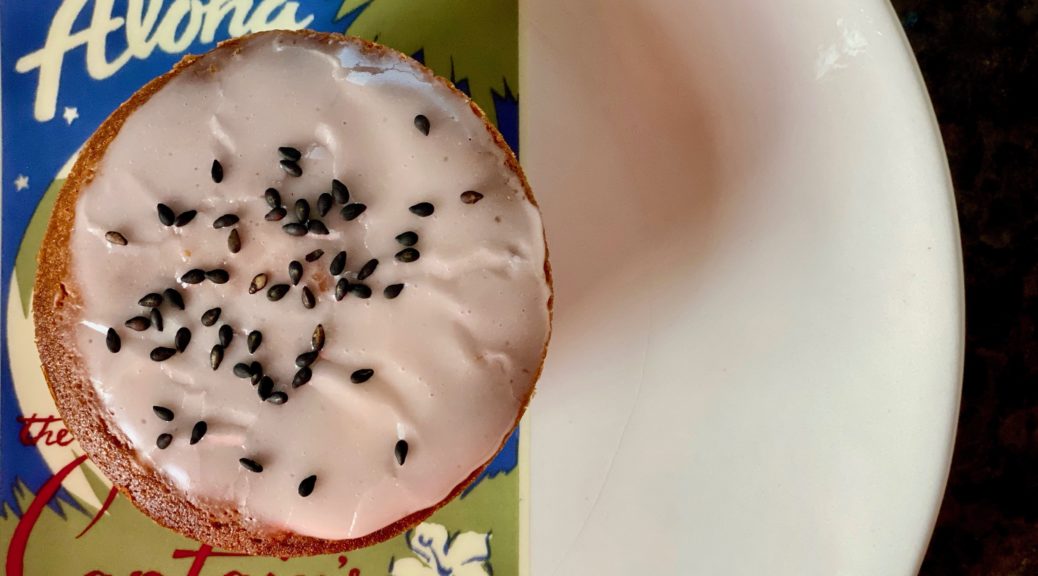
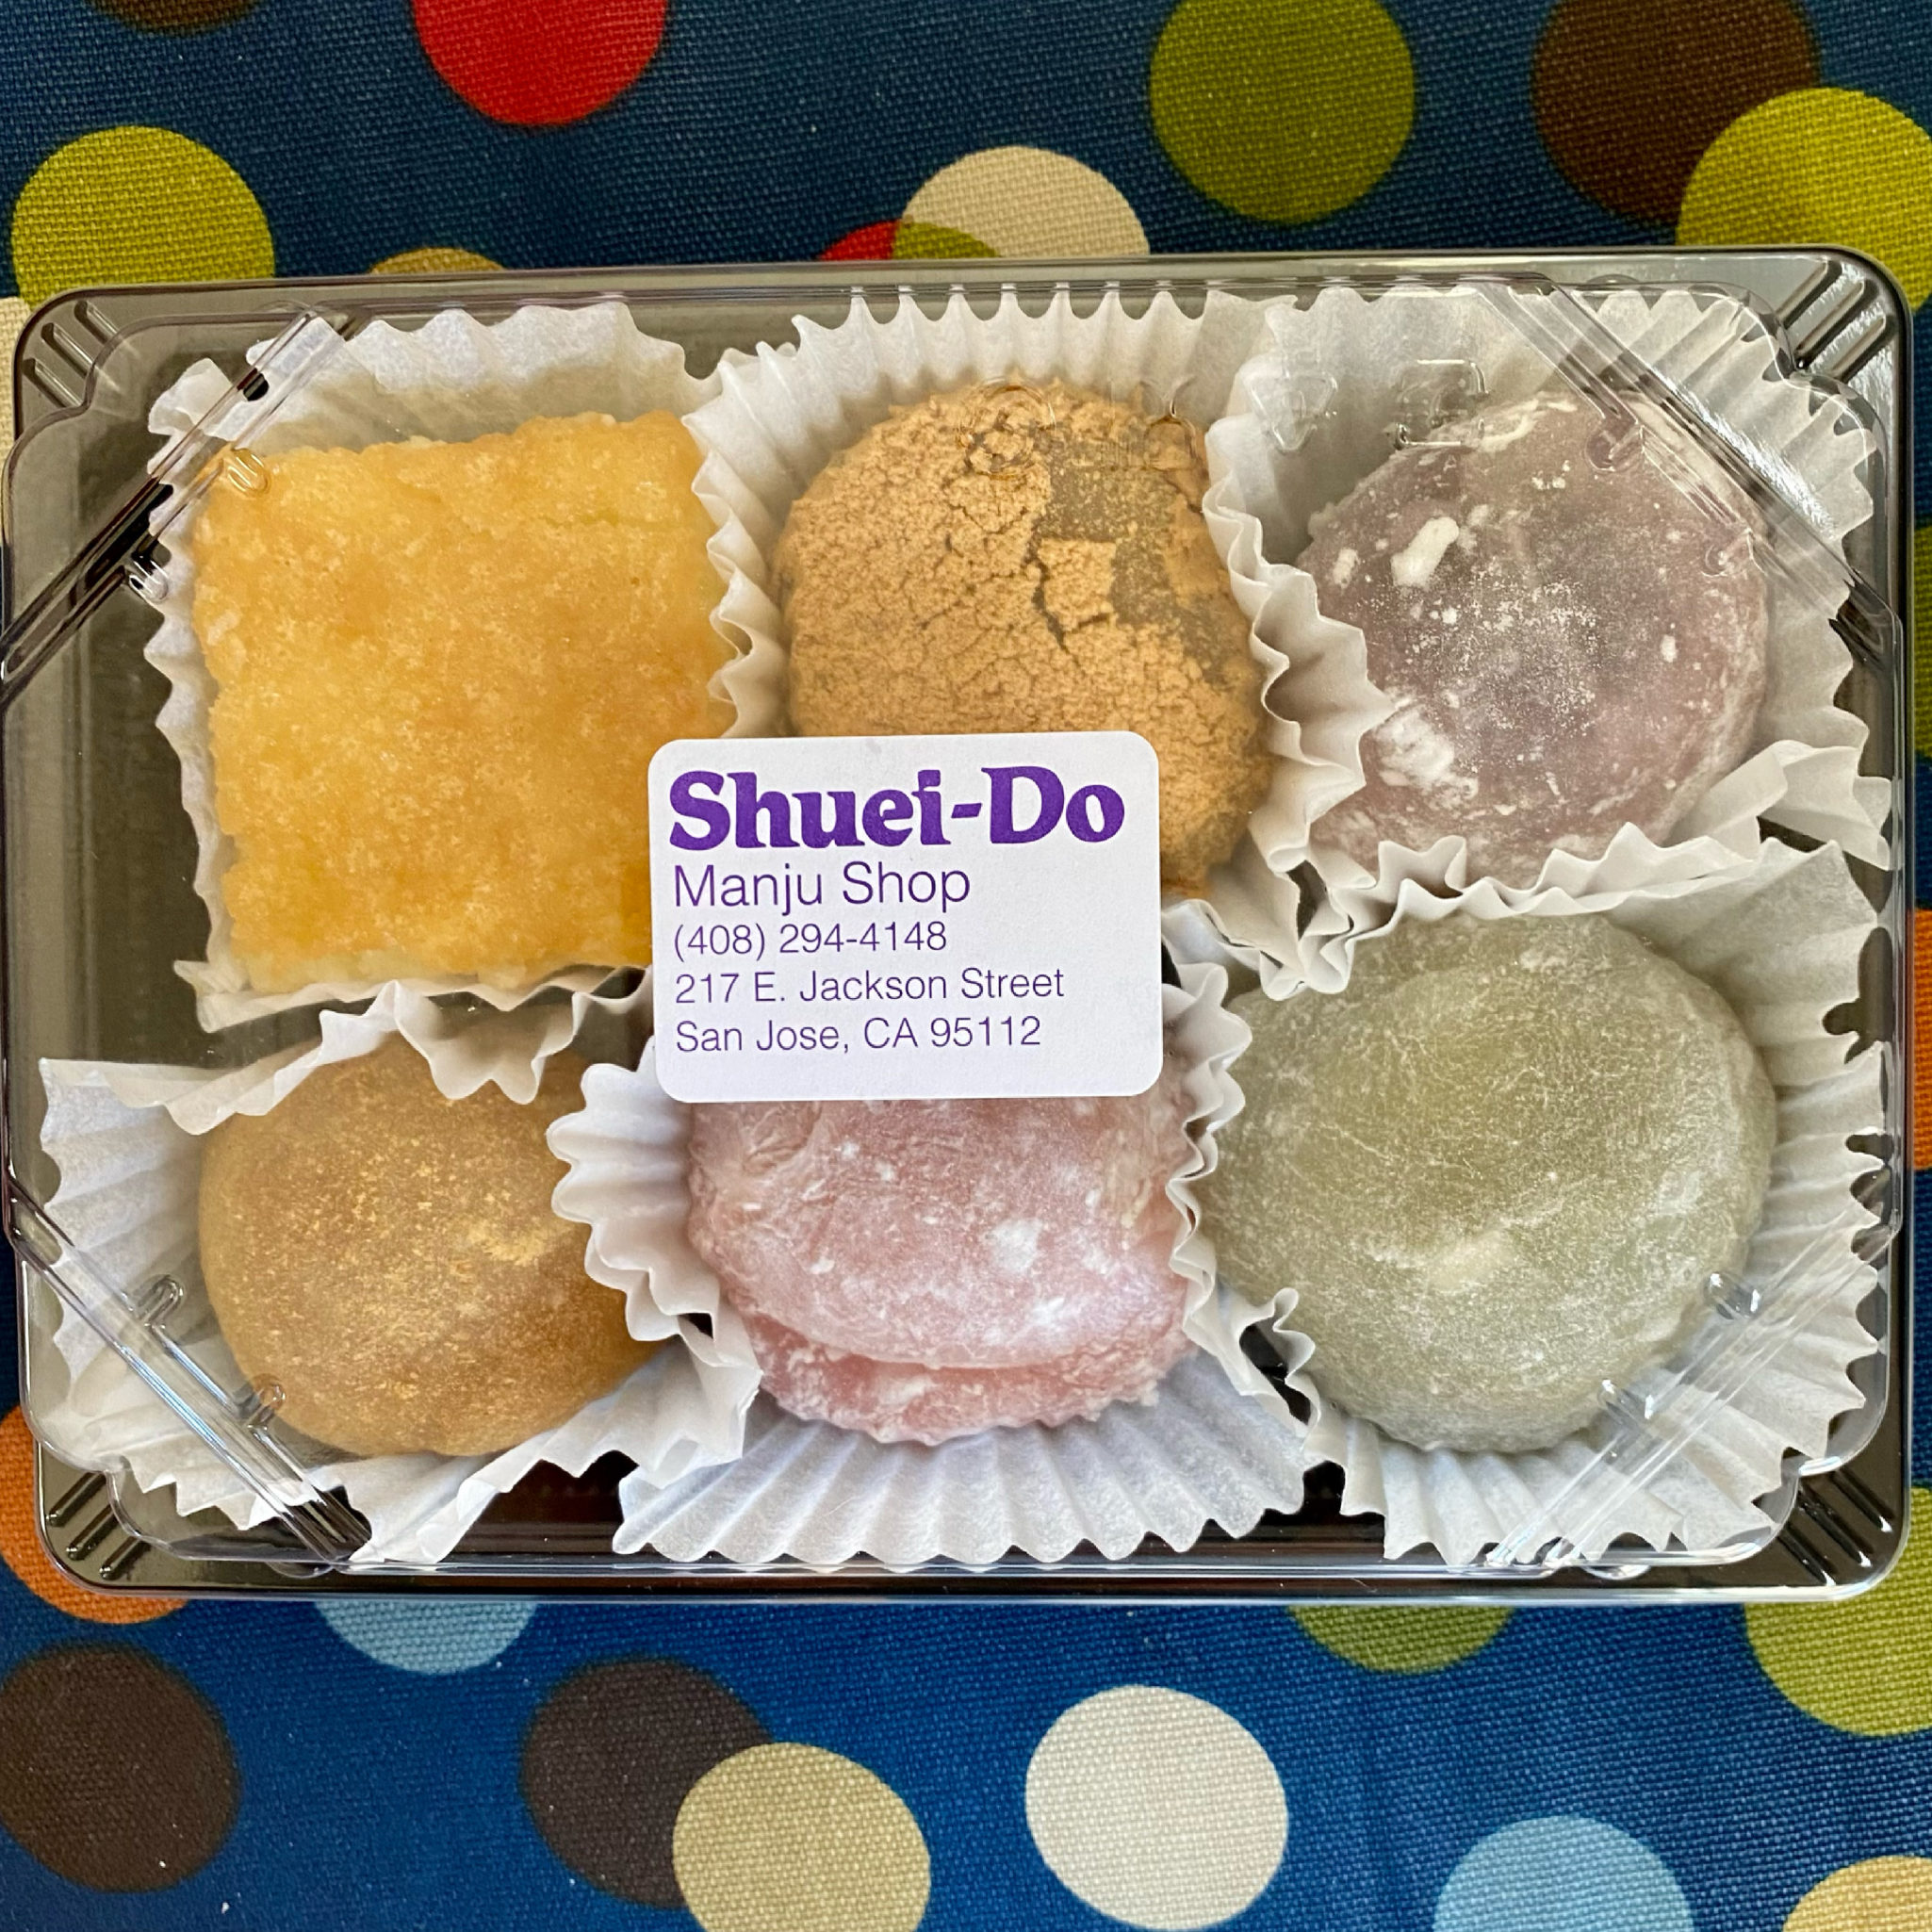
Right next door to Shuei-Do, my favorite manju shop in Japantown, San Jose, is a Poke Shop, Aloha Fresh.  As much as I like Poke, I love going for their butter mochi.  They kick it up a notch by offering different flavors like guava, lilikoi, or a brownie macadamia nut version …all are absolutely onolicious.  Butter Mochi at Aloha Fresh is limited to the weekends but lucky for me and you, Shuei-Do also makes a yummy Butter Mochi. Between the two – you are covered for your mochi fix.

But what if you can’t get to Japantown?

You can make your own AND it’s pretty darn easy.

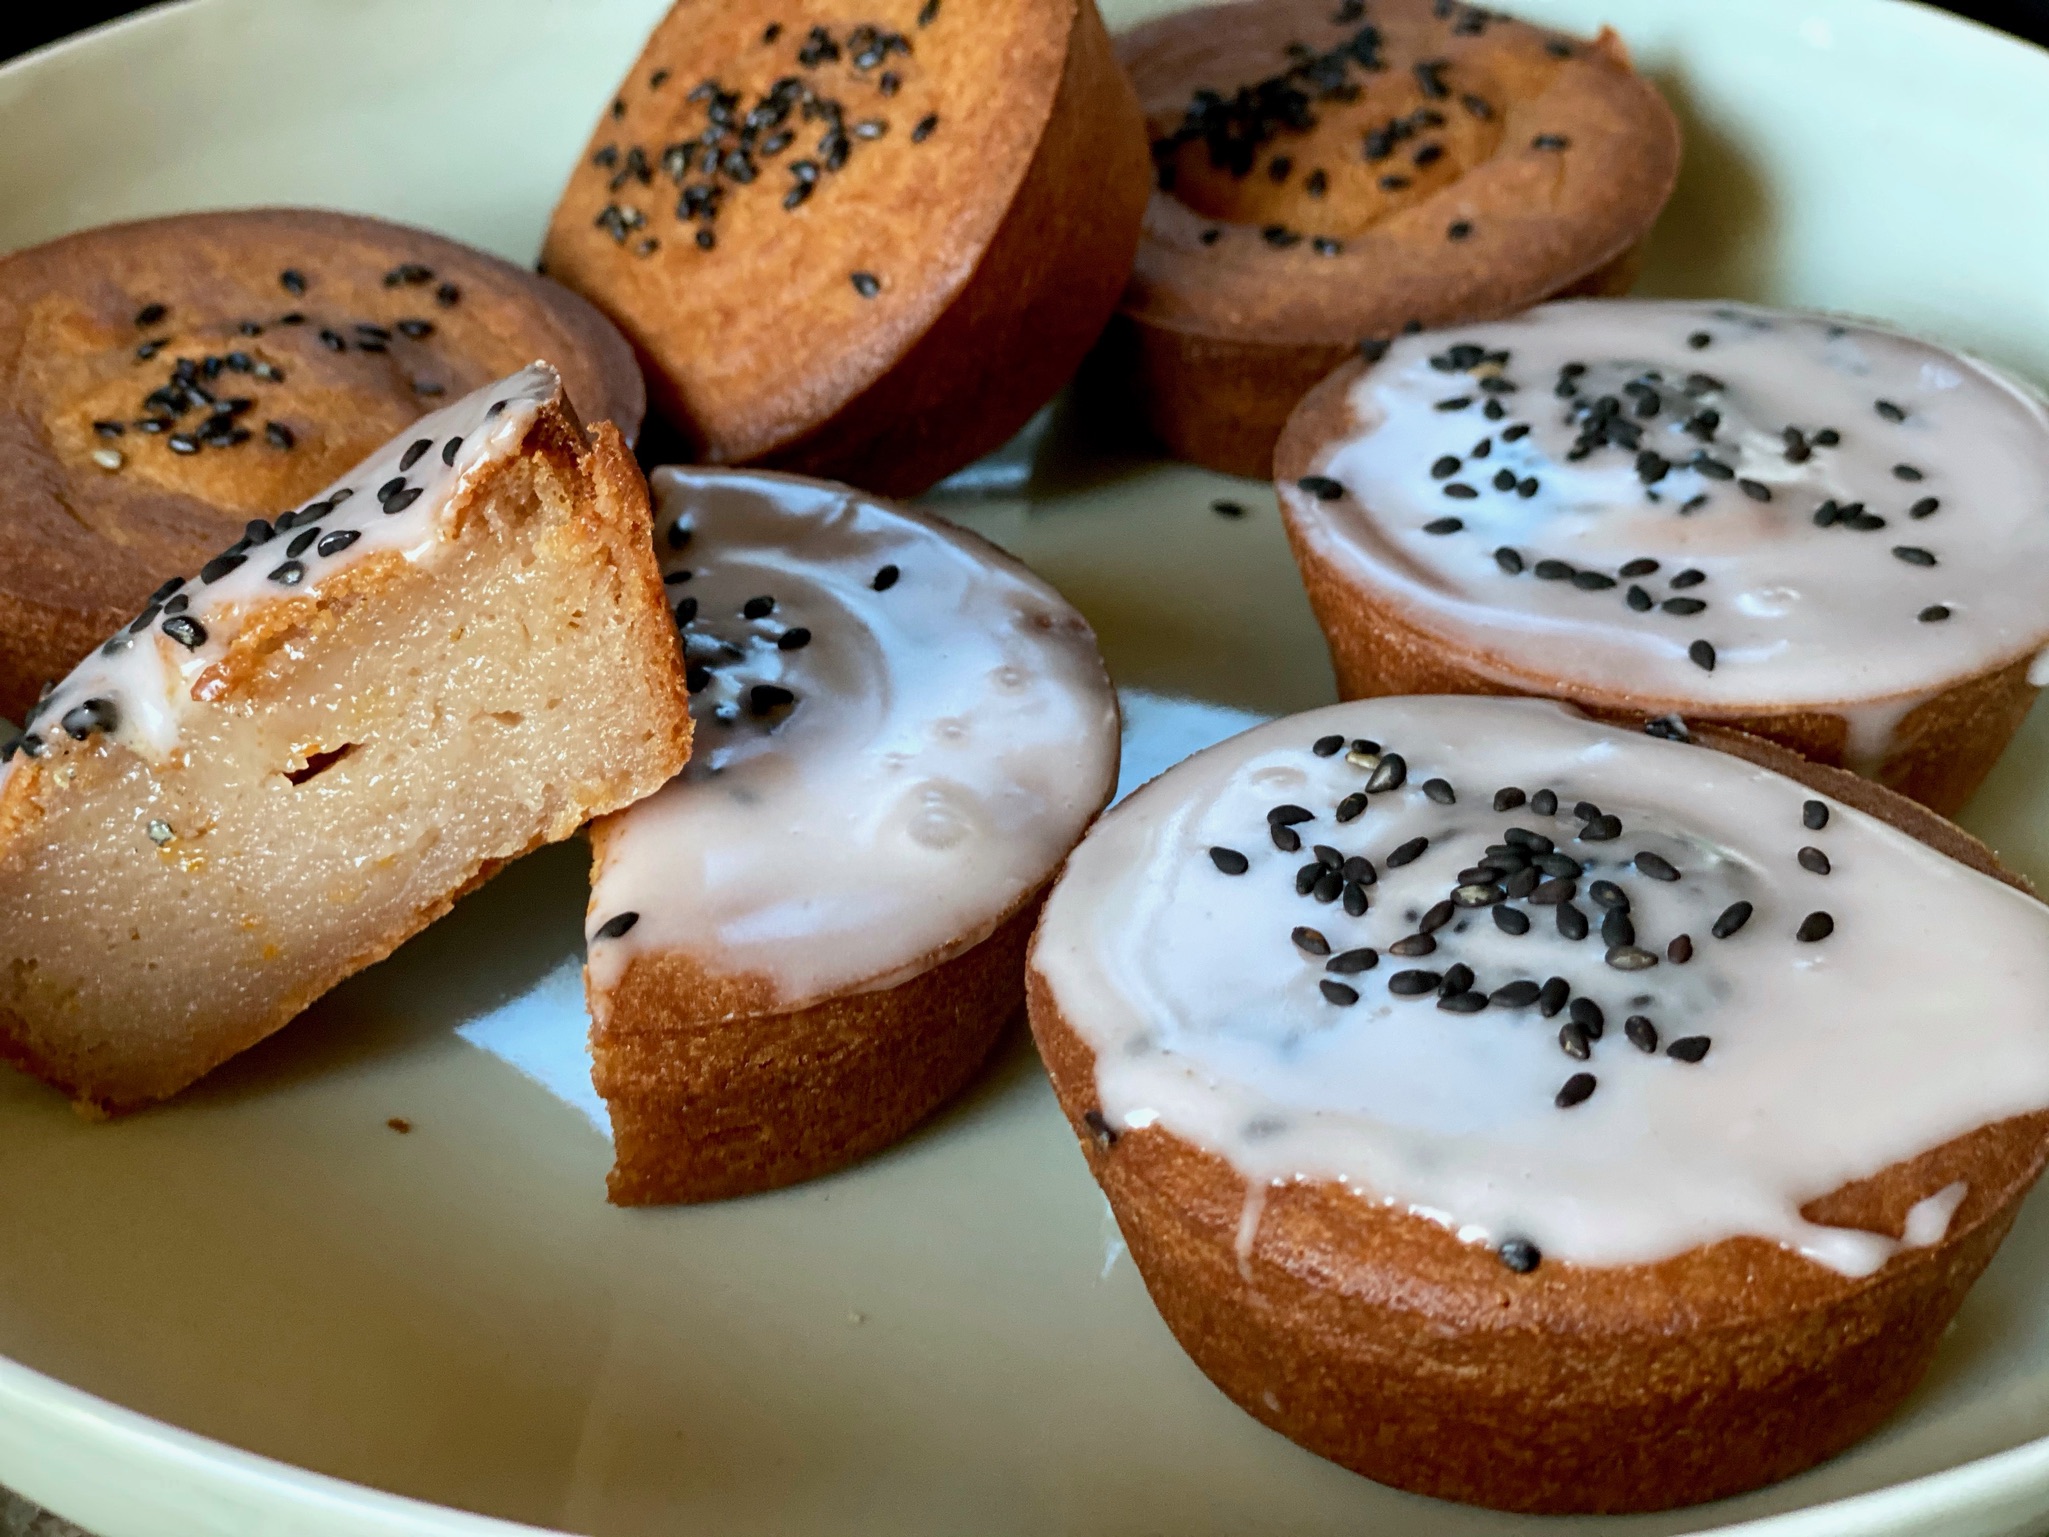
Mochi desserts run the gamut from chewy, bouncy, creamy to moist, a little chewy, and cakey (is that a word?) texture.  I wanted a tropical flavor, buttery, crisp on the outside, chewy on the inside treat.  A recipe for Blood Orange Mochi Muffins from Cooking Therapy served as inspiration.  In place of blood orange juice, I used Guava Nectar.  The muffins were delicious and I plan to try different nectars like Hawaiian Sun’s POG, passionfruit, orange, and guava juice next time.

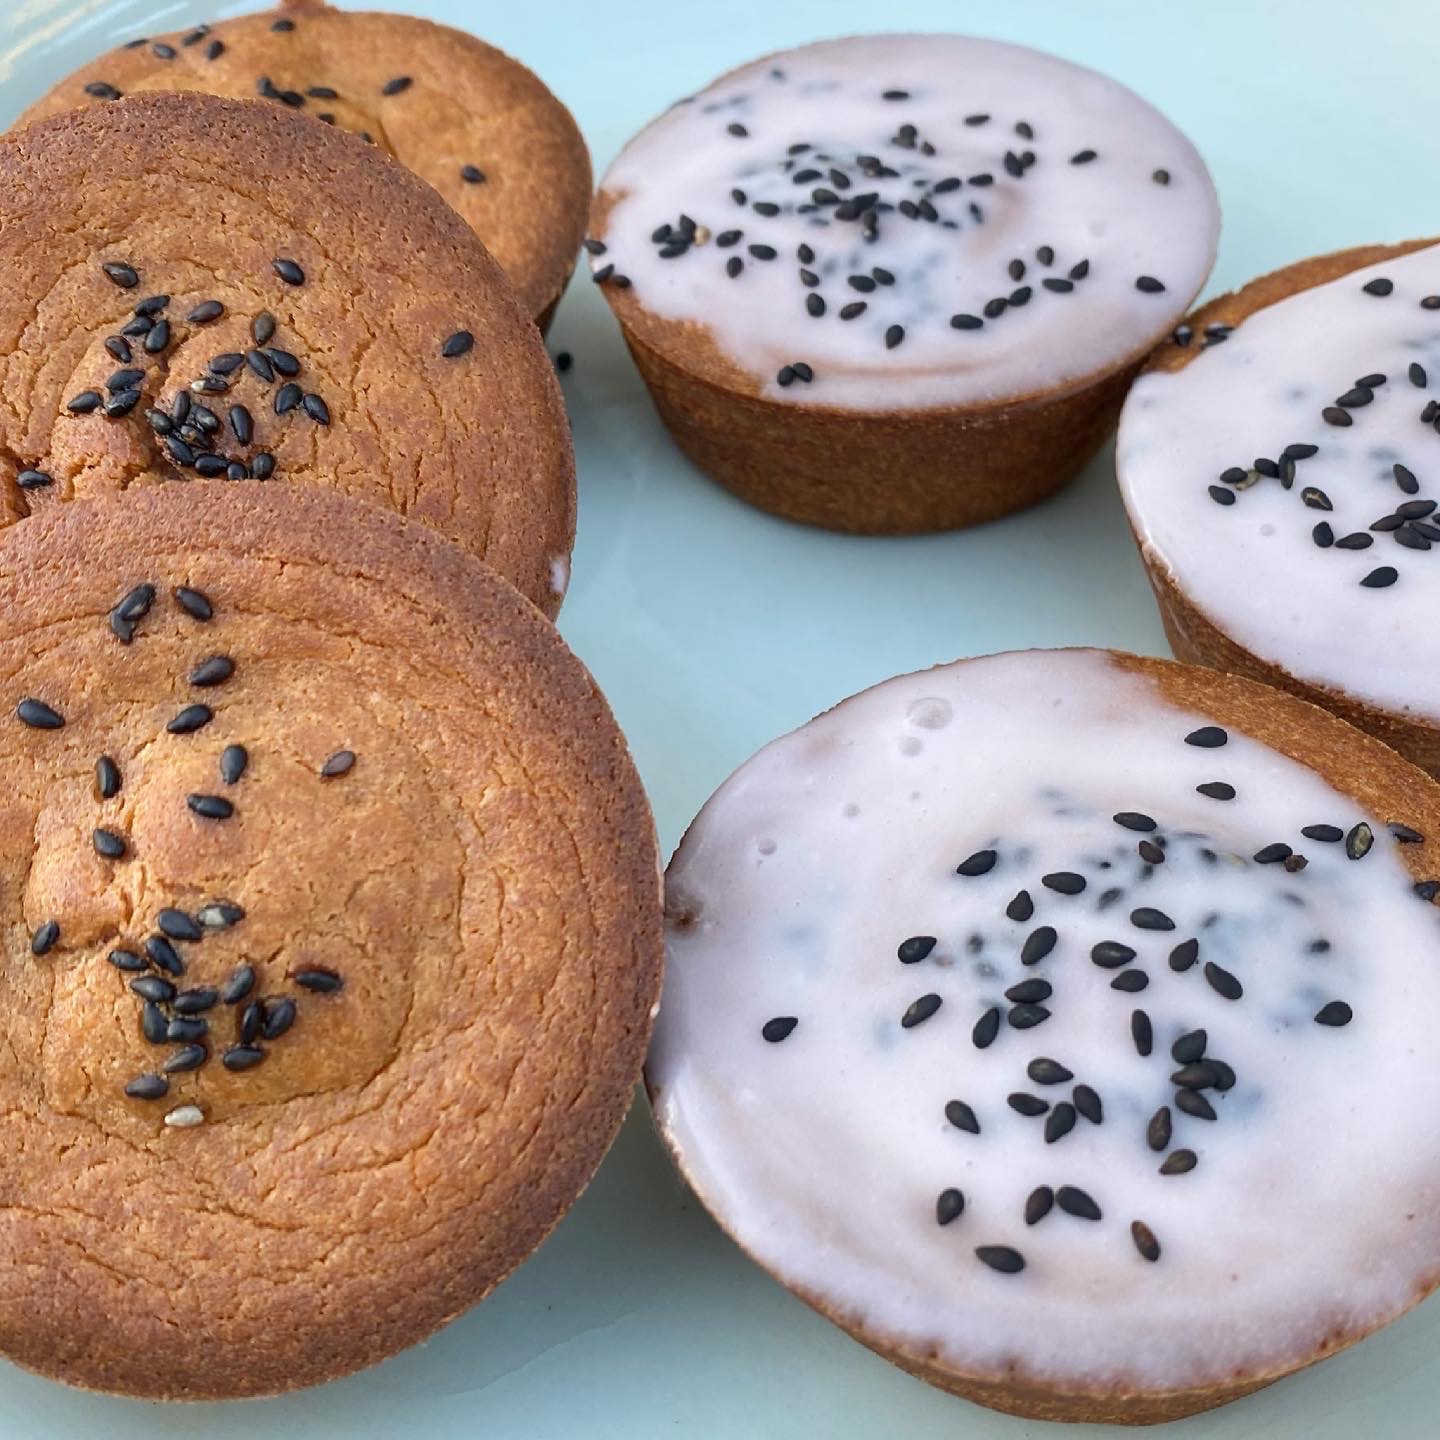
The batter comes together quickly, this is almost one bowl, one wooden spoon, easy territory.  The addition of butter is that Hawaiian tweak that makes it so delicious.  Fill well-greased muffin tins about 3/4 full.  Bake for 45 minutes, or a little longer for a crispier edge.  It will lose that crispness with time though.  Store at room temp for 2-3 days max.  Pop them in a toaster oven to crisp them a little bit.  Do not refrigerate.  You can freeze them without the icing.  Thaw and crisp in the oven.  These muffins are moist, chewy, a little squishy, yummy, and addictive.

Ice, Ice Mochi

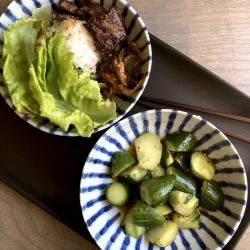
Making the icing is easy.  Whisk the dry ingredients with coconut milk, vanilla, a pinch of salt, and juice.  The icing should be loose enough to dip each muffin top into but thick enough to adhere to the surface with only a bit of dripping. After dipping one muffin you can adjust the sugar or liquid for the right consistency.  Sprinkle topping of your choice, coconut shreds, orange zest, sesame seeds, or a bit of flaky salt.  Let the muffins sit for a couple of minutes so the icing can set, then serve.

Love mochi?  Here are more recipes using sweet rice flour!  Butter Mochi MuffinsPeanut Butter Mochi, and Chocolate Mochi Donuts.

Print Pin
4.75 from 4 votes

Tropical Mochi Muffins

A delicious, gluten-free mochi muffin, chewy, moist, and flavored with guava nectar and citrus.
Course Dessert
Cuisine Asian-American, Hawaiian
Keyword butter mochi, mochi muffin
Prep Time 10 minutes

Ingredients

  • ½ cup butter melted, if using unsalted butter, add 1/4 tsp salt to dry ingredients
  • ¾ cup granulated sugar
  • 1 cup coconut cream or full fat coconut milk
  • 1 tsp vanilla extract
  • 2 eggs room temperature
  • Zest of 1 orange preferably Cara Cara oranges
  • 1 cup guava nectar substitute mango, passion fruit, or tropical fruit blend nectar or orange juice (Cara Cara)
  • 2 cups sweet rice flour
  • 2 tsp baking powder

Guava Icing

  • 2 tbsp Guava Nectar Substitute mango, passionfruit, or tropical blend, or orange juice.
  • 2 tbsp coconut milk
  • 2 cups powdered sugar
  • 1 tsp vanilla extract
  • Zest of 1 orange optional
  • poppy seeds, shredded coconut, black sesame seeds, orange zest garnish

Instructions

  • Preheat oven to 350 degrees F. Grease one 12-cup standard muffin tin.
  • Sift the sweet rice flour and baking powder into a small bowl and set aside.
  • Add melted butter, sugar, and coconut milk to a large bowl. Mix until combined.
  • Add the vanilla extract and eggs. Mix until combined.
  • Add the guava nectar and zest. Mix until combined.
  • Into the wet ingredients. Mix until a wet batter forms. It should be a pretty loose consistency.
  • Scoop batter into the muffin pan. Tap the muffin pan 1-2 times on a flat surface to get rid of the air bubbles.
  • Bake for 40-45 minutes until the edges start to brown. For a crispier edge, bake 45-50 minutes. Don't go much longer as it may make the inside drier and a little tougher.
  • Cool for 10 minutes in the muffin pan before removing.

Icing

  • While the muffins cool, make your icing. Place powdered sugar In a small bowl. Add coconut cream or milk, nectar, vanilla, and a pinch of salt. Stir with a whisk until completely blended.
  • When muffins have cooled, remove from pan. Dip the top of each muffin into the icing and place on a wire rack. Sprinkle with sesame seeds, poppy seeds, shredded coconut. The consistency of the icing should be thin enough to dip but thick enough that it doesn't all run off the muffin top. A little bit will roll down the side of the muffin. That's okay!
  • The icing is optional. If you don't use it, sprinkle the muffins with sesame seeds or flaked coconut before baking.

Notes

This recipe can be easily halved!  
Icing is optional.  
I like using coconut cream instead of milk.  I think the muffins are little denser, richer and chewier with cream instead of milk.  Don't use lite coconut milk.
Play with flavors.  Any nectar or juice would work.  If you can find Hawaiian Sun Juice Drinks they have a variety of flavors including island favorite, POG (Passionfruit. Orange and Guava).
 
Grilled Shrimp & Skirt Steak-Surf and Turf Time!

Grilled Shrimp & Skirt Steak-Surf and Turf Time!

The one consolation to the pandemic for us (which goes to show just how fortunate and entitled we are), my kids came home at various times for extended stays.  I’ll admit, having been empty-nesters for awhile, it took some adjusting but it was nice.  Despite finding ourselves falling back into the “parent-child” trap, conversations were much more introspective for all of us.

Surf and Turf

Dinner the night before the last J moved back to the City was a family favorite we haven’t done in quite awhile, a variation of Surf and Turf.  Grilled Rosemary Garlic Shrimp and Hoisin BBQ Skirt Steak.  Both are simple to make and delicious.

So the surf and turf started with skirt steak grilled on the bbq.  It’s so stupid easy I’ll just include the recipe here.  It is a one to one mixture of Hoisin Sauce and your favorite barbecue sauce.  Slather it all over the meat and allow to marinade for a couple of hours. That’s it.  You can pump it up with minced garlic and a bit of soy sauce if you like. Throw it on the barbie and grill to medium rare, done.  You could use Flat Iron, or Flank Steak (texture is pretty different though). Be forewarned, skirt steak is no longer an “economical” cut, yikes!

Shrimp Primer

In Asian cookery, leaving the shrimp shells on when cooking is a given.  My dad always told me to buy shrimp with the shells on, they taste fresher and more flavorful.  The shells seem to absorb the seasonings.  The way to eat them is to suck all the flavor off the shell-on shrimp and then peel the shrimp and eat it.  With deep-fried shrimp, you can actually eat the shells, it’s crispy, crunchy and delicious.  A favorite dish my dad would make, don’t chuckle, Ketchup Shrimp.  It’s roots are Cantonese. Shell on shrimp are stir-fried with aromatics like ginger and garlic and finished with Ketchup.  The flavor profile is sweet, salty, a hint of tart and it is quick and easy. I can remember happily munching on the shells, yums.  I bet these could be thrown on the grill too.

This grilled shrimp recipe is from Epicurious by way of the sadly defunct Gourmet magazine.  It’s been a favorite in our house for a long time, I think it will become a favorite in yours too.  

I deveined and removed the legs from the shrimp, leaving the shell and tail intact. The garlic is chopped and mashed with coarse salt and added to olive oil along with minced rosemary.  Please try to use fresh rosemary, its so fragrant or substitute fresh herb of choice like oregano, thyme, lemon zest and smoked paprika.

Allow the shrimp to marinade for 4-6 hours.  The beauty of this dish, you can make it year-around!  In the summer, throw it on the barbecue.  In the winter, like NOW, I use a stove top pan and grill 3-4 minutes a side until the shrimp turns color.  Serve with lemon wedges.  Good and easy.

GRILLED ROSEMARY GARLIC SHRIMP

Delicious and easy recipe for grilled shrimp
Course Appetizer
Cuisine American
Keyword garlic, Grilled shrimp, rosemary
Prep Time 15 minutes

Ingredients

  • 1/4 cup finely chopped garlic mashed to a paste with 1 teaspoon coarse salt
  • 2 tablespoons minced fresh rosemary leaves plus sprigs for garnish
  • 16 shrimp about 10-16 per pound jumbo or large
  • lemon wedges as an accompaniment
  • 3 tbsp olive oil plus oil for brushing shrimp

Instructions

  • In a large bowl stir together garlic, minced rosemary, and 3 tablespoons oil and add shrimp. Marinate shrimp, covered and chilled, at least 4 hours.
  • To grill, thread 4 shrimp on each skewer and brush with additional oil. Grill shrimp on an oiled rack, set about 5 inches over glowing coals, 3 to 4 minutes on each side, or until just cooked through.
  • Alternatively, grill in a hot well-season ridged grill pan, covered, over moderately high heat 3 to 4 minutes on each side, or until cooked through.
  • Garnish shrimp with rosemary sprigs and serve with lemon wedges.

Notes

If grilling outdoors, thread shrimp on skewers. The original recipe calls for putting shrimp on skewers, that's too much work for me!
Substitute herbs- use oregano or thyme, smoked paprika, 
For an Asian flavor profile mince garlic and ginger and add basil or cilantro.

Enjoy!

Orange You Gonna Try Persimmons? They’re Delicious

Orange You Gonna Try Persimmons? They’re Delicious

It’s persimmon season!

About this time every year, my friend & co-worker, Trang, comes to work with bags of homegrown persimmons.  I am not ashamed to admit I am Johnny on the spot when she is doling them out.  I adore persimmons.  The thought has crossed my mind that I should plant my own persimmon tree but I think I will just depend on the generosity of friends that have persimmon trees. (HINT HINT)

How to enjoy persimmons.  Eaten out of hand, diced and tossed in salads, and baked in bread, cookies, and puddings.  How about stirred into a risotto for a sweet counterpunch to the cheese and rice?  Or dried, a wonderful way to enjoy them throughout the year.

I have been especially waiting for this persimmon season.  Way back at the beginning of this year from HELL, we celebrated our birthdays with dinner at State Bird Provisions in The City. (Dining in a restaurant-remember that?).  State Bird adopted the Chinese tea house concept, little plates of deliciousness brought out on trays for you to pick and choose from, just like dim sum.  Their signature fried quail, dumplings, risotto, house ribs…plate after plate of tasty tidbits that dazzled us.

The kicker for me was a beautiful dish consisting of bite-size pieces of crisp, sweet persimmons bathed in a dressing of sesame, Kinako powder, and ginger finished with a sprinkling of toasted black sesame seeds and flaky salt.  Simple and absolutely delish, I made a mental note to try this at home.  I found the recipe in my copy of the State Bird Provisions Cookbook.  The dish is incredibly easy to make. I spent more time getting the ingredients than putting the dish together.  The cookbook runs the gamut from this simple, elegant dish to complex dishes better left to enjoy at their restaurant.  I think of it as a coffee table cookbook, beautiful photos, an interesting read.

A Persimmon Primer

There are two kinds of persimmons, Hachiya and Fuyu.  They are NOT interchangeable.  Hachiya is an oblong, acorn-shaped fruit and pretty astringent.  They cannot be eaten until they are super soft and very ripe.  If eaten before they are soft, they will make your mouth pucker.  I use Hachiyas for baking (soft gushy fruit is not my thing).  Fuyu’s are flat, round, more tomato shape. They are non-astringent and can be eaten while they are still firm. For this salad, select ripe, firm fruit.

The recipe calls for grapeseed oil but you could use canola oil instead.  We bought Kinako Powder at H-Mart but it can be found in most Asian stores. Made of soybean, it has a nutty flavor, kind of like roasted peanuts.  If you have munched on manju or mochi covered with a fine light brown powder that’s Kinako.  Toasted sesame oil and black sesame seeds can also be found in Asian markets.

Persimmons with Kinako Dressing and Black Sesame Salt

A simple and delicious tapas dish of sweet persimmons served with a savory sesame soybean powder dressing from State Bird Provisions
Course Appetizer
Cuisine American, Asian
Keyword Persimmons with Kinako Dressing and Black Sesame Salt
Prep Time 15 minutes

Ingredients

  • 6 ripe Fuyu persimmons peeled and cut into chunks

Dressing

  • 1/2 cup kinako roasted soybean flour, plus more for sprinkling
  • 1 teaspoon kosher salt
  • 1/2 teaspoon ground ginger
  • 1/4 cup plus 1 tablespoon grapeseed oil or substitute canola oil
  • 1/4 cup plus 1 tablespoon toasted sesame oil found in most Asian stores
  • 2 tablespoons unseasoned rice vinegar
  • 2 tablespoons Black Sesame Salt

Black Sesame Salt

  • Makes about 1/4 cup
  • 1/4 cup pre-toasted black sesame seeds
  • 1/4 teaspoon flaky sea salt

Instructions

Dressing

  • Combine the kinako, kosher salt, and ground ginger in a medium bowl and stir well. Slowly pour in the oil, sesame oil, and vinegar, whisking constantly until the dressing is well combined. It helps to let it sit just a bit for the powder to absorb liquid.
  • Pour the dressing in shallow serving bowls, arranging the persimmons on top, and sprinkle on the black sesame salt and a generous pinch of kinako. Serve immediately.

Black Sesame Salt

  • Combine the sesame seeds and salt in a mortar and pound until the mixture resembles coarsely ground black pepper.
  • Transfer to an airtight container and store in a cool, dry place for up to 2 weeks.
Rolling for a Good Cause Lumpia Shanghai

Rolling for a Good Cause Lumpia Shanghai

Our action group is hosting a fundraiser for one of only two Filipino-Asian American Representatives in the House, TJ Cox.  Normally we would have finger food at an event and Filipino spring rolls, Lumpia, would be perfect.  BUT, due to COVID, our event will be a virtual one.  The next best thing? How about an online tutorial on how to make Lumpia so people could make their own to enjoy during the event. Sounds like a plan.

I was given 5 minutes for my “how to make Lumpia” video.  I’ve watched a ton of Tasty videos, I can do this, uh-huh. Lumpia is the Filipino version of an Egg Roll.  Filled with meat and vegetables and wrapped in a thin sheath made of flour, water, and salt.  The rolls are fried to a crispy, golden finish.  Crunchy, light, with a savory filling, in a word they are delicious.

Let’s Roll

The filling for Lumpia is made with ground beef or pork or a combination, I use 50:50.  You can substitute ground chicken or turkey.  Add to this, minced onions, grated carrots, shredded cabbage, and egg and seasonings.  I like a combination of salt and soy sauce, minced garlic, ginger for a hint of sweetness, and a couple of grinds of pepper.  The recipe can be halved.

That’s a Wrap

Vietnamese wrappers are made of rice paper while Chinese Egg Rolls are made with egg in the skin, are thicker, and when fried will have a bubbly surface. Lumpia are made with wheat flour, water, and salt and are super thin, resulting in a smooth surface, incredibly light and crispy roll.

The video shows two ways to wrap your Lumpia.  The key is to wrap them tightly.  This is done by tucking and pulling the wrapper taut while rolling.  Seal the egg roll with egg wash and that’s it.  Now repeat 50 times!

Added Bonus

Lumpia freezes beautifully.  Lay the Lumpia on a baking sheet in a single layer and place in the freezer.  When the lumpia is frozen, transfer to a zip lock bag and toss it back in the freezer.  No need to defrost before frying, just add a couple of minutes onto the cooking time.

You can fry the Lumpia in a pan with approximately 1 inch of oil, flip them when they are golden brown to cook the top half, 2-3 minutes per side. They can also be deep-fried.  Serve with your choice of dipping sauce such as Thai Chili Sauce, Vinegar-Soy dipping Sauce, or Banana Ketchup.  Enjoy!

Lumpia Shanghai

Course Appetizer
Cuisine Asian
Keyword Filipino Eggroll, Lumpia Shanghai, springroll
Prep Time 1 hour
Cook Time 4 minutes

Ingredients

  • 4 garlic cloves finely grated
  • 1 tbsp minced ginger
  • 1 medium onion very finely chopped, about 1 cup
  • 2 medium carrots grated on the large holes of a box grater, about 1 cup
  • 4 scallions white and light green parts, very finely chopped
  • 1 cup cabbage very thinly sliced
  • 2 eggs 1 whole, 1 white and yolk separated
  • 1 pound ground pork can substitute ground chicken
  • 1 pound ground beef
  • 2 teaspoons kosher salt
  • 2 tbsp soy sauce
  • 1 teaspoon freshly ground black pepper
  • 2 11-ounce packages lumpia wrapper or spring roll shells Recommend Menlo Wrappers found in freezer section in Asian markets

Changes and optional ingredients

  • 1/4 pound raw shrimp, peeled and deveined Chop finely and add to ground meat mixture
  • 1/2 cup water chesnuts substitute 1:1 for grated carrots

Instructions

  • Combine garlic, onion, carrots, scallion, cabbage, salt, pepper, 1 egg and 1 egg yolk in a large bowl and mix until well blended. Add beef, pork, salt, and pepper and using a wooden spoon or your hands, mix until everything is evenly distributed.
  • In a small bowl, whisk a splash of water into remaining egg white. Working one at a time, place lumpia wrapper on a work surface with 1 corner facing you. Place 1 heaping tablespoon of filling in center of wrapper and shape into a thin horizontal 5-inch long log. Dip your fingers in remaining egg white mixture and lightly brush edges of wrapper. Roll bottom corner up and snugly over filling, then tuck under filling. Fold left and right corners tightly over filling to enclose, use your fingers to crease the wrapper, then continue to roll bundle away from you. Both sides should be as close to sealed as possible; use a little egg wash to seal, as necessary.
  • In a large nonstick pan, fill bottom of pan until oil comes up 1 inch. Oil should cover lumpia at least halfway when frying; adjust amount if needed. Heat pan over medium-high heat. You’ll know oil is hot enough if you place the tip of lumpia into oil and it bubbles immediately. Cook lumpia, until deep golden brown and crisp, 2 to 3 minutes per side. Remove to a wire rack lined with paper towels. You can serve whole or cut in half. Serve with Vinegar-Soy Dipping Sauce or sweet chili sauce.

Notes

Vinegar-Soy Dipping Sauce:
1/4 cup plus 2 tablespoons rice wine vinegar
1/4 cup soy sauce
2 garlic cloves, thinly sliced or finely chopped
1 Thai chile, thinly sliced
1 scallion, thinly sliced
Stir all ingredients together and decant into a small dish.
Cinco De Mayo Dinner in the Time of COVID

Cinco De Mayo Dinner in the Time of COVID

A brief moment of escape from the reality of our world right now to enjoy a Margarita and celebrate Cinco de Mayo.  I got the last bottle of Margarita Mix at TJs and unintentionally created a Cinco de Mayo dinner that looked like an ad campaign for kitchen appliances. Tortilla press for homemade tortillas (so fun), food processor for salsa (so easy), an Instant Pot for Carnitas (so fast), and finally my rice cooker for Mexican Rice (so true, a rice cooker, lol).

I pulled out my tortilla press for a low tech appliance start to stamp those flour tortillas.  I prefer corn tortillas but the fam outvoted me, I didn’t have any Masa Harina anyways. LOL. The King Arthur Flour website was my first stop for a recipe for tortillas.  I found their recipe for Simple Tortillas and I was in business.

The Tortillas

The dough comes together quickly. I used shortening.

The tortilla is simple and contains flour, salt, shortening or oil, and water.  It comes together quickly and is kind of fun to make, especially if you have a tortilla press.  This is a no-brainer fun cooking project with your kids or when without kid but you are abiding by SIP orders for a pandemic.  Find the recipe for Simple Tortillas on King Arthur Flour here.


The dough is divided into 8 pieces. Keep them covered or oiled while you press each flat. This is the tricky part, I tried both a cut-up Ziploc bag and parchment in the press and they still stuck a little.  I ended up dusting each ball of dough with flour to help keep it from sticking.
When the tortilla starts to bubble, flip it over.
Ta-Da! Homemade tortillas are thicker and fluffier than commercial products. These were warm, chewy, and tasty-yum!

Carnitas

Carnitas are probably my favorite taco, burrito, anything filling.  Love em’ and since I had a pound of pork in the fridge and it was Cinco de Mayo. Yep,  no-brainer, Carnitas Tacos for dinner.  Found a tasty recipe on Simply Happy Foodie for small-batch carnitas in a 3 quart Instant Pot. I threw it all in my 6-quart pot which worked fine.  Next time I am doubling or tripling the recipe, that good.

Instant Pot Carnitas

Delicious Carnitas made in half the time in an Instant Pot!
Course Main Course
Cuisine Mexican
Keyword Carnitas in an Instant Pot
Prep Time 15 minutes

Equipment

  • Pressure Cooker or Instant Pot

Ingredients

  • 2 Tbsps Olive or vegetable oil
  • 1 tsp Salt
  • 1/4 tsp Pepper
  • 1 Tbsp Cumin
  • 2 tsp Chili Powder
  • 1 tsp Smoked Paprika or reg
  • 1 tsp Oregano
  • 1 tsp Coriander Powder
  • 1/8 tsp Cayenne Powder use 1/4 tsp or more for spicier
  • 1 to 1-1/2 lbs Pork Shoulder / Pork Butt * cut in 3" chunks
  • 1/2 small Onion chopped
  • 1 Bay Leaf
  • 1/2 Cinnamon Stick about 2-3 inches long
  • 4 cloves Garlic finely chopped or minced
  • 1/2 cup Orange Juice or Pineapple Juice

Instructions

  • Combine oil, salt, pepper, cumin, chili powder, paprika, oregano, coriander powder, and cayenne pepper in a medium size bowl. Mix well.
  • Add the pork to the spice mixture and toss to cover all of the meat with the mixture.
  • Press Saute button on Instant Pot. If you can adjust the heat, use high or more on your pot. When display reads “Hot” add the meat. Cook until browned on all sides, but not done. Remove from pot and set aside.
  • Add onion, bay leaf, and cinnamon stick and cook until onions are tender, stirring occasionally and scraping the bottom of the pot to deglaze (get those brown bits off the bottom) Add a small amount of water to help the deglazing.
  • Add the garlic and cook for a few seconds, stirring constantly.
  • Add the pineapple juice or orange juice and stir.
  • Add the meat back in to the pot and just nestle it down into the juice (it won't be covered).
  • Place the lid on the pot and set the Steam Release Knob to Sealing.
  • Cancel the Sauté function by pressing Cancel
  • Press the Pressure Cook button and set the time to 30 minutes.
  • When the cooking cycle has ended, let it sit for 15 minutes. It will start naturally releasing the pressure.
  • Turn the steam release knob to Venting and release any remaining steam/pressure. There may not be any left, and that's okay. When the pin in the lid drops down it is safe to open the lid.
  • BEFORE you stir, take a spoon or a small measuring cup and skim off the extra fat that is on top and discard. It's a lot easier doing it this way than pouring it into a fat separator!
  • Stir the meat and transfer just the meat to a sheet pan with sides or ovenproof dish. Reserve sauce. Using two forks, shred the meat and spread on baking sheet.
  • Broil the carnitas to get those nice crispy bits. Slide them under the broiler until they reach the desired crispness. Watch carefully it will go fast!
  • Garnish with sour cream, salsa, cilantro, diced white onions or green onions, avocado, and serve with those warm delicious homemade tortillas.

The Salsa

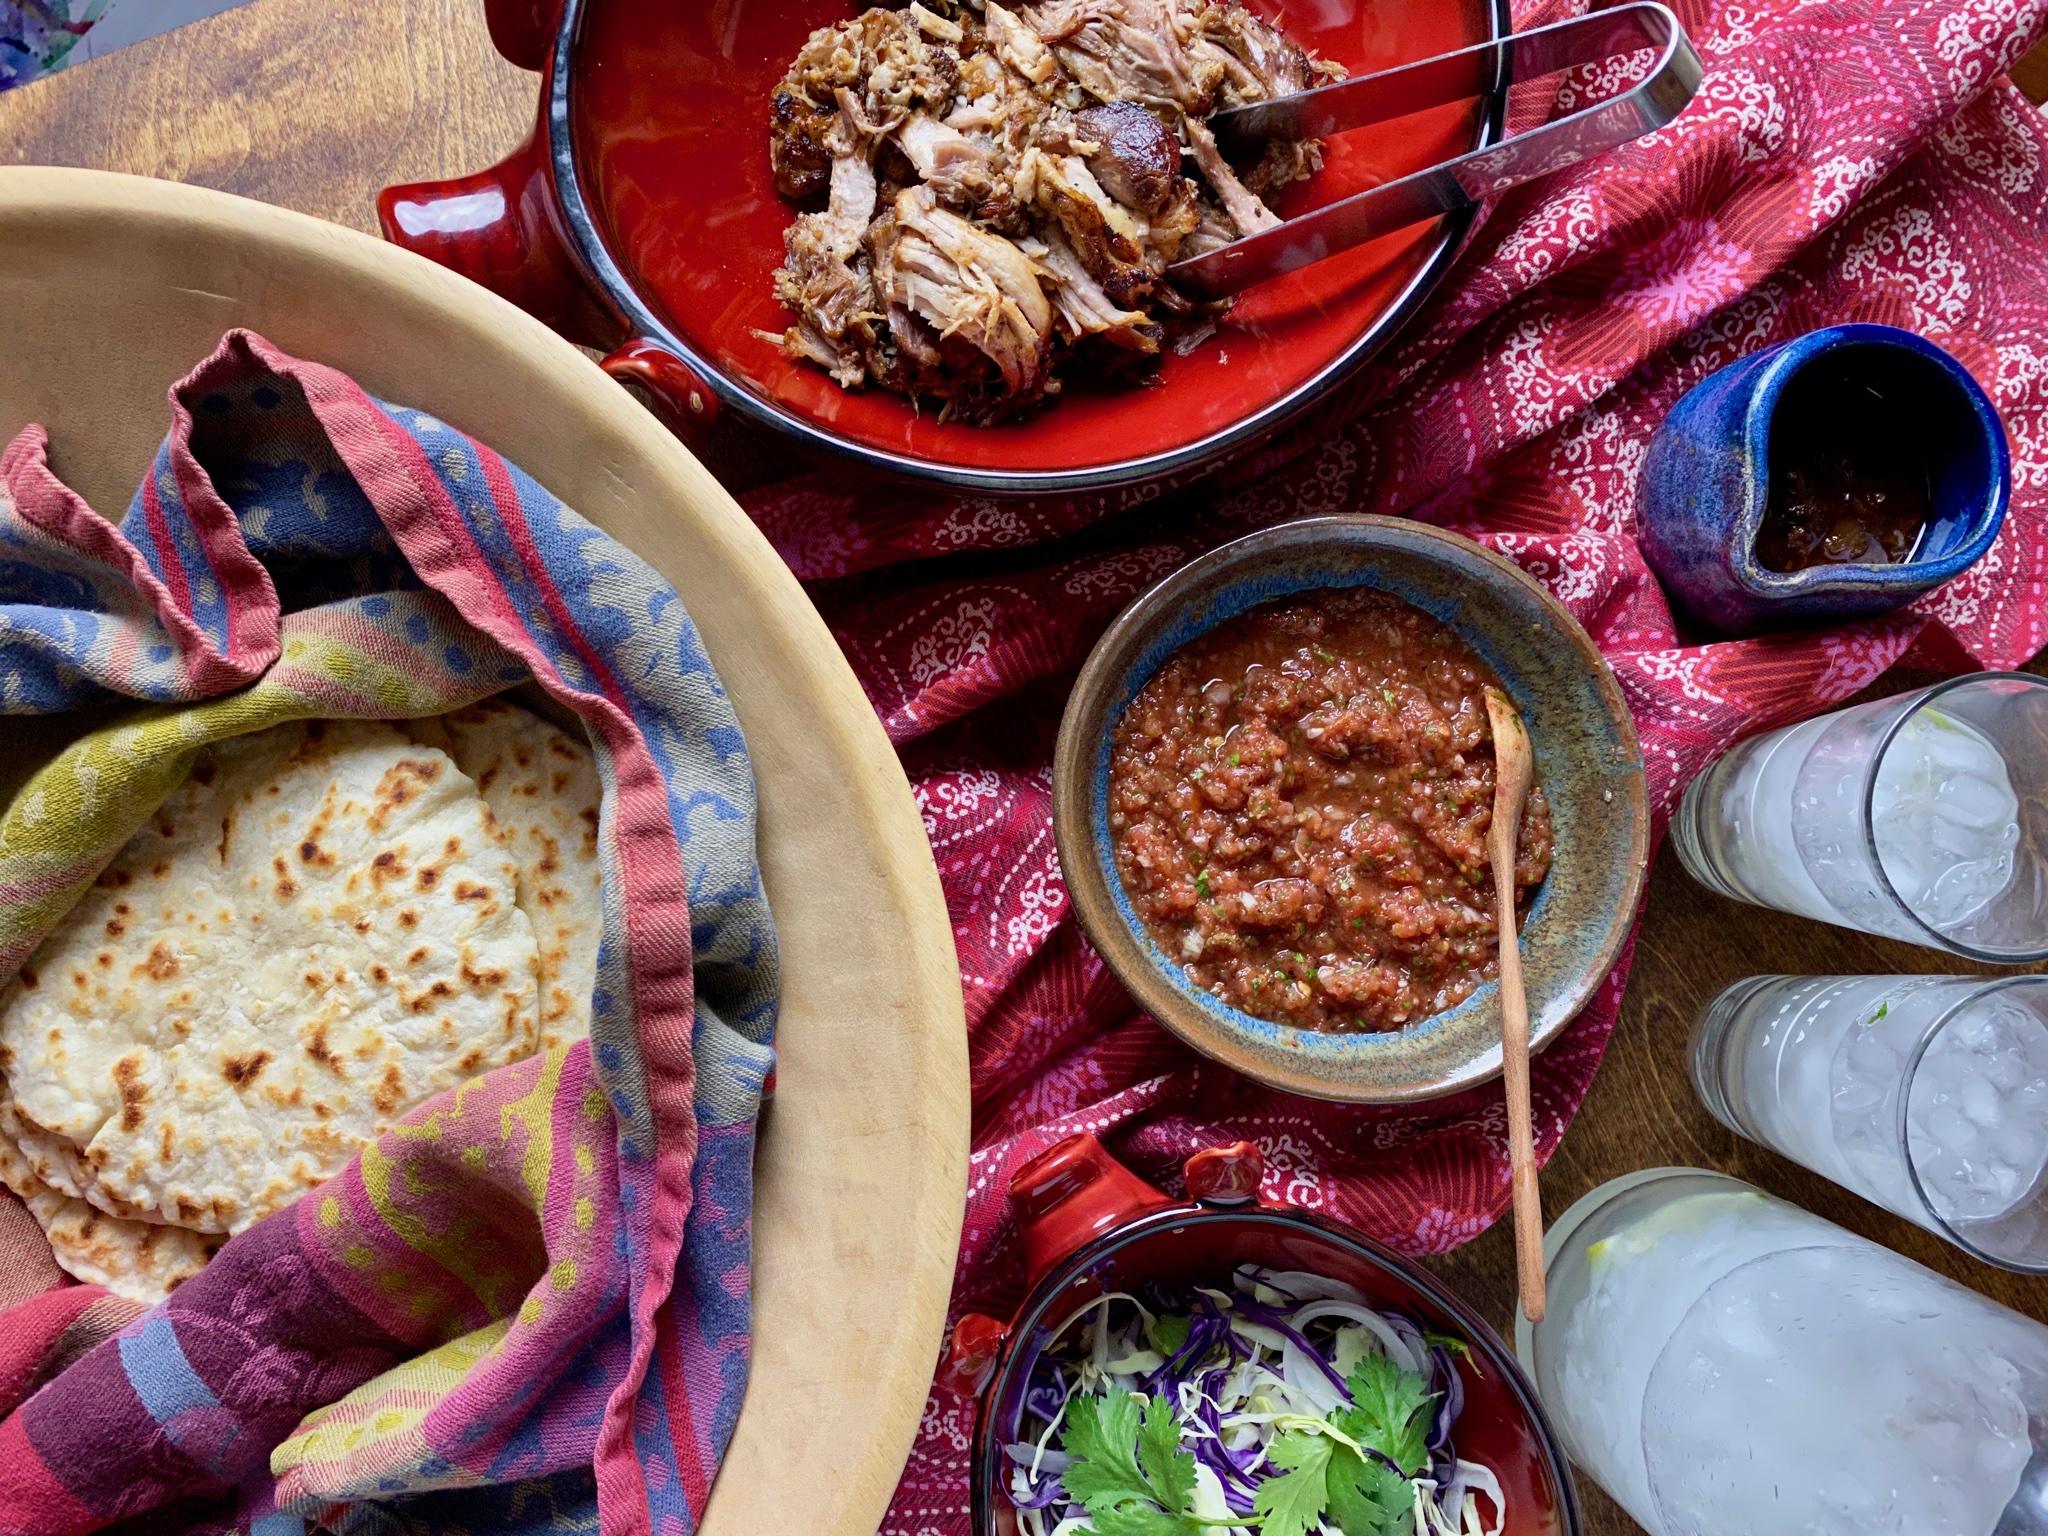
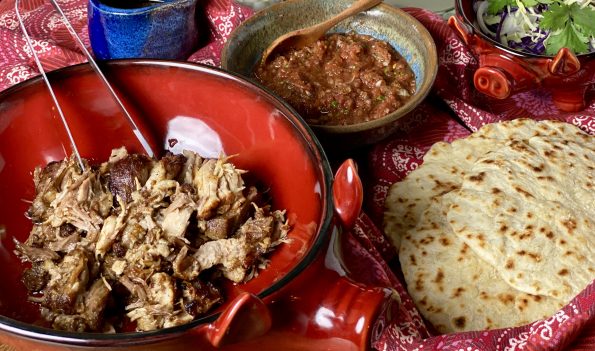
A quick and super easy salsa that starts with Fire-Roasted Tomatoes in a can!  I posted this for Cinco de Mayo a couple of years ago.  It is my go-to salsa.  Find it here!


Mexican Rice

I adapted this recipe from Mexican Everyday by Rick Bayless.  It is right up my alley since it is made in a rice cooker, the only way I know how to make rice.  It’s easy and delicious.  I use half of the quick salsa to make Mexican Rice, and the rest to serve.

Mexican Red Rice

Classic Mexican Red Rice made in a rice cooker, so easy, so delicious
Course Side Dish
Cuisine Mexican
Keyword Meican Red Rice, Rice Cooker
Prep Time 10 minutes
Cook Time 40 minutes

Equipment

  • Rice Cooker

Ingredients

  • tbsp vegetable oil or olive oil
  • cups white rice
  • 1 cup homemade quick salsa commercial salsa will work also
  • 1 cup chicken broth
  • salt to taste start with 1/2 tsp
  • cups frozen peas optional
  • 1 /2 can roasted chilis 4oz you know the mild kind in the little cans, optional
  • 1-2 cloves garlic finely chopped
  • 1/2 tsp ground cumin

Instructions

  • Heat a medium (3 quart) ovenproof saucepan over medium heat.
  • Add the oil. When it is hot add garlic and fry for 1 minute to soften. Add rice and stir frequently until the grains of rice turn from translucent to milky-white – don’t worry if some of them brown.
  • Pour sauteed rice mixture into rice cooker pot.
  • Add the salsa, chicken broth, chilis, ½ tsp salt and cumin. Set to cook.
  • Fluff the rice and mix in the peas. Adjust the salt to taste, then serve
Do You Tteokbokki? Spicy Korean Rice Cakes

Do You Tteokbokki? Spicy Korean Rice Cakes

‘My fondest memories of traveling abroad, not surprisingly, revolve around food.  It started when my parents sent me on a summer exchange program in Taiwan for Chinese American college kids.  While our parents envisioned us hard at work learning Mandarin and Chinese culture, we were sneaking out to the night markets to eat, hooking up with newfound friends, and in general, having a good time.  A documentary made about the program says it all, Love Boat Taiwan.  My introduction to a whole new world of food, culture, and fun.

From the food stalls in Taipei long ago to the markets in Seoul and Osaka most recently; I have feasted on oyster omelets and dumplings (Xiao Lung Bao), Gimbap (Korean rice rolls), Galguksuk (hand-cut noodles), Hotteok (rice pancakes with sweet or savory fillings) and tteokbokki (rice cakes in a sweet and spicy sauce).  I have sampled Takoyaki (Fried Octopus fritters), Kaarage (fried chicken), Gyoza (Potstickers), and Manju (rice cakes) from tiny makeshift kiosks, so delicious.  A trip after college found me relishing the variety of Hawker Fare food in Singapore. Nonya, Indian, Muslim, Chinese dishes all in one spot. Who hasn’t drooled over the Hainanese Chicken enjoyed by Rachel and Nick in Crazy Rich Asians, all cheap and delicious.  Street markets are soul food.  Homey, simple, flavorful dishes remind me of family gatherings around the dinner table.

But, it’s not just about the food, it’s about getting a taste of daily life and culture-sitting next to that businessman as he hurriedly slurps his noodles down before going back to work  Watching the vendors entice their next customer with their hand-pulled noodles or steaming dumplings. Or amusedly watching school children clamoring for their afterschool snack of gimbap or bao from the corner vendor.

That’s My Favorite Part of Traveling

Dreaming about our travels last year has me hungry for the delicious street food we discovered. We took in a baseball game in Incheon and in place of traditional fries and hot dogs, we enjoyed Tteokbokki and KFC (Korean Fried Chicken).  The Tteokbokki, spicy, sweet, and chewy was served on sticks with cute little hot dogs.  I love watching baseball, it reminded me of watching a minor league game, lots of zaniness, fans with broomsticks, and cheerleaders to egg them on.  The icing on the “rice”cake was the food and walk-up music for each batter.

Crazy Fun Baseball Game in Korea

I’ve taken to hunting for recipes to make these tasty tidbits and I found, Korean Bapsang, an absolutely great site with a treasure trove of Korean recipes that are easy to follow and 정말 맛있다 (really delicious)!

You can buy rice cakes and fish cakes in most Asian markets as well as the other needed spices. I didn’t have fish cakes for a batch, so I chose the next best thing in my pantry, SPAM.  Don’t laugh, it was pretty good!  Cook the rice cakes in an anchovy stock or water seasoned with Gochugaru (chili powder), Gochujang (chili paste), and corn syrup.  Fish cakes, cabbage, and onions round out the dish.   It takes all of 15 minutes to make.  A perfect snack while watching a Giants game or my favorite K-drama.

The Recipe

Tteokbokki - Sweet & Spicy Rice Cakes

Tteokbokki, a popular Korean snack, are rice cakes in a spicy-sweet sauce found at street markets, fast food kiosks and baseball games!
Course Appetizer
Cuisine Asian
Keyword Korean Snack, Rice Cakes, Tteokbokki
Prep Time 5 minutes
Cook Time 15 minutes
Servings 4

Ingredients

  • 1 pound tteokbokki tteok 떡볶이 떡 about 24 3-inch long rice cake pieces - See note.
  • 1 sheet eomuk 어묵 fish cake - aka oden or SPAM! or Japanese fishcake
  • 4 ounces green cabbage yangbaechu 양배추
  • 1 - 2 scallions optional
  • 3 cups anchovy broth or water or any fish broth/dashi
  • 3 tablespoons Korean red chili pepper paste gochujang 고추장
  • 1-2 teaspoons Korean red chili pepper flakes gochugaru 고추가루 preferably finely ground)
  • 1 tablespoon soy sauce
  • 2 tablespoons sugar or use 1 tablespoon if you like it less sweet
  • 1 tablespoon corn syrup
  • 1 tablespoon minced garlic

Instructions

  • Make fish broth if using. Soak the rice cakes for about 20 minutes if hardened or refrigerated. Cut the fish cake, cabbage, and scallions into about 2-inch long pieces.
  • Add the anchovy broth (or water) to a large pan. Stir in the sauce ingredients. Bring it to a boil over medium high heat, stirring to dissolve the red chili pepper paste (gochujang).
  • Add rice cakes, boil until the rice cakes become very soft and the sauce is thickened, about 8 - 10 minutes. Stir frequently so the rice cakes don't stick to the bottom of the pan.
  • Add cabbage, green onions (optional) and fish cakes. Continue to boil, stirring constantly, for an additional 4 - 6 minutes. Depending on your rice cakes, it may need more time to reach a desired level of softness. Add more broth or water as necessary. Taste the sauce, and adjust the seasoning if needed. Serve immediately.

Notes

You can find tteokbokki rice cakes fresh, refrigerated, or frozen at Korean markets. Locally made fresh rice cakes are the best ones to use, but good quality refrigerated ones are okay too. Try avoiding frozen ones if you have other options.
 Tteokbokki doesn't reheat well in the microwave. Reheat any leftovers, along with a little bit of broth or water, in a small pan over low heat.
Don't have eomuk use the Japanese fish cakes-kamaboko or even surimi (imitation crab legs).
A Sweet Mash-Up (Helmand Palace Kaddo)

A Sweet Mash-Up (Helmand Palace Kaddo)

I found myself in the city one evening last week driving down Van Ness Ave.  If you have driven down that boulevard lately, it has been under major construction for what seems like an eternity.  Major swaths of the street have been dug up and walled off with wood barriers and fencing.  I can’t even imagine how the businesses on the street are coping with such a major disruption.

On this night I reached the section near Green and Van Ness and much to my surprise, the walls and giant cranes were gone.  I spotted  the restaurant Helmand Palace, an Afghani restaurant I have been meaning to try for a long time.  A spot opened up (in the City that’s a sign) in front so I immediately parked my car and headed into the restaurant.  Obviously I was meant to have Afghani food tonight!

I zeroed in on the one dish I had to try, Kaddo.  What’s Kaddo, you ask? It’s pumpkin slow roasted in sugar and cinnamon until tender and smothered with a tomato based sauce of ground beef flavored with ginger, coriander and turmeric.  It’s topped with a cold yogurt sauce spiked with garlic and mint. Every bite is a melt-in-your-mouth revelation—soft, satiny, DELICIOUS.  It is mind bogglingly good.

I asked for TWO orders of Kaddo for take-out (the fam was at home), and, while I waited, I told the host that I found their recipe for Kaddo on Epicurious and it is one of my favorites.  His restaurant and the Kadoo, in particular, have been my gotta try bucket list for a long time.  It didn’t disappoint.  Their Aushak, a dumpling filled with leeks and scallions layered with a meat sauce and yogurt was equally scrumptious.

A while back we celebrated mom’s birthday with a visit to  Cala in San Francisco.  The food was delicious but their slow-roasted Sweet Potato with Bone Marrow Salsa Negra had me in a tizzy.  How could something so simple taste so delicious?  Smitten Kitchen posted a recipe for slow roasted sweet potatoes that sounded so much like the amazing dish at Cala, it gave me an idea. You know where I’m going with this right?  Beautifully charred, meltingly soft sweet potatoes topped with Kaddo….oh yeah we are so going there.

SWEET MASH-UP TIME

I slow-roasted the sweet potatoes until they were soft, caramelized, and charred on the outside. While the sweet potatoes were roasting, I made the Helmand Palace meat and yogurt sauces. Remove the potatoes from the oven and let them cool so you can handle them.  Brush the roasted sweet potatoes with browned butter and top with sugar/cinnamon before adding the warm meat sauce and cold yogurt.  Offer to the highest bidder.  I’d raise my hand and bid for this.

You can also set up a SWEET little fixings bar so everyone can choose their own toppings. Have the Kaddo sauces and any of the toppings from Sam Kass’s, Eat a Little Better at the ready for everyone to pick their favorite.  Indescribably delicious and fun!

For vegetarians, skip the meat sauce and slather the cool minty, garlic yogurt sauce on the hot, charred sweet potato.

Potatolicious, you’re welcome.

Kaddo

Delicious appetizer adapted from Helmand Palace in San Francisco. Roasted sweet potatoes topped with a savory meat sauce and a cool mint-garlic yogurt.
Course Appetizer
Cuisine Middle Eastern
Keyword Kaddo
Prep Time 30 minutes
Cook Time 2 hours
Servings 4

Ingredients

  • 4-6 Sweet potatoes
  • butter
  • sugar
  • cinnamon

For the yogurt sauce

  • 2 C plain yogurt
  • 2 garlic cloves minced
  • 1 tsp dried mint
  • 1/2 tsp salt
  • For the meat sauce
  • 1/4 C vegetable oil
  • 1 large onion finely diced
  • 1 1/2 lbs. ground beef or mixture of lamb and beef
  • 1 large tomato seeded and finely chopped
  • 2 large garlic cloves minced
  • 1 1/4 tsp ground coriander
  • 1 1/2 tsp salt
  • 1 tsp freshly ground pepper
  • 1/2 tsp ground turmeric
  • 2 tbsp tomato paste
  • 1 1/3 C water

Slow Roasted Sweet Potatoes

  • 4 medium sweet potatoes (about 3 pounds), scrubbed clean
  • 4 teaspoons olive oil
  • 2 teaspoons kosher salt
  • 1 teaspoon freshly ground black pepper

Instructions

Slow Roasted Sweet Potatoes

  • Heat your oven to 275°F. Arrange sweet potatoes on a large, foil-lined baking sheet. Rub each with 1 teaspoon olive oil, 1/2 teaspoon salt (which will make a quite salty skin, use less if desired) and 1/4 teaspoon pepper until well coated.
  • Bake until very soft inside and caramelized on the bottom, about 2 1/2 hours.
  • Heat your broiler and run the potatoes underneath it — mine is fairly weak, and this took 5 to 10 minutes, but check in regularly, a more robust one might do it in 1 to 2 minutes — until lightly charred on top.
  • Let potatoes cool 10 minutes, then gently crush potatoes with your hands to expose the flesh.
  • Split sweet potatoes, brush insides with melted butter. Sprinkle with sugar and a dash of cinnamon.

Sauces (Make while sweet potatoes are roasting)

  • YOGURT SAUCE: Mix all the ingredients together. Refridgerate.
  • MEAT SAUCE: Brown the onions in the oil in a heavy-bottomed saucepan. Add meat and cook over medium-high heat, stirring, until browned. Add all other ingredients (except for the tomato paste and water) and cook, stirring, for another 5 minutes or so. Stir in the tomato paste, then add the water and bring to a boil. Lower the heat and let simmer, covered, for about 15 minutes.
  • Top each sweet potato with cold yogurt sauce and hot meat sauce. Serve immediately

Notes

The original recipe calls for 2 sugar pumpkins which are prepared as follows:
Make the pumpkin: It helps to have a serious vegetable cleaver for this bit. Preheat your oven to 300º. Wash off the outside of the pumpkins. Cut them in half. Scrape out the stringy stuff on the inside. Cut the halves into 3#-4# pieces or so. Peel them. Get rid of all the green and rind. Find a baking pan large enough to hold all the pumpkin pieces in a single layer. Cover the pumpkin pieces in the oil and place them hollow side up in the pan. Pour the sugar evenly over the pumpkin pieces. Cover the pan with aluminum foil. Bake for 2 1/2 hours, then baste the pieces with the pan juices, cover them up again, and bake for another 45 minutes. The sugar will all melt away and end up partially absorbed. The pumpkin pieces will turn dark orange and translucent. They will have a stunningly novel texture. 
You can substitute butternut squash for either the pumpkin or sweet potatoes.
Cheesy Corn, Are You Ready for Some Football Food?

Cheesy Corn, Are You Ready for Some Football Food?

I love the fall season. Aside from all things pumpkin and apples, I start thinking about foods that go hand in hand with watching football.  My dad was a sport’s junkie and he definitely passed the sports-watching gene to my brother and me.  He also liked to cook.  Every Sunday he would have a big pot of Rice Soup or Congee simmering just for the 49er game. I’m not sure what I looked forward to more, the Rice Soup (Instant Pot) filled with bits of chicken, potatoes, tiny pork meatballs, topped with green onions and cilantro, or the football game.  

Football Food

In addition to the soup, football watching requires yummy totally bad for you snack food and I just discovered one that would fit in perfectly with a sport-watching spread.  One of my favorite cookbooks this year, A Common Table, has a popular Korean snack that must have been created to go with beer and fried chicken and therefore football.  Korean Cheesy Corn. Yep, the best thing since sliced bread. Okay, I’m kidding but it is good and stupid easy.

Start with fresh corn from the Farmer’s Market.  It is so good right now.  Frozen corn or canned corn (lots of Korean recipes start with canned corn) would work, but, come on, go fresh and support your local farms.

And now a public service announcement, a video on how to take corn off the cob from Saveur using a bundt pan! It works like a charm!

From here on in it’s a downhill slide.  Stir-fry corn in oil or butter until it is soft.  Combine corn with mayonnaise and place in an ovenproof dish. I use Kewpie Mayo which is slightly sweet but use whatever mayo (better be Best Foods) you have in the fridge.  Sprinkle a crap ton of Mozarella cheese on the corn and bake at 500 until the cheese is browned, gooey and melty. So delicious.  Versions of Korean Cheesy Corn add sugar.  If your corn is sweet you won’t need to, but if you like it sweeter add 1-2 teaspoons of sugar.  If you use Best Foods or Hellman’s add 1 tsp of sugar.

The corn, mozzarella, mayo, green onions, and cilantro are the basic ingredients for this yummy super easy dish.  Of course, you can go CRAZY and add extra fixings to bring it to a whole new level.  A bucket list of add-ons includes bell pepper, red onion, jalapeno peppers, or crumble in bacon (cuz everything is better with bacon).   You can also add cut-up rice cakes cause what’s a few more calories in a totally not-on-your diet dish.

Ready set, dig in!

Korean Cheesy Corn

Delicious, decadent and easy. Korean Cheesy Corn a popular Korean dish. Perfect as a side dish or snack.
Course Side Dish
Cuisine Asian
Keyword cheese, Corn, Korean, Korean Cheesy Corn, snack
Prep Time 15 minutes
Cook Time 5 minutes
Servings 4 servings

Ingredients

  • 1-1/2 cups fresh corn about 2 ears, canned or frozen can be used
  • 2 tbsp mayonnaise, preferably Kewpie add 1-2 teaspoons sugar if using regular mayo
  • 1 tbsp unsalted butter or vegetable oil
  • 1/4 tsp salt
  • 1/4 tsp fresh ground pepper
  • 1/2 cup shredded mozzarella or more if you are a cheese freak. Additional 1/4 cup stirred into corn with mayo.
  • 1/4 cup sliced green onions
  • 1/4 cup cilantro coarsely chopped
  • 1/8-1/4 cup additions ie. bell pepper, diced red onions, bacon, optional

Instructions

  • Preheat oven to 500 degrees
  • In a large non-stick skillet, heat butter or oil. Over medium heat, add corn and if using bell peppers, jalapeno or onions. Cook, stirring frequently until soft about 4-5 minutes. Season with the salt and pepper.
  • Transfer corn to an ovenproof dish, stir in mayo and sugar if using.
  • Sprinkle cheese evenly over the surface and bake for 5-7 minutes until cheese is melted, bubbling and starts to brown. Like a pizza!
  • Garnish with green onions and cilantro and serve immediately.
Cool Hand Cuke (Cucumber Salad from A Common Table)

Cool Hand Cuke (Cucumber Salad from A Common Table)

This summer I have been the lucky recipient of what seems like a bushel of cucumbers from the gardens of friends and neighbors.  Luckily, I LOVE cucumbers.  I saute’ julienned strips of cucumbers for Bi Bim Bap, put crispy slices in sandwiches in place of lettuce, and thrown every salad I toss together.  What’s a cheeseboard with an array of dips without cucumbers to serve as a “dip-stick” (lol) for them?  So much better than celery if you ask me.

But what is my favorite way to serve cucumbers?  As a refreshing cold dish.  I posted a simple Korean Cucumber Banchan (side dish) recently that is flavored with soy sauce, chilis, and sesame oil and sprinkled with green onions and Korean chili powder.  It’s incredibly easy and TASTEE!

I also love the Smashed Cucumber Salad from A Common Table cookbook (love, love, love).  A classic Chinese dish that is perfect on a hot summer day.  Cukes, crisp and refreshing are dressed in a blend of soy sauce, vinegar, and chilis. The secret is to lightly smash the cut pieces of cucumber and salt them.  The added surface area allows the salt to extract more moisture and the cucumbers to then absorb the dressing.   It’s so simple, comes together in minutes, and makes a lovely side dish.  I use English or Persian cucumbers, fewer seeds and the skin is much thinner, no peeling necessary!  American cucumbers, on the other hand, have a thick waxy skin, which means peeling.  They also have more seeds and higher water content. Stick to the English or Persian cucumbers, trust me.

As summer comes to an end and you fire up the barbecue for the last time, this would be a perfect, refreshing side dish.

Chinese Cucumber Salad

A cool and refreshing cucumber salad which has its roots in Chinese cuisine.
Course Salad, Side Dish
Cuisine Chinese
Keyword cucumber salad
Prep Time 10 minutes

Ingredients

  • 1 lb Persian or Kirby cucumbers unpeeled (2 to 3 small cucumbers if using Persian)
  • 1/2 teaspoon kosher salt or more to taste
  • 1 to 2 teaspoons rice vinegar I use 1 teaspoon
  • 1 teaspoon sesame oil
  • 1/2 to 1 teaspoon soy sauce 1 teaspoon or more to taste, substitute Ponzu, Soy Dashi or Yuzu Soy Sauce
  • 1/4 teaspoon crushed red pepper flakes to taste or use Korean chili powder, Gochugaru

Instructions

  • Slice the cucumbers in half lengthwise, then into 1-inch pieces or cut at a diagonal and rotate cucumber 1/4 turn, cutting angled 1-inch pieces.
  • Place the pieces cut-side down on a cutting board. Working with a few pieces at a time, lay the broad side of a wide chef's knife or cleaver on top of the cucumbers, and carefully use the palm of your free hand to smash down lightly on the blade.
  • Place the smashed cucumbers in a colander and sprinkle them evenly with the salt. Set aside until cucumbers release water, 20 to 30 minutes.
  • Stir 1 teaspoon rice vinegar, 1 teaspoon sesame oil, 1 teaspoon soy sauce, and red pepper flakes together and add to drained cucumbers. Taste and adjust seasonings, if desired. Let sit at room temperature or in the refrigerator for a minimum of 30 minutes to 1 hour (*note: the salad will taste better with more time, so if time allows, refrigerate and marinate for 6 hours or longer to let the flavors develop.

Notes

The key for crispy cucumbers is to smash and salt the cukes!