Category: Food

Molasses Snickerdoodles: Walking for Cookies

Molasses Snickerdoodles: Walking for Cookies

More rain, more gray…will it ever end?  Of course, it will but when?  Last week, the high winds took out our power at home so we escaped to San Francisco for the day.  Luckily, we had a brief, much-welcomed break in the weather and made the most of it.  It was too gorgeous not to take a walk and hit some of the scenic spots in The City.

Polk Gulch-Polk Street

There are a couple of streets that come to mind for me that define life in the city, and Polk Street is one of them. If you haven’t visited this area of the city, put it on your list.  Polk Street stretches from the  Civic Center area near City Hall, the gritty Tenderloin, all the way to the tony Russian Hill area, Aquatic Park, and Fisherman’s Wharf. To walk from Aquatic Park, the northern end of Polk to Civic Center, the southern tip, encapsulates San Francisco.

How can one street be home to Michelin-Starred Restaurants, trendy coffee kiosks, and French Bakeries, but also drug addicts and homeless sleeping in doorways or living in tents?  City life is uncensored and chaotic, where you see Everything, Everywhere, All at Once

We made a beeline for Polk Street which is only 2.5 blocks away…uphill.  The perfect way to start a walk since we’ll inevitably end up at one of the many bakeries on or near Polk.

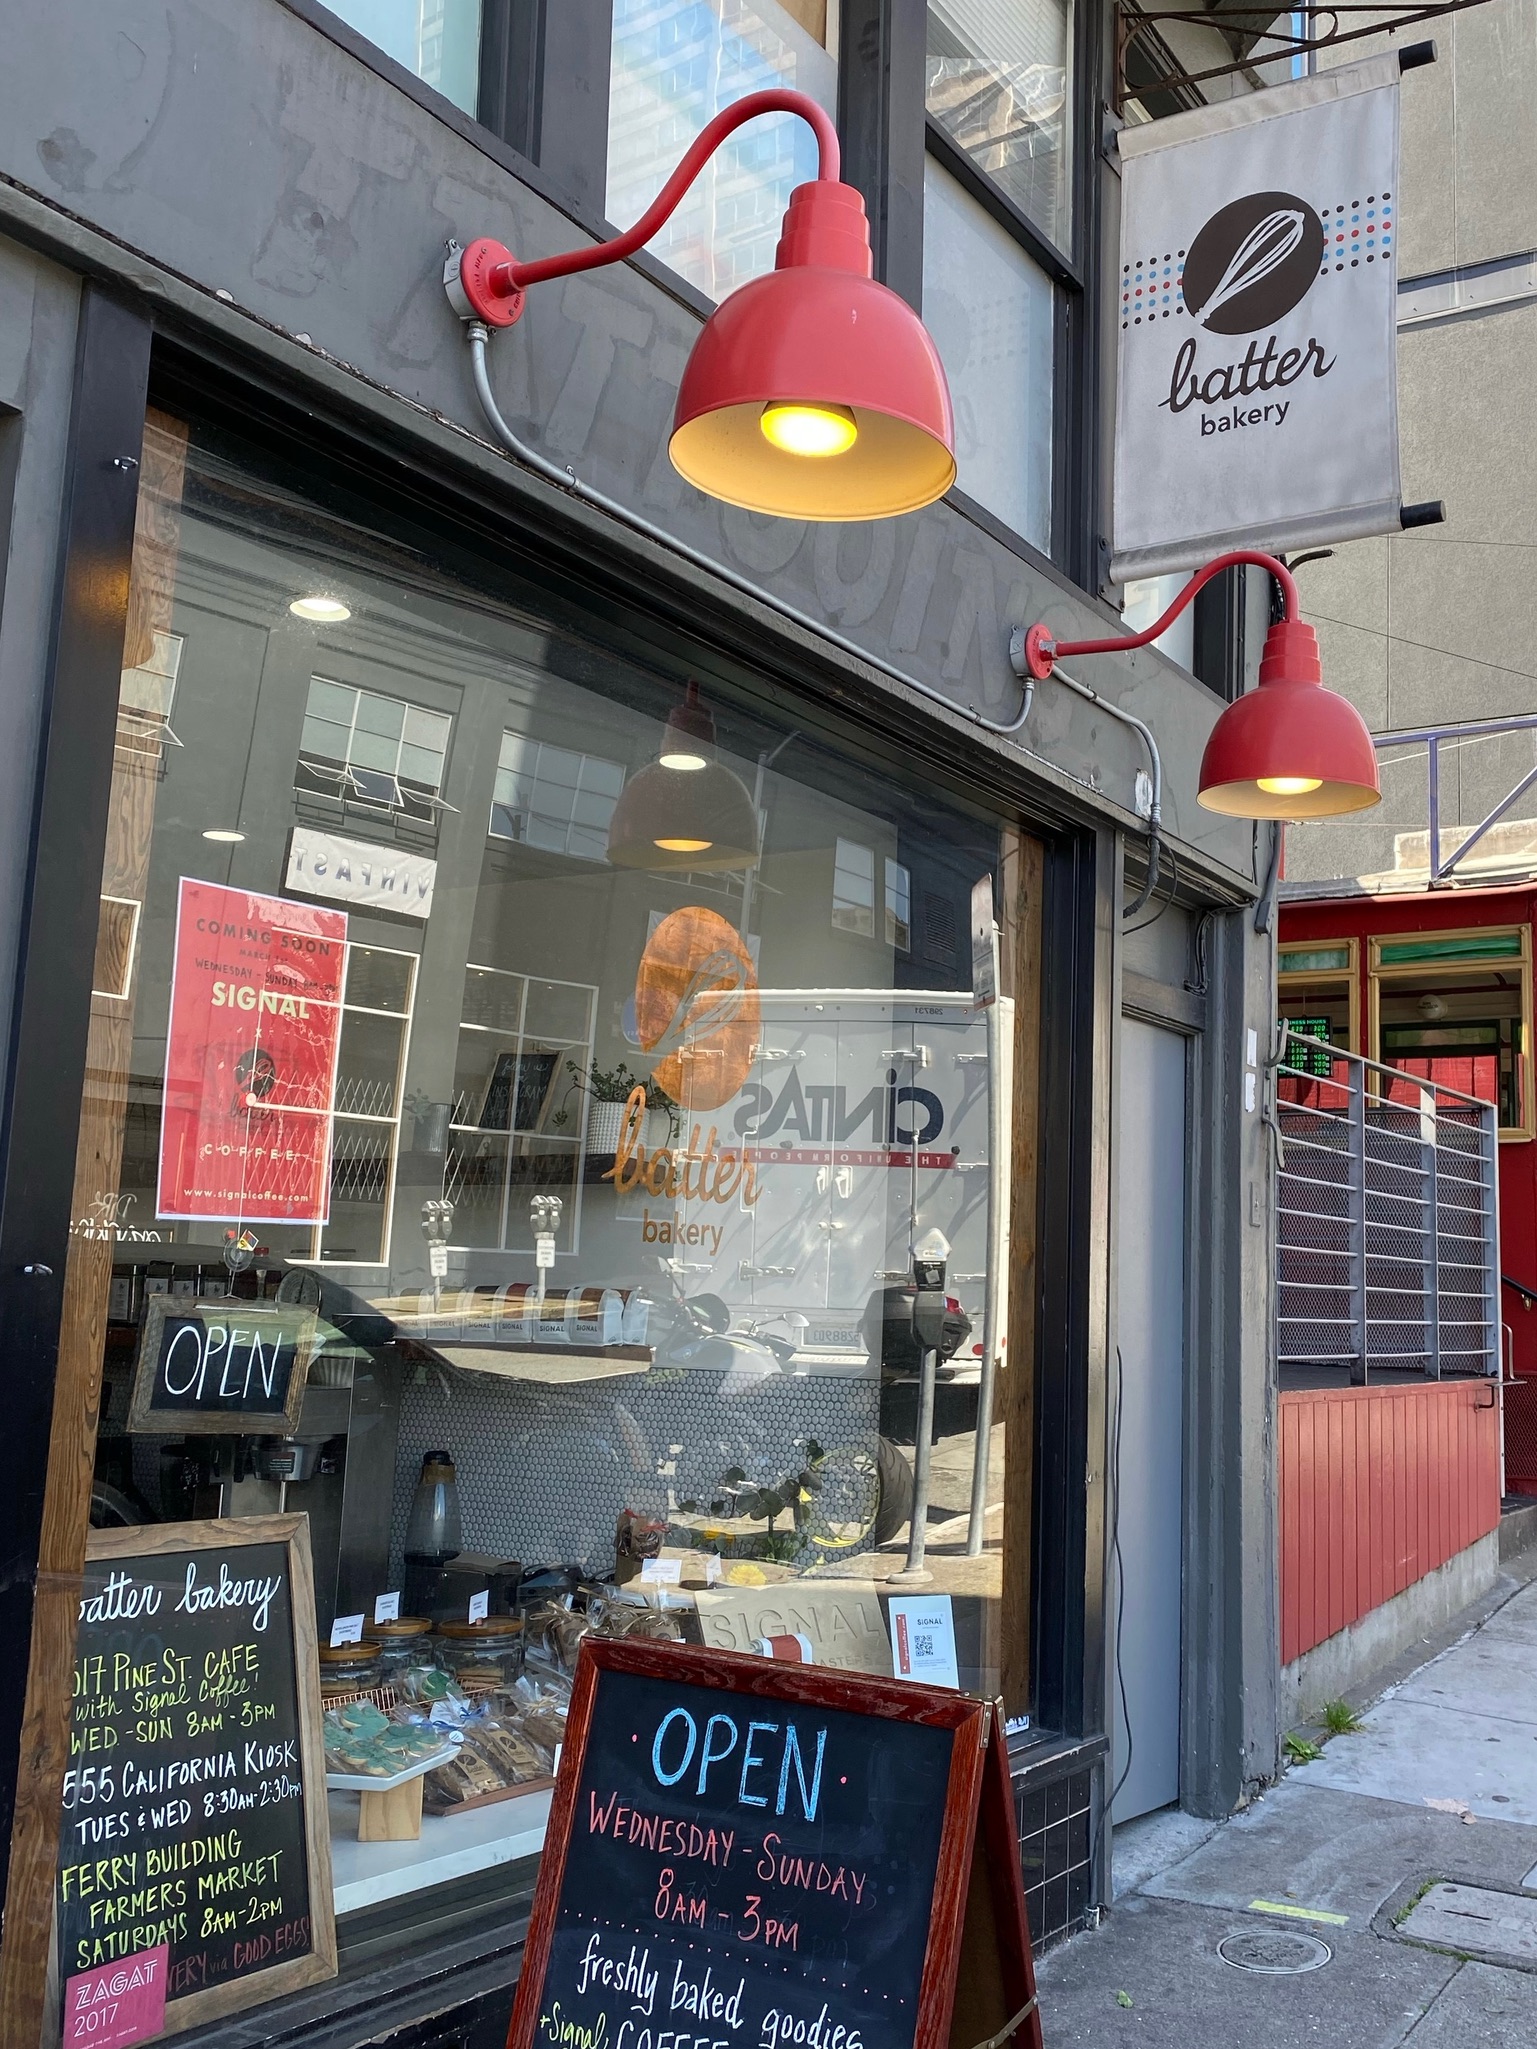
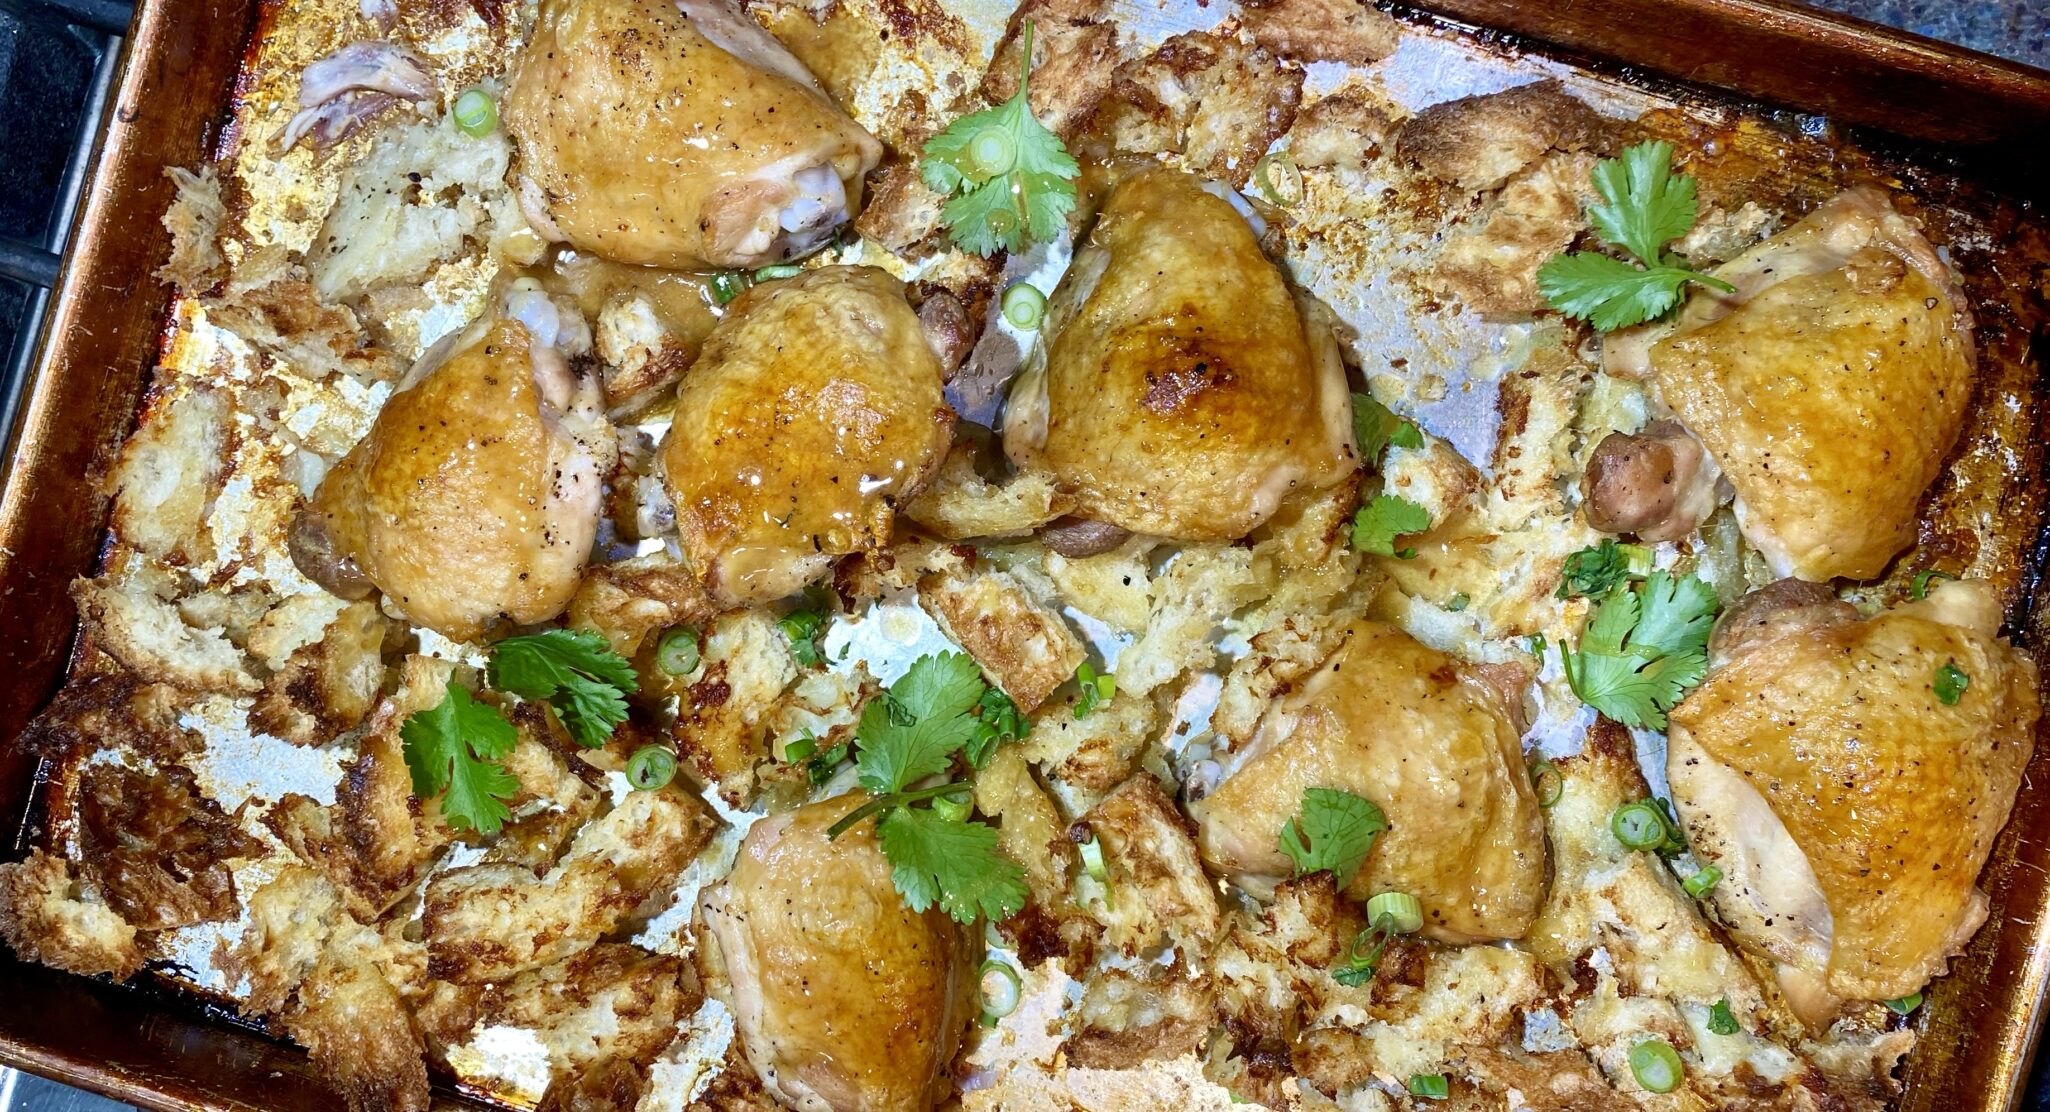
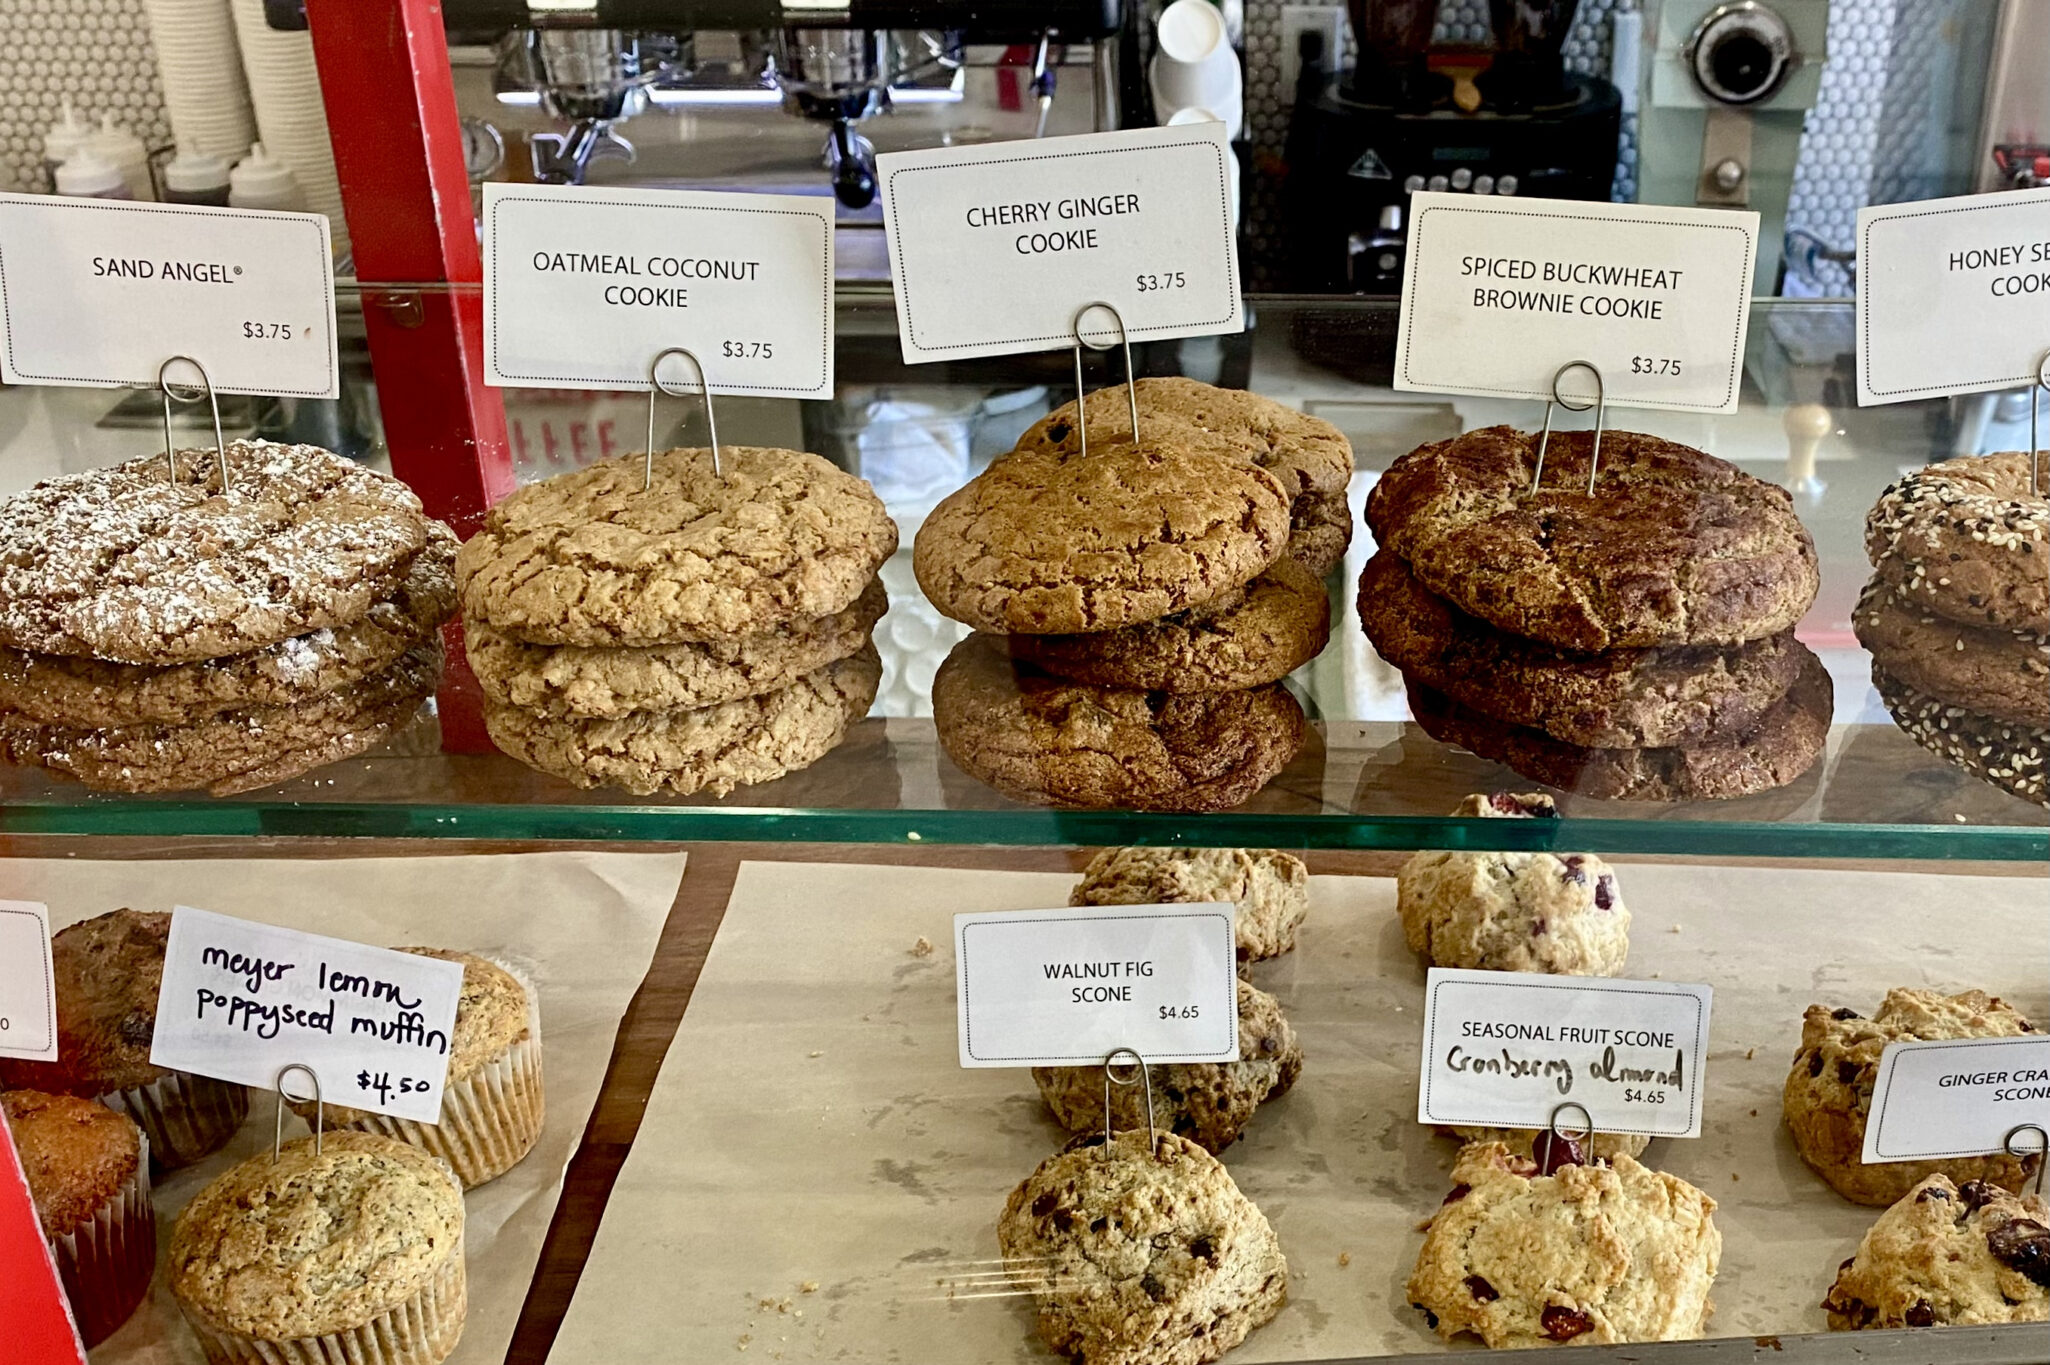
We stopped at Batter Bakery for a cup of coffee and some cookies.  Known for their cookies, I had a tough time choosing what to try.  As much as I love shortbread, which they have so many permutations, we decided on their Sand Angel and a Sesame Cookie that looked scrumptious.  The Sand Angel had me at first bite.  A molasses cookie with a crispy edge and soft, slightly cakey center, best described as a cross between a Snickerdoodle and Molasses Cookie.  Yummy on the cookie meter, 🍪🍪🍪🍪

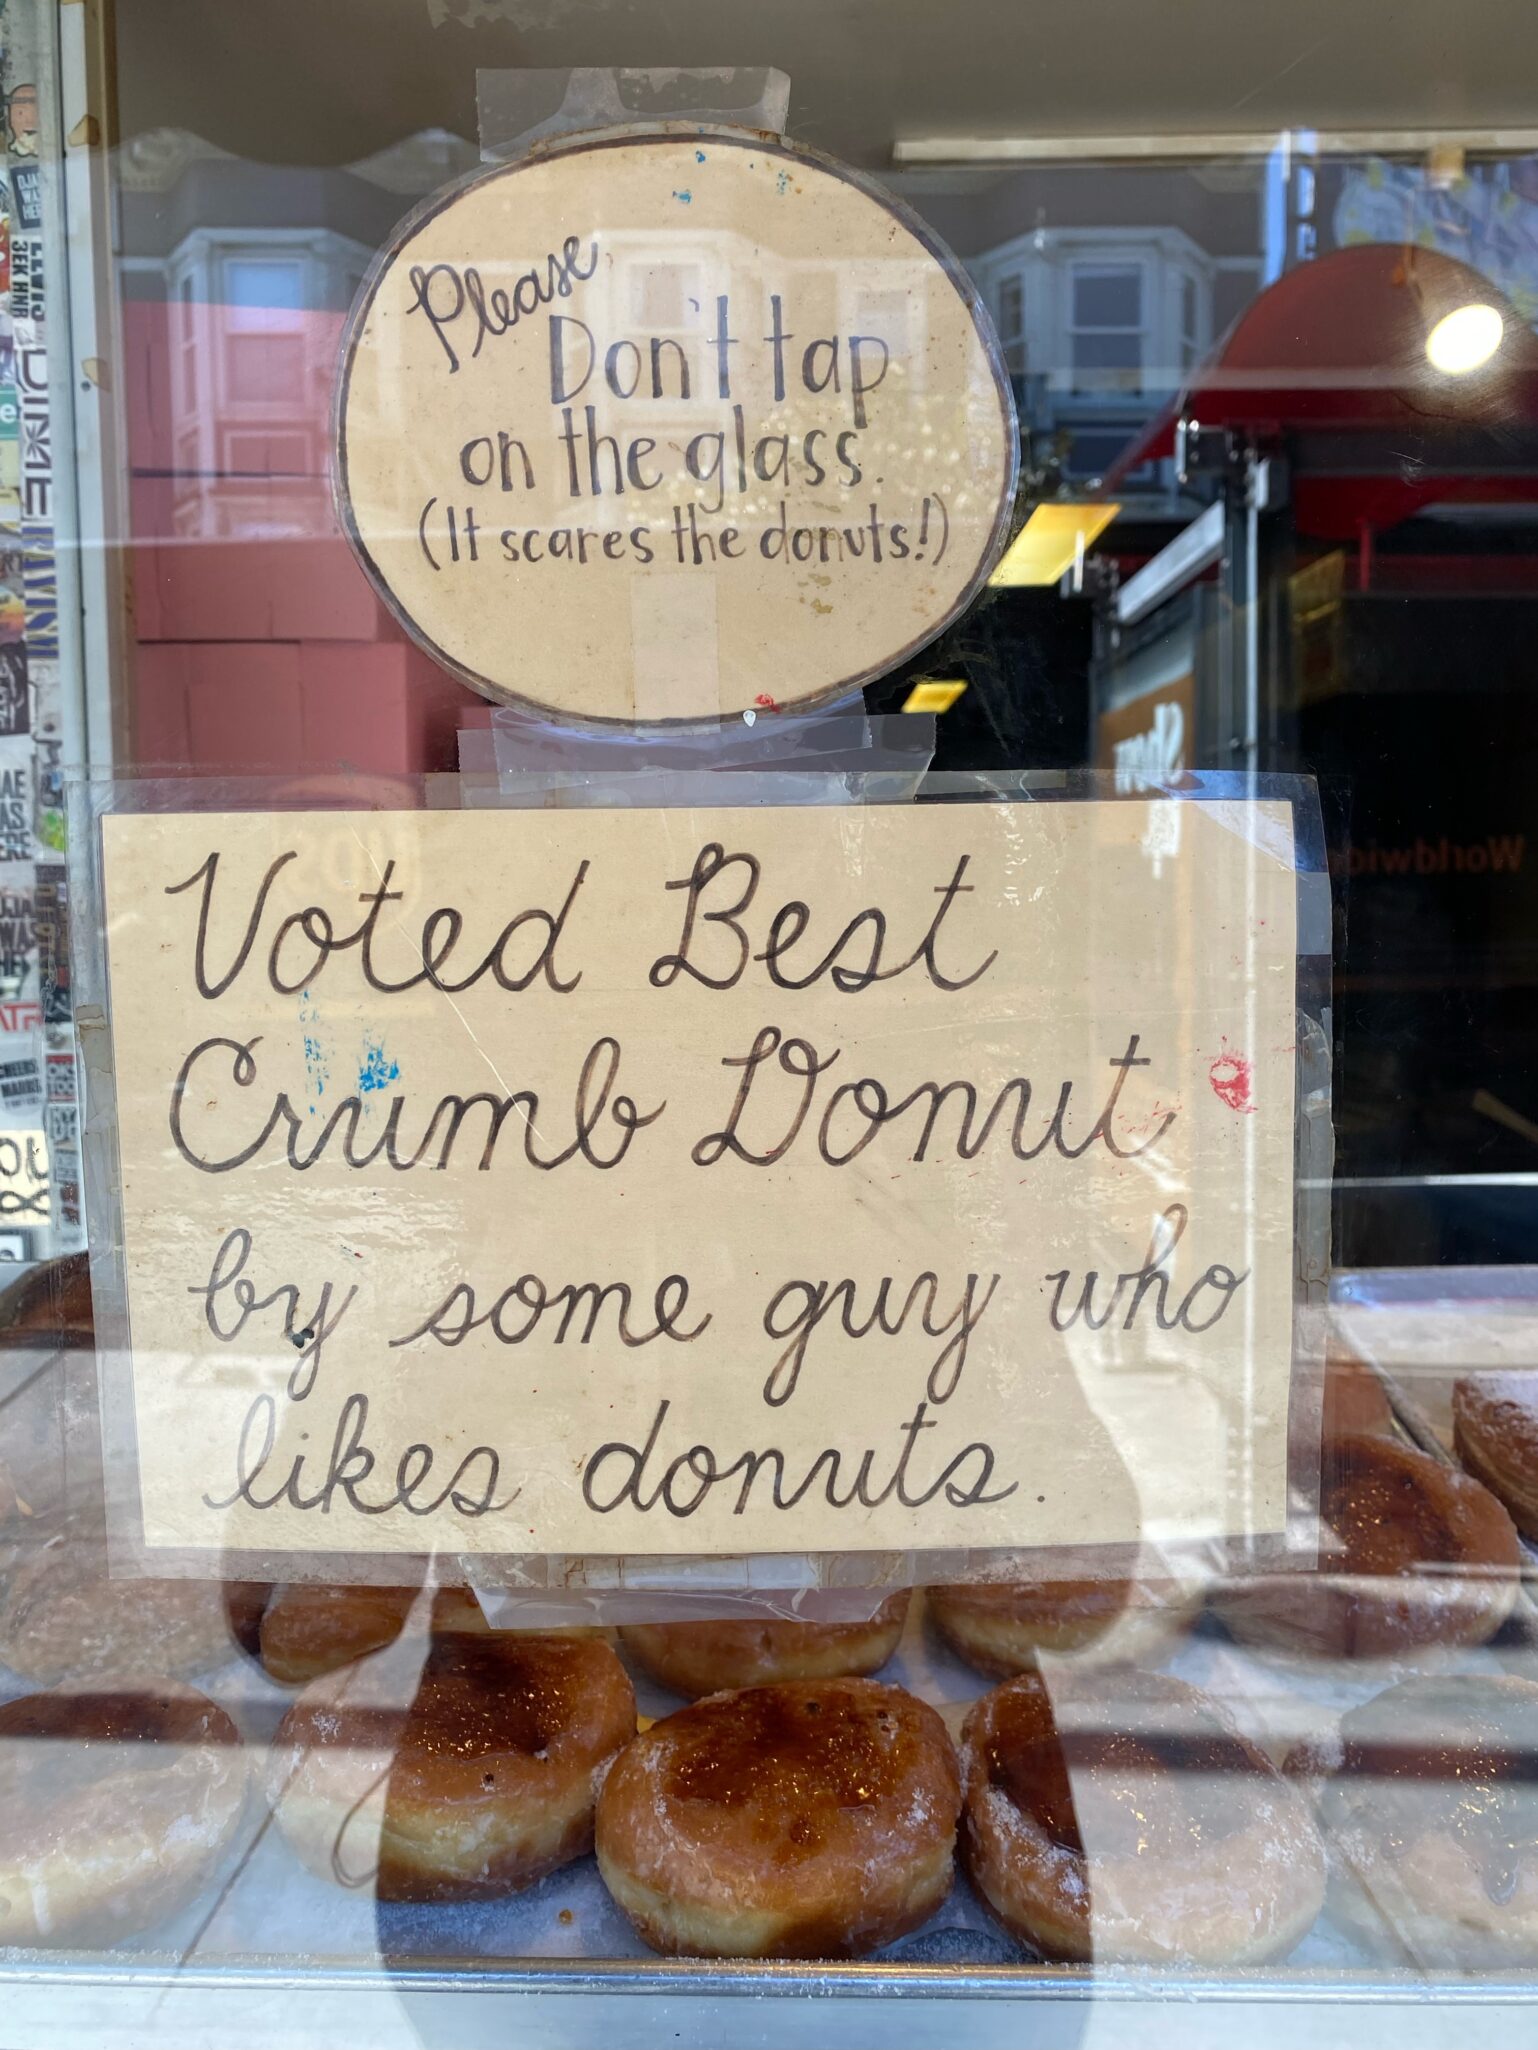
Grabbing our coffee and cookies we continued on our walk.  I pointed out spots of interest to the hubster.  Places that were part of my childhood-my elementary school, Victor’s Pizza (still there!), and the corner my favorite dessert cafe, Blum’s occupied (sadly not there).  We passed Bob’s Donuts and Swan’s Oyster Depot, SF icons that have been around for as long as I can remember.

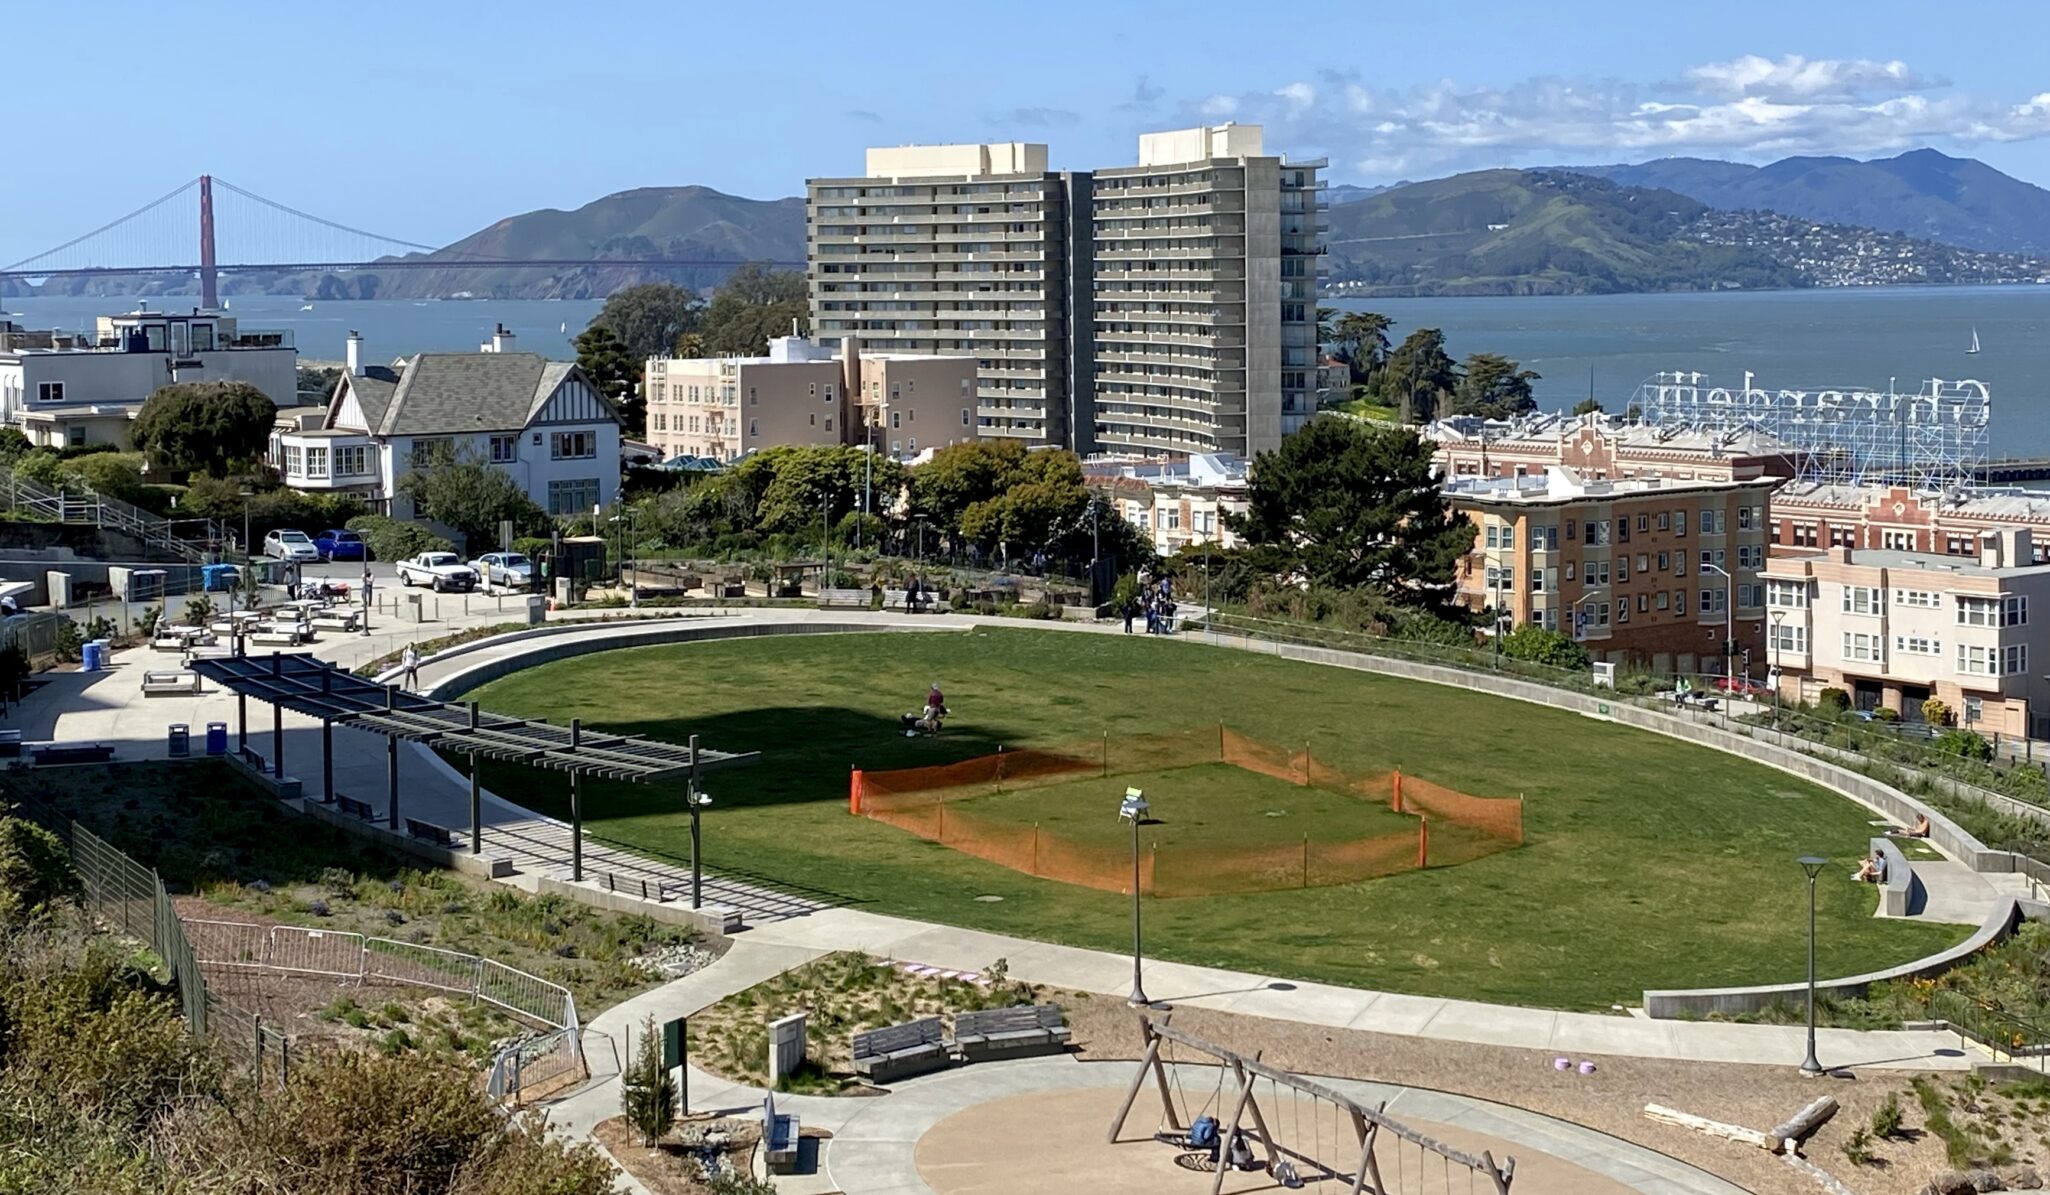
On our walk back we stopped to take a peek at a new neighborhood park, Francisco Park. Built on top of an old reservoir, it’s a nice respite with gorgeous views.  With a community garden, playground, picnic tables and a doggy-run on street level, the park is worth a visit.  Just a note those two highrises, the Fontanas, led to the restrictions on building heights in the city. 😉

So, after a fun day in the city, I returned home with one thing on my mind, Molasses Snickerdoodles.  Adapted from Grandma’s Molasses, it isn’t quite the same as the Batter Bakery cookie, but it’s pretty darn good!

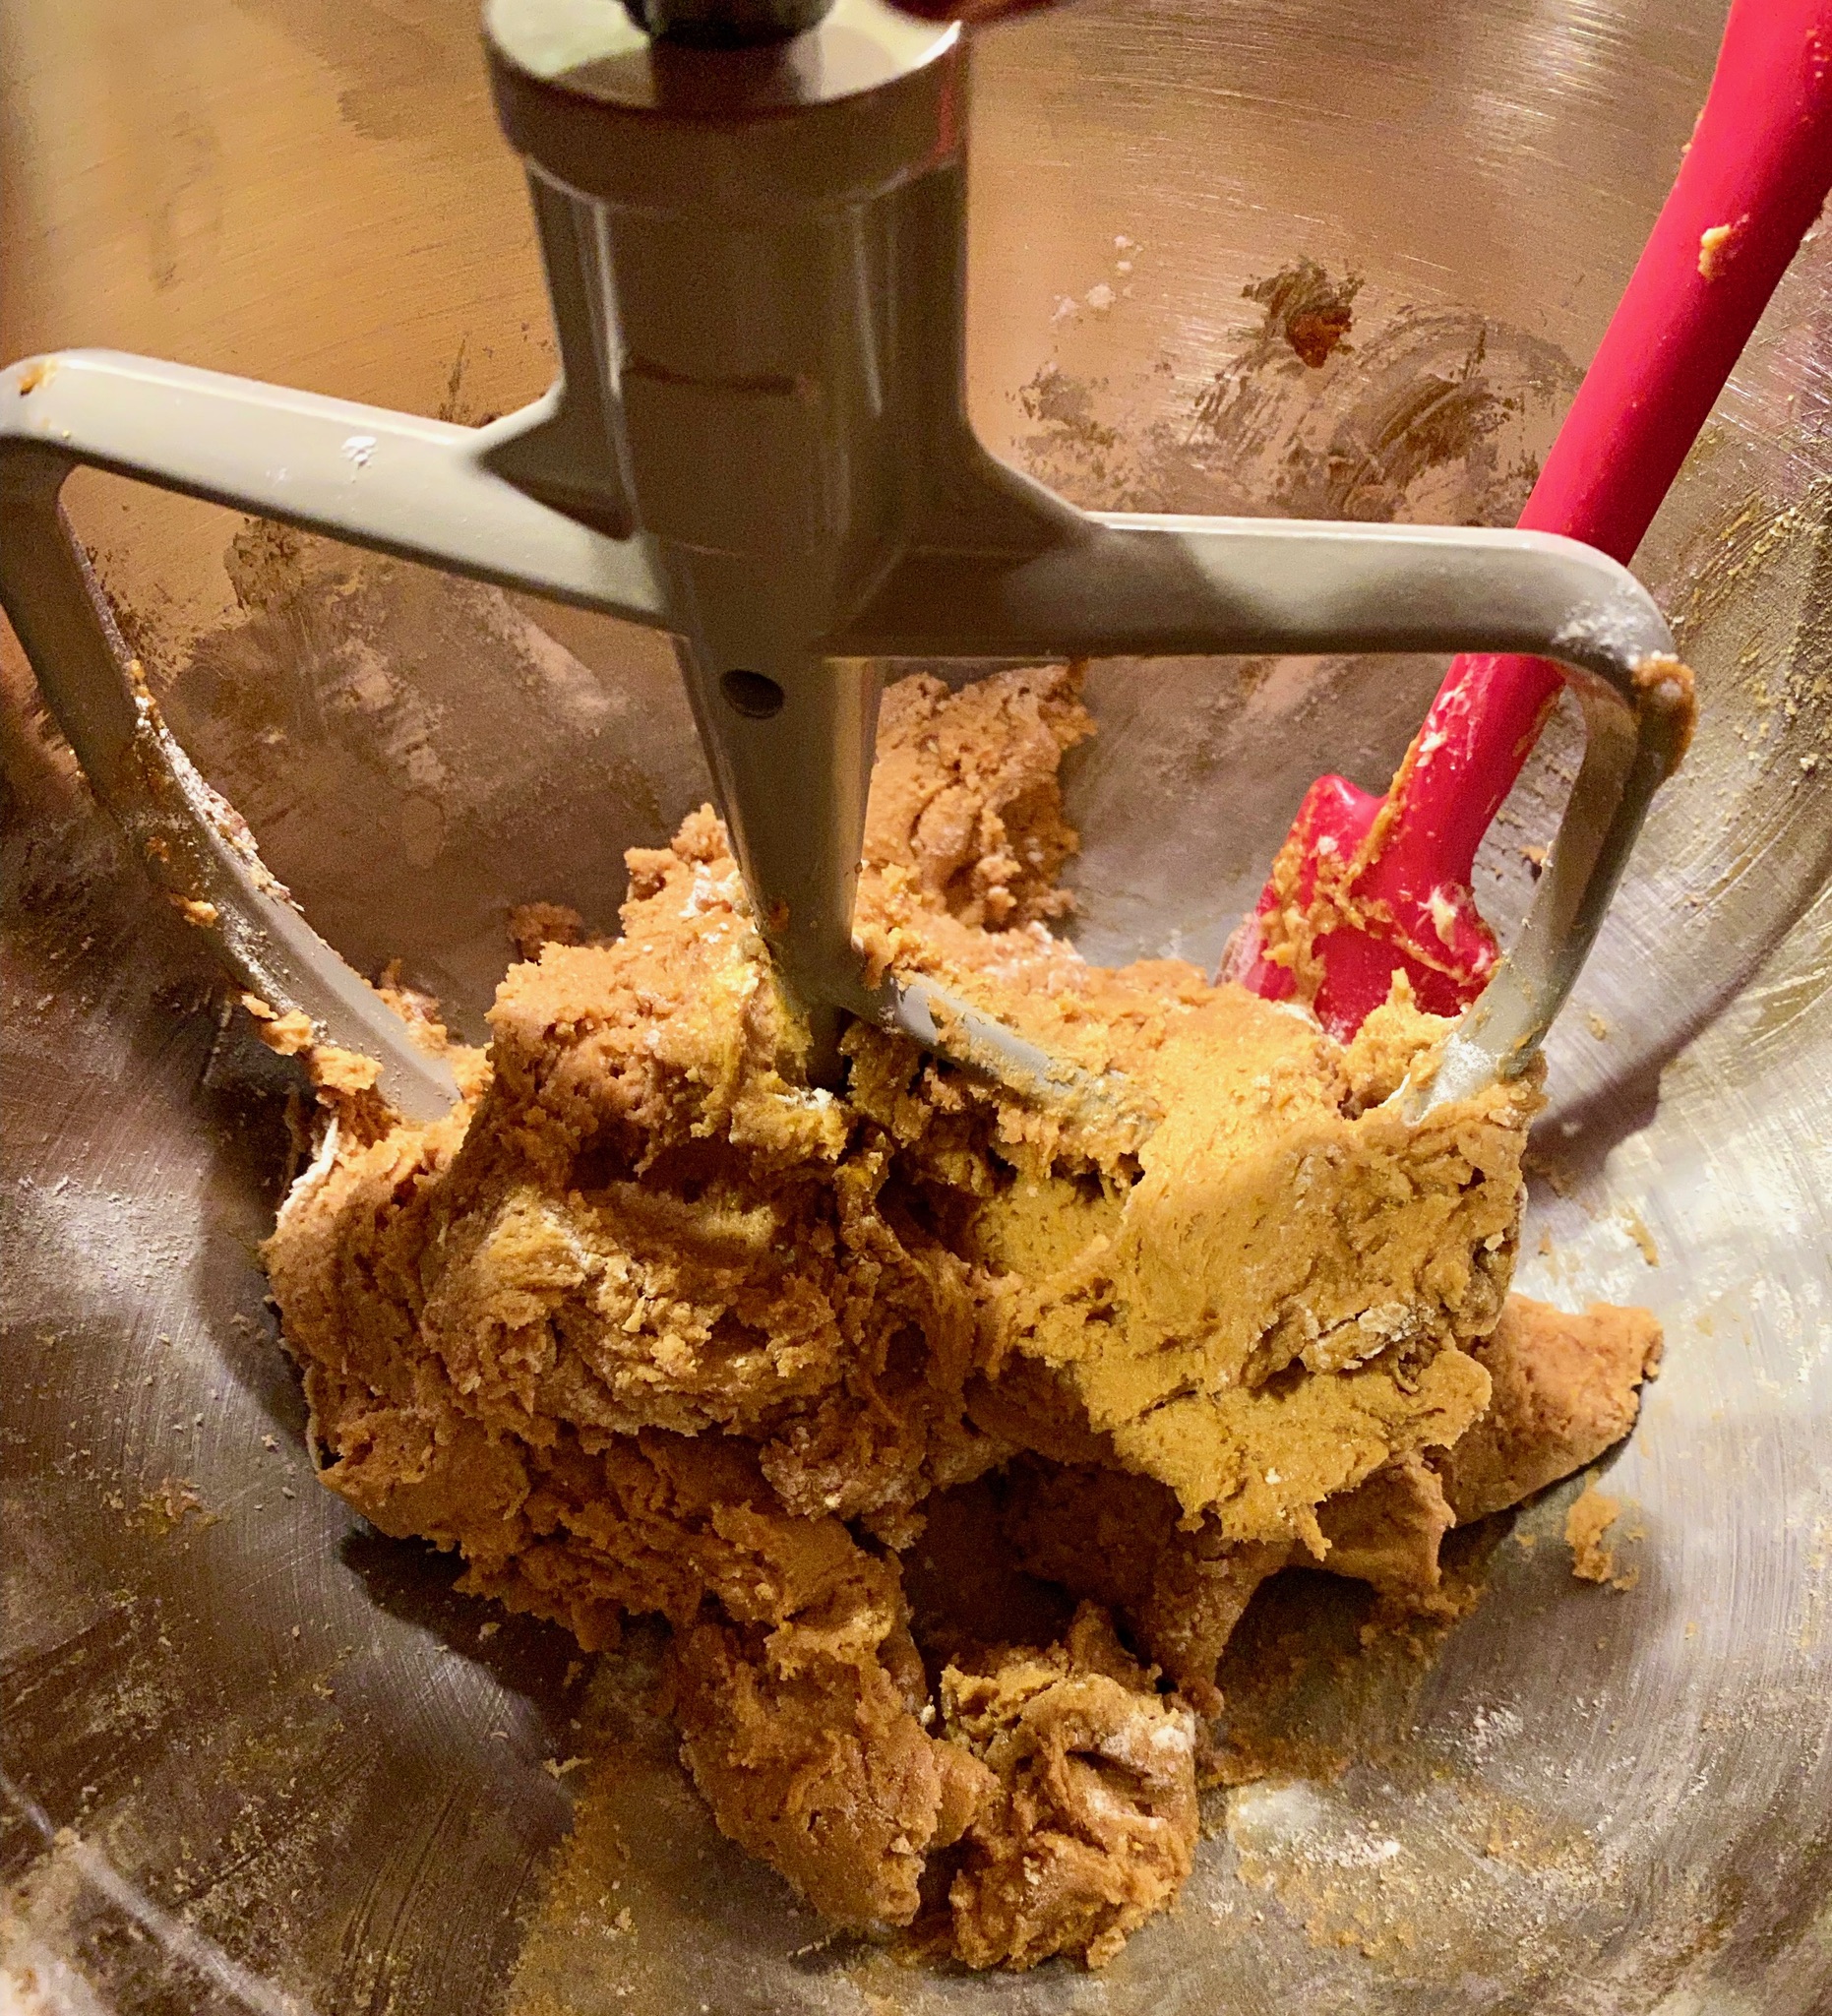
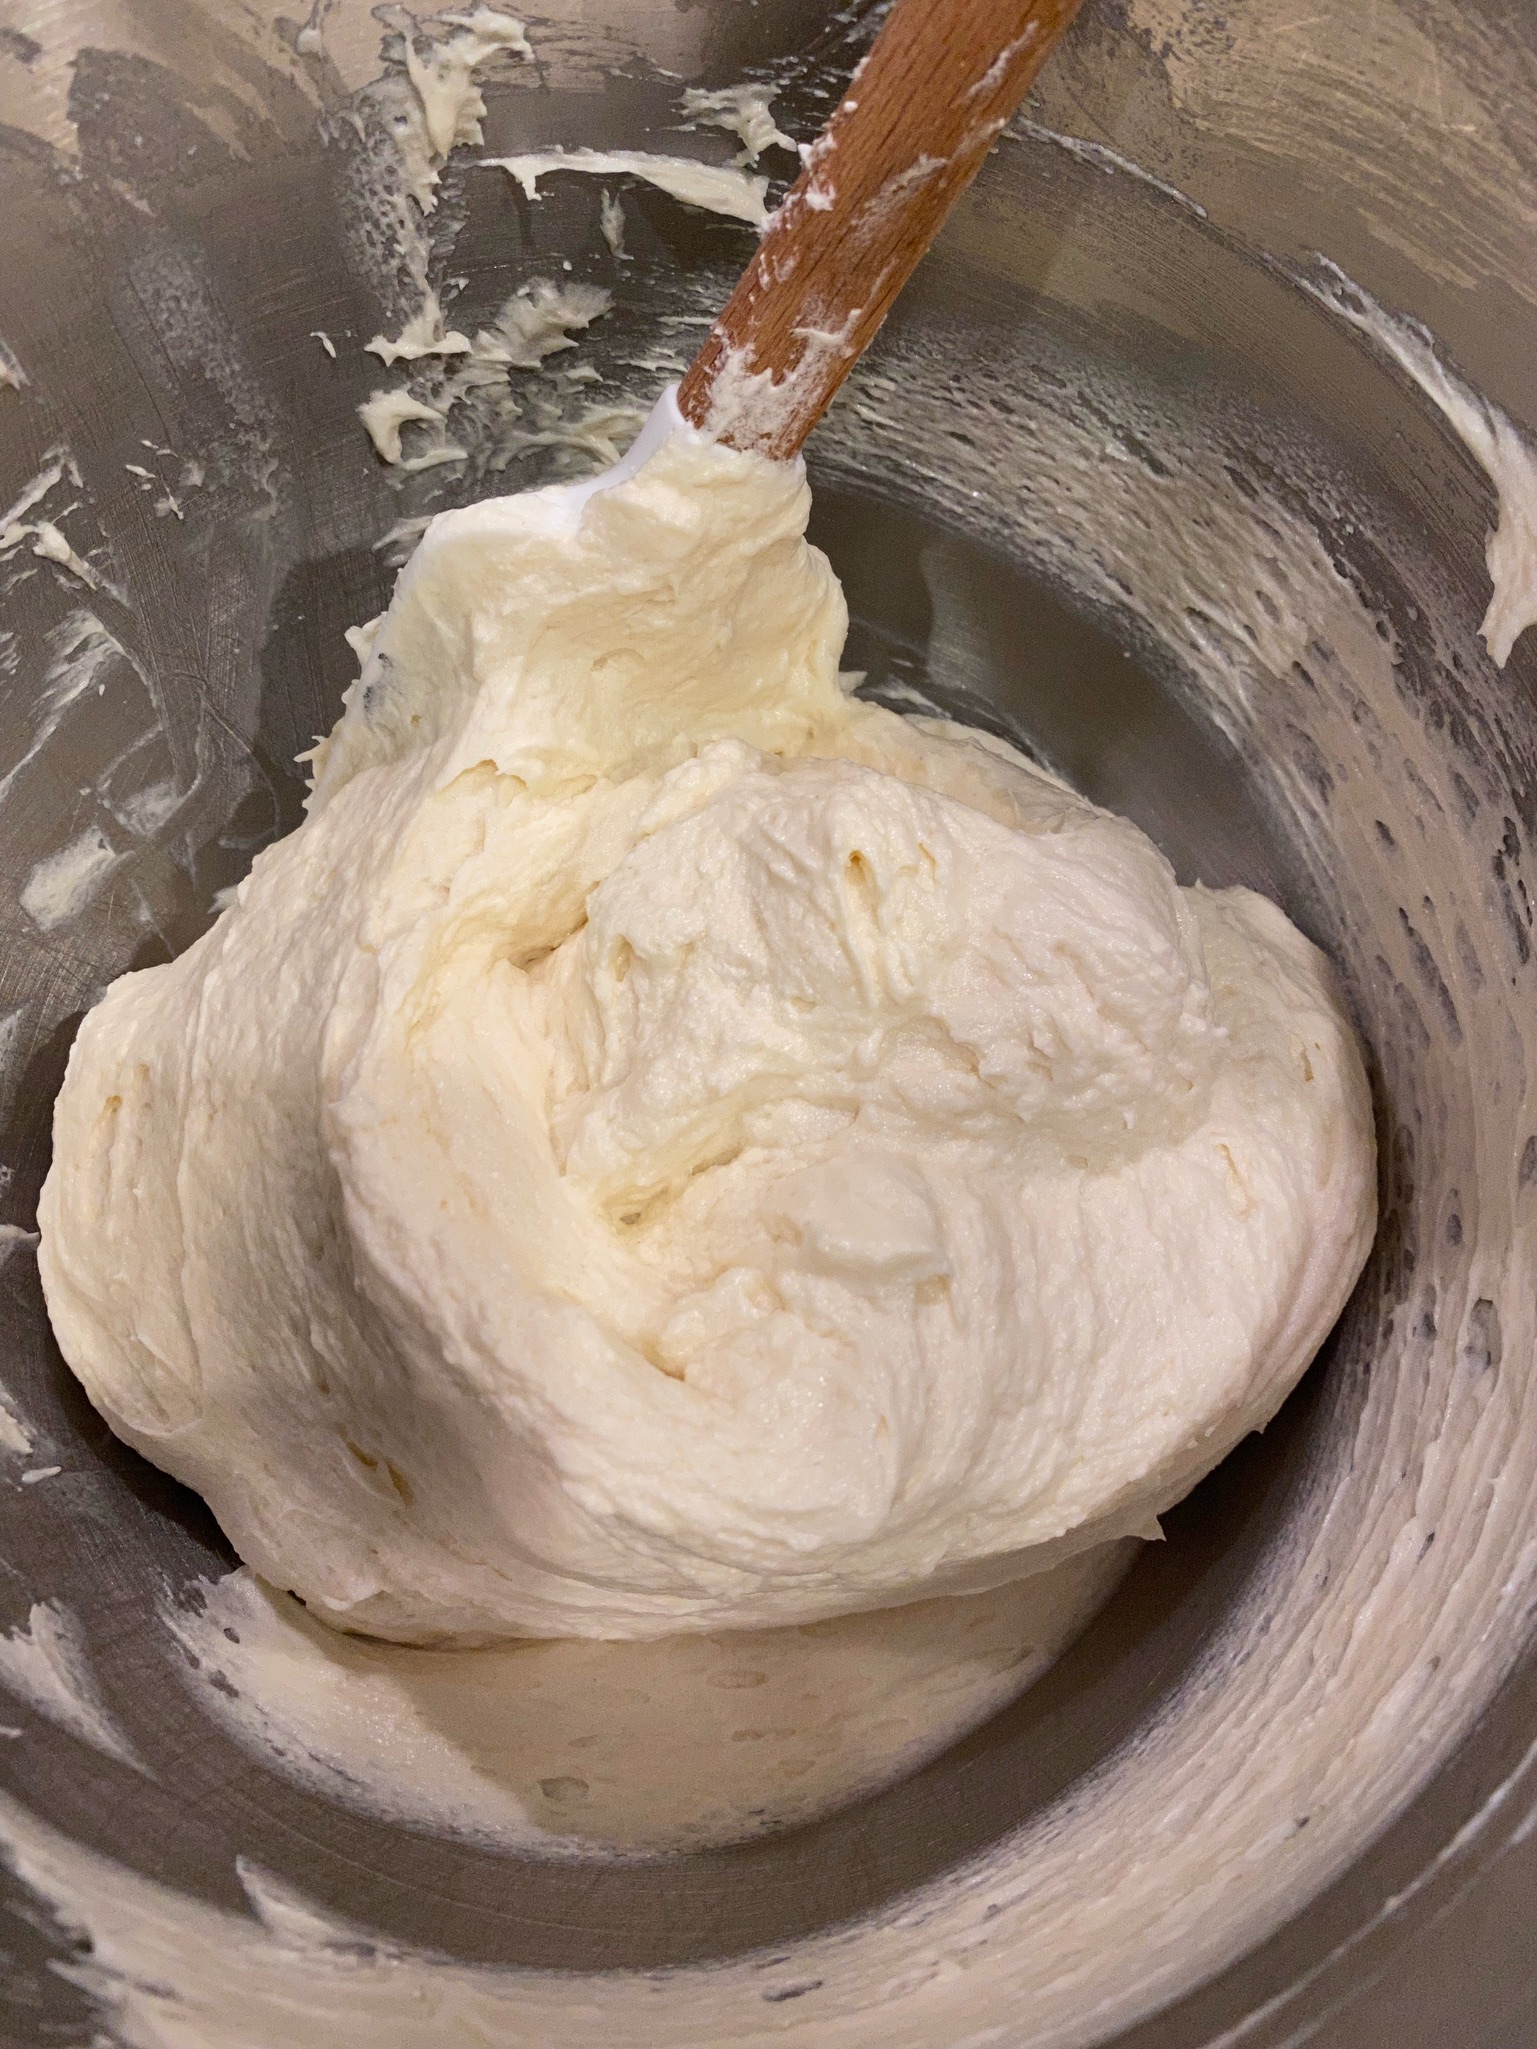
Key points: Beat butter and sugar until light and fluffy.  This will give this cookie a cakier texture in the middle. If you prefer a less cakey texture and a chewier center, two things, beat only until smooth and creamy, and during baking when the cookie puffs, pull the pan out and bang the sheet on the oven rack. Do this a couple of times.  More on this later.

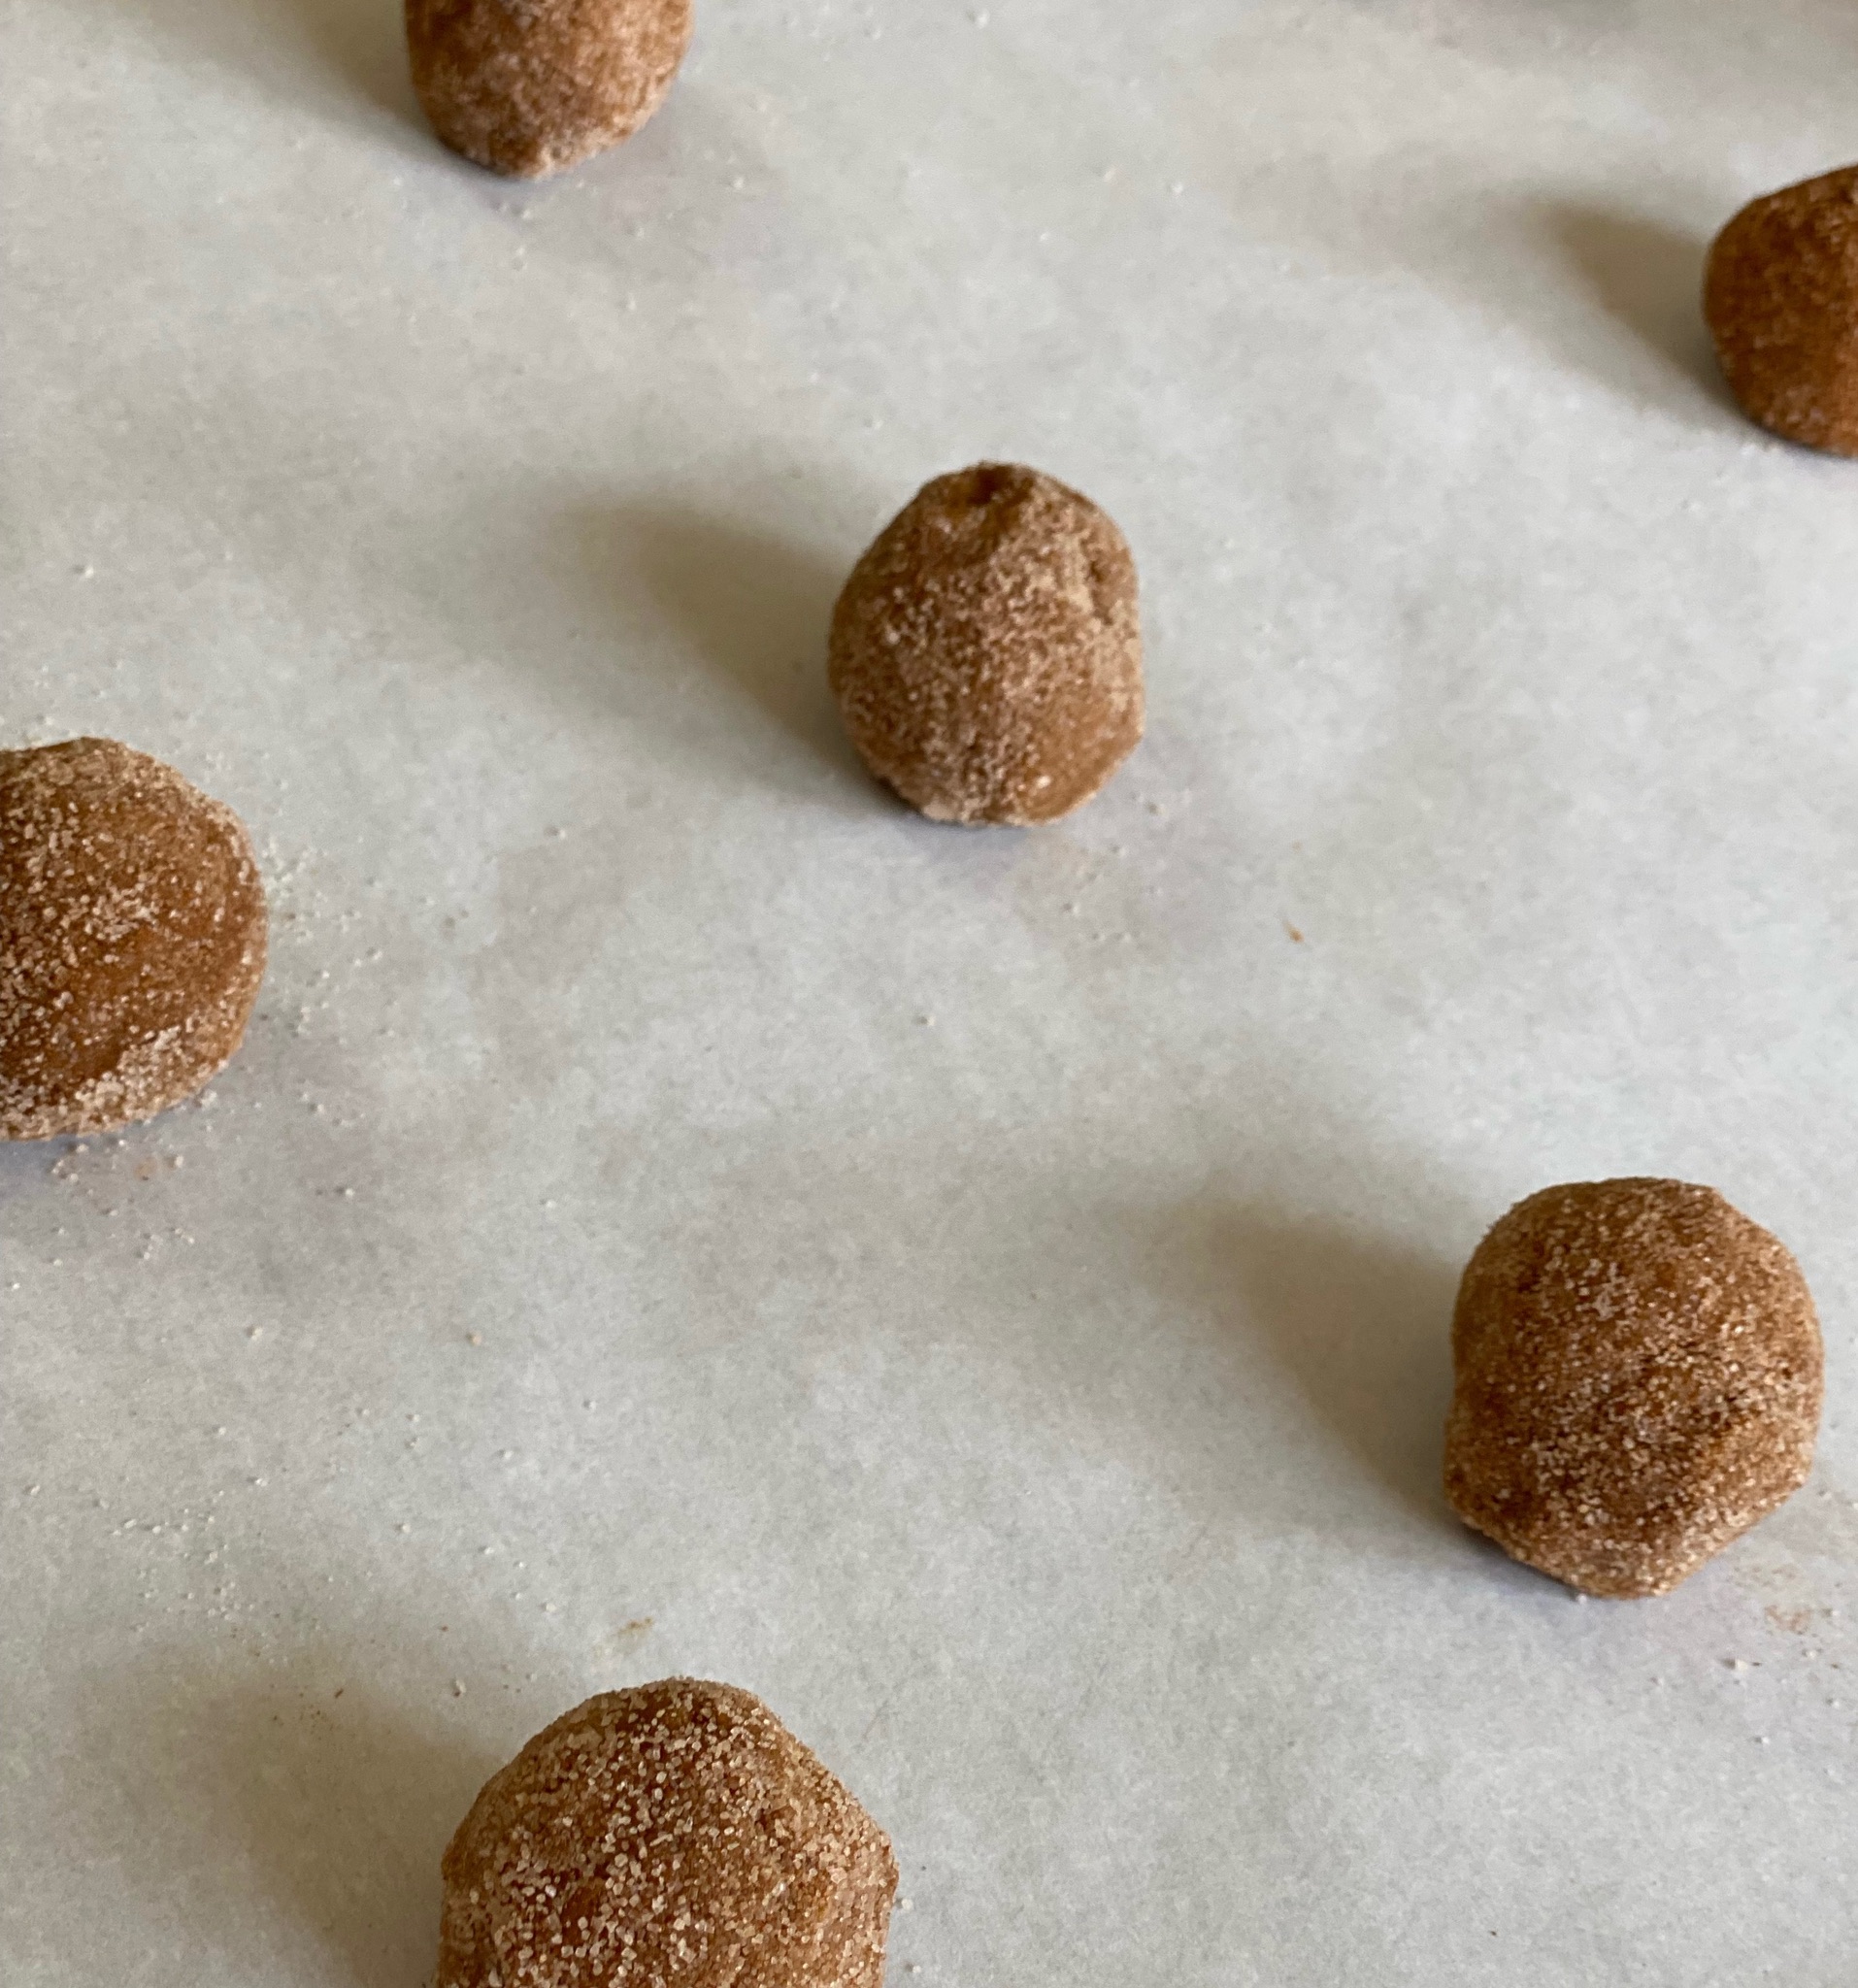
If the dough seems too soft to work with, chill it for 10 minutes.  A #40 scoop (2 tablespoons) will yield a 2.5-3 inch cookie.  Perfect dunking size.  The dough balls are rolled in a mixture of cinnamon and granulated sugar.  Substitute turbinado or raw sugar for a crunchier finish.

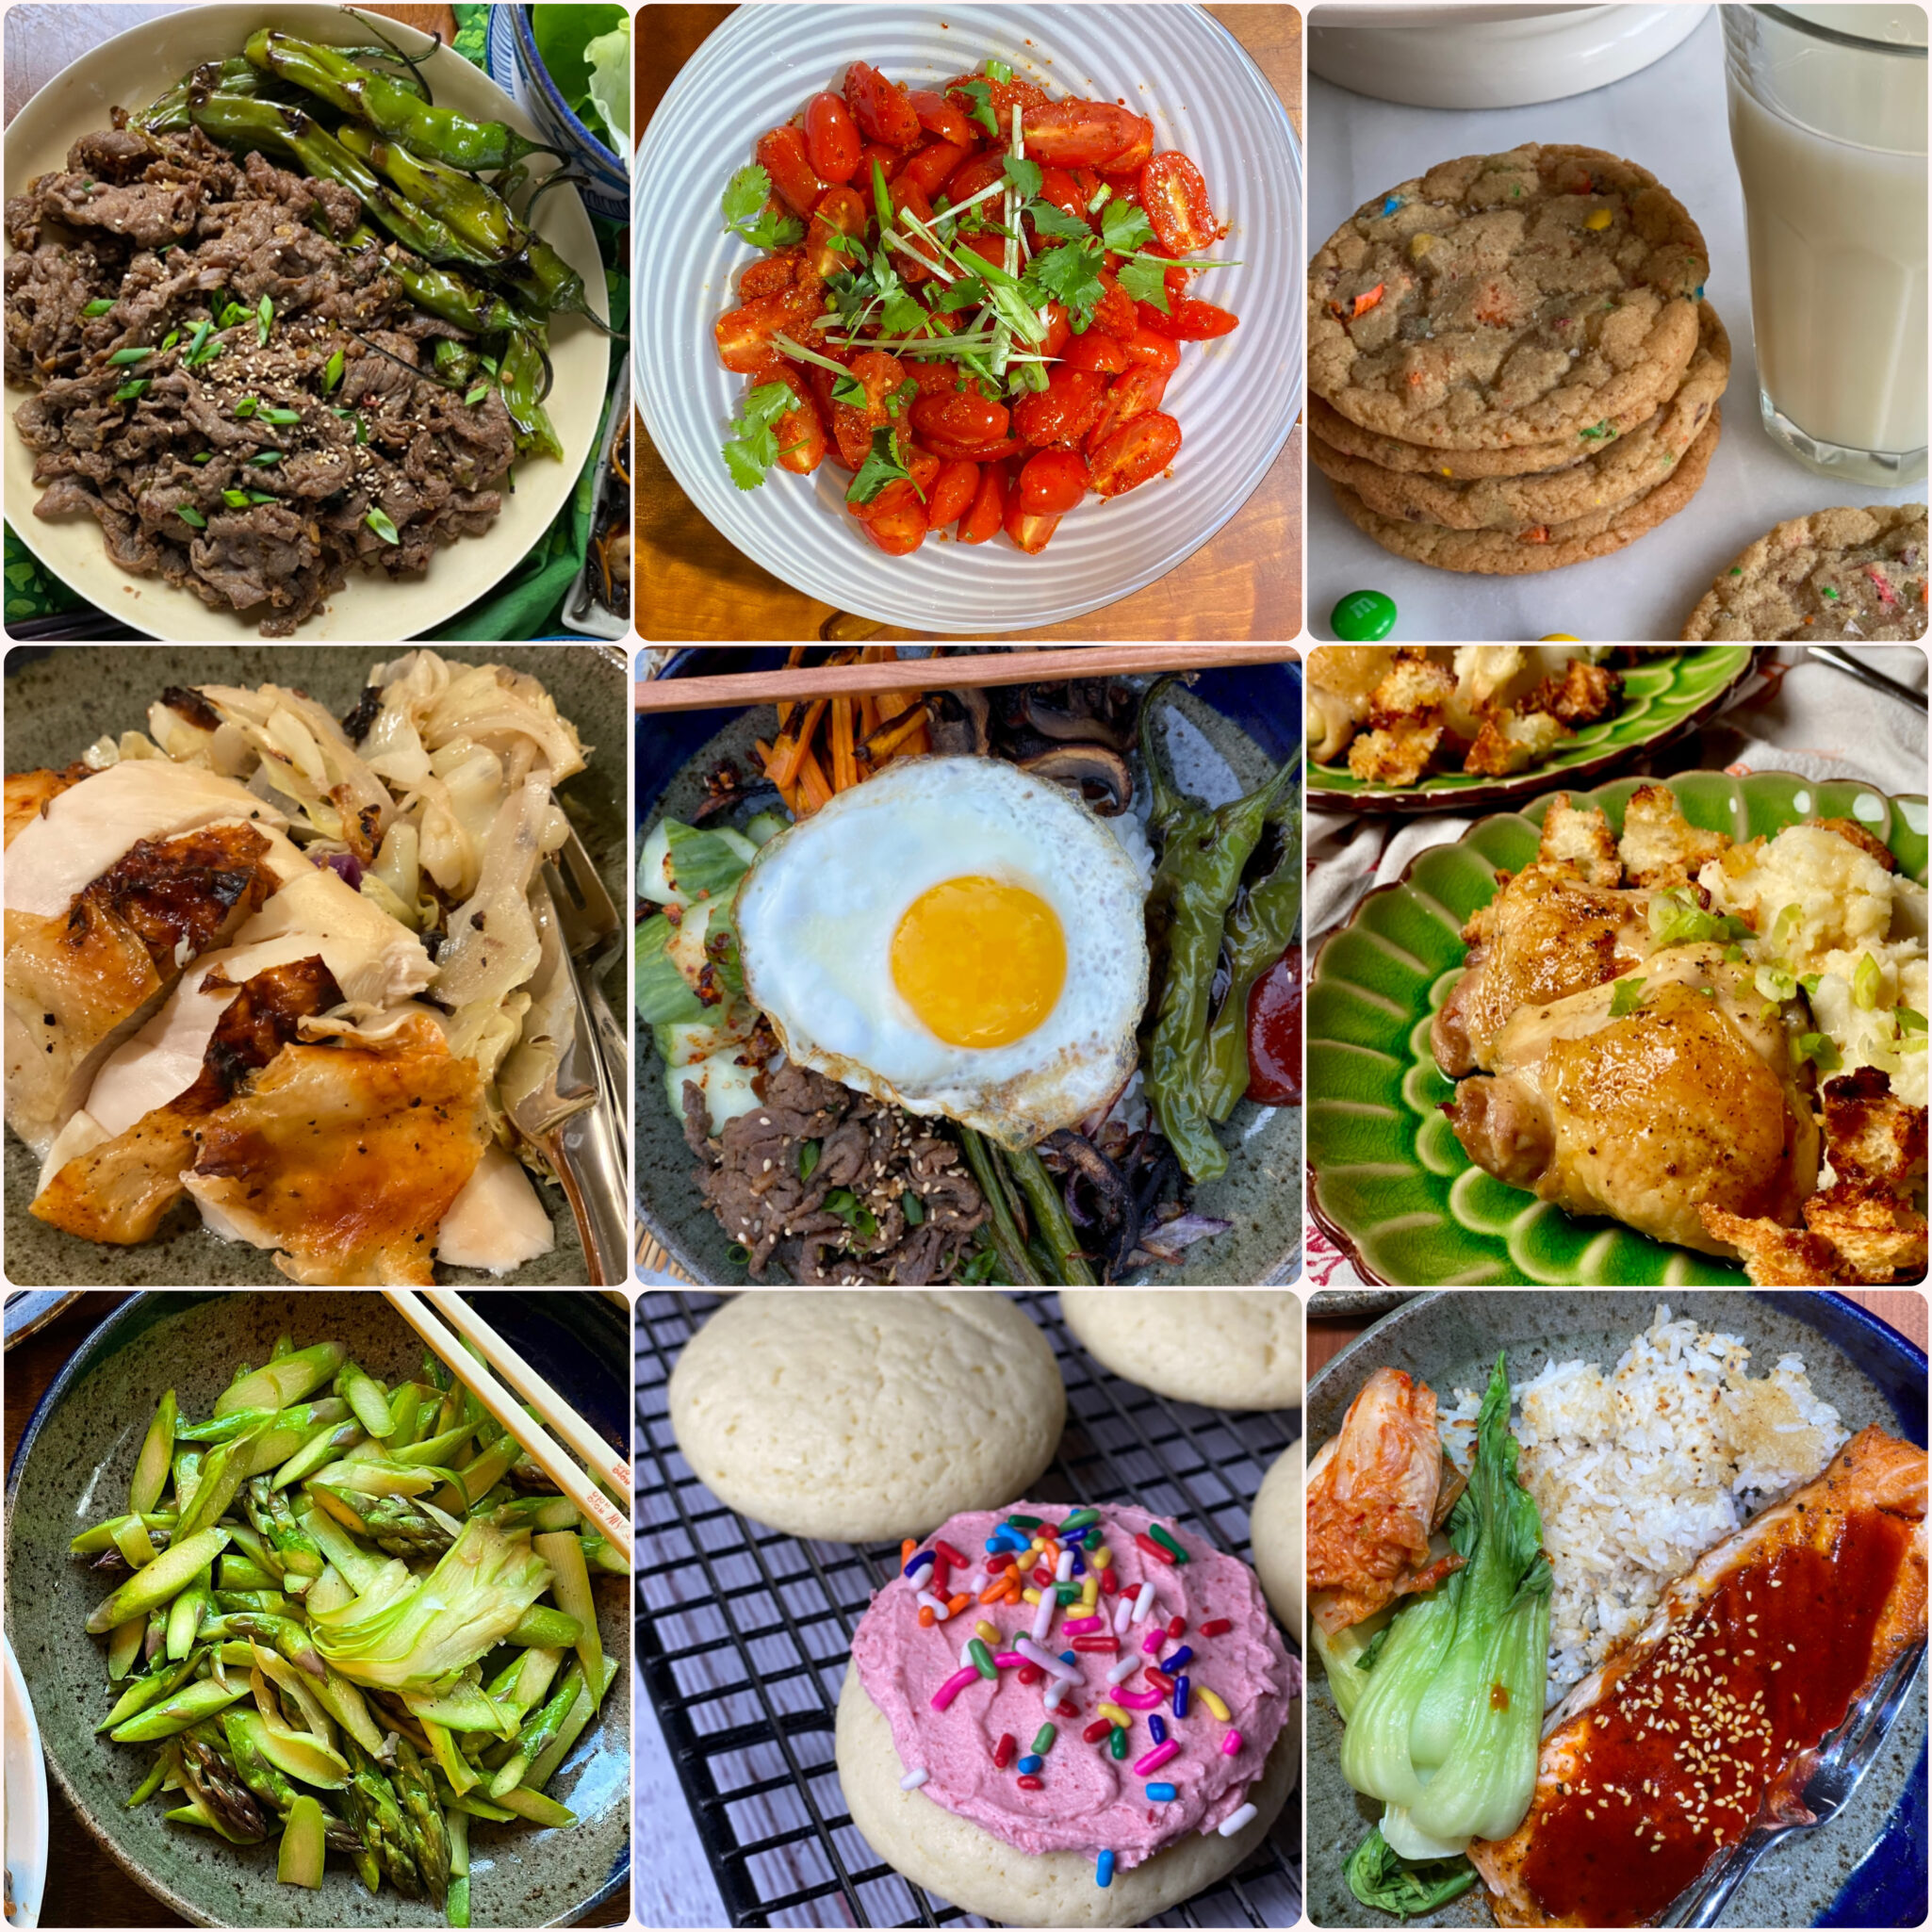
Variations on a Cookie

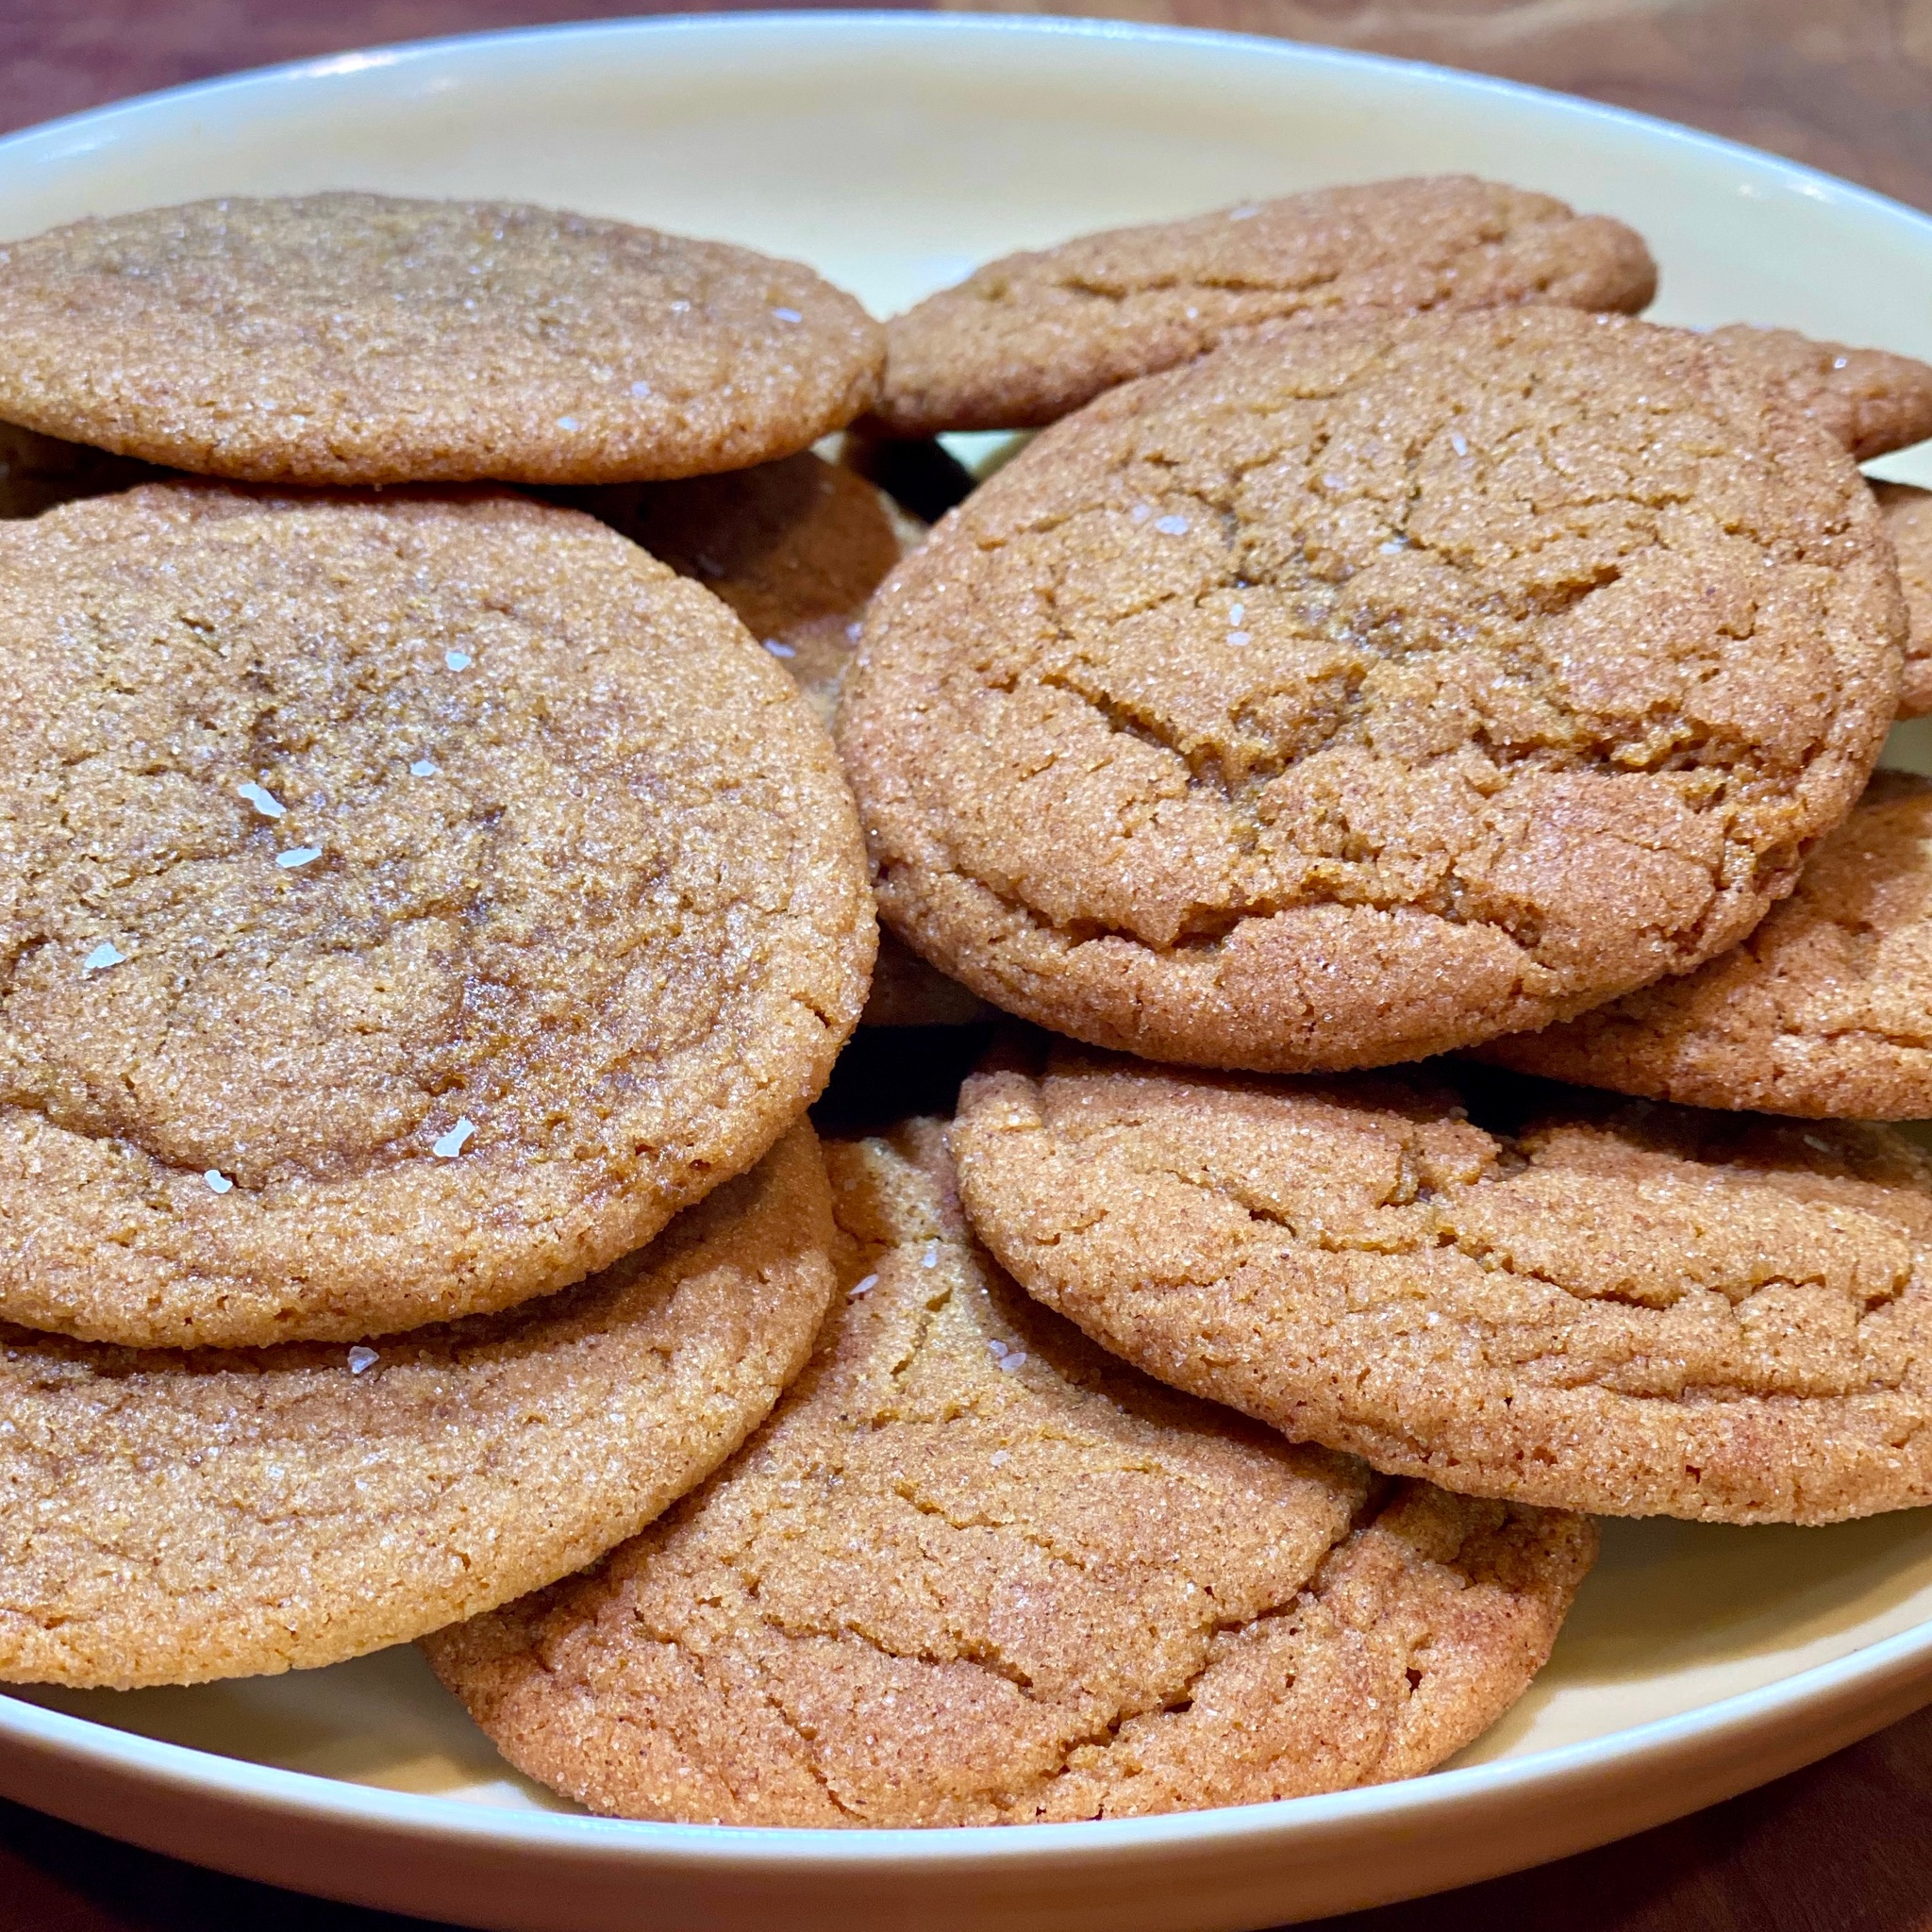
One dough, two different bakes.  The cookies on the left received Sarah Kieffer’s pan-banging baking treatment.  This means about two-thirds of the way through baking, when the cookies are puffy, rap the pan on the oven rack to deflate the cookies. Repeat this a couple of times.  The result is flatter, chewier cookies with crisp edges.  The cookies on the right were allowed to bake undisturbed, they puffed and fell naturally creating cracks.  This results in cookies that are a little thicker and cakier than the pan-banging cookies.

Enjoy!

Molasses Snickerdoodles

A rift on Snickerdoodles, adding molasses gives these cookies a nice earthy flavor. Crispy-edged, tender, slightly cakey, cookie.
Course cookies, Dessert
Cuisine American
Keyword Cookie recipe, cookies, Molasses Snickerdoodles
Prep Time 15 minutes

Ingredients

Dry Stuff

  • 1 3/4 C. all-purpose flour
  • 1/2 tsp Cream of Tartar
  • 1/2 tsp Baking Soda
  • 1/8 tsp salt

Creamed Ingredients:

  • 1/2 C. unsalted butter room temperature
  • 3/4 C. granulated sugar
  • 1/4 C. Light or mild Molasses
  • 1 large egg
  • 1 tsp Vanilla Extract

Dredge

  • 3 Tbsp. granulated, raw or turbinado sugar
  • 1 tsp Cinnamon

Instructions

  • Preheat oven to 375° F.
  • In a bowl, whisk together flour, cream of tartar, baking soda and salt until well blended. Set aside.
  • In a large mixing bowl or the bowl of a stand mixer, beat butter and sugar on medium-high speed until light and fluffy, 1 to 2 minutes.
  • Add molasses and beat until combined, scraping down the sides of the bowl as needed.
  • Add egg and vanilla and mix until smooth.
  • Add dry ingredients and mix on low speed until incorporated and no dry flour remains.
  • In a small dish, mix raw sugar together with cocoa powder and cinnamon until well blended.
  • Drop dough by the tablespoonful into sugar mixture, rolling until completely coated. (Dough will be sticky, but the sugar mixture should keep it from sticking to your hands.).
  • Arrange on non-stick or parchment-lined baking sheets, leaving 2 inches of space between cookies. Repeat with remaining dough.
  • Bake for 9 to 10 minutes or until cookies are just set on top and bottoms are lightly golden brown.
  • Let cool for 5 minutes on baking sheets and transfer to a wire rack to cool completely.
Another Biscuit? SWEET!!!

Another Biscuit? SWEET!!!

Bleary-eyed, I arrived home at 6:15 AM after dropping off Jamie at the airport at 5 AM.  I actually live only 10 minutes from the airport.  Are you wondering is California traffic that bad?  A protracted goodbye with the kid? A flat tire?

NOPE

Being very nice, enabling parents, we offered to drop her off for her flight and return the rental car.  The plan went smoothly, I dropped her off curbside and headed to the car rental lot to pick up the Hubster.  As soon as I entered the return lot a voice in my sleep-deprived brain said…hmmm, is this a good idea?  Apparently not.  The parking guys that man the exit booth do not arrive until 6 AM.  I guess it stands to reason if you are dropping off a rental car, you are probably catching a flight. 🤦🏻‍♀️🤦🏻‍♀️🤦🏻‍♀️. So we sat in the car for 50 minutes, the Hubster occasionally looking over at me and shaking his head while playing Spelling Bee.  I ignored him.

By the time we got home, I was wide awake.  I might as well bake, I deserve a morning treat (ok, not really).  A recent article by my fav NYT cooking columnist, Eric Kim, highlighted (glowingly) the Buttermilk Sugar Biscuits from Tandem Coffee + Bakery in Portland, Maine.  I LOVE biscuits and a recommendation from Eric…turn on the oven now, please.

These biscuits are sweeter than most biscuits.  They have a crunchy exterior due to the high sugar content and yet are still flaky and tender inside.  This makes them sturdy enough for biscuit sandwiches, think ham or fried chicken.

First, grate cold butter and lightly blend it with flour, sugar, baking powder, and salt.  This eliminates cutting the butter into the flour step.  By grating the butter you have strands of butter that help create those flaky layers.

Let’s Skip to the Good Part

Pour the crumbly mass of butter and flour onto your counter. Take out your bench scraper and push your dough mass together and gently press down to compress, you want to roll or pat the dough into a rectangle.

Fold one half over on top of the other half using the bench scraper, gather the escaped bits, and press them into the dough. Then roll the dough out again into a rectangle.  Repeat the process a total of 5 times, rotating your dough ninety degrees each time.  The dough will come together and be less crumbly.  This is the process of lamination, creating layers of butter and flour in pursuit of flakiness.

With the last fold, shape the dough into a square.  Use your bench scraper to cut the dough in thirds both lengthwise and crosswise yielding 9 squares.  Cut straight down without sawing through the dough.  Sawing would smoosh the layers creating an uneven rise while baking.

Next time I will trim the outside of the dough to help with an even rise.

Flaky, crispy, buttery, and sweet. Brush the biscuits with butter and sprinkle them with Maldon salt or any coarse finishing salt you like to highlight the sweet-salty vibe.  Enjoy!

Buttermilk Sugar Biscuits

Course Biscuits and scones, Breakfast
Cuisine American
Prep Time 20 minutes

Ingredients

  • 1 cup cold unsalted butter 227 grams
  • 3⅓ cups all-purpose flour 425 grams plus more for rolling
  • ½ cup granulated sugar 100 grams
  • 1 tablespoon baking powder
  • teaspoons kosher salt (such as Diamond Crystal) or 1¾ teaspoons fine sea salt
  • cups cold buttermilk 300 grams
  • Melted butter and flaky sea salt both optional, for finishing

Instructions

  • Heat oven to 375 degrees and line a large sheet pan with parchment paper or foil.
  • Coarsely grate the butter onto a plate, then freeze until cold and hard, at least 10 minutes. Meanwhile, in a large bowl, whisk together the flour, sugar, baking powder and salt.
  • Add the butter to the dry ingredients. Using a spoon, toss together until all of the butter is coated with flour.
  • Add half the buttermilk and toss with the spoon. When incorporated, add the rest of the buttermilk and gently toss again, without mashing together or overmixing, until the dry ingredients are lightly hydrated throughout. The mixture will be crumbly.
  • Flour a clean surface and dump the mixture directly onto it. Using your hands, gently press the crumbs together and then use a floured rolling pin to roll the mass gently but firmly into a 1-inch-thick rectangle.
  • Fold the dough in half: Using a bench scraper, lift the top half off the surface and fold it over the bottom half. This step may be crumbly and messy at first, but just go for it and fold what you can down from the top. Repeat this roll-and-fold motion 5 times, flouring the surface and dough as needed and using the bench scraper to straighten the edges as
  • Build the final layer: Fold the dough in half one last time, then roll to about 1½ inches thick to create a 6-inch square, using the bench scraper to straighten out the edges.
  • Using the bench scraper or a sharp knife, cut straight down into
  • the square to create a 3-by-3 grid of 9 squares, then place them on your sheet pan, upside down if you’d like taller biscuits.
  • Bake for 25 to 35 minutes, rotating the pan halfway through, until risen, golden brown on top, and slightly pale on the sides.
  • Don’t worry if a couple of the biscuits tip over or if melted butter pools underneath. Brush the tops with melted butter and sprinkle with flaky sea salt, if using
Corned Beef & Cabbage (Let’s Hash It Out)

Corned Beef & Cabbage (Let’s Hash It Out)

I feel if I am going to eat a meal that is associated with a holiday I ought to learn a little bit about that particular holiday and its significance to the culture or country of origin.  The extent of my knowledge regarding St. Patty’s Day is corned beef and cabbage.

So Friday as I was pulling my corned beef out of the fridge, I googled St. Patrick’s Day.  In a nutshell, Patrick, before he became a saint, is credited with bringing Christianity to Ireland.  St. Patrick’s Day is the day of his death.  A folktale credits him with driving the snakes out of Ireland, symbolism for pagan religions as there are no snakes in Ireland.

Corned Beef and Cabbage is not the chosen celebratory meal in Ireland but rather came about here in America.  Corned beef and cabbage were both relatively cheap and out of necessity became the meal of choice for the poor Irish immigrants striving to make a new life here.  In Ireland, you are more likely to have Irish Stew and Soda Bread.

Shortcut Corned Beef

I will admit, I make this once a year.  Don’t get me wrong, I love Corned Beef, I just don’t make it at home…except on Saint Patty’s Day.  As a kid, my favorite breakfast was Corned Beef Hash by Mary’s Kitchen.  Yep, hash out of a can, I thought it was delicious.

Two things I did differently this year.  On a whim, I splurged on Wagyu Corned Beef Brisket from Costco.  Second, we pulled out the Instant Pot.  With two unknowns it’s hard to know if the Waygu or the IP was responsible for just how delicious the corned beef came out.  It was tender, moist, and delicious.  A variety of recipes found online served as my guide with a shout-out to Simply Recipes.

  • Various recipes I looked at called for a 2.5-pound chunk of corned beef. I don’t know about you, but after cooking,  it shrinks quite a bit and that wouldn’t be enough, not in my family at least. There would be little left for my fav breakfast hash (not acceptable in my book).  The piece I bought was 4 pounds and fit nicely in my 6-quart Instant Pot.  This was enough for dinner, the next day’s lunch, and a generous skillet of hash for that leisurely weekend breakfast.
  • Rinse corned beef thoroughly before placing it in the pressure cooker, helps keep the salt at bay.
  • Place the corned beef on the metal trivet that comes with the Instant Pot, makes it much easier to lift out when it is done.
  • Add 1 quartered yellow onion and a couple of cloves of garlic to the pot.  Sprinkle the seasoning packet that comes with the corned beef and 1 tablespoon of brown sugar on the surface of the meat.
  • Add 4 cups of liquid to the pot.  It may not completely cover the meat, and that’s okay.  The liquid can be all water, water, and beef stock 1:1, or a can of stout and water.  The Wagyu beef was on the salty side.  So be careful with the stock, use low sodium or homemade.

Let’s Get to the Easy Part

Seal your Instant Pot and set it to high pressure for 85 minutes and go relax, but tell everyone you are making dinner, they’ll never know.

Once the cycle is complete, turn off the Instant Pot and allow the corned beef to natural-release for 15 minutes before taking it out.  If it has not completely depressurized, vent the pot before taking off the lid.  Add your potatoes, carrots, and cabbage (that you prepped while it was cooking, oops, forgot to mention).  Place potatoes and carrots into the pot first, then the cabbage on top. Seal the pot and set a timer for 5 minutes.  Quick release when it is done.

Slice corned beef against the grain.  Serve with honey mustard and veggies on the side or if you are like the Hubster, make a sandwich…yum.  Happy Saint Patrick’s Day!

But What About Breakfast?

I like corned beef, I LOVE corned beef hash.  The remaining corned beef became Sunday breakfast.  I pulled out my cast iron skillet, the remaining beef and potatoes, chopped some onion and bell pepper, bada-bing-bada-boom, hash.

Feel free to add other vegetables or change the proportions.  This can easily be a veggie-focused hash, more potatoes, throw in the leftover cabbage, add some mushrooms…it will be delightful and perfect for a weekend relaxing breakfast.

Beautiful board made by 3jamigos woodworking.

Corned Beef Hash and Eggs

What to do with leftover corned beef? Hash of course!
Course Breakfast, Brunch, lunch
Cuisine American, Irish-American
Keyword cabbage, Corned beef, corned beef hash, potatoes
Prep Time 10 minutes
Cook Time 15 minutes
Servings 4 servings

Equipment

  • cast iron skillet

Ingredients

  • 2 to 3 tablespoons unsalted butter
  • 1 small onion finely chopped (about 1 cup)
  • 1/4 green or red bell pepper or pepper of choice!, chopped
  • 2 to 3 cups cooked corned beef finely diced or chopped
  • 2 to 3 cups chopped cooked potatoes from dinner 🙂
  • Kosher salt and freshly ground black pepper
  • Chopped fresh parsley or scallions
  • Eggs one per serving

Instructions

  • Heat butter in a large skillet (preferably cast iron) on medium heat. Add the onion and pepper and cook a few minutes, until translucent.
  • Add corned beef and potatoes. Spread out evenly over the pan. Increase the heat to medium-high and press down on the mixture with a heat-proof spatula.
  • Do not stir the potatoes and corned beef, but let them brown. If you hear it sizzling, that's a good sign.
  • Use a spatula to peek underneath and see if they are browning. If nicely browned, use the spatula to flip sections over in the pan so that they brown on the other side. Press down again with the spatula.
  • If there is too much sticking, you can add a little more butter to the pan. Continue to cook in this manner until the potatoes and the corned beef are nicely browned.

Egg-a-licious: Your choice, hash is good with eggs cooked any style

  • Or cook eggs like Shashuka. When hash is close to being done, create depressions in the hash and crack an egg into each spot. Cover skillet for a couple minutes until egg is cooked to your liking.
  • Remove from heat, top with chopped parsley or scallions. Season with freshly ground black pepper and salt to taste.
Happy Chicken Pot Pi Day!

Happy Chicken Pot Pi Day!

Here in California, we have been battered by some extreme weather…more rain, snow and high winds than we have seen in a long, long time.  I hope folks are staying safe, warm and dry.

So we are having a somewhat subdued, quiet Pi Day.  Especially since we haven’t had power all day!  That’s not gonna stop me, pi golly.  I adore pies, sweet or savory, by the slice, as a potable hand pie, you get the pic. So Pi Day is just an excuse to make pie.  A day of cold, wet, blustery weather calls for comfort food so what better dish than Chicken Pot Pie?  

I LOVE Pot Pie.  As a kid, it was a special treat if mom pulled out Swanson’s Chicken or Beef Pot Pies for dinner.  Little did I know, it meant an easy meal for her.  As I got older and my taste became more refined I left behind those Swanson’s pies.

I discovered Marie Callendar’s Pot Pies!  So good, more crust, bigger pie, yum.

My love of pies logically led to making my own pies and this includes savory pies, top on the list is Chicken Pot Pie.   

The Elephant In the Room

Not everyone wants or has a compelling need to start from scratch and that’s OKAY!  It’s perfectly fine to start with cooked chicken (a Costco rotisserie chicken comes to mind), commercial low-sodium chicken stock AND a premade pie crust. Making a Chicken Pot Pie is a labor of love.  If any step, homemade PIE CRUST comes to mind, gives you anxiety, use a shortcut. There are great frozen pie crusts dough and puff pastry doughs that can be used to make a fabulous pot pie. Hate prepping veggies?  Frozen WORKS, really.  But if you want to go the whole nine yards…read on 🙂

For novice pie makes, this is a good recipe to make over a couple of days so it doesn’t seem overwhelming.  Make the pie crust and throw it in the fridge to chill. You could do this up to a couple of days before.  This also applies to poaching the chicken and making the filling too.  The chicken can be shredded, the stock reduced, and the filling made and kept in the fridge until you are ready to assemble the pie.

Pick your favorite veggies, I like mushrooms, carrots, celery, broccoli, potatoes, and peas.  Pretty classic aside from the broccoli.  Blanching the veggies ensures they will be nicely cooked in the pie.  Blanch 10 minutes, the goal is al dente + so they don’t get too soft.  The veggies should be cut roughly the same size for even cooking.  The exception to this would be mushrooms, saute’ these before adding to the sauce.

Sauce Me Up

What holds everything together is a simple bechamel sauce of butter, flour, milk,and stock.  Start by making the roux .  Sauté onions with the butter for flavor and add the flour. Cook this for a couple of minutes before adding the chicken stock and milk.  Simmer sauce until it is thick like gravy, stir constantly.  Season well with salt and pepper.  

Two Pie Camps

There are 2 kinds of pie people in my book, those who like crust (ME) and those who like filling (Can’t even imagine who that is).  So I’ve searched far and wide for a pie crust I like.

I love Dorie Greenspan’s pie crust recipe. It’s buttery and flaky, and best of all, it makes a generous amount of dough, enough for a two-crust pie and a small single-crust pie. That’s a lot of crust.  Which is exactly what I want.

Make the crust by hand or in a food processor.  Be extra vigilant that you don’t overprocess the dough.

This is what your dough should look like coming out of the food processor. 

Gather it up into a disc shape and chill.  Roll out 2 crusts one for the top and one for the bottom.  Follow my tweak below or line your baking dish with the bottom crust and chill again.

Let’s Get to the Bottom of the Pie

Bake your chicken pot pie with a top crust only.  What Deb?!  That’s less crust!  Hold on now…here is the tweak.  Roll out the pie dough for the bottom crust then cut out circles or squares from this sheet equal to a serving of your pie.  Bake them separately.  When it’s pot pie time, place one of these buttery, flaky rounds on the bottom of each plate then topped with a generous wedge of your baked pie over it.  Buttery, flaky, crispy, crust on the top and bottom. This, my friends, is chicken pot pie nirvana.

Let it sit for 5-10 minutes before serving!

So, Happy Pi Day, now go make some pie! Check out my IG Reel for Chicken Pot Pie!

Classic Chicken Pot Pie

Ultimate comfort food. This is the classic Chicken Pot Pie. Buttery, flaky crust with a thick, velvety Bechamel filled with chunks of chicken and veggies. A keeper!
Course comfort food, dinner, One dish meals
Cuisine American
Keyword Chicken, chicken pot pie, comfort food, food for the soul, made from scratch, pie, pot pie, savory
Prep Time 1 hour
Cook Time 1 minute
Servings 6 servings

Equipment

  • 1 food processor

Ingredients

The chicken and stock:

  • 1 3 1/2-pound whole chicken (approximately 3 cups of cooked chicken, shredded or cubed) Shoretcut 1: Sub chicken parts for whole chicken Shortcut 2: Costco Roast Chicken Yeah, you read that right
  • 1 carrot
  • 1 stalk celery
  • 1 small onion halved
  • 2 teaspoons salt or 1 t salt and 1 tablepsoon Better Than Bouillion Chicken Base

Simply Irrecrustable: or Dorie's MoRe CrUsT RecipE

  • 1 1/2 cups all-purpose flour
  • 1/2 teaspoon salt
  • 1/2 cup 1 stick chilled unsalted butter, diced into 1/2-inch cubes (best to chill cubes in the freezer for at least 15 minutes before using)
  • 1/4 cup vegetable shortening chilled
  • 3 to 4 tablespoons ice water

It's All About the Filling

  • 3 med carrots sliced about 1.5 cups
  • 2 stalks celery sliced about 1 cup
  • 3/4 cup green peas frozen or fresh
  • Use any veggies you like broccoli, squash, potatoes. You want about 3 cups of vegetables sliced or chopped.

Da Sauce: This is a generous amount of sauce so you can increase your veggies if you like.

  • 6 tablespoons unsalted butter
  • 1 1/4 cups yellow onion (you have leeway use 1 med or large onion which yields 1 cup to 1-1/2 cups diced onions diced
  • 1/2 cup all-purpose flour
  • 2 1/2 cups chicken stock reserved from cooking chicken
  • 1 1/2 cups milk
  • 1 teaspoon chopped fresh thyme leaves
  • 1/4 cup dry sherry
  • 2 tablespoons minced fresh parsley
  • 2 teaspoons salt to taste
  • 1/2 teaspoon freshly ground black pepper to taste
  • For the egg wash: optional
  • 1 egg whisked with 1 tablespoon water

Instructions

Da Chicken: A whole chicken in a large stockpot with water to make a chicken pot pie casserole. Yep, you read that right.

  • Combine the chicken, carrot, celery, onion and salt or chicken base into a large stock pot. Add cold water until just covered and bring to a boil over high heat.
  • Reduce the heat to a simmer and cook for 45 minutes. Remove the chicken from the pot and let cool for 15 minutes. While the chicken is cooling, continue to boil the remaining water and vegetables in the pot.
  • When the chicken is cool enough to touch, strip away as much of the meat as you can. Place the meat on a dish, set aside. Shred chicken or cube. You should have about 3 cups.
  • Return the chicken bones to the stockpot and continue to boil, on high heat, until the stock has reduced to a quart or quart and a half.
  • Set aside 2 1/2 cups of the stock for this recipe. Freeze remaining stock for a rainy day.

All About the Crust: Simply Recipe Yields only 1 crust. You will need to double it or make Dorie's omitting the sugar

  • Combine the flour and salt in a food processor. Add the chilled butter cubes and pulse 5 times to combine. Add the shortening and pulse a few more times, until the dough resembles a coarse cornmeal, with some pea-sized pieces of butter.
  • Slowly stream in ice water, a tablespoon at a time, pulsing after each addition, until the dough sticks together when you press some between your fingers.
  • Empty the food processor onto a clean surface. Use your hands to mold into a ball, then flatten the ball into a disk. Sprinkle with a little flour, wrap with plastic wrap, and refrigerate for at least 30 minutes, or up to 2 days, before rolling.

Filling It Up

  • Blanch prepped carrots, celery, potatoes, broccoli (if using) in water for about 10-15 minutes. Veggies should be al dente but cooked through. Set aside.
  • In a large skillet, melt butter on medium heat. Add the onions and cook until they're translucent, about 10 minutes. Add the flour and cook, stirring, one minute more.
  • Whisk in 2 1/2 cups of the chicken stock. Whisk in the milk. Decrease the heat to low and simmer for 10 minutes, stirring often until thickened and creamy.
  • Add the chicken, thyme, sherry, peas, blanched veggies, parsley, salt and pepper and stir well. Taste and adjust seasoning if necessary. Pour into prepared baking dish(s)

Pieformers: Assemble

    Bake: Preheat oven to 375

    • Roll out dough on a lightly floured surface to a little less than a quarter-inch thick.
    • Roll roughly to the shape and size of your baking dish. A little bigger so you crimp the edge. Lay pastry over filling and dish.
    • Fold the excess dough under itself and crimp edge of pie.. Cut a 1-inch vents into pie. Use a pastry brush to apply an egg wash to each pie.
    • Line a baking sheet with foil, place pie on baking sheet. Bake at 375°F for 45 minutes, or until the pastry is golden and the filling is bubbling. If the edge gets too dark, cover with foil.
    • Let cool for at least 5 minutes before serving.
    Roasted Chicken & Croutons with Fish-Sauce Butter-Sheet Pan Magic

    Roasted Chicken & Croutons with Fish-Sauce Butter-Sheet Pan Magic

    I couldn’t help but tweak Eric Kim’s Roasted Chicken with Fish-Sauce Butter title.  I added Croutons to the title because… lets be real, the croutons are the star of this dish.  It reminds me of Roti Roti, a food truck fixture in the Bay Area.  A simple winning formula of chickens roasting on a spit, dripping all that deliciousness onto a bed of potatoes below it.  Well, that’s this dish but with bread and your own oven.

    First, roast chicken thighs on a sheet pan (the operative words for an easy meal) in a 450-degree oven.  This gives you crispy skin chicken and a pool of deliciousness aka SCHMALTZ on the pan.  Then toss flakes (yes flakes, more on that later) of bread onto the pan and smoosh it around so it soaks up the chicken fat.  Shove it back into the oven, and fifteen minutes later those bread flakes have morphed into golden, crunchy, umami bombs.

    It’s Soooo Good

    I divide the dish evenly between me and the hubsters, he gets the chicken,  I get the croutons, yep, 50-50 all the way.

    Let’s talk flakes.  You can use any bread you like, sourdough, milk bread, or my favorite, ciabatta.  The key is to tear the bread so you get shards or flakes.  Cubes don’t cut it for this dish, not enough surface area. Try to tear or split the bread to form flakes for ultimate crispness.

    The rest is easy-peasy.  Place chicken on a sheet pan, and season with salt and pepper.  Go easy with the salt as the fish sauce has salt. Drizzle olive oil on the chicken and flip each piece around to coat each piece.  Roast for approximately 25 minutes.  I prefer bigger pieces of chicken so the skin crisps without drying out the chicken.  Pull the chicken out, there should be a nice puddle of schmaltz in the pan.  Add the croutons to the pan and toss the bread in the chicken fat.  Slide the pan back into the oven to crisp the croutons and finish the chicken.  If the chicken is cooked through before the croutons, pull them out and continue to bake the croutons.

    Meanwhile…

    While the chicken and croutons are roasting, make the Fish-Sauce Butter.  The sauce is genius, easy to make, and delish with just four ingredients, fish sauce (I use 3 Crab Vietnamese Fish Sauce), lemon juice, brown sugar, and BUTTER.  Reduce the first 3 ingredients to a syrupy consistency.  When the surface of the sauce is covered with bubbles, turn the heat off and add the chunk of COLD butter to the pan and swirl to create an emulsion.

    Leave the chicken and croutons in the pan, drizzle some of the sauce on the chicken and croutons, garnish with cilantro and green onions, and bring the pan to the table.  So easy. Serve the remaining sauce on the side. If you want to be fancy, transfer chicken and croutons to a serving platter.

    Accompaniments?  Rice, double carb, is always yummy, or I like serving it with mashed cauliflower.  Another winner from Eric Kim.  Sheet pan magic happening here.

    Roasted Chicken and Croutons with Fish-Sauce Butter

    From Eric Kim via NYTCooking, roasted chicken thighs, toasty croutons, and a scrumptious, quick sauce made with Vietnamese Fish Sauce, brown sugar, lemon, and butter. The perfect weekday meal.
    Course dinner, Main Course
    Cuisine Asian-American
    Keyword brown butter, Chicken thighs, croutons, fish sauce, oven-baked
    Prep Time 15 minutes
    Cook Time 35 minutes
    Servings 2 servings

    Ingredients

    • 4 bone-in skin-on chicken thighs (about 2 pounds)
    • Kosher salt such as Diamond Crystal and black pepper
    • 2 tablespoons olive oil
    • ¾ pound bread crusts removed, bread torn into bite-size pieces about 4 cups;
    • 1 tablespoon dark brown sugar
    • 1 tablespoon fish sauce
    • 1 tablespoon lemon juice
    • 3 tablespoons COLD unsalted butter kept in one piece
    • Cilantro leaves with tender stems for serving
    • scallions or chives, chopped garnish for serving

    Instructions

    • Heat oven to 450 degrees. Pat the chicken dry with paper towels and season lightly with salt and pepper. (The fish-sauce butter is plenty salty, so don’t overdo the salt here.)
    • Arrange the chicken skin-side up on a sheet pan and drizzle the oil over the chicken skin, coating it evenly.
    • Roast until the chicken is light gold and the sheet pan is a pool of hot, rendered chicken fat, SCHMALTZ, about 20-25 minutes.
    • Take the sheet pan out of the oven, scatter the bread around the chicken. Using tongs toss gently to coat in the chicken fat.
    • Place the pan back in the oven and roast until the chicken is golden, crispy and sizzling (you’ll hear it), about 15 minutes.
    • While the chicken roasts, combine the brown sugar, fish sauce and lemon juice in a small saucepan and bring to a simmer over medium heat. Cook, occasionally swirling the pan or stirring the sauce with a wooden spoon, until it bubbling vigorously and the mixture has reduced by about half, 2 to 3 minutes.
    • Turn off the heat and add the butter, constantly swirling the pan or stirring with a wooden spoon, until all of the butter has melted and incorporated into the fish sauce mixture. It should be a heavy syrup consistency.
    • To serve, scatter the cilantro and scallions or chives over the chicken and croutons. Spoon some of the fish-sauce butter over each chicken thigh, reserving some to add to each plate for dipping the chicken and croutons while eating, so yummy.

    Notes

    Roasting chicken thighs in a hot oven is a hands-off way to achieve two of life’s greatest pleasures: crispy skin and golden schmaltz. And you want that chicken fat because it will crisp hand-torn bread into croutons. A bold but balanced fish-sauce butter that you whip up on the stovetop while the rest of the meal takes care of itself in the oven, takes this over the top. Be sure to start with cold butter; the gradual melting of the fat helps thicken the sauce without breaking it.
    After making this dish...go get his cookbook, Korean American, another winner.
    Everything Everywhere All At Eri-onCe (Cream Cheese Pound Cake)

    Everything Everywhere All At Eri-onCe (Cream Cheese Pound Cake)

    I am seriously thinking about adding a new category to 3Jamigos. I’m going to call it “Everything Everywhere All at Eric”.  Serving a dual purpose, a nod to the movie EEAAO and its amazing cast, and of course to Eric.  For those of you not “in the know”, I am referring to Eric Kim, food writer, cookbook author (Korean American: Food that Tastes Like Home), Food52 alum, and current columnist of lots of yummy stuff at the New York Times.

    I’ve been following him since his days at Food52 where he wrote a column, Cooking for One.  His writing is gorgeous and his recipes are simple, straightforward, and delicious.  I have a backlog of his recipes I have made but just haven’t had the time to do them justice in a post.  I will get to them soon, promise!  During the holidays I made his Cream Cheese Pound Cake, it’s divine. Posting about it is long overdue! So here is the list of Eric recipes I have made and love. Links to the ones I have posted. Hope you will try them!

    Savory

    Sweet

    Well, the list of savory is overwhelming at this point so I am going to finish off the Sweet category with his Cream Cheese Pound Cake.  It’s delicious and something you should bake right now. It will fill your home with the aroma of butter and sugar and help keep the house warm, since our cold, wet, weather is back again.  This is the perfect antidote.

    Does it bother you when you make something from scratch and the person eating it says, “wow this tastes just like the one in the grocery store!” Unless it is your hubby, who you would slug, you politely smile, laugh, and let it go.  Well, this cake is reminiscent of the Sara Lee Poundcake we all grew up with.  Don’t be surprised if someone exclaims “this is like Sara Lee’s” and definitely take it as a compliment.

    Lets Get Baking

    Make sure your butter and cream cheese are at room temperature (about 68 degrees).  Cream cheese adds moisture, richness, and flavor to the cake. Three cups of sugar is pretty typical for a pound cake although this cake may be a little sweeter since it has a smaller amount of flour.  Cream the butter, cream cheese, sugar, salt, and vanilla.  Then add the eggs, one at a time, beating until smooth.  Finally, add the dry ingredients at low speed.  Do not overbeat after adding the flour, this would toughen the cake.

    I cut the recipe in half using weights to split it and baked it in an 8×8 square pan. The cake dipped in the middle despite being fully baked. Looking at a couple of recipes for pound cake, for the equivalent amount of butter and sugar, most used 3 cups of flour. Using less flour, in this case, 2.5 cups, may make a softer cake with less structure and therefore lower in the center.   It was still delicious and nothing a nice dollop of whipped cream couldn’t hide.

    The whipped cream, jam and raspberry dust are nice additions to the cake but not absolutely necessary.  I skipped the jam and the cake was delicious with just whipped cream and a dusting of ground freeze-dried raspberry.  Fresh berries instead of jam would be lovely too.

    Cream Cheese Pound Cake

    Just like Sara Lee's Pound Cake! Buttery, slightly dense but tender with a fine crumb. From Eric Kim and the NYT, an absolutely delicious pound cake that will transport you to your childhood.
    Course Dessert
    Cuisine American
    Keyword buttery, Dessert, ERic KIm, freeze-dried raspberries, NYT Cooking, pound cake, whipped cream
    Prep Time 20 minutes
    Cook Time 1 hour 5 minutes

    Ingredients

    It's All About the Cake

    • cups all-purpose flour (320 grams)
    • 1 teaspoon baking powder
    • cups unsalted butter (345 grams) at room temperature
    • 8 ounces cream cheese (226 grams) at room temperature
    • 3 cups granulated sugar (600 grams)
    • 1 tablespoon vanilla extract
    • teaspoons fine sea salt
    • 5 large eggs at room temperature

    The Bling Finish

    • 2 cups cold heavy whipping cream (473 milliliters)
    • 2 tablespoons granulated sugar
    • ½ teaspoon fine sea salt
    • 1 cup raspberry preserves (305 grams) see notes
    • cups freeze-dried raspberries (34 grams)

    Instructions

    Make the cake:

    • Position a rack in the center of the oven and heat the oven to 325 degrees. Grease a 9-by-13-inch baking pan; line the bottom and long sides with parchment.
    • In a medium bowl, add the flour and baking powder. Whisk to combine and to break up any lumps. Set aside.
    • Add the butter,cream cheese, sugar, vanilla and salt to the bowl of a stand mixer fitted with the paddle attachment. Mix on medium-low speed to combine. Increase the speed to medium-high and beat until fluffy, almost white, and the sugar is mostly dissolved about 5 to 7 minutes. With the mixer on medium speed, add the eggs one at a time, mixing until smooth after each addition. Use a flexible spatula to scrape the bowl, then beat over medium speed for another minute.
    • With the mixer on low speed, gradually add the dry ingredients and mix until most of the flour streaks have disappeared. Using the spatula, scrape the bowl and gently stir until you eliminate the flour streaks. Scrape the batter into the prepared pan, then smooth out the top.
    • Bake, rotating the pan halfway through, until golden brown and a skewer or cake tester inserted in the center comes out clean, 60 to 65 minutes. When you gently press on the center of the cake with your fingertip, you shouldn’t leave a dent. The internal temperature of the cake should be about 205 degrees. Let cool completely in the pan. (The cooled cake can be covered and kept at room temperature for up to 3 or 4 days.)

    Putting it all together

    • If using the jam, spread layer on top of the cake. You could use strawberry or a mixed berry jam also.
    • In the bowl of a stand mixer, whisk the heavy whipping cream, sugar and salt over medium-high until billowy soft peaks form. When you lift the whisk out of the bowl and turn it upside-down, a peak of cream should flop over slightly like a Santa hat. Evenly spread the whipped cream over the jam-topped cake.
    • Add the freeze-dried raspberries to a fine-mesh sieve and hold it over the cake. Using your fingers, pass them through until most of the magenta powder rests atop the frosting like fresh snow and most of the seeds are left behind in the sieve. The entire surface of the whipped cream should be covered in pink dust. Discard the raspberry seeds. Serve immediately.

    Notes

    Personally, the cake is so damn good, I don't think it needs the jam.  The whipped cream is great and the sprinkling of raspberry dust is more than enough. YOu could also substitute strawberry for raspberry.
    This is from the original recipe
    Look for a brand of raspberry preserves with minimal ingredients: They should consist of only raspberries, sugar, pectin and some kind of citrus. That will taste more tart and less artificial than one with, say, high-fructose corn syrup and other fruit juices that muddy the natural raspberry flavor. If your preserves taste especially sweet, you can stir in up to 3 teaspoons of fresh lemon juice for added tartness.
    Heartfelt Thumbprint Cookies

    Heartfelt Thumbprint Cookies

    Just in time for Valentine’s Day…2024!

    Thumbprint cookies with a heart-shaped center.  Do I hear a collective “Awwwww, how cute”? Yes!  I came across these delectable morsels on a fab blog I follow by Catherine Zhang, Desserts with a Hint of Asian Inspiration.  After watching her on Netflix’s Zumbo, an Australian Baking Contest/Show, I went hunting for her blog.  Cute as a button (I can say that I’m a MOM), she looks like a teenybopper but can razzle-dazzle us with her mad “baking skillz” on both her blog and her cookbook, “Mochi, Cakes and Bakes”. Her skills are beyond her years.  Her book is available at all my favorite places.

    Thumbs Up Thumbprints

    These thumbprints are buttery, tender, and delicious.  She adds powdered sugar which sweetens and tenderizes the cookie and cornstarch which further lowers the protein content of the flour and ensures a tender and slightly crumbly cookie.  I  added a touch of salt to bring out the flavor.  For a hint of citrus, try adding lemon or orange zest to the dough.  Cream the butter and powdered sugar until light and fluffy, add the egg yolk and vanilla (be generous), and finally, the flour and cornstarch.  Stir just until combined.  Don’t overmix.  Scrape the sides of the bowl after adding each ingredient.

    Cookie Hacks

    Kudos to the cookie baker, chef, or whomever who had that 💡 moment while scooping out cookie dough, THIS would be so much easier if I used an ice cream scoop.   My cookies will be round and all the same size!  For these thumbprints I used a #50 ice cream scoop (~0.68 ounce or 1.25 tablespoon) which made approximately 12-14 cookies about 2.5 inches in diameter.  Each scoop of dough weighed about 25-27 grams.

    Catherine’s thumbprints call for making a cherry jam for the cookie centers.  I opted to use one of the many jams I have, a luscious strawberry jam from my favorite farmer’s market vendor, Live Earth Farm.  Depending on the consistency of your jam, you might have to heat and reduce the jam to thicken it.  This is what I did with their strawberry jam, worked like a charm.

    To fill each cookie, use a squeeze bottle.  Put the jam in a squeeze bottle topped with a large bore cap.  I save the honey caps from Trader Joe’s, they work like a charm.

    View these hacks on my IG reel under 3jamigos bakes.

    Modern Old Inventions to Make it Simple

    So, the tweak to this thumbprint cookie is using your thumb and pressing the center of your cookie dough TWICE, in the shape of a V to make the heart.  Two things, it’s a little cumbersome and she must have tiny thumbs, I had to use my pointer finger.

    So there I was in my kitchen…

    Enter Wes from the garage, his mancave, into the kitchen.

    Wes: Whatcha doing?

    Me: Making thumbprints with a heart in the middle, it’s a bit more work, but hey, it’s Valentine’s Day.

    Wes:  Hmmm, I could make a heart shape stamp, would that make it easier?

    Me: YES…back to the garage for you!

    A few hours later…

    Ooh, I LOVE my ❤️ shaped cookie stamp!  It does make it easier, but you can totally make these with your own little digits!  And, the cookies will be so cute.

    Heart Thumbprints

    Customizing thumbprint cookies for Valentine’s Day! Use strawberry or raspberry jam and 2 thumbprints in the shape of a V. A delicious, very cute cookie !
    Course cookies, desserts
    Cuisine cookies
    Keyword cookies, strawberry jam, thumbprints, valentine, valentine's day
    Prep Time 20 minutes
    Cook Time 12 minutes

    Ingredients

    CHERRY JAM: But feel free to substitute your favorite red jam, like strawberry or raspberry!

    • 150 g Whole cherries approx. 1 cup
    • 50 g 1/4 cup Sugar
    • 1 tsp Lemon juice

    COOKIE

      Creamed Mixture

      • 115 g Unsalted butter (1/2 cup) room temperature 68 degrees, shuld not be soft and melty
      • 60 g powdered sugar (1/2 cup)
      • 1 Egg yolk
      • 1/2 tsp Vanilla extract

      The Dry Stuff

      • 140 g All purpose flour (3/4 cup + 2 tbsp)
      • 15 g Cornstarch (2 tbsp)
      • 1/4 tsp salt
      • 1/2 Tsp lemon or orange zest, OPTIONAL finely grated

      Instructions

      • Preheat the oven to 350F

      CHERRY JAM

      • Finely chop cherries
      • Combine cherries, sugar and lemon juice in a small saucepan
      • Heat over medium heat for 8-10 minutes until thickened. Cool

      COOKIE

      • Combine flour and cornstarch in a bowl. Set aside.
      • Cream butter and powdered sugar until light and fluffy
      • Add egg yolk and vanilla extract, beat until well mixed.
      • Add flour mixture and stir until combined.
      • Use a #50 scoop to form 12-14 balls. If dough is sticky, chill for 10 minutes before scooping. Remove from fridge and roll into smooth balls. This is essential, a smooth surface, or you will have cracks in your finsihed cookie. Create a heart shape in the center of each ball using two thumbprints (I used my pointer finger) pressed in a V shape. Chill for 10-15 minutes.
      • Fill the thumbprint with cooled cherry jam or jam of your choice*
      • Bake for 10-12 minutes, or until lightly golden brown.

      Notes

      Weigh dough and divide by 12.  Use this as your guide.  Each dough ball will weigh approximately 25 grams.  Each baked cookie will be approximately 2 inches in diameter.
      *Use jam of choice.  I like raspberry or strawberry for Valentine's Day.  The jam should be fairly thick so it doesn't run too much.  If need be, heat jam and reduce to thicken it.
      The recipe can be doubled
      Chicken Wings and Daikon Nimono + TV for Rainy Days

      Chicken Wings and Daikon Nimono + TV for Rainy Days

      It’s raining once again in California.  Which is the best excuse to stay home (in sweats), watch a lot of TV, bake and cook.  I started the weekend on a carb bender.  First, I made No-Knead Focaccia from Bon Appetit, it gets a big thumbs up, pillowy, springy, and delicious.  Caveat:  You will have to start a day earlier for said focaccia, 8 hours of resting time. Then I started on Kristina Cho’s Milk Bread from Mooncakes and Milk Bread, also extremely delicious.  Think of it as the Asian version of Brioche, slightly sweet, buttery, rich, and soft.

      THEN, I needed a Bake Break

      Well, actually, my hips needed a break.  The combination of being a couch potato and baking is to say the least, lethal.  I had to pick one, couch or carbs. Couch won.  Mainly because I started watching a cute, sweet Japanese show on Netflix called Makanai:  Cooking for the Maiko House. In a nutshell, two BFFs go off to Kyoto to become geishas.  One is a total washout but a fabulous cook (thanks to her grandmother) and becomes the Makanai or resident chef for the geisha house.  A role usually held by an older woman.  In each episode, she makes something yummy, often a comforting, homestyle dish.

      Well, you can’t sit there watching without a bowl of something delicious.  The cold, wet, weather and The Makanai put me in the mood for Nimono.  Nimono, a family-style dish usually contains protein, vegetables, or tofu that are simmered in seasoned dashi (stock).  I scoured my fridge and found chicken wings and daikon (radish) perfect for nimono.

      Start by browning the wings.  I got fancy and grilled them, don’t bother, one more pan to clean. Then add your dashi, seasonings, and sliced daikon and bring to a boil. Cover the nimono with a piece of parchment.  This keeps everything submerged so it cooks evenly.  Then lower the heat and simmer for 15-20 minutes or until the daikon is soft.  Pierce daikon with a knife to test.  Korean radish would work well also.

      Meanwhile, as chicken and daikon are simmering, make your eggs.  Use the ramen egg recipe for a soft center yolk.  Cool the eggs and peel.  Place eggs in cold water to chill (so it doesn’t overcook when you put it in the Nimono).

      When the radish is soft, Place eggs in Nimono.  Try to submerge them so they absorb some of the flavor of the broth.  Simmer additional 5 minutes.

      Garnish with green onions, and or sesame seeds.  Serve with rice, in front of the telly, watching Makanai, or Midnight Diner, or Julie and Julia…

      Chicken Wings and Daikon Nimono and Netflix

      Simple and quick Japanese braised dish of chicken wings and radish
      Course One dish meals
      Cuisine Asian, Japanese
      Keyword Chicken, daikon, ninono, one pot meal
      Prep Time 15 minutes
      Cook Time 20 minutes

      Ingredients

      • 6-8 Ounce Daikon radish can use Korean radish cut into 1/2 inch rounds
      • 4 Eggs boiled till the yolk is still jammy, see ramen eggs post
      • 8-12 Chickin wings
      • 1 Clove Garlic
      • 2 tsp Instant Japanese soup stock (you will need 1 cup of dashi) or make dashi with packet or Shiro dashi
      • 2 tbsp Sugar
      • 1 tbsp Soy sauce if using dashi packet, increase to 2 T
      • 4 Tbsp Sake
      • 2 Tbsp Mirin

      Options

      • Add mushrooms or sliced carrots with daikon if you like

      Instructions

      • Make dashi and set aside. You can use the powder Hondashi, or dashi bags, or Shiro Dashi concentrate. For concentrate dilute 1:12 Make 1-1.5 cups
      • Peel and cut the daikon into 1/2 inch slices. Set aside.
      • Sauté the chicken wings approximately 2 minutes a side in a 3-4 quart saucepan. They should be light brown.
      • Add dashi to pot followed by soy sauce, mirin and sake. Add daikon on top. Bring to a boil then lower heat to a simmer. Use an otoshibuta (dropped or parchment lid) while simmering although you can forego this step. Simmer for 15-20 minutes or until radish is soft when pierced with a knife.
      • While chicken is simmering, make ramen eggs or hard boil the eggs just until the yolk is barely set. Peel and place eggs in an ice bath. When nimono is done, add peeled eggs to it and let it simmer another 5 minutes. Make sure the eggs are submerged in the broth.
      • Ladle the Nikon into bowls, garnish with green onions and sesame seeds. Serve with rice and a half or whole egg per person. It's worthwhile making nimono in advance, since it tastes better the next day. Or just make a larger quantity to keep. Reheat before eating at home, or reheat then let cool down again if using for bento. Can be stored in the fridge for 2-3 days.
      Mille-Feuille Nabe Blooming Delish!

      Mille-Feuille Nabe Blooming Delish!

      I’m sure I saw this on TikTok or an IG Reel.  It looked so delicious I knew I was going to make it, if not today, definitely tomorrow.  Jackpot, making it today, why?  As most of you know I stop at grocery stores so often I should be classified as a professional food shopper.  The beauty of being a “pro”, I generally have the ingredients for any dish found on the internet, lol. This is a perfect example, a quick perusal of my kitchen and I was in business.

      Thinly sliced pork – check. From Asian Market. I always keep some in the freezer, ALWAYS.

      Napa Cabbage – check. Picked up a head at the Hankook Market last weekend, cause you never know when you might need some cabbage…

      Mushrooms – check. My fridge qualifies as a certified mushroom farm most days.

      Dashi or Broth – check. I pulled my bottle of Shiro Dashi from the fridge. Literally concentrated dashi that you dilute with water, VERY good, stupid easy. For a detailed run down check out Guide to Shiro Dashi

      OR I can make Dashi with packets from Japan that I keep squirreled away in my pantry.  Again, VERY good,  a bit more work than Shiro Dashi, still super easy.

      I won’t go into making my own Dashi cause that would defeat the dinner in a few minutes mantra.

      Korean radish – check.  You don’t need it, I just happen to have some so why not?

      Staples – check.  Green onions, sesame seeds, soy sauce S&P…Hello? Would not be caught dead without any of these.

      Pot- check. Y’all know I didn’t have to list this but I wanted to mention the tiny Donabe I bought at the MANRESA fire sale.  It gives me JOY.  I also used my gorgeous Staub pot for the family-sized version.

      So that’s it, all you need to make this scrumptious, perfect when it is cold and wet outside, quick and easy dish.

      Let’s Goooooo!

      This is super easy, TRUST ME.  Have I ever steered you wrong?  Start with your Napa Cabbage, wash and separate the leaves.  You only need 1 head of cabbage and you won’t use all of it, unless you are feeding a cast of thousands, then you’re on your own.

      Take out your thinly sliced pork, I’m sure this would work with beef also. Use any protein cut for Shabu Shabu or Hot Pot.  I know you are thinking, 🤔, can I use bacon?  My inclination is no, as much as I love bacon, the flavor may be too much and too salty for this Nabe.  But if you are feeling bold, try it.  Definitely REPORT BACK to me!

      Layer the pork on the Napa Cabbage, covering most of the leaf. Continue layering until you have a stack of 3-4 leaves.  Cut crosswise into 3-4 sections, and try to match it up with your pot.  Each section should be about 2-2.5 inches in height. Definitely not taller as you will need to cover the pot when cooking.  Continue circling the pot with the sections until you reach the center.  I finished with slices of Korean radish surrounding a bouquet of mushrooms smack dab in the middle, totally optional.  But so good.

      To finish, add dashi to barely cover the cabbage, cover, and cook.  Cook for 10-15 minutes, the beauty of thinly sliced meats and veggies.  Dinner is served! BACK to the dashi.  Dashi is a fish-based stock, used in many yummy Japanese dishes.  There are ka-zillions of ways to make dashi.  Skip the traditional and time-consuming options.  I use Shiro-dashi alot.  It is a seasoned concentrated fish stock that comes in a bottle.  Dilute Shiro-dashi 10-12 fold for soups and casseroles, EASY PEASY.  The other way is using dashi packets, kind of like tea bags.  Drop it into the water, let it sit to infuse the flavor from the packets, and presto dunzo.

      CAVEAT: The Shiro Dashi is seasoned with salt and sugar while the dashi packets just impart the fish flavor.  You will need to add salt or soy if using the dashi packets.

      That’s it!  Serve it up with bowls of hot, steaming rice, maybe fry an egg or if you have Mayak Eggs or Ramen Eggs yum. So damn delicious it is criminal.  Or use the flavorful broth on a lovely bowl of noodles, udon noodles would be delicious.

      A Picture is Worth a Thousand Words…check out my Instagram for a reel on Mille-Feuille Nabe!

      Mille-Feuille Nabe

      Japanese Hotpot with Napa Cabbage and thinly sliced pork belly arranged in layers in a donabe of casserole. Dashi serves as the cooking broth that turns this into a lovely dish perfect for cold weather.
      Course dinner, Main Course, One dish meals
      Cuisine Asian, Japanese
      Keyword Mille-feuille, napa cabbage, Pork Belly, soup
      Prep Time 15 minutes
      Cook Time 15 minutes

      Equipment

      • 1 donabe If you have one, but any casserole type pot will do.

      Ingredients

      Main Ingredients

      • 1 napa cabbage medium size should do
      • 1-1½ lb Thinly sliced pork belly smaller the pot the less you will need
      • 1 bunch of mushrooms like enoki or shiimeji optional
      • Korean Radish or Daikon, thinly sliced optional

      Dashi

      • 1 knob ginger 1 inch, 2.5 cm
      • 5 cups dashi See post for dashi options!
      • 2 Tbsp sake cut in half or omit if using Shiro Dashi
      • 1 Tbsp soy sauce cut in half or omit if using Shiro Dashi
      • ½ tsp kosher salt Diamond Crystal; use half for table salt

      Finishing Touches

      • green onions, diced for garnish
      • Chili oil or Shichim Togarashi at the table
      • Rice to serve with hot pot or boil some noodles to have with the flavorful broth!
      • Any kind of eggs-Ramen, Mayak or raw that you crack and cook in the broth

      Instructions

      • Remove leaves carefully from the base, wash and drain well. Don’t throw away any leaves that naturally came off while rinsing. We’ll use these leaves later on. If you happen to get a ginormous cabbage cut in half or quarters lengthwise. I usually buy small ones so I use the whole leaf. Pat them dry before next step.
      • Layer the pork belly and napa cabbage by placing one slice between each of the leaves. Cover leaves with pork belly, trim if necessary to fit. Repeat 3-4 times depending on size of pot.
      • Cut each napa cabbage wedge into 3-4 pieces each about 2 to 2½ inches (5-6 cm) long. Each section should not be taller than your cooking pot. Try to keep the layers of napa cabbage and pork belly neatly stacked as you slice.
      • Next, start stacking the ingredients in a donabe, hot pot, or regular 10-inch pot. I used a shallow Staub pot with the grill top. Turn the stacks on their side as you pack them so the pink and green layers are visible. Start from the outer edges of the pot and work your way toward the center. Place the thicker cabbage leaves near the outside edge and the tender leaves in the center. Make sure that you pack the pot tightly as the layers will become loose once the ingredients start to cook.
      • If you don’t have enough layers to pack the pot tightly, consider using a smaller pot or place other ingredients in the center. I Like to stuff enoki mushrooms or shimeji mushrooms in the center. Or use slices of radish to surround the mushrooms.
      • Make you dashi. Don’t reduce the salt If you are using dashi from packets since the napa cabbage will release liquid during cooking and dilute the soup. If using Shiro Dashi that is seasoned omit half the soy sauce and sake. Taste your broth, it should not be too salty.
      • Pour the broth into the pot with the napa cabbage and pork belly. Start cooking on high heat. Once boiling, skim off the foam and fat on the surface using a fine-mesh skimmer. Then, reduce the heat to medium low and cook covered until the napa cabbage is tender and the pork belly is cooked through, roughly 8-10 minutes.

      Garnish

      • Garnish with chopped green onion/scallion, have shichimi togarashi (Japanese seven spice) on table or sprinkle on top of dish. Serve while hot with rice or boil up some noodles to serve in the delicious broth!
        I like adding a ramen egg or a Mayak egg t round it out.