Category: Food

Best Damn Banana Bread-Slipping in A New One

Best Damn Banana Bread-Slipping in A New One

There are things you take for granted, things that are constants within your own universe.

For example, I have made the same banana bread forever.  A recipe from my kids’ pre-school teacher WAY BACK in the day.  Every time I strayed and tried a different recipe my family’s response was “it’s not bad, but it’s not Teacher Heidi’s banana bread”.  Convinced,  I boldly titled it “Best Damn Banana Bread” on 3Jamigos.

So, there I am, sitting on the can this morning, taking in all the bad news of the day, fires, hurricanes, pandemic, political craziness, when Wes slides the door open (please, don’t tell me you lock your bathroom door at home)  and says…

”I like this banana bread more than your usual”

Say What?

Thus proving we are living in crazy times, I almost fell off my “throne”.  I had just received a copy of Dominique Ansel’s new baking book, Everyone Can Bake.  (Now, that is a constant in my universe-buying cookbooks) and had yet to make anything from it. Fortunately, while perusing the blogosphere, I found My Baking Addiction’s (Boss Blog) post on Ansel’s Banana Bread.  Rave reviews all around.  Never one to shy away from a banana bread challenge, I decided to have a go of it.

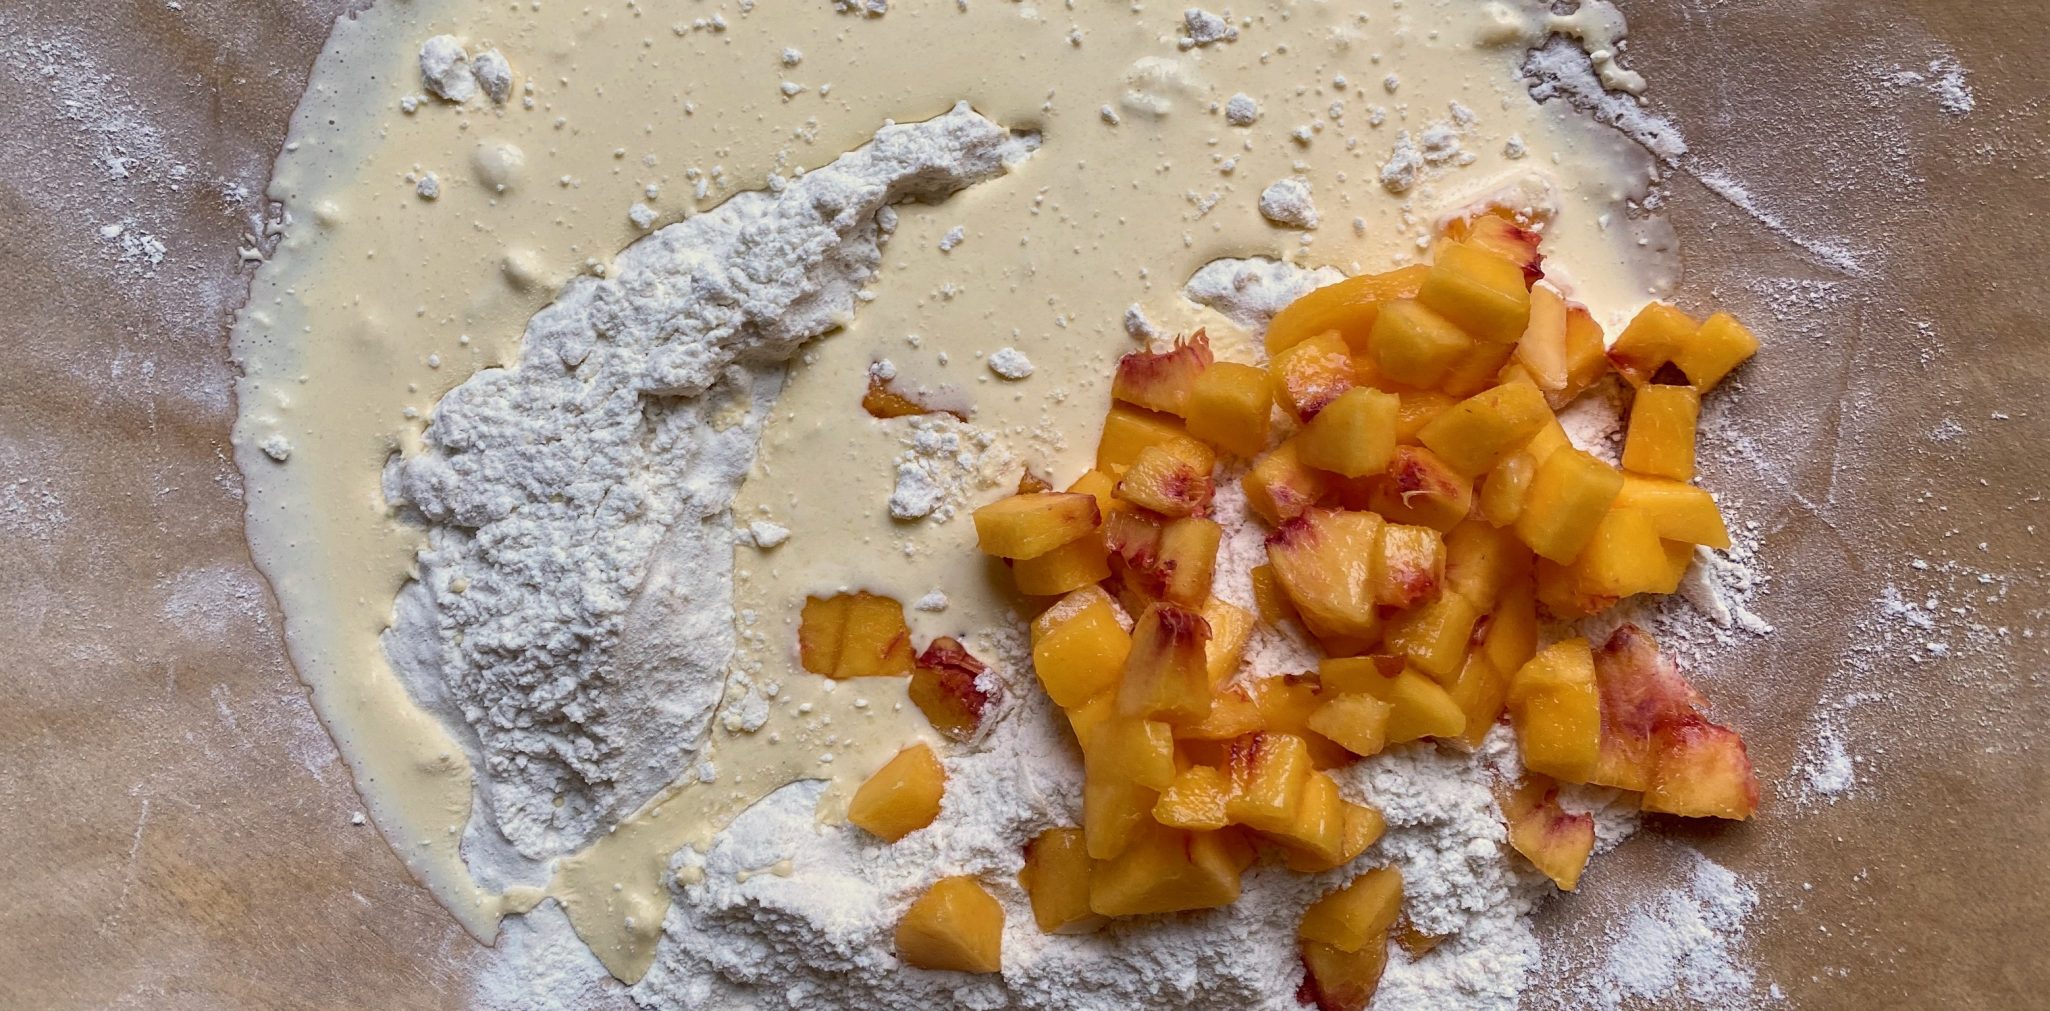
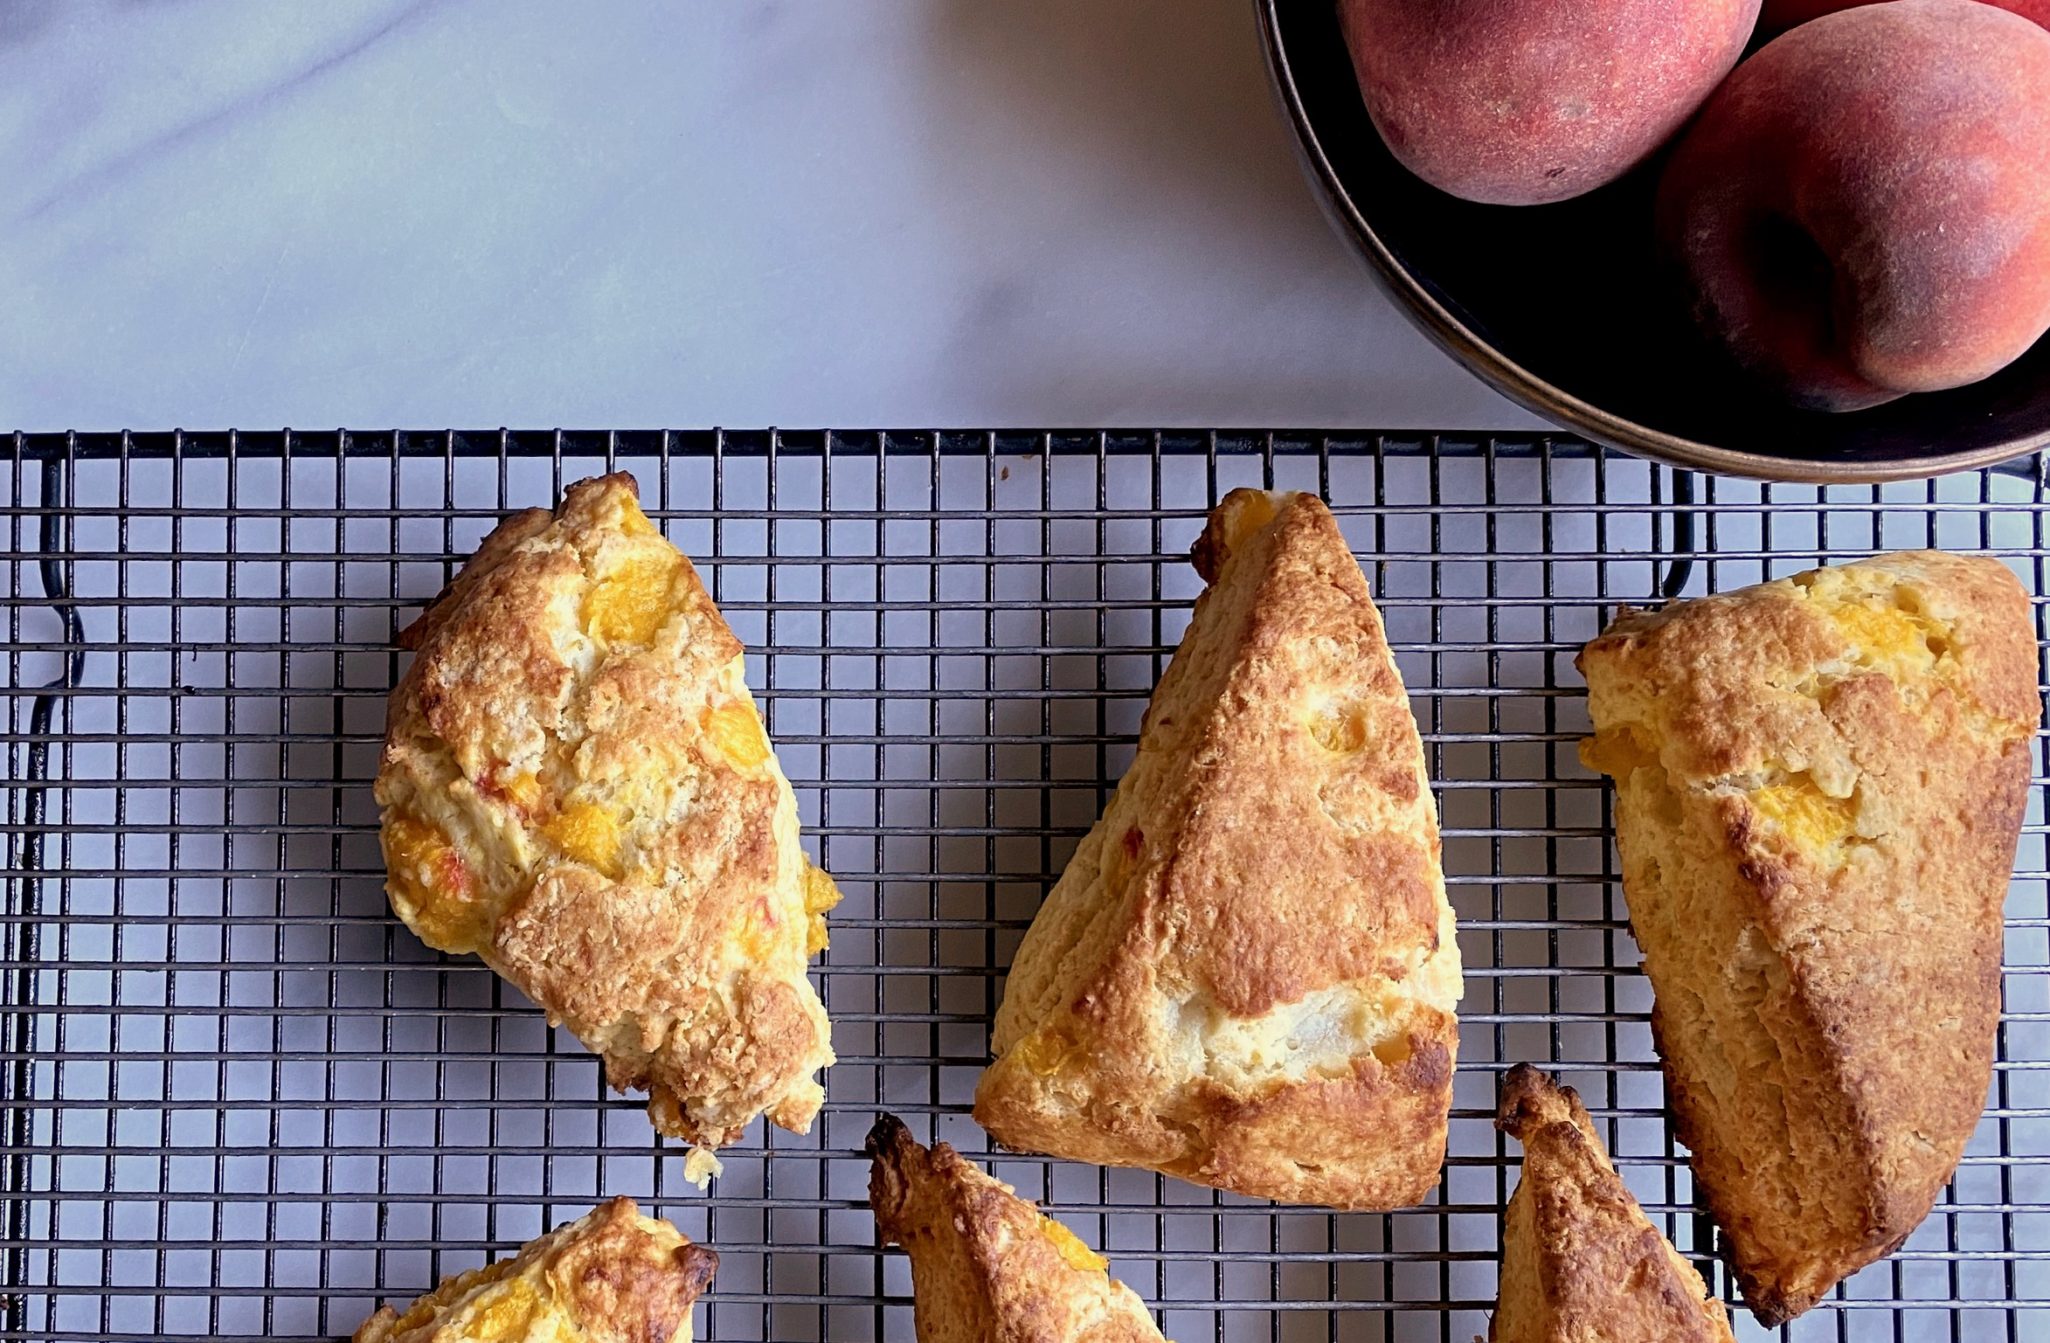
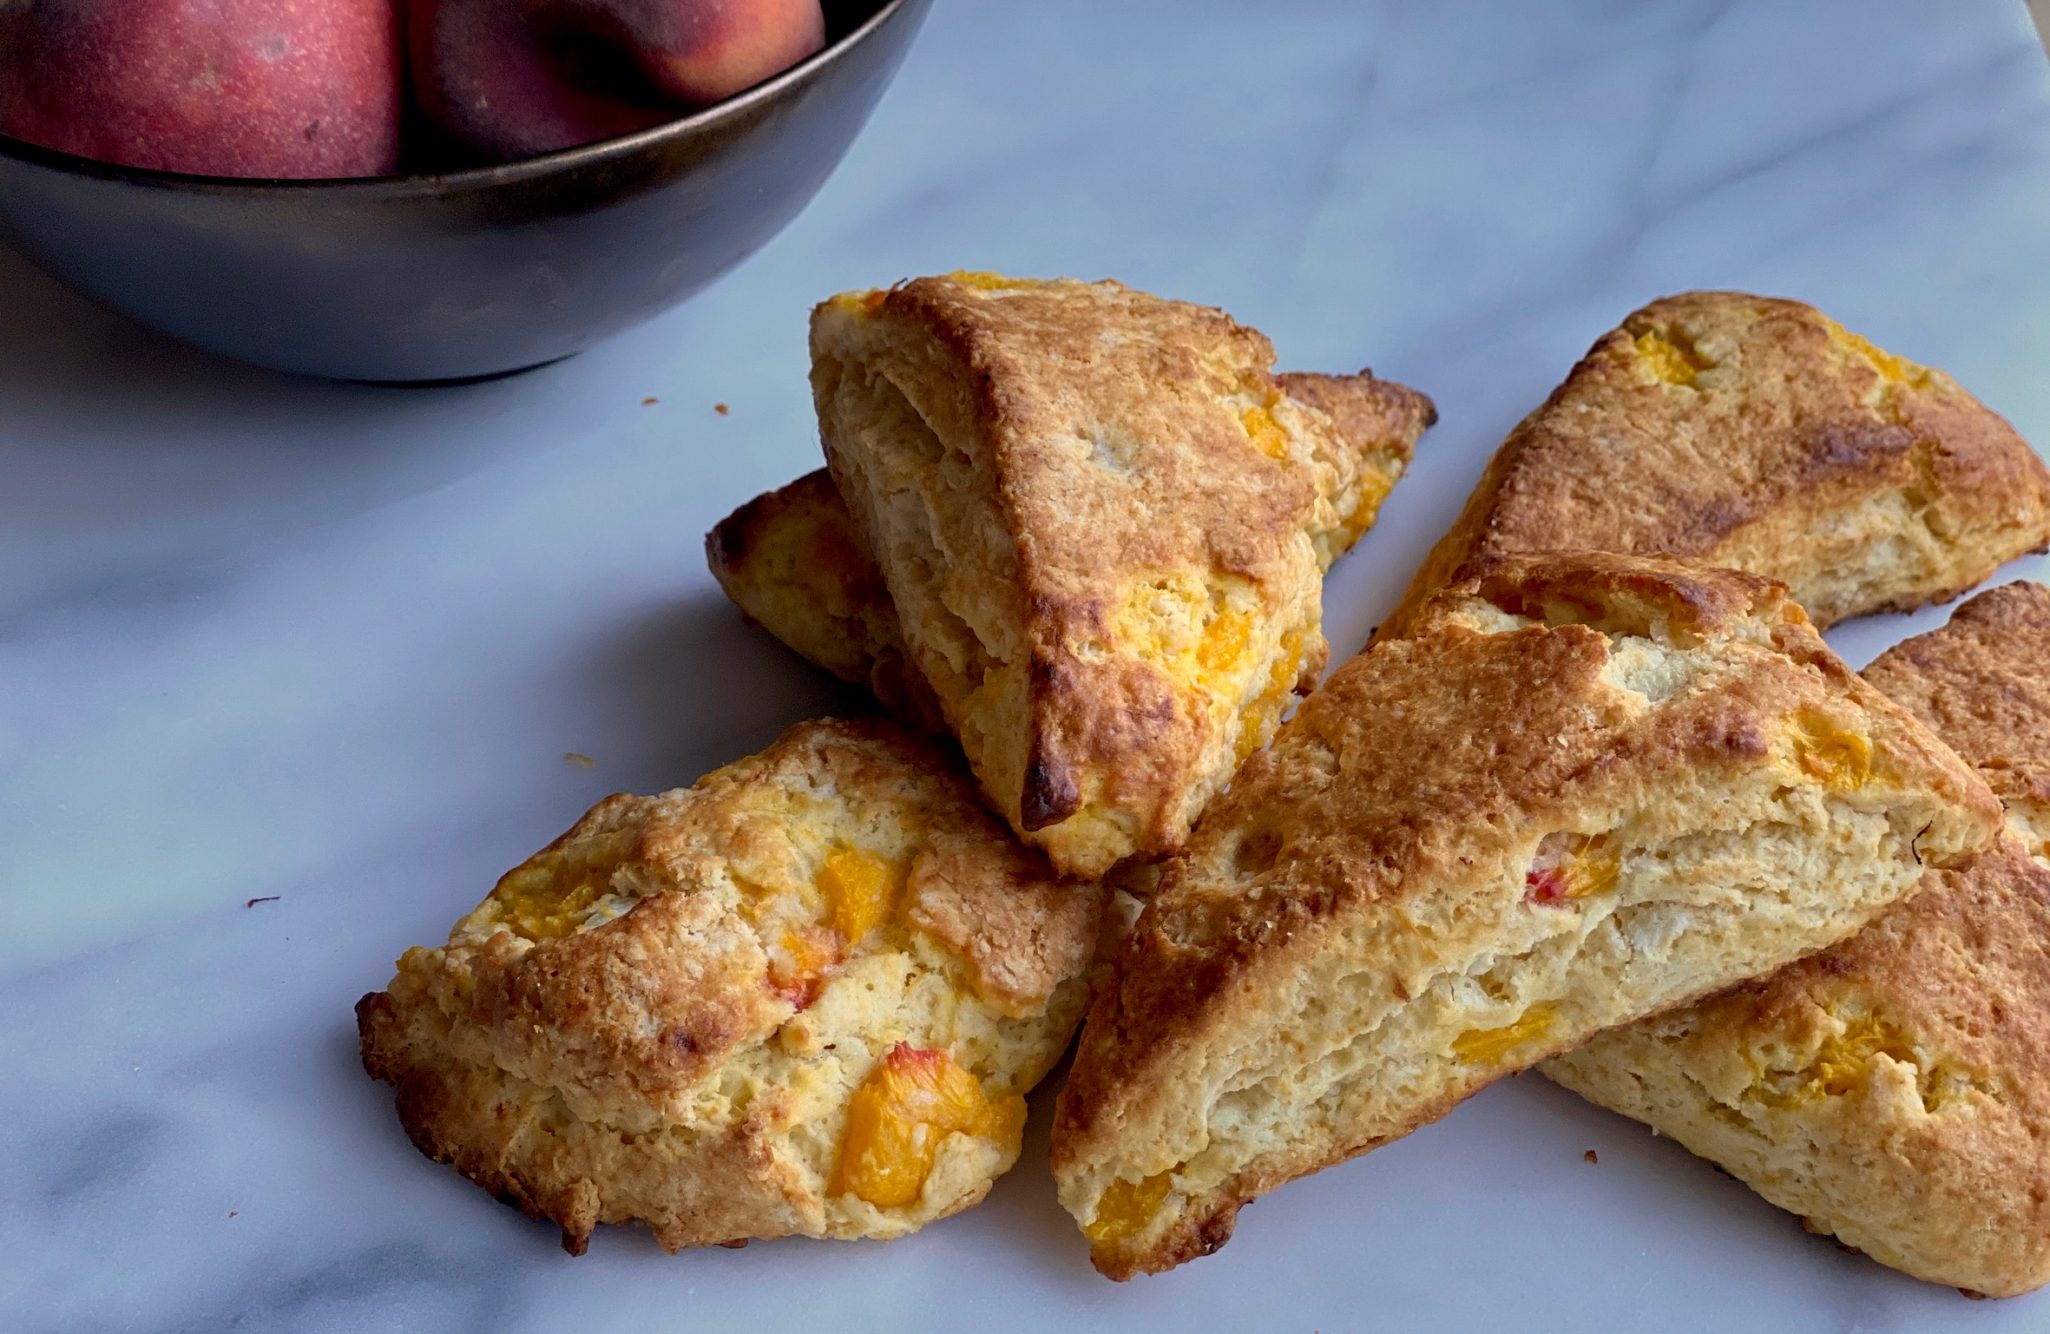
The recipe comes together quickly. It calls for melted butter, 4 bananas, eggs, flour…pretty standard although it is quite generous with the butter and bananas.  I decided to tweak the recipe so I added diced apricots, substituted mace for nutmeg, and finished with Midwest Made’s crunchy sugar topping with a touch of cinnamon. (Technique for sugar from Midwest Made Banana Bread)  
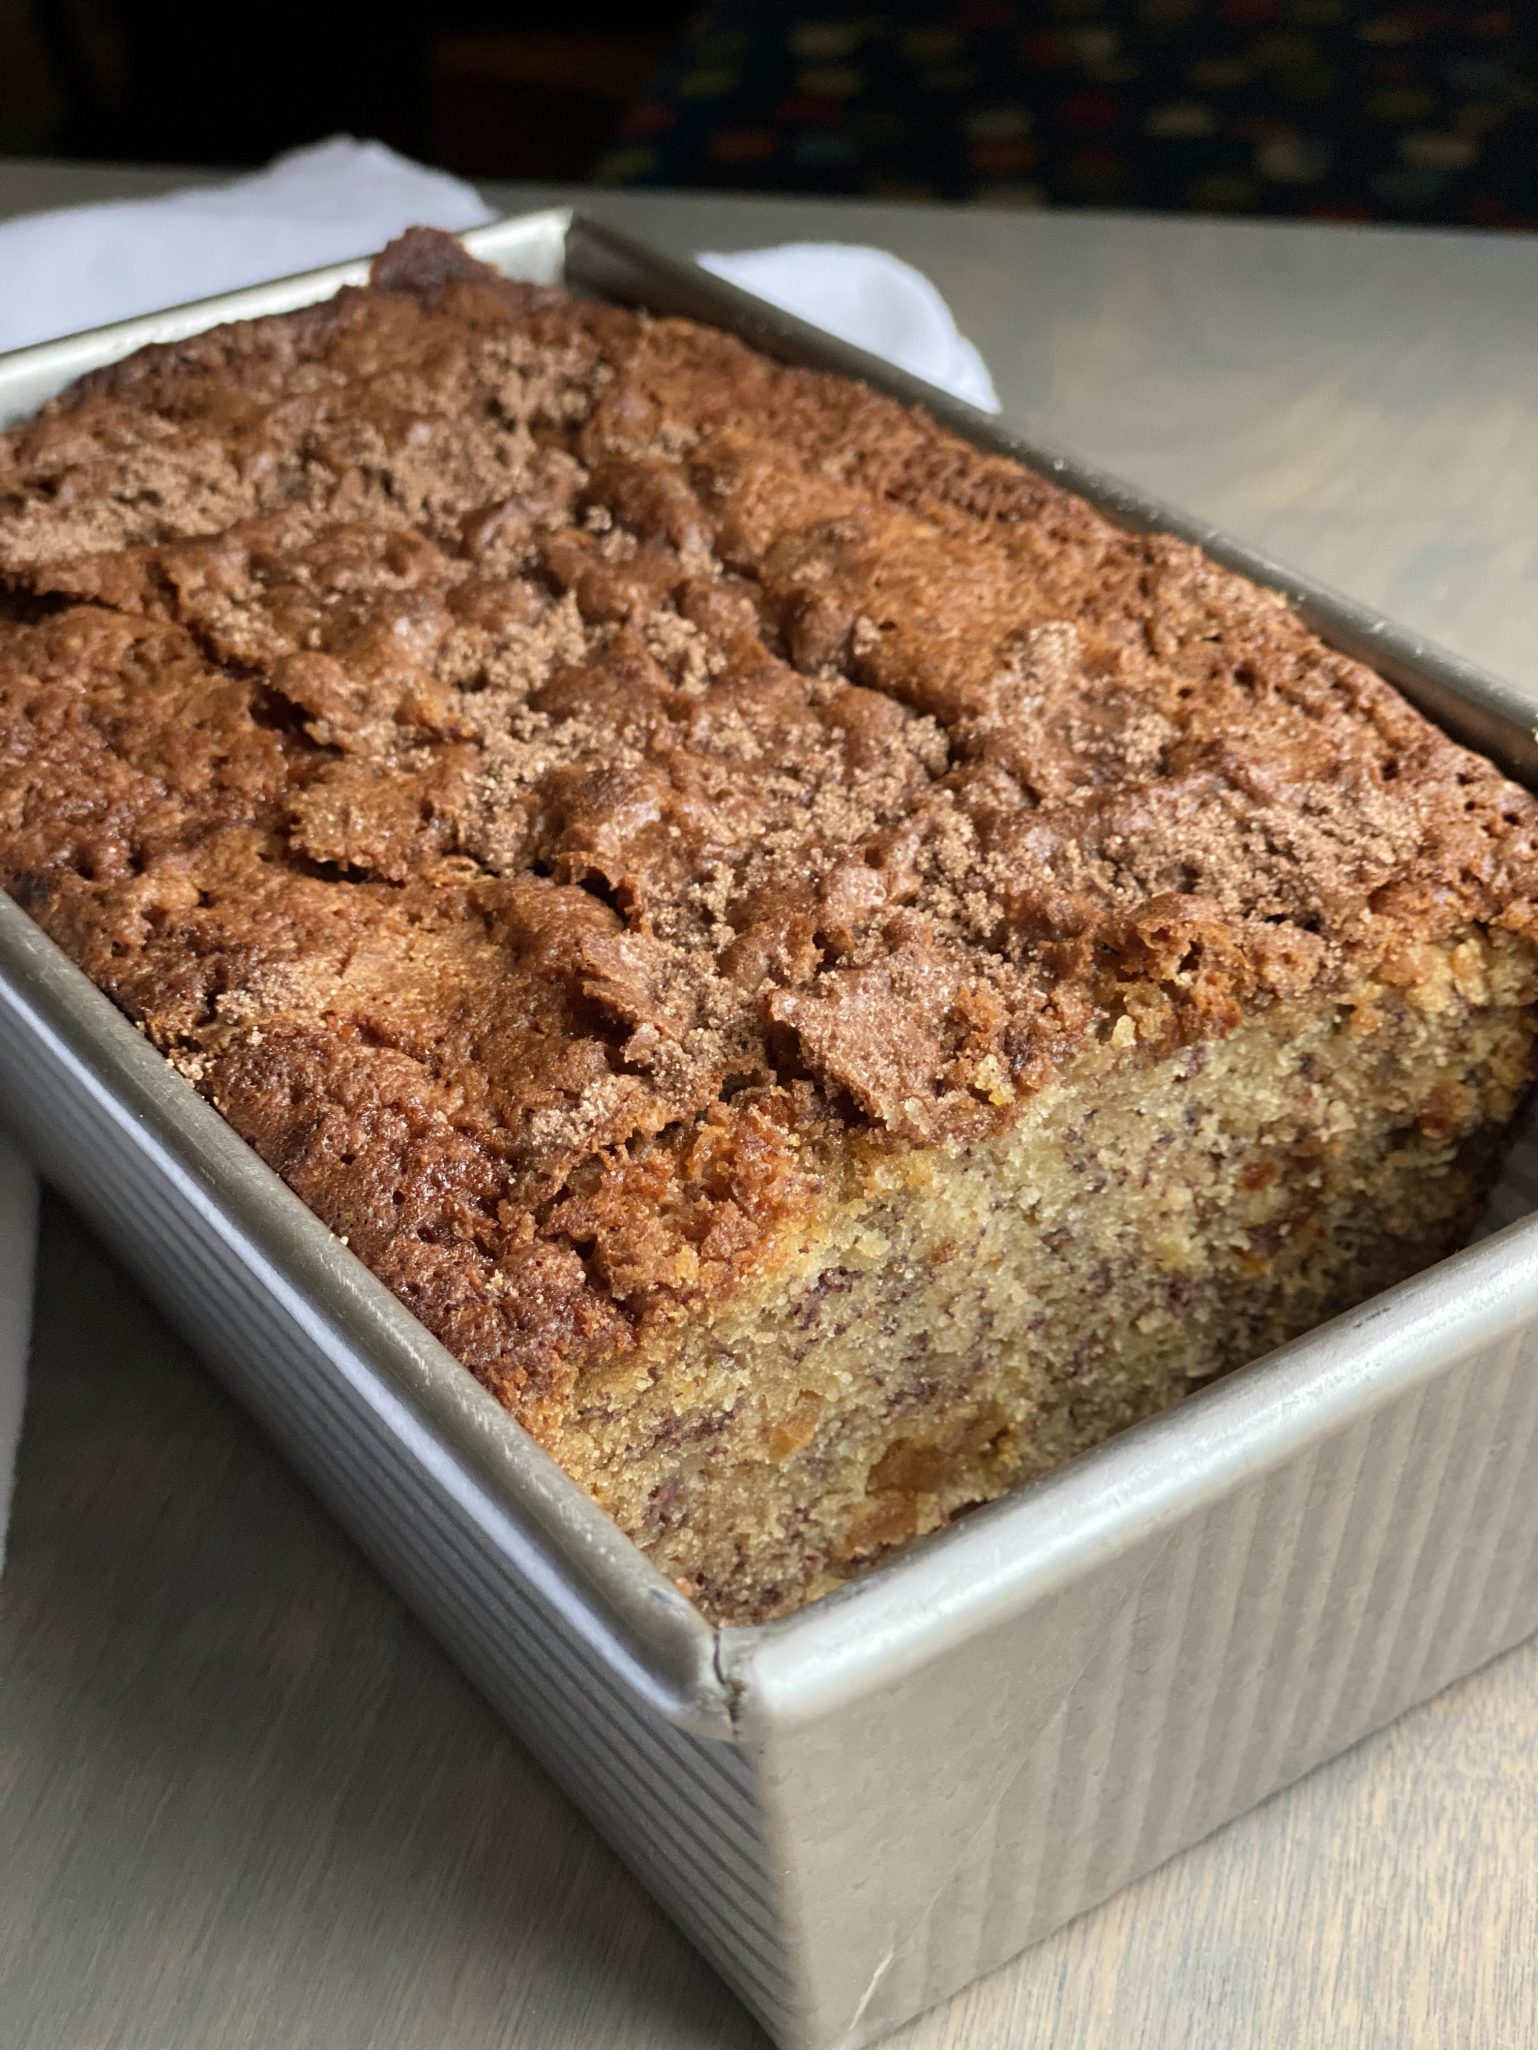
Nota Bene

Ansel’s book calls for an 8 x 4.5 loaf pan.  NOPE.  I used a 9×5 loaf pan and had extra batter for 3 muffins. Don’t try to pour all the batter into an 8 x 4.5 pan, it will overflow creating havoc in your oven.  My Baking Addiction used a 10 x 5 pan.  I filled my loaf pan to approximately 3/4-inch below the top edge.  Baking time was around 1 hour and 15 minutes, halfway through I covered the top with foil so it wouldn’t get too dark.

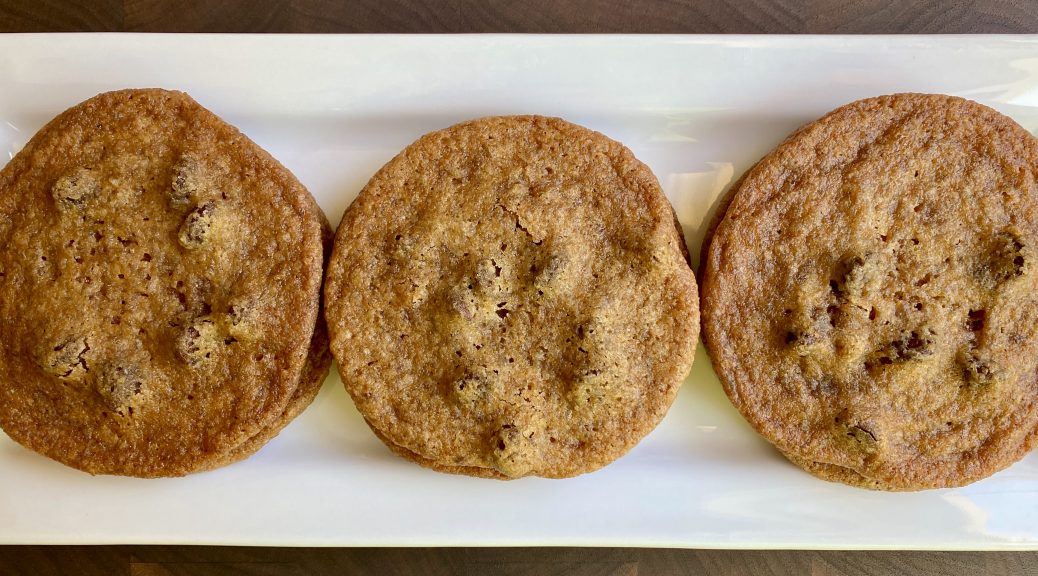
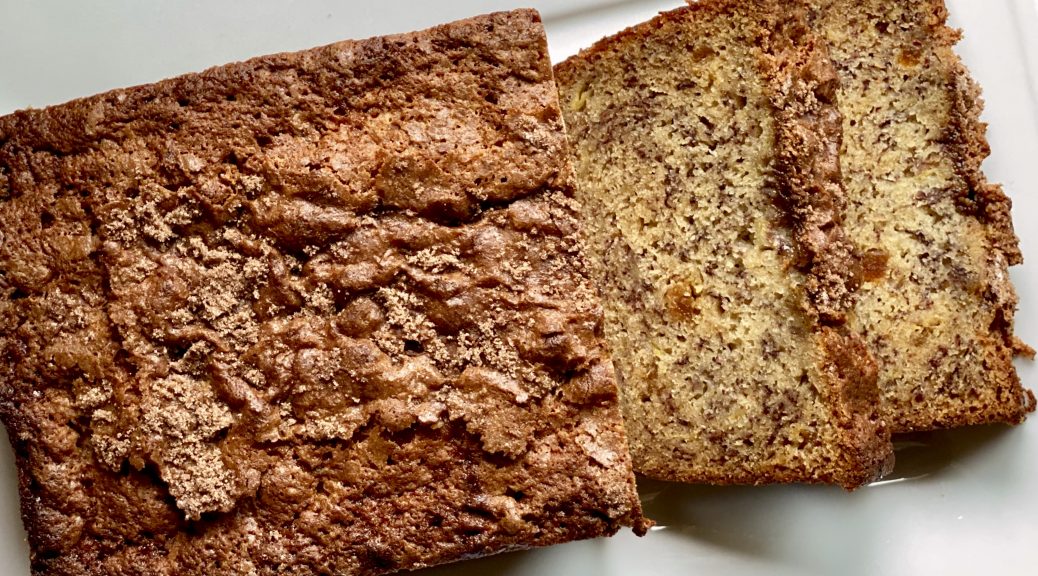
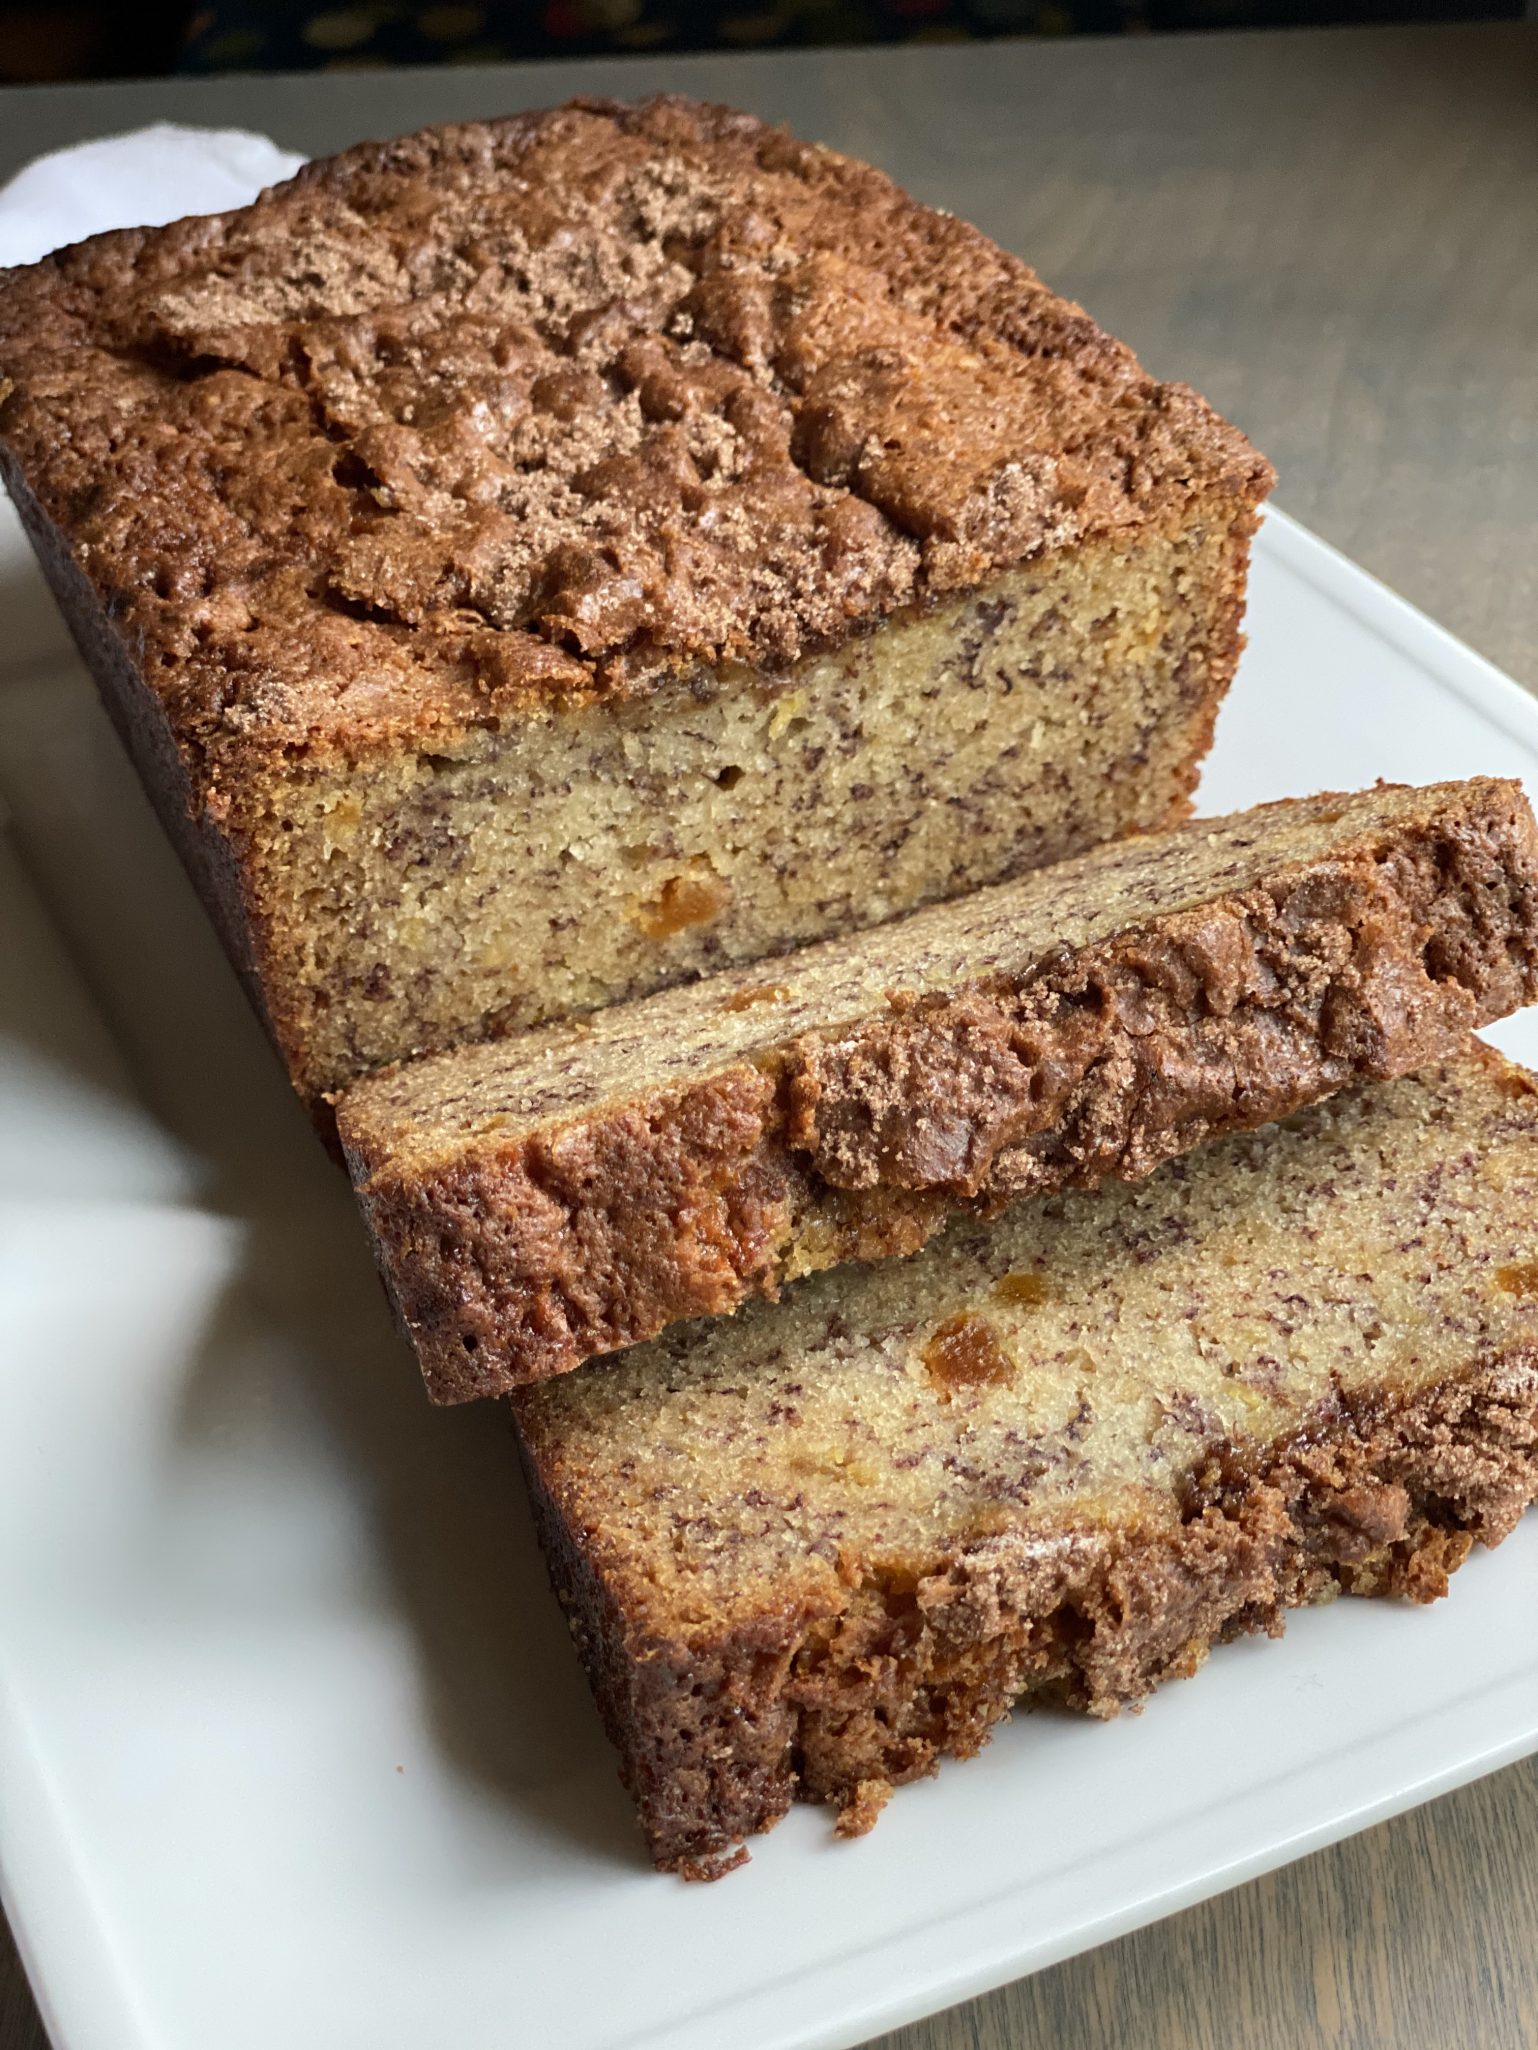
It’s everything banana bread should be-dense, moist, and banana-y.  The bits of apricot gave the bread a tart, sweet, component. My bet is dried strawberries, blueberries, or a tropical fruit medley would work too.  If you like nuts, toss a handful of chopped walnuts in with the apricots or sprinkle on top of the loaf before baking.

Nota Nota Bene

The beauty of this recipe is you can make it by hand…and you absolutely should!  I was befuddled (omg, who uses that word), a couple of times I have made this bread it sinks in the middle.  I now think it is because I used a mixer and inadvertently beat too much air into the bread causing it to fall in the center.  This is truly a one-bowl recipe to make by hand.

So, I now have two Best Damn Banana Bread recipes but as they say, variety is the spice of life.  Try both, tell me which one reigns supreme.


Banana Bread, Yet Another Best Damn BB

Banana Bread by Dominic Ansel. Easy and delicious!
Course quick breads
Cuisine American
Keyword Banana Bread, dominic ansel
Prep Time 15 minutes
Cook Time 1 hour 15 minutes

Ingredients

Dry Ingredients

  • 2 cups sugar 400grams
  • 2 cups flour 250 grams
  • ¾ teaspoon baking soda 3 grams
  • ¾ teaspoon nutmeg 2 grams can substitute mace
  • 1 teaspoon salt 5 grams
  • 1 teaspoon baking powder 5 grams

The Wet Ingredients

  • 3 eggs 150 grams
  • 4 overripe bananas, mashed 400 grams, approx 2 cups
  • 14 tablespoons unsalted butter, melted, 200 grams
  • 1/2 cup dried apricots, diced substitute dried berries, or tropical fruit medley, optional
  • 1/4 cup chopped walnuts or pecans optional

Instructions

  • Preheat the oven to 350°. Grease a 10" x 5" x 3 ½" loaf pan and set aside. If you use a smaller pan, fill until the batter reaches 3/4-1 inch below the top edge. Excess batter can be used for muffins or mini-loaves.
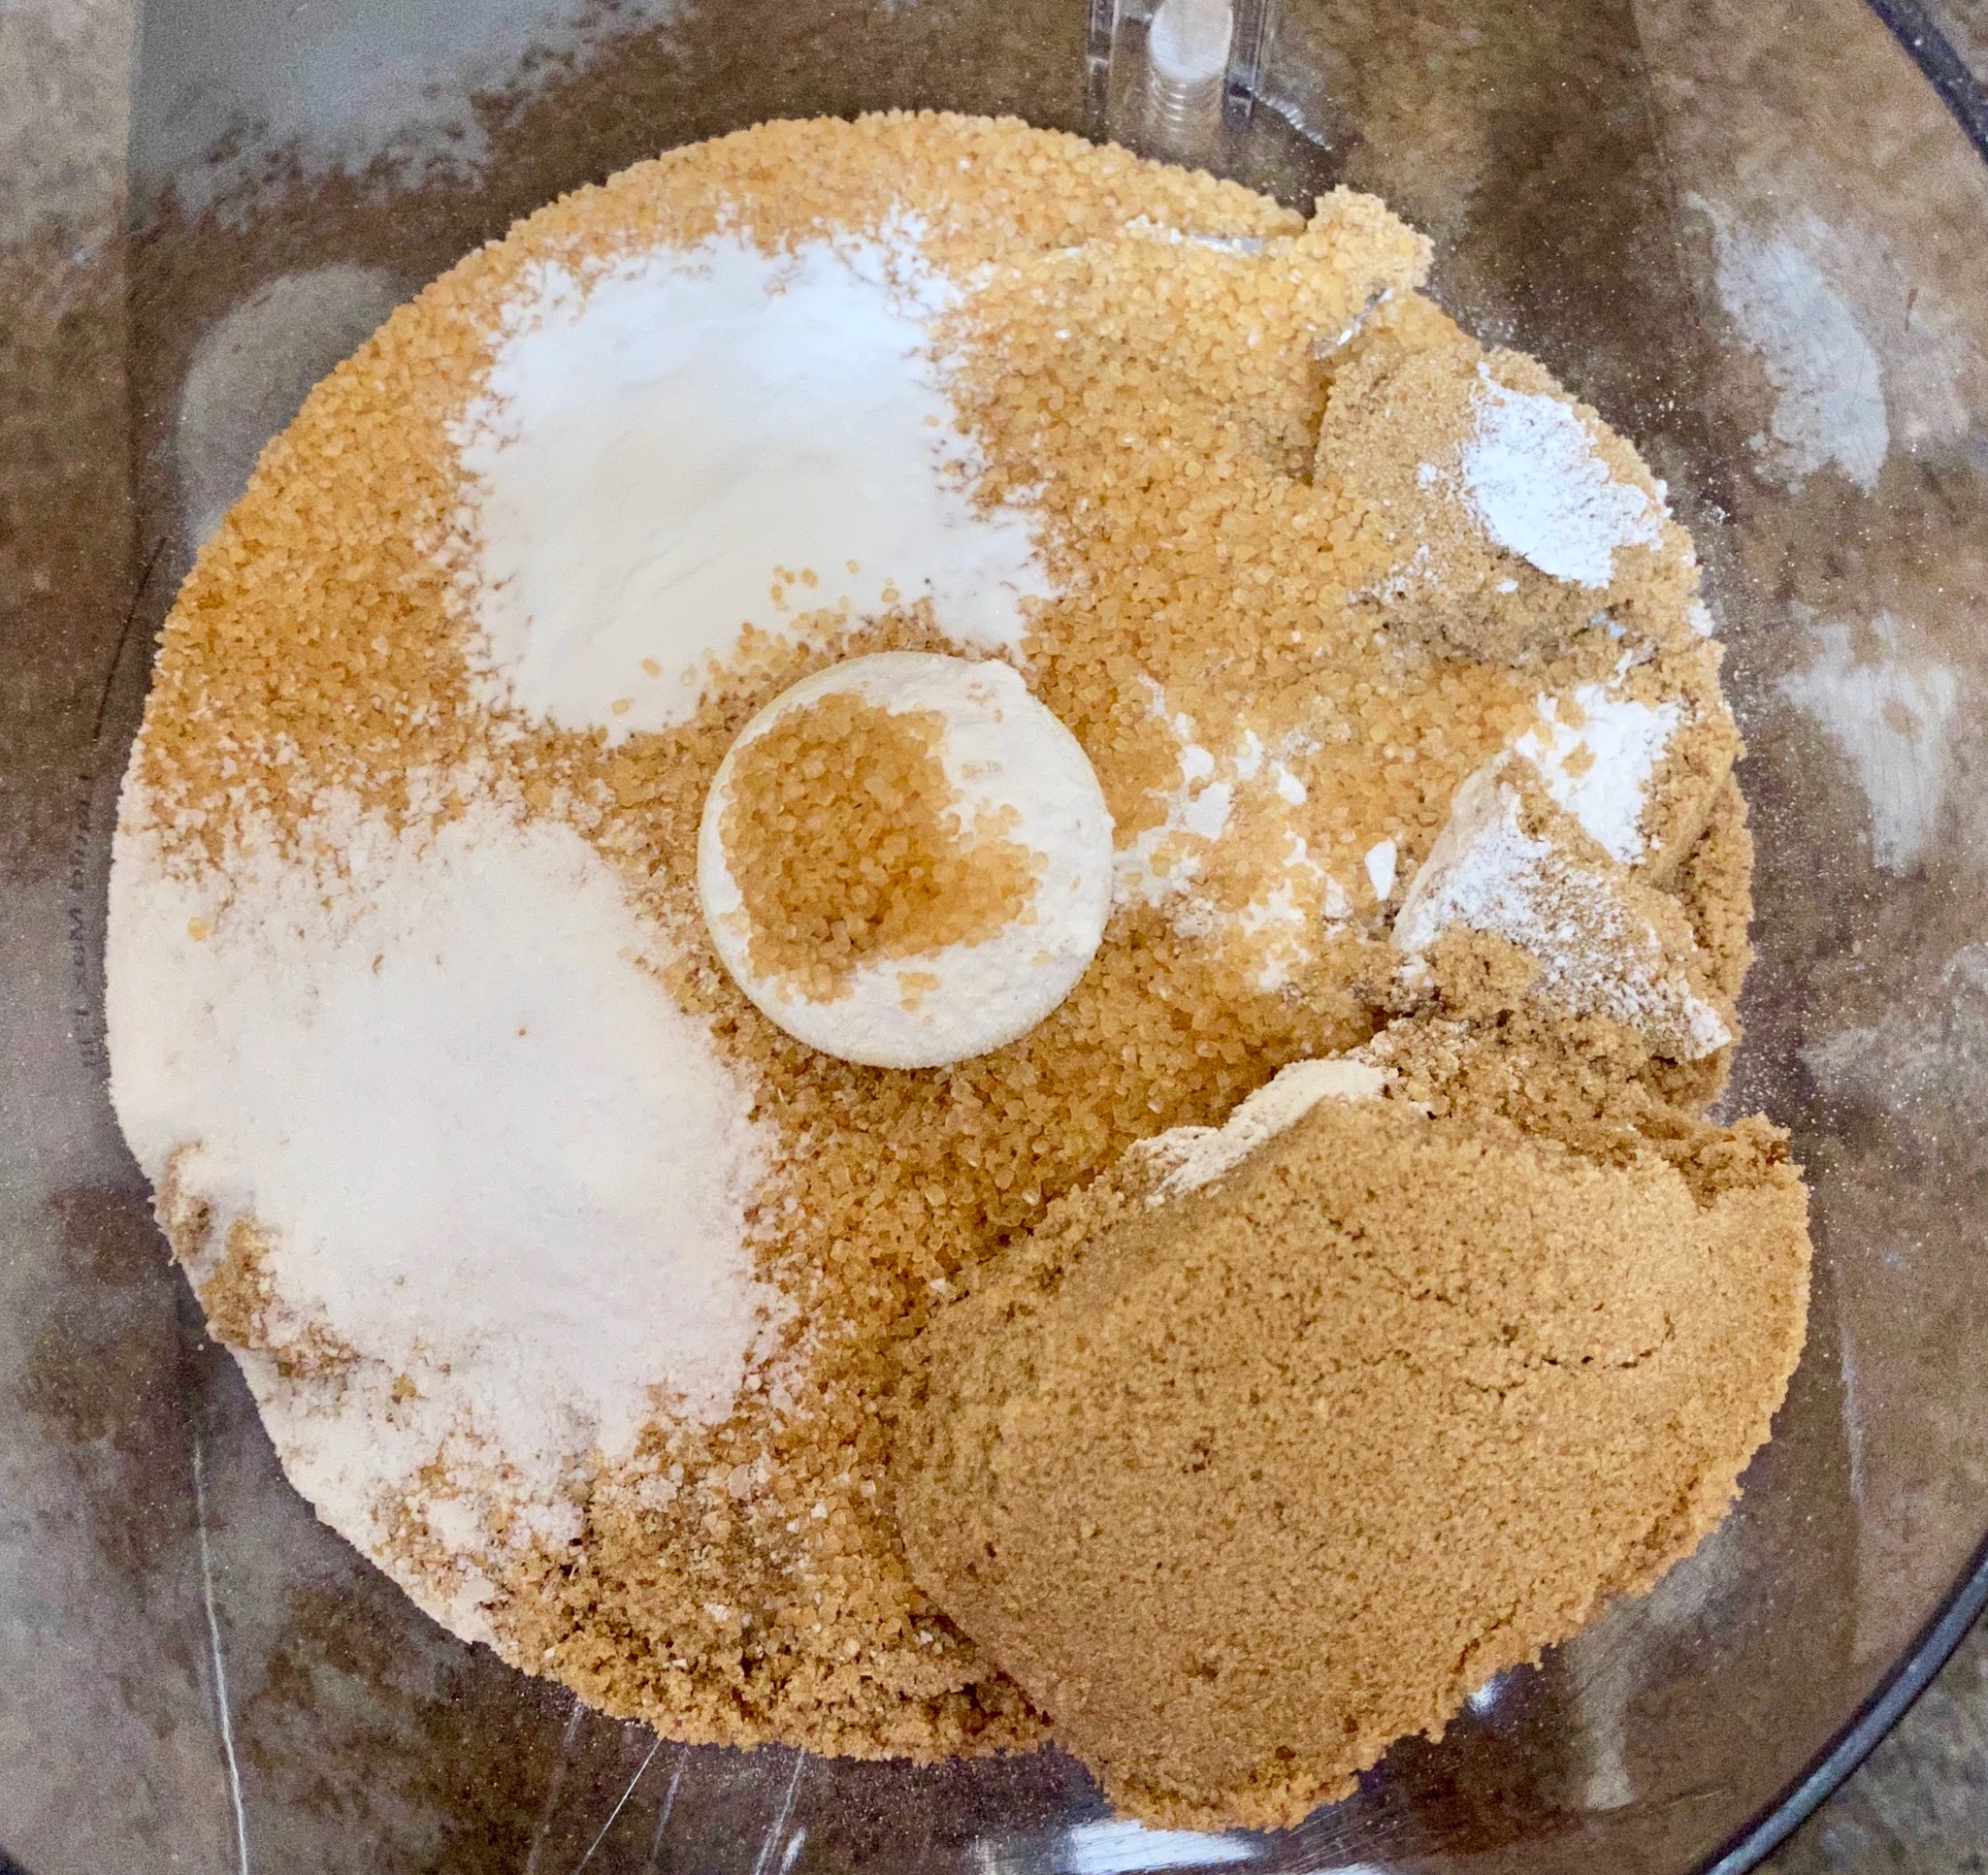
  • In a large bowl, whisk together the sugar, flour, baking soda, nutmeg, salt and baking powder.
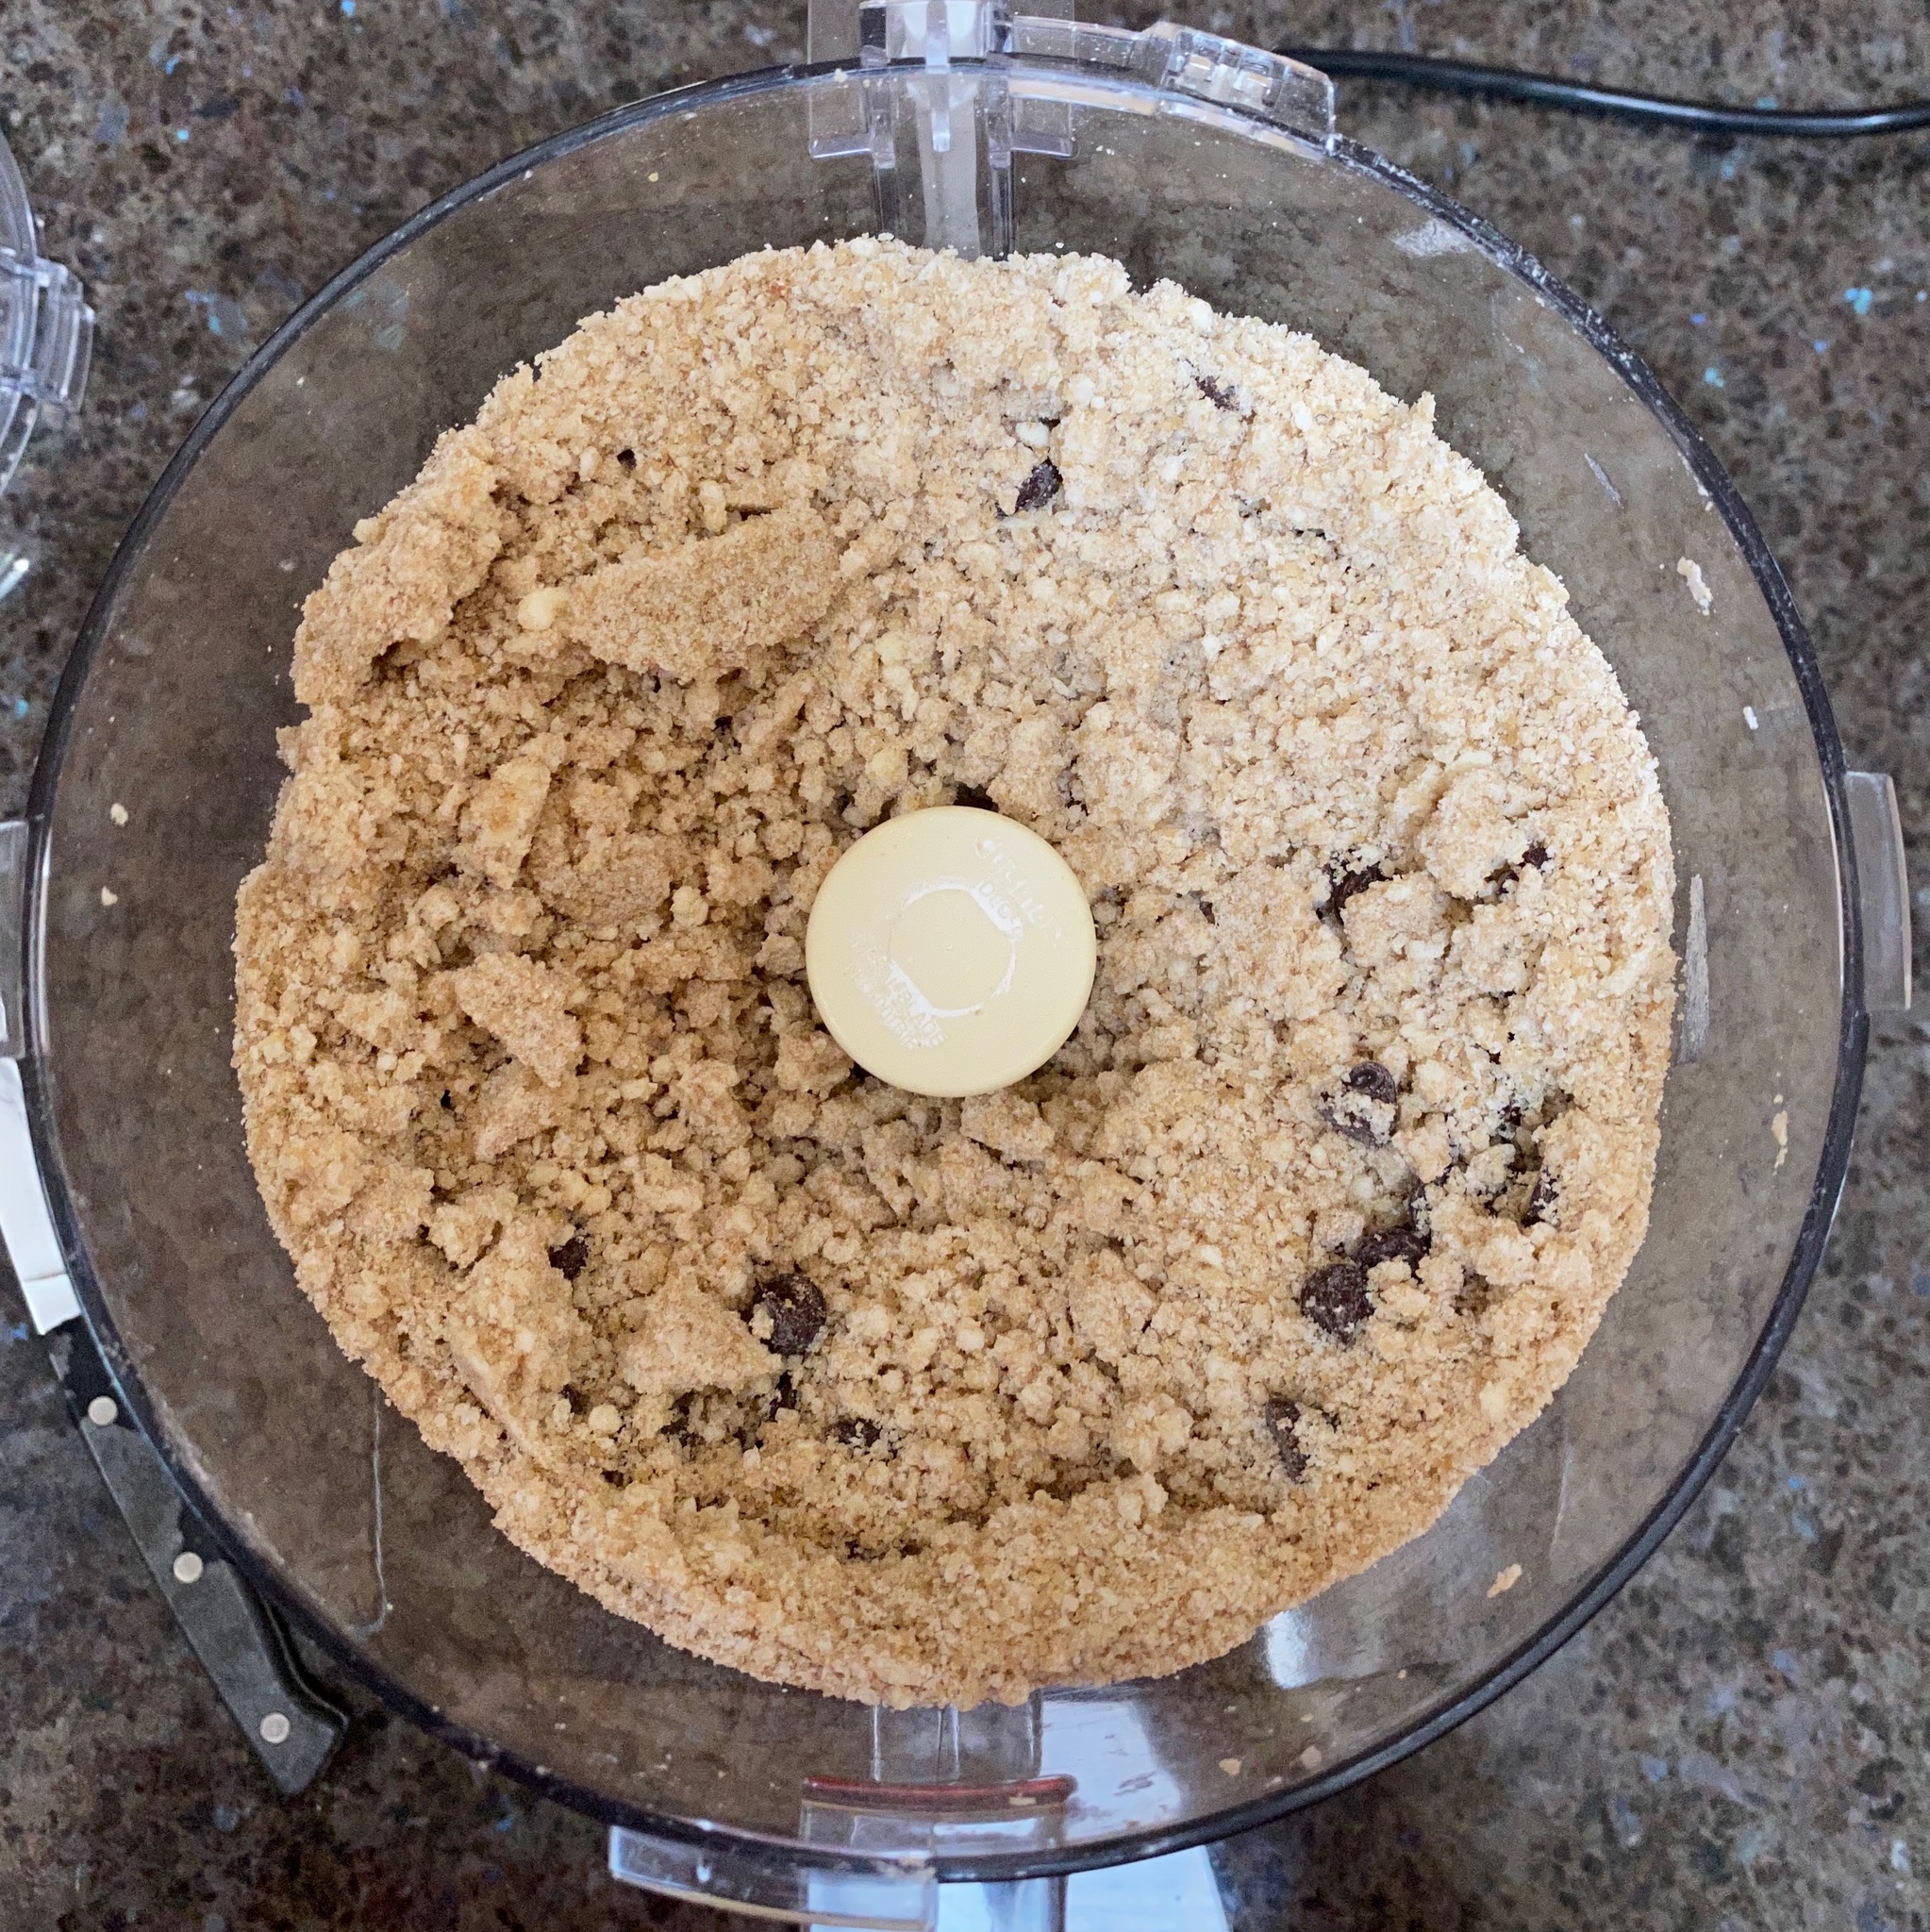
  • In a medium bowl, beat the eggs and the mashed bananas together. Pour the wet ingredients over the dry ingredients and mix together until the dry ingredients disappear. Stir in the melted butter until fully incorporated. If using, fold in dried fruit and nuts.
  • Pour the batter into prepared pan* Bake until golden brown and a cake tester inserted in the center of the loaf comes out clean, about 1 hour and 10 minutes. Check loaf halfway through, if the crust is browning too quickly, cover with foil. Allow to cool for 20 minutes before slicing.
  • *Optional: Mix 1 teaspoon cinnamon with 2 tablespoons granulated sugar. Wet finger tips and mix sugar mixture until it clumps. Sprinkle evenly over top of batter. Or use your favorite streusel topping.
Grandma’s Chocolate Chip Cookies-Take Two

Grandma’s Chocolate Chip Cookies-Take Two

The search continues for a thin, crispy chocolate chip cookie just like my grandmother use to make.  My first try was a Tate’s Chocolate Chip Cookie facsimile by that guru of American desserts, Stella Parks.  While absolutely scrumptious-buttery, caramelized, slightly chewy in the middle with crispy edges, they just weren’t my grandma’s cookies. So…

I took a different tack

I googled, buttery, crispy, thin cookies, leaving out the chocolate chips.  Surfing the Pinterest pics that popped up, I came across a photo for Crisp Almond Cookies from Chocolate, Chocolate, and More.  It looked promising.  The cookies were thin with golden edges and a light, flat, center.  They looked a whole lot like my Pau Pau’s cookies but without the chocolate.

So I made the recipe for Crisp Almond Cookies and added mini chocolate chips to the dough.  The recipe is straight forward, classic cookie making protocol.  Cream the butter and sugar, add eggs, dry ingredients, nuts and finally fold in chocolate.  Tips for this particular recipe include soft butter (not melting) and room temperature eggs since you want the cookies to spread.  Once again I used a tablespoon ice cream scoop to portion out the dough leaving 2-3 inches between each scoop.

The Grandma Test

These cookies looked a lot more like my grandma’s cookies.  These were crisper than Stella’s and buttery, without the caramelization.  (My test group actually LOVED the caramel flavors of the Stella Park cookies) I think the inclusion of almonds lightened the cookie and make it less chewy and a touch crisper, again more like Grandma’s.  I liked them a lot, definitely getting closer to ground zero for Pau Pau’s cookie.  I will try it with walnuts next time since that is the nut she used in her recipe. I don’t think it will change the texture but may add that characteristic walnut flavor.  The use of baking powder instead of baking soda also reduces browning.  It didn’t make these cookies cakey, which you might expect.

I arbitrarily added 1 cup of mini-chips to the dough.  I didn’t want to overwhelm the cookies with chocolate.  I ended up with more than 3 chips a cookie but I think Grandma would be okay with a bit more chocolate.  I would not put more chocolate.  In fact, I might decrease the amount to 3/4 cup in the spirit of her cookies.  You could substitute a good quality chocolate sprinkle instead, a suggestion from my kid- the Sprinkle Cookie King.  The recipe makes quite a few cookies but luckily you can easily half the recipe.

Crisp Almond Cookies with Chocolate Chips

I took a recipe for Crisp Almond Cookies and added Chocolate Chips! Buttery, crisp with a hit of chocolate, a delicious combination.
Course cookies
Cuisine American
Keyword Crisp Almond Cookies with Chocolate Chips
Prep Time 15 minutes
Cook Time 10 minutes

Ingredients

  • 1 1/2 cups butter softened (337 g) (salted butter)
  • 1 cup light brown sugar 200 g
  • 1 cup granulated sugar 200 g
  • 2 large eggs room temp
  • 2 teaspoons vanilla extract 10 ml
  • 2 1/4 cups all-purpose flour 280 g Use a moderate protein flour like Gold Medal
  • 1 teaspoon baking powder 4 g
  • 1/8 teaspoon salt 0.7 g If using unsalted butter increase salt to 1/2 teaspoon
  • 1 cup finely chopped almonds 112 g
  • 1 cup mini chocolate chips sub good quality chocolate sprinkles

Instructions

  • Cream together butter and sugars, until light and fluffy, about 5 minutes.
  • Add in eggs and vanilla and beat again.
  • Combine flour, baking powder and salt. Add flour mixture to dough, one third at a time until all added. Stir in almonds.
  • Fold in chocolate chips
  • Using a small cookie scoop (1 tablespoon), place dough on a parchment-lined baking sheet three inches apart (these cookies spread.) Bake in a preheated 350-degree oven for 8-9 minutes. Until edges turn golden. Let cool on baking sheet for 5 minutes before removing to racks to cool completely.

Notes

Recipe is easily halved.  If you are looking for a crisp almond cookie, buttery and sweet, just leave out the chips!

The search continues…but we are headed in the right direction.

Thin Crispy Chocolate Chip Cookies, In Search of Grandma’s Cookie

Thin Crispy Chocolate Chip Cookies, In Search of Grandma’s Cookie

My grandmother, who we called Pau Pau, was the classic iron fist in the velvet glove.  She was outspoken and strong-willed, bossy, pragmatic, the protector of her family.  

Not gonna lie. She was kind of scary.  I see where my mom gets her strength, her willfulness, and her disciplinarian streak.  When my brother and I got in trouble, it was mom we answered to, not dad, Mr. Marshmallow.  

This isn’t surprising about my grandmother. After all, you have to pretty tough to be a new bride, leave your family, get on a boat (pregnant), and travel thousands of miles to a place where you don’t speak the language and nobody knows your name.

She Was a Bad Ass

My mom next to Pau Pau and Auntie Jessie on Granpa’s lap, four more kids followed.

It was a tough life, six kids, my grandfather working different jobs-farmer, grocery store clerk, restaurant worker, and moonshine maker.  Ultimately, they settled in Chinatown and Pau Pau ran a sewing factory, all the kids pitched in and worked the factory.  She employed other Chinese women struggling to make ends meet and care for their families.  Her six kids grew up to serve in the military, become business owners, a chemist at Stanford, an elementary school teacher, and the first Chinese woman real estate broker in the City. 

Ours is the story of the immigrant dream of America

Growing up we spent a lot of time at my grandmother’s house in Chinatown. We usually migrated to the dining room while she cooked up a storm in the kitchen.  In one corner of the dining room was a memorial to my grandfather complete with his picture, incense, banners to ward off spirits, and dishes of food. Food is such an integral part of life, like so many Asian parents, feeding us was her way of showing that she cared for and loved us.  She cooked mainly Chinese food.  Two exceptions, both sweets, were fruitcake (amazingly good, no one used her fruitcake for a doorstop) and Chocolate Chip Cookies.

Pau Pau’s Chocolate Chip Cookies were thin, crispy, and buttery.  I could eat a zillion of them, I’m sure I tried.  She always kept a tin of cookies on her dining table to tempt everyone that visited. 

I remember watching her make cookies.  She flattened each ball of dough and carefully placed 3 chocolate chips on each cookie then finished with a sprinkle finely chopped walnuts. When I asked her for the recipe she rummaged through her cabinet, pulled out a package of Nestle’s Semi-Sweet Chocolate Morsels, and tossed it to me.  I was incredulous, no way were her cookies the same as the Nestle’s Toll House Cookies.  Years later I asked my Aunt if she had Pau Pau’s recipe, nope, but she did recall Grandma would melt chicken fat if she didn’t have enough butter.  

So armed with bits and pieces of info, I set out to replicate those darn cookies.  I found a recipe on Serious Eats by Stella Parks for “Thin, Crispy CCC, just like Tate’s (never had em).  They were buttery, caramelized, sweet, but only the very edges were crispy while the center was a bit chewy.  Not the cookies of my childhood.  Disappointed I threw the cookies in a Tupperware and left them on the table.

My kids inhaled them.  In fact, my nieces, my moms’ coffee group (which met practicing COVID guidelines) loved these cookies.  It’s all about expectations.  I wanted crisp, buttery, light, and just a couple of chips just like Grandma’s.  

But if I didn’t compare these to the cookies of my childhood, they’re really darn good.  The best analogy, thanks to my kid is as follows.  It’s like you’re going crazy looking for your lost keys…and you find your lost wallet.  Yay!  But damn it, you still haven’t found your keys.  

Here are my notes and the recipe for Stella Park’s Thin, Crispy, Chewy Chocolate Chip Cookies.  Make them soon. 

The recipe calls for a moderate protein flour like Gold Medal AP Flour.  Do not use King Arthur or Bob’s Red Mill both of which have a higher protein content.  It will throw off the texture and the spread.  Stella’s recipes are tested with Gold Medal, readily available, and easy to find, that is unless there is a pandemic.  I tried these with White Lily, a low protein Southern flour.  The cookies were soft and barely held their shape.  My kids liked them (lifetime members of the ooey-gooey cookie club), I thought they were too soft.  I used GM for the second batch, the extra protein provided needed structure and crispness, a winner.

Make the dough in a food processor which Stella says is key. Place dry ingredients into the processor and whirl to combine.

Pulse butter into the dry mix until crumbly, add chips, and process 1-2 short pulses.  Pour the dough into a bowl and add egg and vanilla, knead until it comes together. Put the soft dough in the fridge to firm it up so it is easier to scoop.  With a tablespoon scoop, I measured out over 60 cookies, more than the expected yield.  The cookies took 10-11 minutes to bake to a deep rich caramel brown.

The search continues for Grandma’s cookies but I will gladly make another batch of these.

Thin Crispy Chocolate Chip Cookies

Stella Parks version of Tate's thin Crispy Chocolate Chip Cookies. Crispy, buttery studded with chips, delicious and easy to make!
Course cookies
Cuisine American
Keyword chocolate chip cookies, Crispy, stella parks, tates, thin
Prep Time 15 minutes
Cook Time 12 minutes

Ingredients

  • 8 ounces med protein all-purpose flour such as Gold Medal blue label or Whole Foods 365 blue label (about 1 3/4 cup, spooned; 225g)
  • 8 ounces light brown sugar not dark brown (about 1 cup, firmly packed; 225g)
  • 3 1/2 ounces raw cane sugar not white (about 1/2 cup; 100g)
  • 2 teaspoons Diamond Crystal kosher salt; 8g or table salt, use about half as much by volume or the same weight
  • 1 1/2 teaspoons 8g baking soda 8g
  • 8 ounces cold unsalted butter, cut into 1-inch chunks (about 16 tablespoons; 225g)
  • 8 ounces assorted chocolate chips preferably no darker than 70%, see note (about 1 1/3 cups; 225g)
  • 1 large egg straight from the fridge, well beaten (1 3/4 ounces; 50g)
  • 1/2 ounce vanilla extract about 1 tablespoon; 15g

Instructions

  • Adjust oven rack to middle position and preheat oven to 350°F (180°C). In the bowl of a food processor, combine flour, light brown sugar, raw cane sugar, salt, and baking soda. Process until well-combined; add cold butter and pulse to form a dry and powdery mix; comparable results cannot be produced by hand or with a stand mixer. Add chocolate chips and pulse once or twice to combine.* Chill to make it easier to handle dough.
  • Transfer the cookie "mix" to a large bowl; add egg and vanilla, stir well; the mixture will seem alarmingly crumbly and dry at this stage. Once the wet ingredients have been absorbed, knead mixture by hand until it comes together like classic soft dough.
  • Divide into about 56 portions with a 1-tablespoon scoop. If you like, these can be transferred to a zipper-lock bag and refrigerated for up to 1 week or frozen for up to 3 months; soften to about 68°F (20°C) before baking.
  • Arrange portions on a parchment-lined half-sheet pan (do not use a silicone mat), leaving about 2 or 3 inches between cookies to account for spread. Bake until thin and golden brown, with an even color from edge to center, about 16 minutes (check earlier). I used a tablespoon scoop, yield over 60 cookies that took 10-11 minutes to bake.
  • Cool cookies directly on the baking sheet until room temperature. Transfer to an airtight container and continue cooling an hour more; the cookies will not be fully crisped until then. At cool room temperature, the cookies will keep at least six weeks in an airtight container.

Notes

*The mixture can be refrigerated up to one week in an airtight container or used immediately in the next step.

Quick Fix: Cabbage with Butter and Soy Sauce

Quick Fix: Cabbage with Butter and Soy Sauce

I love cabbage.  This has been a recent revelation.  I’m not quite sure why cabbage has grabbed my attention but I find myself throwing it into a variety of dishes-salads, curries, soups, and stir-fries.

With a head of cabbage in the fridge and little time,  I needed a quick side dish for dinner.  A recipe form Eric Kim on Food52 popped into my head, asparagus with soy sauce and butter.  Why not trade the cabbage for the asparagus?

Quick and Easy

Shred cabbage, not too finely so it retains some crunch, and set it aside. Heat a pan large enough to hold the cabbage.  Melt the butter, add the cabbage and cook until it wilts.  Add soy sauce, and stir fry until the butter and soy sauce bubble.  Season with pepper and salt if needed.  Bada Bing Bada Boom, done.

Substitute ponzu soy for a touch of citrus or dashi soy for seafood twist or an equal amount of oyster sauce adds flavor also.  Garnish with sliced green onions.

Cabbage with Butter and Soy Sauce

Course Side Dish
Cuisine Asian-American
Keyword brown butter, cabbage, soy sauce
Prep Time 5 minutes
Cook Time 5 minutes
Servings 3 servings

Ingredients

  • 2 tablespoons unsalted butter
  • 1/2 head of green cabbage shredded into 1/2 to 3/4 inch strips
  • 2 tablespoon soy sauce or substitute Ponzu or Soy Dashi or use 1 T oyster sauce and 1 T soy sauce
  • Flaky sea salt and freshly ground black pepper garnish

Instructions

  • Heat a skillet over high heat and melt the butter. Add the cabbage, season with salt and pepper, and cook for 2-3 minutes until slightly wilted. Add the soy sauce and cook for another minute or until the butter and soy sauce bubble up into a sticky glaze. Garnish with sliced green onions. Serve immediately.

Notes

Okay, for you carnivores...saute' diced bacon (2 slices), omit salt and use half the butter with the bacon fat.  

Crispy Cheesy Pan Pizza, Knighted by King Arthur… Flour That Is

Crispy Cheesy Pan Pizza, Knighted by King Arthur… Flour That Is

In this topsy turvy year, where flour has been in short supply since the COVID crisis, King Arthur Flour selected a pizza as their recipe of the year.  It’s easy to make with the caveat it does require a good amount of time, so plan in advance.  But it is so worth the time, it’s delicious.  

Years of pizza filled kids’ events-birthday parties, sports parties, playdates at Chuckie Cheese, and school functions, have left me with an aversion to pizza.  But the kids have grown up, no more bad pizza, only pizza by choice, my choice.  

During quarantine, our daily routine always includes someone asking, what’s for lunch?  To which Wes has lately been replying, how about pizza?  A couple of friends have raved about King Arthur’s 2020 recipe, Crispy Cheesy Pan Pizza which meant, pizza time baby.

Crispy Cheesy Pan Pizza-Doing the Happy Dance

If you haven’t ever made your own bread, this is a great place to start.  This is one of those insanely popular, deservedly so, no-knead bread recipes.  Zero intimidation, a little bit of folding and lots of raves at the end, yep, it’s a keeper. The extended rest time gives rise (lol) to a crispy, airy, yummy crust.  The center is soft and pillowy and as you move to the perimeter it takes on a nice crunch.  

I’m sure the flour shortage during the time of COVID was pushed to new heights with this recipe. I used a 00 flour from Central Milling, I was out of KA AP flour.  You could sub bread flour by Gold Medal of Pillsbury as the protein content is a little higher and closer to King Arthur AP flour.  You make the dough, let it rest overnight in the fridge before putting on the final touches, TOPPINGS and then baking.

So a day later, take the dough out of the fridge and  smoosh it into a cast-iron skillet, I used my Staub pan or a 9-inch cake pan would work too.  But, keep in mind a heavy bottom skillet, especially cast-iron, enhances the crispiness.

Toppings

The King Arthur Flour recipe is all about the crust, no toppings so I went in search of a BOSS tomato sauce for the pizza.  First and last stop, Serious Eats.  New York Style Pizza Sauce, easy, tasty, a little spicy, a little sweet, a touch of basil, onion, and oregano, the perfect match.  Then the killer, butter is added to the sauce, which accentuates the crust.  OMGoodness, make this pizza.

Toppings are whatever your heart desires.  Our usual includes sausage and the triple-play of mushrooms, onions, and peppers.  Pre-cook toppings first.  My latest kick is adding arugula or micro-greens to the finished pizza.

Let me reiterate…Make this pizza, SOON.

Crispy Cheesy Pan Pizza

King Arthur Flour 2020 Recipe of the Year Crispy Cheesy Pan Pizza
Course Main Course
Cuisine Italian-American
Keyword Crispy Cheese Pan Pizza
Prep Time 30 minutes
Cook Time 25 minutes
Resting Time 1 day
Servings 6

Equipment

  • Cast-iron skillet or heavy bottom pan

Ingredients

Crust

  • 2 cups King Arthur Unbleached All-Purpose Flour 240g I used 00 flour from Central MIlling
  • 3/4 teaspoon salt
  • 1/2 teaspoon instant yeast or active dry yeast
  • 3/4 cup lukewarm water 170g
  • 1 tablespoon olive oil 13g
  • 1 1/2 tablespoons olive oil for the pan 18g

Toppings

  • 6 ounces mozzarella, grated about 1 1/4 cups, loosely packed* 170g
  • 1/3 to 1/2 cup tomato sauce or pizza sauce 74g to 113g homemade or storebought
  • freshly grated hard cheese and fresh herbs for sprinkling on top after baking optional
  • handful of fresh greens like arugula optional
  • toppings of choice

Tomato Sauce from Serious Eats

    Instructions

    • Weigh your flour; or measure it by gently spooning it into a cup, then sweeping off any excess. I really like using a scale.  Place the flour, salt, yeast, water, and 1 tablespoon (13g) of the olive oil in a medium-large mixing bowl.
    • Stir everything together to make a shaggy, sticky mass of dough with no dry patches of flour, about 1 minute by hand, using a spoon or spatula. Scrape down the sides of the bowl to gather the dough into a rough ball; cover the bowl.
    • After 5 minutes, uncover the bowl and reach a bowl scraper or your wet hand down between the side of the bowl and the dough, as though you were going to lift the dough out. Instead of lifting, stretch the bottom of the dough up and over its top. Repeat three more times, turning the bowl 90° each time. This process of four stretches, which takes the place of kneading, is called a fold.
    • Re-cover the bowl, and after 5 minutes do another fold. Wait 5 minutes and repeat; then another 5 minutes, and do a fourth and final fold. Cover the bowl and let the dough rest, undisturbed, for 40 minutes. Then refrigerate it for a minimum of 12 hours, or up to 72 hours. It'll rise slowly as it chills, developing flavor; this long rise will also add flexibility to your schedule.
    • Refrigerate it for a minimum of 12 hours, or up to 72 hours. It'll rise slowly as it chills, developing flavor.
    • About 3 hours before you want to serve your pizza, prep pan. Pour 1 1/2 tablespoons (18g) olive oil into a well-seasoned cast iron skillet that’s 10” to 11” diameter across the top, and about 9” across the bottom. Heavy, dark cast iron will give you a superb crust; but if you don’t have it, use another oven-safe heavy-bottomed skillet of similar size, or a 10” round cake pan or 9” square pan. Tilt the pan to spread the oil across the bottom, use a brush to spread some oil up the edges, as well.  
    • Transfer the dough to the pan and turn it once to coat both sides with the oil. After coating the dough in oil, press the dough to the edges of the pan, dimpling it using the tips of your fingers in the process. The dough may start to resist and shrink back; that’s OK, just cover it and let it rest for about 15 minutes, then repeat the dimpling/pressing. At this point the dough should reach the edges of the pan; if it doesn’t, give it one more 15-minute rest before dimpling/pressing a third and final time. 
    • Cover the crust and let it rise for 2 hours at room temperature. The fully risen dough will look soft and pillowy and jiggle when you gently shake the pan.
    • About 30 minutes before baking, place one rack at the bottom of the oven and one toward the top (about 4" to 5" from the top heating element). Preheat the oven to 450°F.
    • When you’re ready to bake the pizza, sprinkle about three-quarters of the mozzarella (a scant 1 cup) evenly over the crust. Cover the entire crust completely for those crispy, caramelized edges. Spread small spoonfuls of the sauce over the cheese. The first cheese layer helps prevent sogginess from the sauce. Sprinkle on the remaining mozzarella.
    • Bake the pizza on the bottom rack of the oven for 18 to 20 minutes, until the cheese is bubbling and the bottom and edges of the crust are a rich golden brown (use a spatula to check the bottom). If the bottom is brown but the top still seems pale, transfer the pizza to the top rack and bake for 2 to 4 minutes longer. On the other hand, if the top seems fine but the bottom's not browned to your liking, leave the pizza on the bottom rack for another 2 to 4 minutes. Home ovens can vary a lot, so use the visual cues and your own preferences to gauge when you’ve achieved the perfect bake.
    • Remove the pizza from the oven and place the pan on a heatproof surface. Run a table knife or spatula between the edge of the pizza and side of the pan to prevent the cheese from sticking as it cools. Let the pizza cool a little then transfer to a cooling rack or cutting surface. No soggy crusts.

    New York-Style Pizza Sauce

    Perfect sauce for King Arthur Crispy Chessy Pan Pizza
    Course Main Course
    Cuisine Italian-American
    Keyword New York Style Pizza Sauce
    Prep Time 15 minutes
    Cook Time 1 hour

    Equipment

    • Food mill, food processor, or hand blender

    Ingredients

    • 1 28-ounce can whole peeled tomatoes
    • 1 tablespoon extra-virgin olive oil
    • 1 tablespoon unsalted butter
    • 2 medium cloves garlic grated on microplane grater (about 2 teaspoons)
    • 1 teaspoon dried oregano
    • Pinch red pepper flakes
    • Kosher salt to taste
    • 2 6-inch sprigs fresh basil with leaves attached
    • 1 medium yellow onion peeled and split in half
    • 1 teaspoon sugar

    Instructions

    • Combine butter and oil in medium saucepan and heat over medium-low heat until butter is melted. Add garlic, oregano, pepper flakes, and large pinch salt and cook, stirring frequently, until fragrant but not browned, about 3 minutes.
    • Add tomatoes, basil sprigs, onion halves, and sugar. Bring to a simmer, reduce heat to lowest setting (bubbles should barely be breaking the surface), and cook, stirring occasionally, until reduced by 1/2, about 1 hour.
    • Discard onions and basil stems. Season to taste with salt. Allow to cool and store in a covered container in the refrigerator for up to 2 weeks.

    Notes

    The sauce makes enough for 2 12 inch pizzas so you will have plenty.  Keep the onion, don't discard it.  This sauce would probably work over some pasta too, with that onion!

    Chicken, Woman, Man, Soccer, Beer-Extra Points For Fried (KFC)

    Chicken, Woman, Man, Soccer, Beer-Extra Points For Fried (KFC)

    The Hubster is still on his quest for the perfect fried chicken.  He is getting pretty darn close if you ask me.  This time a recipe for Fried Chicken Wings caught his eye, which was okie-dokie with me.  I love any kind of fried chicken.

    KFC

    When we were in Seoul last year (seems like forever ago), one of the first things we did was hit the streets looking for KFC, no,  not Kentucky Fried Chicken, but Korean Fried Chicken.  We found a place, there are zillions to choose from (there are more fried chicken stores in South Korea than McDonalds in the world, its not even close) that serves Chicken and Beer or Chimaek as it is called.  Apparently, back in the early 2000s, when South Korea made a serious run at the World Cup, Koreans ate a ton of fried chicken and drank a lot of beer while watching the matches.  Their love for KFC persisted after the soccer tourney and whenever a soccer match is broadcasted, chicken sales go crazy in S. Korea.

    Yes, in Myeongdong Market, one of many restaurants, for chicken and beer.  My kinda town.

    I don’t drink beer normally (I’m a wine gal) but it did go REALLY well with the sweet and spicy fried chicken.  Serve wings with savory crackers and radishes for a complete meal-protein, veggies, and starch.  See?

    The Secret to Captain K-runch

    KFC is super crunchy and crispy and the secret to the extra crunch, drum roll please, is twice-fried chicken.  The first fry is to cook and seal the chicken and the second fry is to give it that extra crunch.  The other secret is to use potato starch as part of the batter for the chicken to kick up the crispiness even more.

    The chicken is marinated so its pretty tasty as is after frying, BUT what fun would that be?  I found a delicious sweet and spicy sauce for fried chicken from one of my favorite sites, Korean Bapsang.  We transferred the fried chicken into the sauce and rolled the chicken in the sauce to coat.  So good, it immediately transported me back to our visit to Seoul and having DakGangjeong in the street markets.  맛있는! Delicious!

    Korean Sweet and Crispy Fried Chicken (DakGangjeong)

    How to make Sweet Crispy Crunchy Korean Fried Chicken Wings
    Course Appetizer, Main Course
    Cuisine Korean
    Keyword Crispy, Fried Chicken, Sweet and Spicy
    Prep Time 1 day
    Cook Time 30 minutes

    Equipment

    • Deep Fryer

    Ingredients

    Chicken and marinade

    • 2 to 2.5 lbs chicken wings
    • 1/2 tsp 2 3/4 g salt
    • 1 tsp fresh ginger minced
    • 1/2 tsp Gochugaru Korean chili powder
    • 1 tsp fresh garlic minced
    • 1 Tbsp yellow onion minced or grated
    • 1/4 cup rice wine or sherry
    • cooking oil to deep fry

    Fry Mix

    • 1 cup 125 g potato starch can sub cornstarch for potato starch
    • 1 cup 125 g all purpose flour
    • 1 tsp baking powder optional
    • 1 tsp salt
    • 1 tsp granulated sugar
    • 1 tsp ground ginger
    • 1 tsp Gochugaru powder fine grind not coarse
    • 2 tsp granulated garlic powder
    • 2 tsp granulated onion powder

    The Sauce

    • 1 tablespoon soy sauce
    • 3 tablespoons rice wine or mirin
    • 2 tablespoons apple cider vinegar or rice wine vinegar
    • 1 tablespoon gochujang Korean red chili pepper paste
    • 3 tablespoons honey or corn or rice syrup
    • 2 teaspoons sesame oil
    • 2 tablespoons brown sugar
    • 1 teaspoon minced garlic
    • 1 teaspoon grated ginger
    • pinch pepper

    Instructions

    The Chicken

    • Combine marinade ingredients and add to chicken wings, get in there and mix the marinade into the chicken. Marinade in fridge at least a couple of hours to overnight

    Fry Mix

    • Combine flour and starch and seasonings in a bowl. Mix well.
    • Remove 1/2 cup of dry mix to a separate bowl. This is for the batter. Add approximately 1/2 cup cold water to the 1/2 cup fry mix shoot for pancake bstter like consistency.
    • Heat vegetable oil in a pot big enough to hold a quart and half of oil. Or if you are lucky enough to have a deep fryer-ues as directed. (I don't have one so you are on your own)
    • As the oil heats to 350 degrees. Prep your chicken.
    • Set up your station like this: chicken, wet batter, dry mix, rack. Place chicken pieces in wet batter and coat thoroughly. Take each piece and roll it in the dry mix to coat well, pat down the dry mix on each piece. Place on rack and repeat with remaining pieces.
    • When the oil reaches 350 degrees add chicken a few pieces at a time to fryer. Fry approximately 7-8 minutes until a nice crust forms on the chicken. It will still be pale in color. Remove chicken to rack and continue to all the pieces are fried. Heat oil to 375 degrees. Fry chicken a second time until golden brown about 2 minutes.
    • You can serve chicken as is or coat pieces with the sweet and spicy sauce, my favorite.

    Sweet and Spicy Sauce

    • In a pan large enough to hold the chicken, combine sauce ingredients, and stir well. Bring it to a boil. When it starts to bubble, reduce the heat to medium low, and simmer until it thickens slightly, about 3 to 4 minutes.
    • Add chicken to sauce mixture. Stir to coat and pour onto a platter. Garnish with sesame seeds and diced green onions.

    Egg Dumplings (Gai Don Gok)

    Egg Dumplings (Gai Don Gok)

    One of my favorite homestyle dishes my mom would make is Egg Dumplings or Gai Don Gok.  My mom’s version of Gai Don Gok or Dan Jiao uses her recipe for won tons and replaces the flour wrapper with egg.  Whenever my mom visited she would make a batch of won tons and egg dumplings.  While the kids were at school we would head to the Chinese market for ingredients, pork, shrimp, water chestnuts, and fresh wrappers.  As soon as we got home Mom would set about making the won ton filling.  Half of it was always reserved for egg dumplings.  As soon as she was done wrapping won tons, she started on the egg dumplings.   She wanted to make sure she had a plate of hot dumplings ready and waiting when the kids came bounding through the door.

    Unfortunately, not only is my mom too frail now to make her dumplings but the COVID pandemic has prevented us from visiting her in person.  We are being robbed of precious moments we could spend with her.  Our only consolation is the aggressive measures taken were successful and thankfully she and the other residents remain virus-free.

    Moments of Comfort

    Missing my mom, the memories of making won tons and egg dumplings with her popped into my head.  I felt the urge to make won tons and egg dumplings.  Just like Mom,  I hand-chopped everything-the pork, shrimp, water chestnuts, shrooms, and onions for the filling.  I wrapped wontons and then set about making egg dumplings.  The hubs and kids came walking through the door just as I put the finishing touches on the plate of Gai Don Gok.  Mom would approve.

    I love the combination of pork and shrimp but the filling can be made with all pork.  Substitute ground chicken for a portion of the pork if you like.  That is the beauty of Mom’s Super Duper Won Ton and Everything Filling for egg dumplings, stuffed squash, or meatballs in soup, it is versatile and pretty darn tasty.

    It will take a little bit of practice to make the dumplings unless of course, you are an omelet pro.  Then it will be a piece of cake.  Whip eggs with water (one teaspoon per egg) and set aside.  Have everything next to the stove.  Heat a sufficient amount of oil to generously coat the bottom of the frying pan.  I use a stainless steel pan generously oiled to keep the egg from sticking.  Heat the pan over medium-low heat.  It can’t be too hot or the egg will brown too much before the filling has a chance to cook completely.

    The Dumpling Process

    Use a Chinese soup spoon (this is what mom and millions of other Chinese moms use to measure) or an equivalent (1.25 tablespoon volume) spoon and fill it with the egg mixture.  Pour this into your pan to create a 3-inch circle, lower the heat if the egg cooks too quickly.  Scoop the filling (about 2 teaspoonfuls) and drop it on one side of the egg circle.  Immediately fold the egg over to cover the filling and form a crescent-shaped omelet.  Gently press down the filling to flatten it so it cooks evenly.  Flip the dumpling over and cook to a light golden brown, approximately 30 seconds per side. Push to the side, or transfer to another pan set on low heat to set while cooking additional dumplings.   Serve with ketchup or oyster sauce.  The egg dumplings are delicious in soup just like won tons.

    Egg Dumplings (Gai Don Gok)

    Course Main Course
    Cuisine Asian
    Keyword Egg Dumplings, Gai Don Gok
    Prep Time 30 minutes
    Cook Time 30 minutes

    Ingredients

    Pork & Shrimp Filling

    • 3/4 lb ground pork
    • 1/4 pound fresh shrimp peeled and deveined and roughly diced
    • 4-6 water chestnuts peeled and coarsely chopped, fresh or canned (rinse before using)
    • 3-4 dried shiitake mushrooms soaked, drained and coarsely chopped
    • 2 stalks of green onions coarsely chopped
    • 1 T cilantro leaves finely chopped (optional)
    • 1/2 inch knob of fresh ginger peeled and minced
    • 1 T soy sauce
    • 1 T oyster sauce
    • 1 T rice wine or sherry
    • 1/2 tsp. sugar
    • 1 tsp cornstarch
    • 1/2 tsp. salt and 1/2 tsp white pepper
    • 1/2 tsp sesame oil optional

    Egg Wrap

    • 4 large eggs, slightly beaten plus 1 t water per egg substitute stock for water

    Instructions

    To Make Filling:

    • Place ground pork and shrimp in a medium sized bowl. Add seasonings. Using chopsticks or a spoon, stir the mixture in one direction until the ingredients are well combined. Transfer half of the filling to a bowl. Reserve the other half for won tons.
    • You can pre-shape the filling into little balls to have ready for frying the dumplings or scoop little balls while you are frying if you like.

    To Make Egg Dumplings

    • Break eggs into a bowl, add water and beat until thoroughly combined. Place the filling and egg mixtures by stove. If water is used, add a dash of salt and pepper to the egg mixture. Omit salt if stock is used.
    • Heat a stick-resistant or non-stick skillet over medium low heat. Add 1-2 tablespoons of vegetable oil to the pan. I use a steel pan with a generous amount of oil to coat the bottom.
    • Using a large spoon (or Chinese soup spoon) spoon approximately 1.5 tablespoons of egg mixture into the pan to form a circle. Cook about 10 seconds, when the egg edge is set, place 2 teaspoons of filling on one side the egg. Using a spatula and fork, fold the other side of the egg over the filling and gently press down. Cook for 15 seconds and flip. Cook 30-45 seconds on the second side. If the filling seems soft and not quite done, continue to flip and cook. The dumplings should be a golden color. Adjust heat so the filling cooks through and the egg doesn't brown too much.
    • Transfer the dumpling to another pan set on low heat. This keeps the dumplings warm and ensures they cook through. Continue to cook additional dumplings.
    • Serve with ketchup or oyster sauce.

    Just Peachy Cream Scones

    Just Peachy Cream Scones

    Ripe for the Picking

    Peaches and nectarines are showing up at the farmer’s market in full force now. Summer is in full swing and the delicious scent of summer fruits-peaches, melons, and berries permeate the air. Even with my COVID mask on I catch whiffs of the heady aroma of vine-ripened fruit.  

    I came home with way too many peaches and nectarines of course. After eating more than a couple out of hand I decided it was time to change it up.  I saw a recipe in the NYT for a peach loaf bread but that would mean having the oven on for a very long time, way too hot for that.  How about scones?  I can make Dorie’s Cream Scones and throw in peaches in place of currants and fortunately, they bake in a jiffy. 

    Dorie’s Cream Scones is my go-to recipe, I have made it with dried cranberries and orange zest, dried blueberries and lemon, or freeze-dried strawberries.  It lends itself well to variations. But fresh fruit?  A little trickier.  I diced the skinned peach and placed it in the freezer while I made the dough.  I used one cup of diced peaches which is conveniently about 1 peach. 

    Partially freezing the peaches (don’t use commercially frozen peaches, those have too much liquid), prevents the peaches from getting smooshed when you fold them into the dough.  I tossed them in when I added the liquid to the dry ingredients but it would be better to add the liquid, blend it to a shaggy mess, then add the peaches as you bring the dough together.

    Pearls of Sconedom

    Fresh fruit is less focused in sweetness and flavor than dried fruit.  I liked the peaches but they would benefit from a couple of “flavor amplifiers”.  Next time I will add a teaspoon of vanilla or 1/2 teaspoon of almond extract to the dough.  I was lazy so I did not put a wash on the scones.  My bad, do not skip this. Brush an egg-wash or heavy cream on the scones before baking and sprinkle them generously with turbinado or sparkling sugar.  This adds both crunch and sweetness.  Another variation to jazz these scones up, finely diced candied or crystallized ginger would be ah-mazing, use about 2 tablespoons.  

    Make these scones an hour or two before you serve them. I like them at room temperature, the flavor, and texture set up nicely.  They are often served warm too, just not my preference.  Scones are drier than biscuits which means they are perfect with a spoon of jam and dollop of clotted cream-scone heaven.  If you don’t have clotted cream, you can use creme fraiche, mascarpone, or butter.

    Whaddya waiting for, go make some scones!

    Dorie Greenspan's Cream Scones

    Dorie's classic cream scones with fresh peaches
    Course Biscuits and scones, Breakfast, Dessert
    Cuisine American, British
    Keyword Cream Scones, Dorie Greenspan, Scones
    Prep Time 20 minutes
    Cook Time 22 minutes

    Ingredients

    Dry Ingredients:

    • 2 cups all-purpose flour
    • 2 Tablespoons granulated white sugar
    • 1 Tablespoon baking powder
    • 1/2 teaspoon salt
    • 5 Tablespoons unsalted butter chilled & cut into small pieces

    Wet Ingredients:

    • 1 large egg
    • 2/3 cup heavy whipping cream
    • 1 tsp vanilla extract optional

    Adds:

    • 3/4-1 cup fresh fruit-peaches, nectarines, strawberries, berries larger fruit-diced and left to drain on a paper towel while making dough.

    Egg wash:

    • 2 tbsp heavy cream or egg wash
    • turbinado or sparkling sugar

    Accompaniments

    • jam or preserves serving
    • clotted cream substitute creme fraiche or mascarpone

    Instructions

    • Center a rack in the oven and preheat the oven to 400°F.
    • Line a baking sheet with parchment
    • In a small bowl, stir the egg, cream and vanilla (if using) together.
    • Whisk the flour, sugar, baking powder and salt together in a large bowl.
    • Drop in the butter and, using your fingers, toss to coat the pieces of butter with flour. Quickly, working with your fingertips or a pastry blender, cut and rub the butter into the dry ingredients until the mixture is pebbly.
    • Pour the egg, cream and currants over the dry ingredients and stir with a fork just until the dough, which will be wet and sticky, come together. Don't overdo it. Still in the bowl, gently knead the dough by hand, or turn it with a rubber spatula 8 to 10 times.
    • You can also use a food processor. Place dry ingredients in bowl, pulse 1-2 twice to mix. Add butter and pulse 5-6 times until mixture looks like crumbs. Add egg/cream and pulse to dough just begins to clump. Do not overmix! Take mixture out of processor bowl, fold in peaches and shape dough into circles, proceed as below.
    • Lightly dust a work surface with flour and turn out the dough. Divide it in half. Working with one piece at a time, pat the dough into a rough circle that's about 5 inches in diameter, cut it into 6 wedges and place it on the baking sheet.
    • Brush scones with heavy cream and sprinkle with sugar
    • Bake the scones for 20 to 22 minutes (start checking at 15 min) or until their tops are golden and firm. Transfer them to a rack and cool for 10 minutes before serving, or wait for them to cool to room temperature.
    • The scones can be frozen on the baking sheet as the cut wedges, then wrapped airtight. Don't defrost before baking- just add about 2 minutes to the baking time.
    • Serve with jam and clotted cream or butter

    Notes

    Great combinations include:
    Sub dried blueberries and lemon, add 1 tsp lemon zest
    Sub dried cranberries and orange add 1-2 tsp orange zest
    Sub fresh fruit for currants:
    blueberries, strawberries
    cut fruit-partially freeze diced fruit before adding to dough

    Lemon Icing

    • 1 cup (120gconfectioners’ sugar
    • 3 Tablespoons fresh lemon juice (about 1 large lemon)

    Tomato Egg Soup (Souper Easy, Soul Food)

    Tomato Egg Soup (Souper Easy, Soul Food)

    My favorite category for foods is not dessert.  Nope, its soup. I LOVE soup. To the age-old question if you were stranded on a desert island and could only have three things…soup would most definitely be on my list.

    Growing up, my dad almost always made soup with dinner.  Weeknight dinners meant a quick soup like Corn Soup or Egg Drop Soup.  This is a twist on egg drop soup. With tomato season in full swing, this is the perfect time to make Tomato Egg Drop Soup.

    I adapted a recipe I found on The Woks of Life, a fabulous blog/website for Asian recipes and stories.  My version includes a bit of ground meat for flavor and texture because that’s the way my Dad made it.  The cornstarch slurry gives the soup a bit of body, you can leave it out if you wish.  This is great as a noodle soup also.  Delicious with rice noodles, hand-pulled noodles.

    The Key

    The key to this recipe is not just great tomatoes, but how to create the ribbons of egg in the soup. The direct translation of the name is actually Egg Flower Soup as the egg resembles a flower.  When adding the egg, make sure the soup is on low heat so that the soup is at a gentle simmer.  Add the egg in a slow steady stream as you swirl the soup in ONE DIRECTION with either chopsticks or a spoon. If you move your utensil in different directions you will not get the ribbons of egg.  You can hold the soup at a gentle simmer, do not boil the soup as that can curdle the egg. Garnish with green onions or cilantro, I like both.

    Try this quick and easy homey soup, I think you’ll like it.

    Tomato Egg Drop Soup

    A delicious quick and easy soup, Tomato Egg Drop Soup is a rift on the classic Egg Drop Soup
    Course Soup
    Cuisine Asian
    Keyword Tomato Egg Drop Soup
    Prep Time 15 minutes
    Cook Time 15 minutes
    Servings 4

    Ingredients

    • 2 tablespoons oil
    • 10 ounces tomatoes, peeled 1 large or 3-4 small, about 280g; cut into small chunks
    • 2 cups chicken stock 480 ml
    • 2 cups water or more chicken stock; 480 ml, low-sodium if using canned
    • 2 teaspoons light soy sauce
    • 1/2 teaspoon sesame oil
    • 1/4 teaspoon white pepper
    • salt to taste
    • 1 egg beaten
    • 1 1/2 teaspoons cornstarch mixed with 2 tablespoons cold water or broth
    • 1 scallion finely chopped
    • 2 tablespoons cilantro chopped, optional

    Protein Option

    • 1 Tbsp Vegetable oil
    • 1/2 Cup Ground beef preferably can substitute ground pork or chicken

    Marinade

    • 1 Tsp Soy sauce regular or light
    • 1 Tsp Oyster sauce
    • 1 Tsp Rice wine
    • 1 slice fresh ginger smash to release flavor
    • 1/4 Tsp Granulated sugar
    • 1/4 Tsp Salt
    • dash White pepper

    Instructions

    • Combine seasonings for meat mixture, mix with ground meat Let sit for 10 minutes. Heat 1 tablespoon oil in 3-4 qt pot over medium heat. Add ground beef and sauté’ just until meat loses pinkness. Remove from pot and reserve.
    • In the same pot, heat 2 T oil over medium low heat. Add the tomato chunks and stir-fry for 5 minutes until the tomatoes are softened and start to fall apart. Add meat mixture back to pot.
    • Add in 1 cup chicken stock, 2 cups water, 2 teaspoons light soy sauce, 1/2 teaspoon sesame oil, 1/4 teaspoon ground white pepper and salt to taste. Add the meat back to soup. Bring to a boil, and then lower the heat so that the soup is simmering with the lid on. Allow soup to simmer for 10-15 minutes.
    • Beat the egg in a small bowl and prepare the cornstarch slurry in a separate bowl.
    • Use chopsticks or a spoon to slowly swirl the soup in a whirlpool motion in one direction only. Keep swirling as you pour in the cornstarch slurry until well incorporated. Pour a thin stream of egg into the middle of the whirlpool as you swirl the soup with your chopsticks. This will create the ribbons of egg characteristic of egg drop soup.
    • Ladle soup into bowls and garnish with green onions and cilantro. Serve immediately

    Notes

    Blanch tomatoes in boiling water to remove the skin before cutting into quarters.  Once added to soup the skin separates from the rest and you are left with fibrous skin in your soup. It's better to remove the skin despite being more work.