Category: Book Reviews

Review of books I have read or listen to!

Blueberry Muffins-Humming a New Tune

Blueberry Muffins-Humming a New Tune

Now don’t get me wrong, I have not just been getting tomatoes at the Farmer’s Market.  Nope, my first stop is the blueberry stand.  I love those little blue gems and find myself throwing them in salads, eating them out of hand, and feeding them to Moose (Jamie’s dog, not actual moose).  But my favorite thing?  Making blueberry pastries like snacking cakes, hand pies, cobblers and of course MUFFINS!  A couple of weeks ago I made Smitten Kitchen’s Blueberry Muffins, easy and pretty darn tasty BUT I just found another recipe that I LOVE.  From the blog, Hummingbird High by Michelle Lopez, Levain Bakery Blueberry Muffins.  Bursting with blueberries, tender, and a bit cakier in texture, fine crumbed with a fantastic crunchy top, to die for.

If her version of Levain Bakery’s Blueberry Muffin is any indication of the scrumptiousness of Levain Bakery’s pastries-I am making a beeline there when I am in New York (which will be soon since I now have a kid living there-oh happy day).  I hear they have a decent Chocolate Chip Cookie too, lol.  This muffin is so good it prompted me to pull out her cookbook (of course I have it-Silly), Weeknight Baking to try more of her recipes.  Her recipes are easy to follow and provide detailed information even a novice baker will be successful.

Beat butter and sugar until light and fluffy

Pros and Cons

The Smitten Kitchen muffin gets the nod for quick and easy.  Melt butter and stir all the ingredients together.  How simple is that?  While good right after they come out of the oven, they tend to fall off the scrumptious curve quickly.  SK’s suggestion is to split, toast and butter the next day, I agree.

The batter is not as stiff or thick as SK’s batter but dense enough so the blueberries do not sink to the bottom.

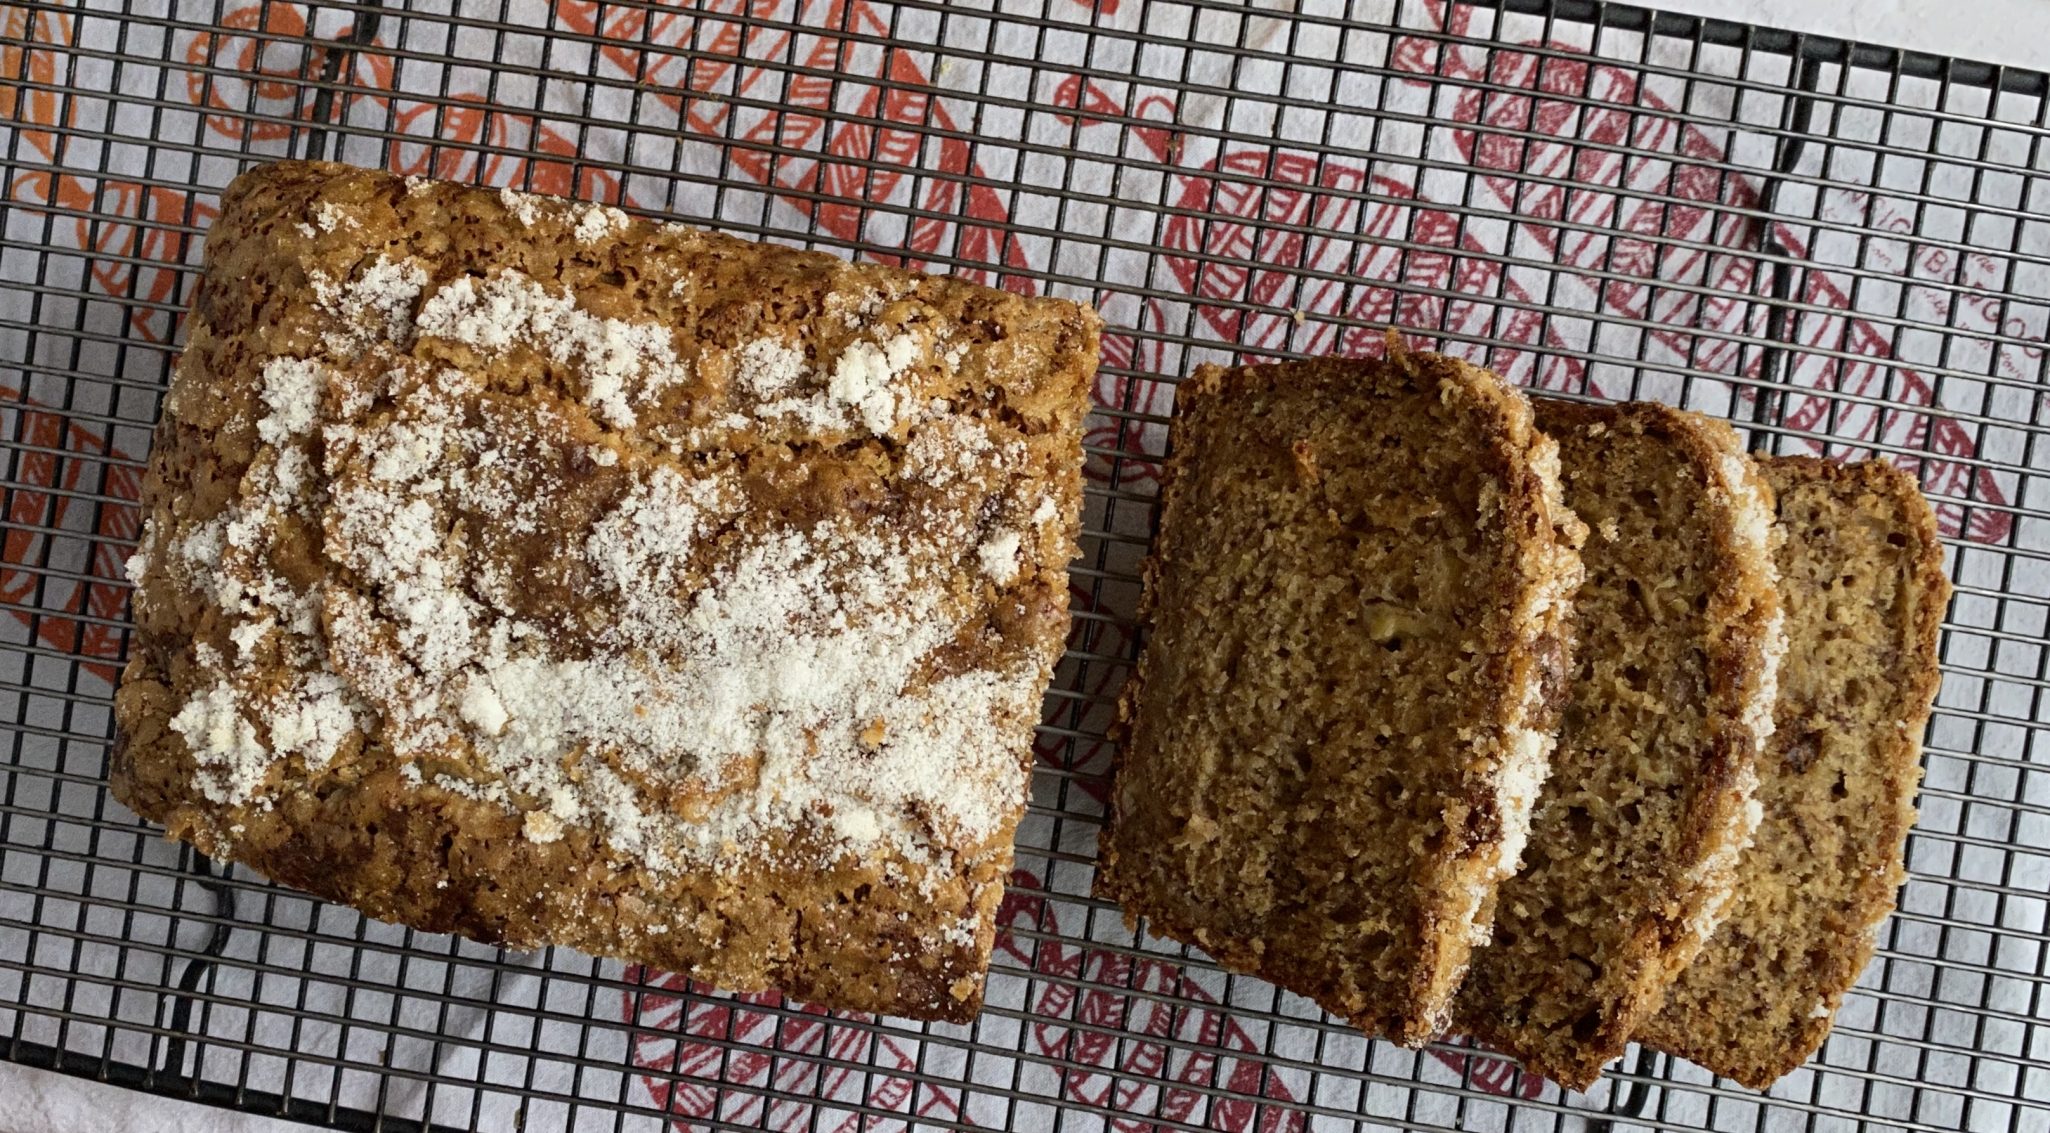
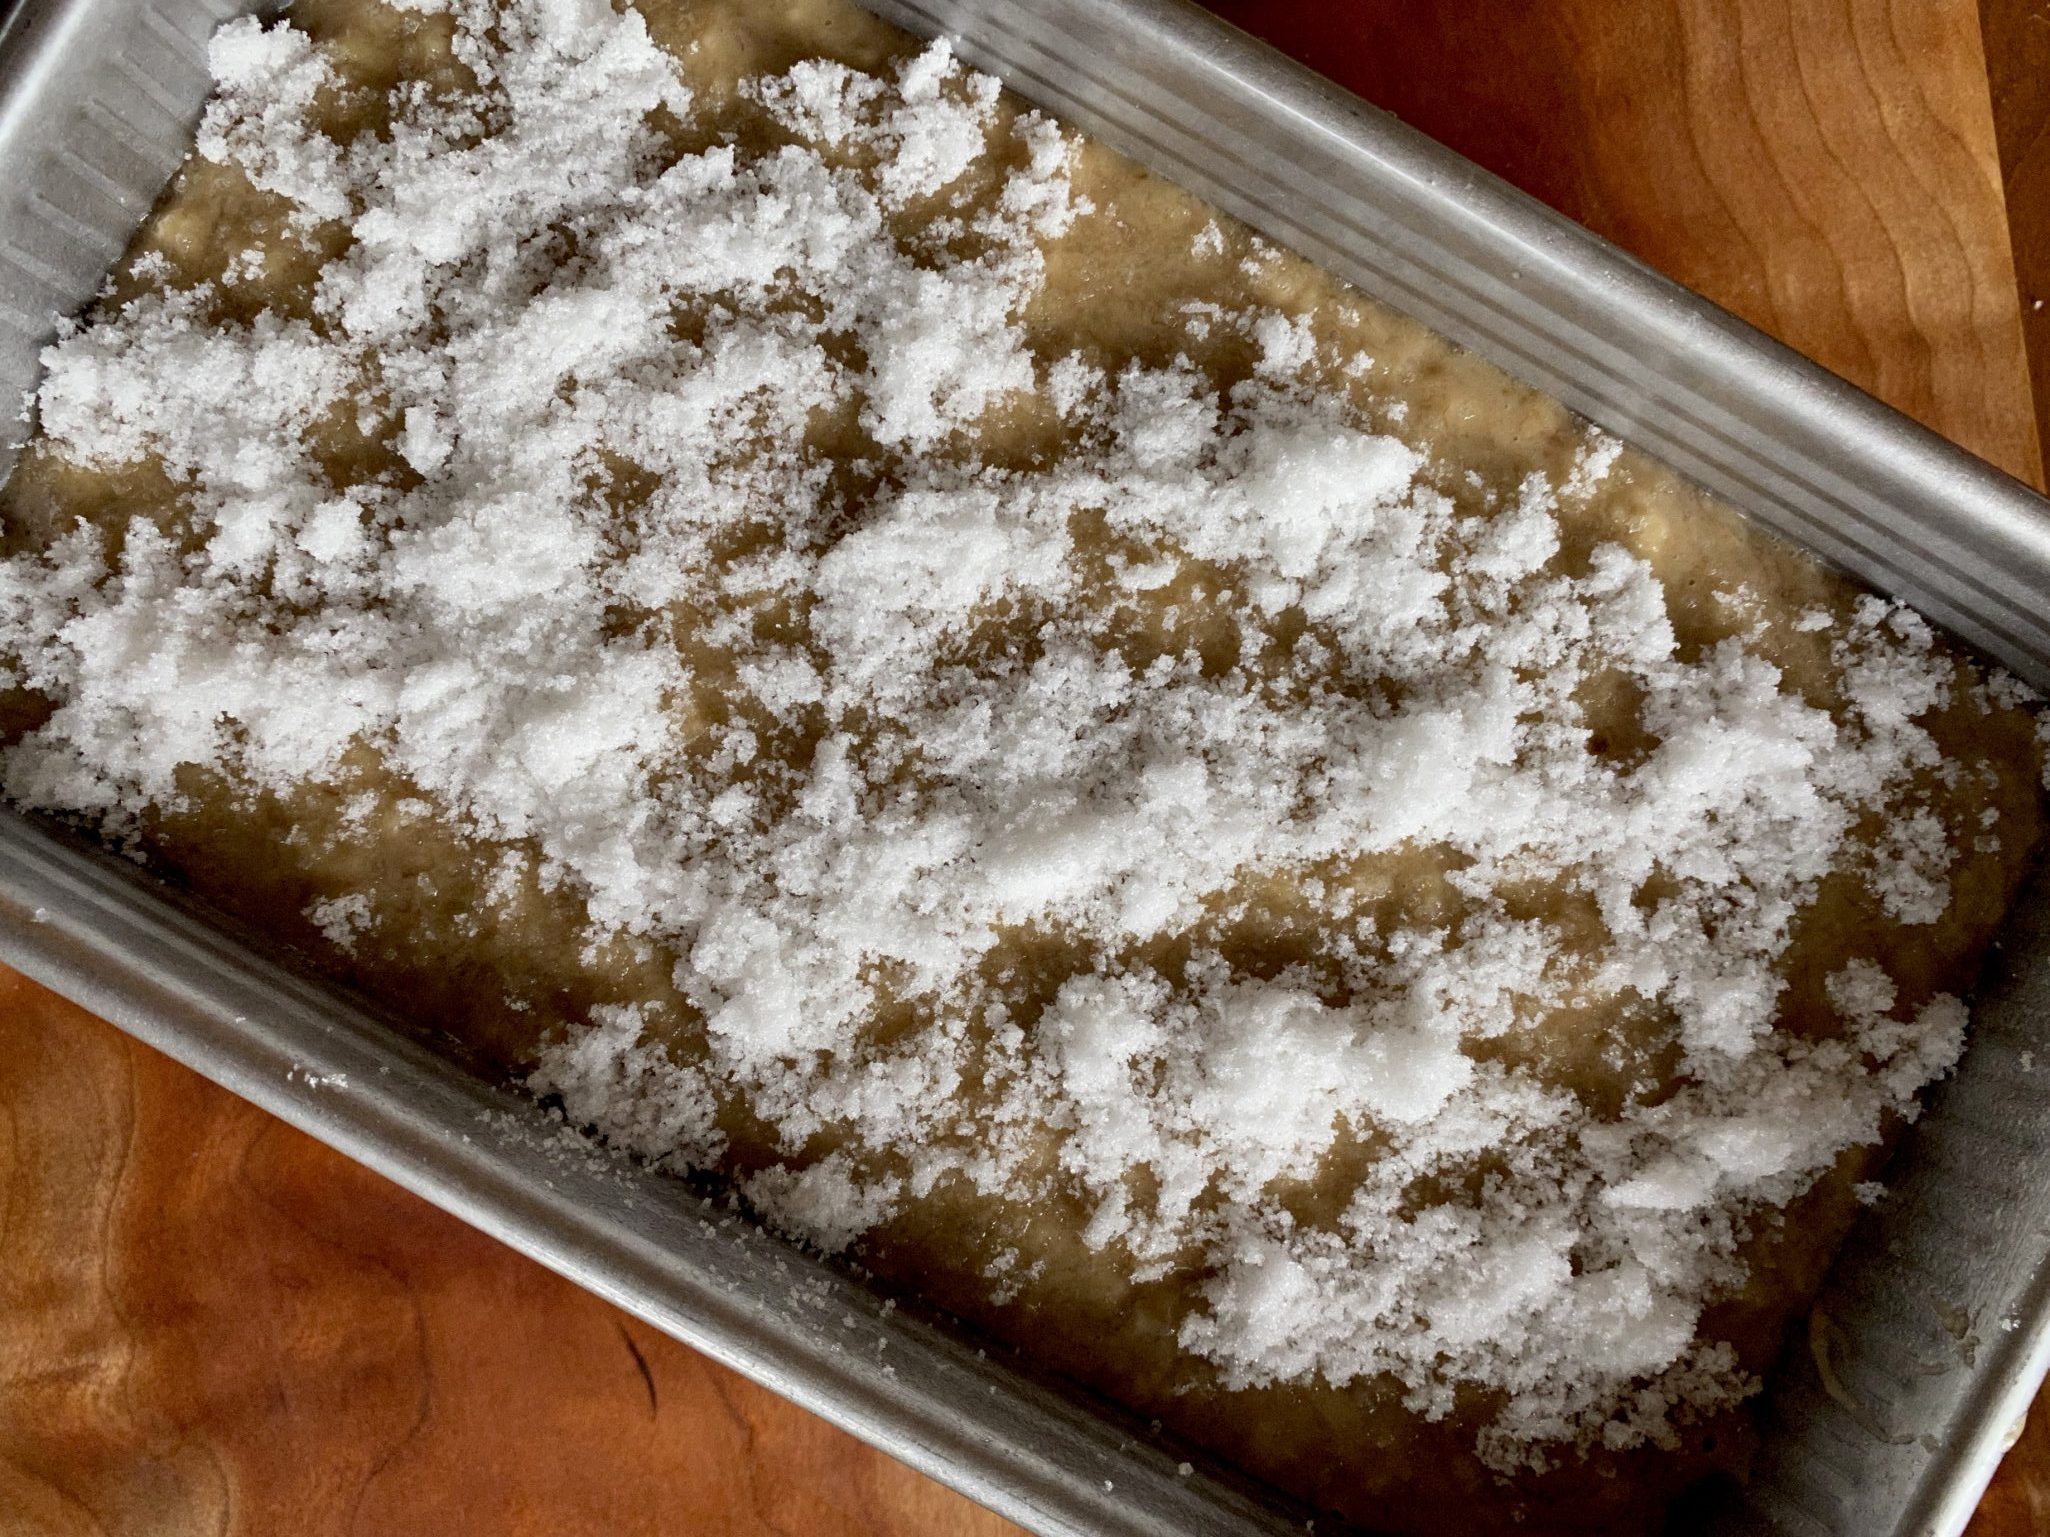
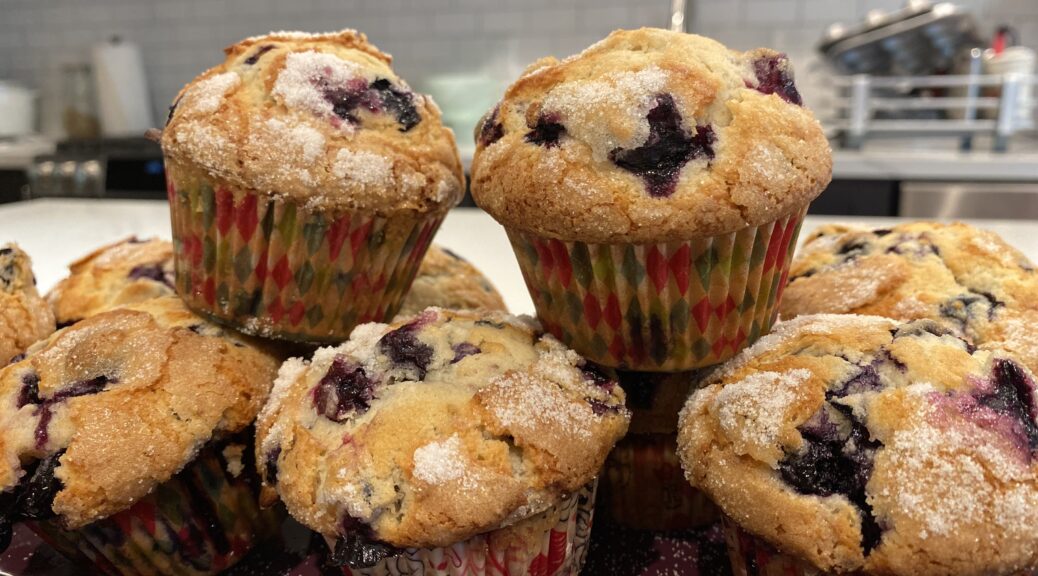
The homage to Levain Bakery’s is absolutely delicious.  Moist, bursting with blueberries, and tender from the addition of almond flour.  The top is crunchy from the generous sprinkling of sugar which you can up by using raw sugar.  Crispy edges with a classic pointy dome, it is one impressive muffin.  But, it is a bit more work than the SK version.  Butter is creamed with sugar and the batter should rest an hour before baking.  So if you are looking for a freshly baked morning treat..get up early for this blueberry bad boy.  The cake part of the muffin holds up well but the top loses its crunch after a day.  I use paper liners because…well, I’m lazy.  The original recipe does not use paper and notes that it changes the outside texture.  What are ya gonna do? 🤷🏻‍♀️

I’m keeping both muffin recipes in my repertoire, a quick fix muffin and the out to impress late morning Sunday Brunch muffin. After all, you should always be prepared!  Make either of these recipes, guaranteed to chase away the blues-berries.

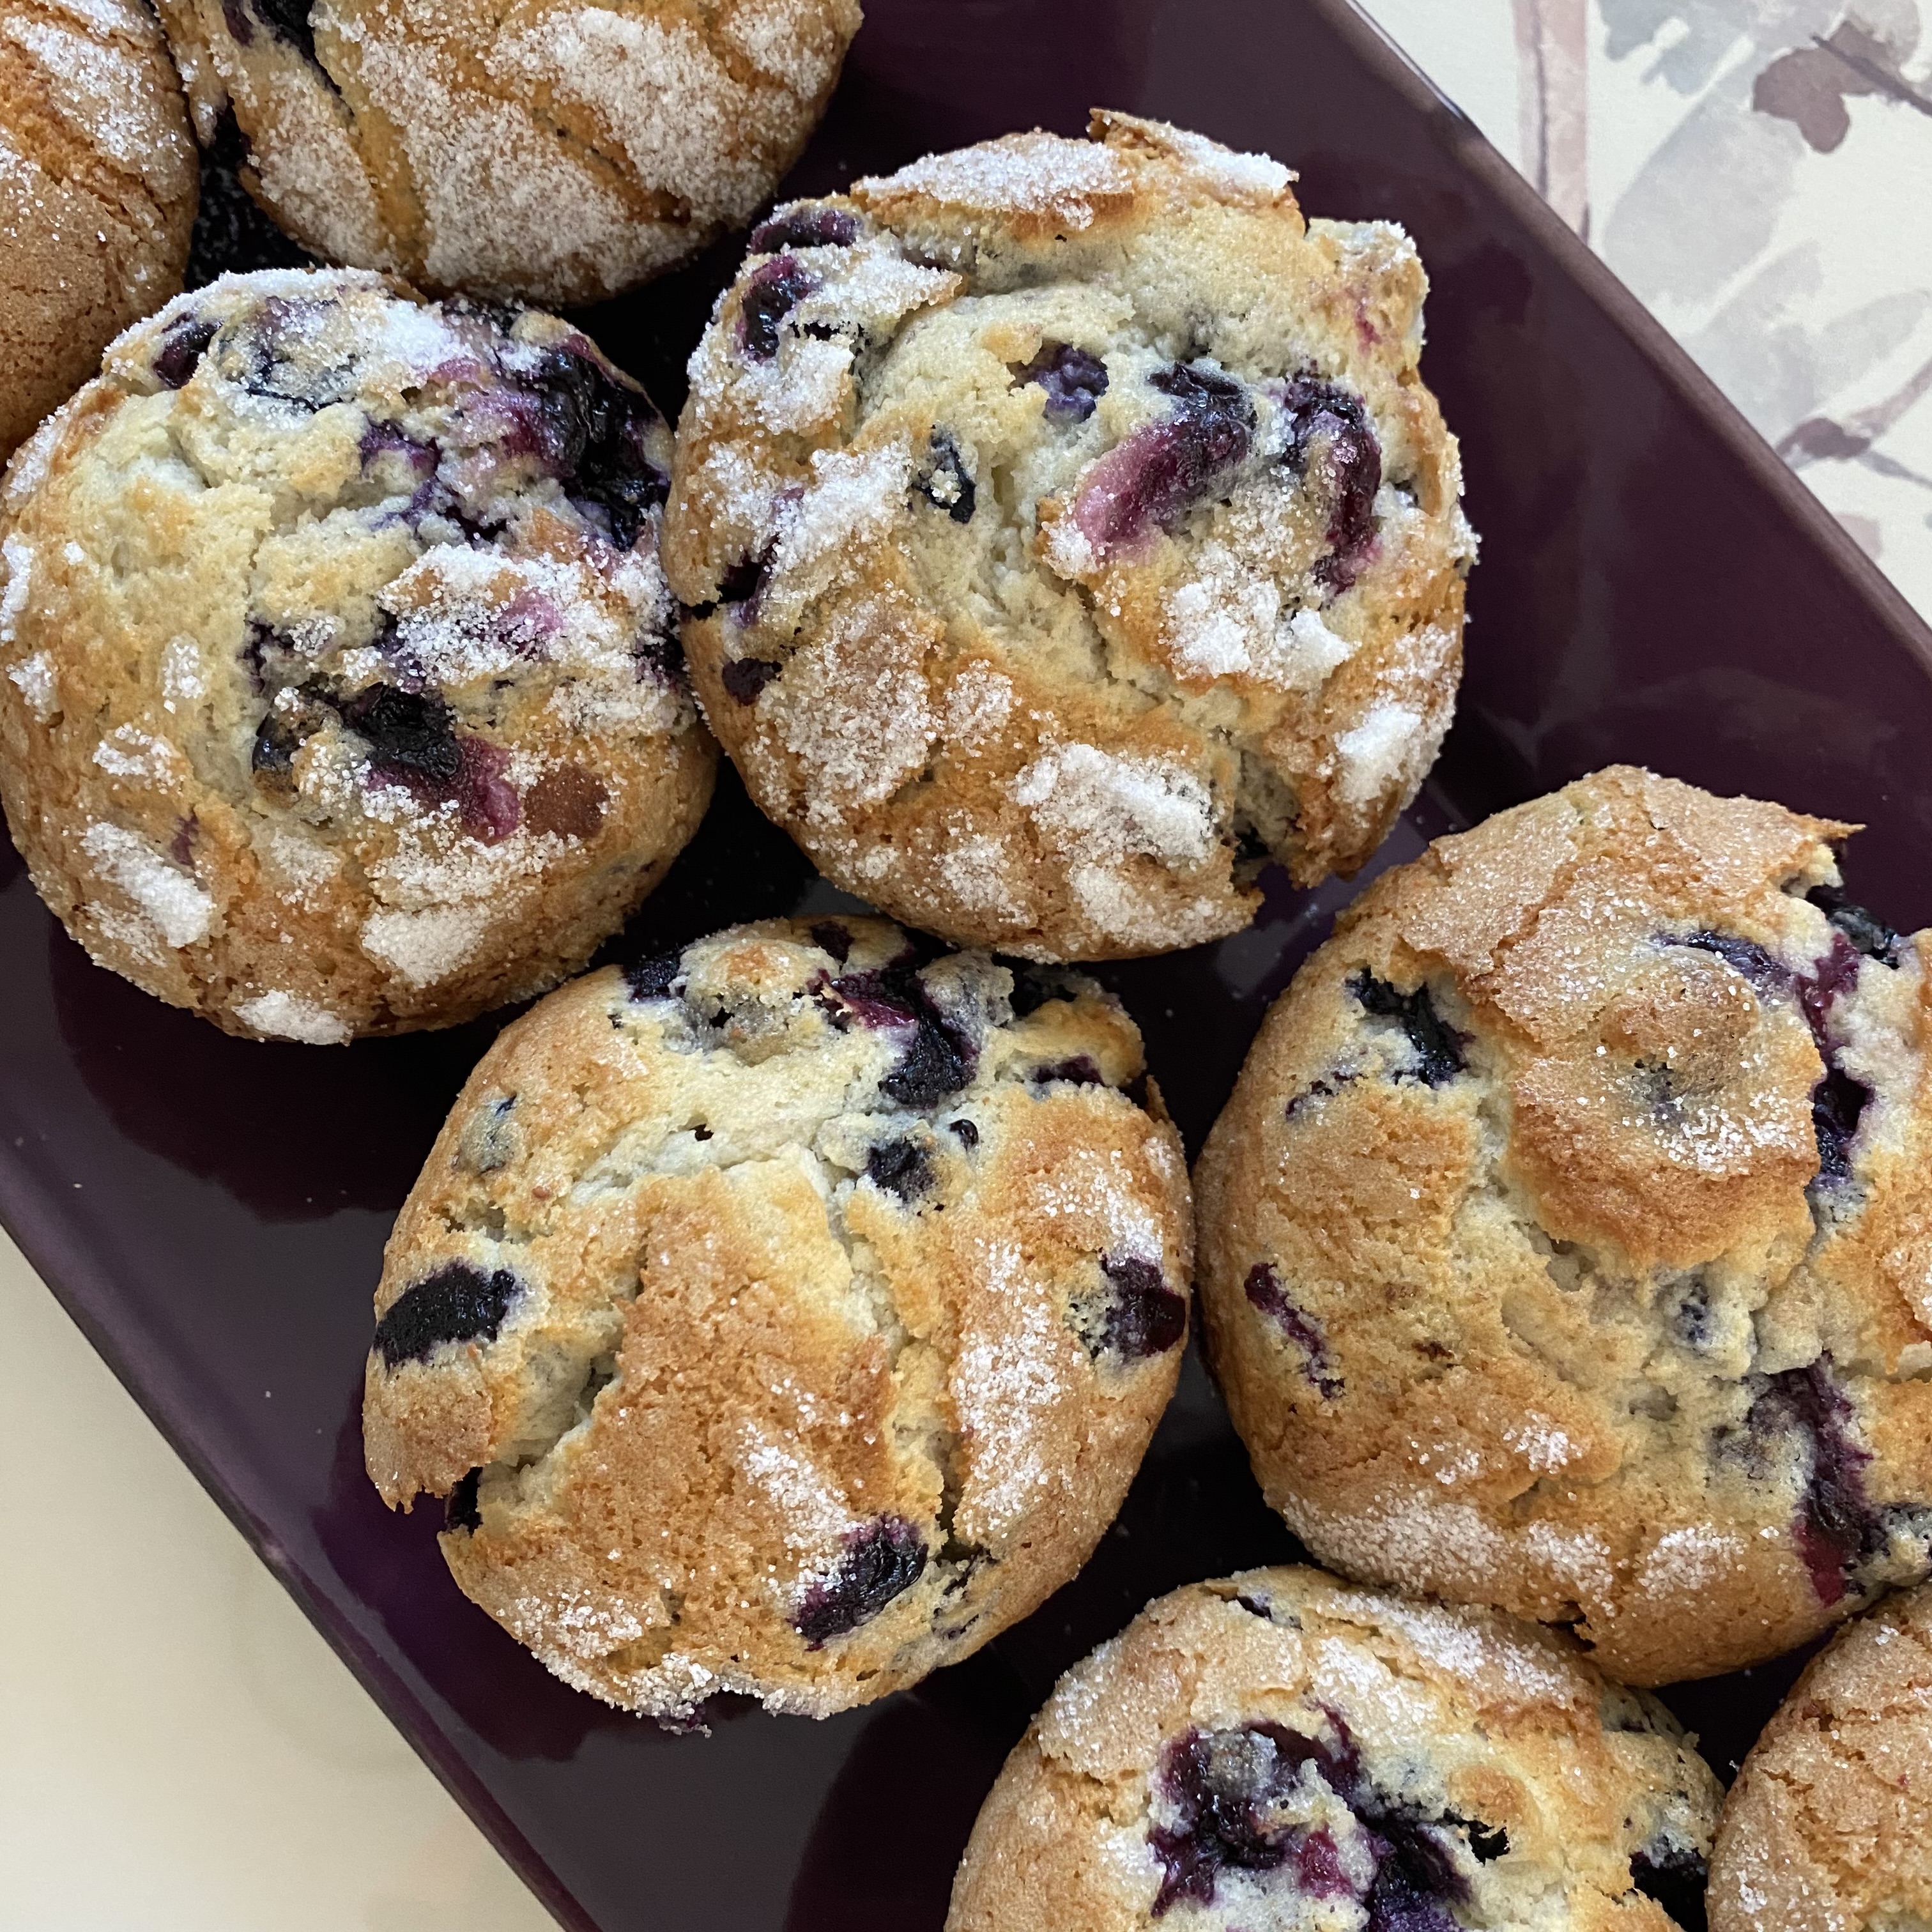
Mine did not have the super domed peak but that may be because I did not fill the muffin tin as much as Hummingbird High’s.  I ended up with 11 muffins.  Fill for 9 to get the domed top.  But they’re still “purdy” and tasty.

Levain Bakery Blueberry Muffins

From Hummingbird High, fabulous blueberry muffins, her take on NYC's Levain Bakery
Course Breakfast, Dessert
Cuisine American
Keyword Blueberry Muffins, Hummingbird High, Levain Bakery
Prep Time 1 hour 20 minutes
Cook Time 30 minutes
Servings 9 servings

Ingredients

Dry Ingredients

  • 2 cups all-purpose flour 9 ounces or 255 grams
  • ½ cup almond meal or almond flour 1.75 ounces or 50 grams
  • 2 teaspoons baking powder
  • ½ teaspoon kosher salt

Wet Ingredients

  • ½ cup whole milk, at room temperature 4 ounces or 113 grams
  • 1 teaspoon pure vanilla extract
  • 1 cup granulated sugar 7 ounces or 198 grams
  • ½ cup unsalted butter, at room temperature 4 ounces or 113 grams
  • 2 large eggs at room temperature
  • 2 ½ cups fresh blueberries, at room temperature 13 ounces or 369 grams
  • For the Garnish
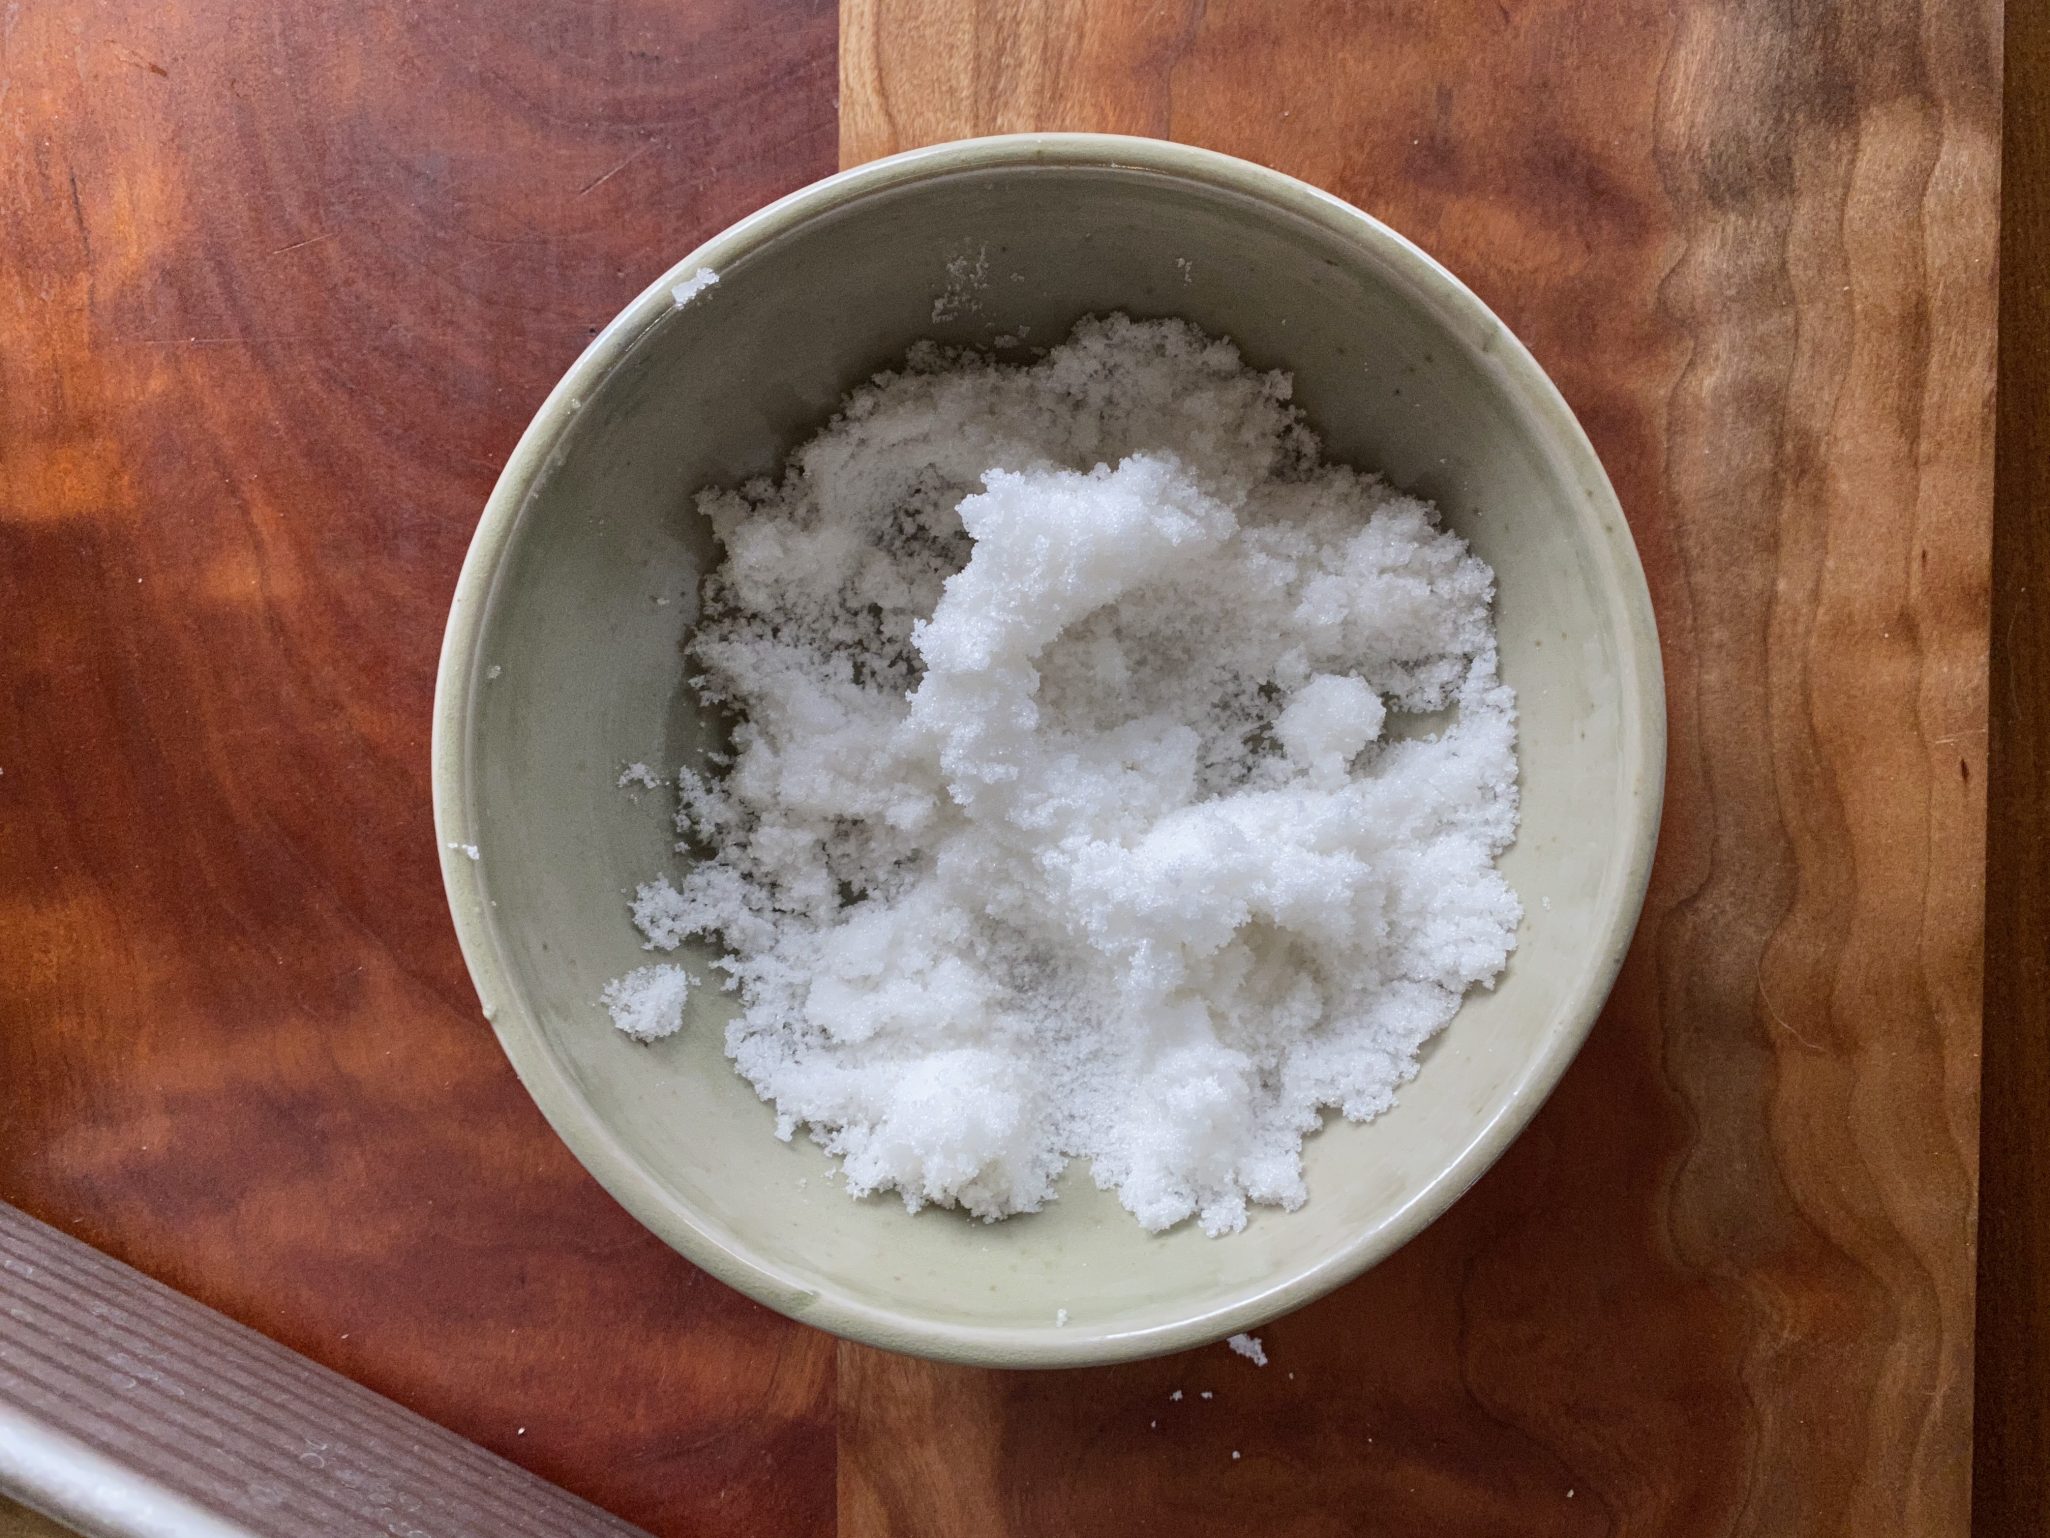
  • 9 teaspoons granulated sugar If you want more crunch use raw or turbinado sugar

Instructions

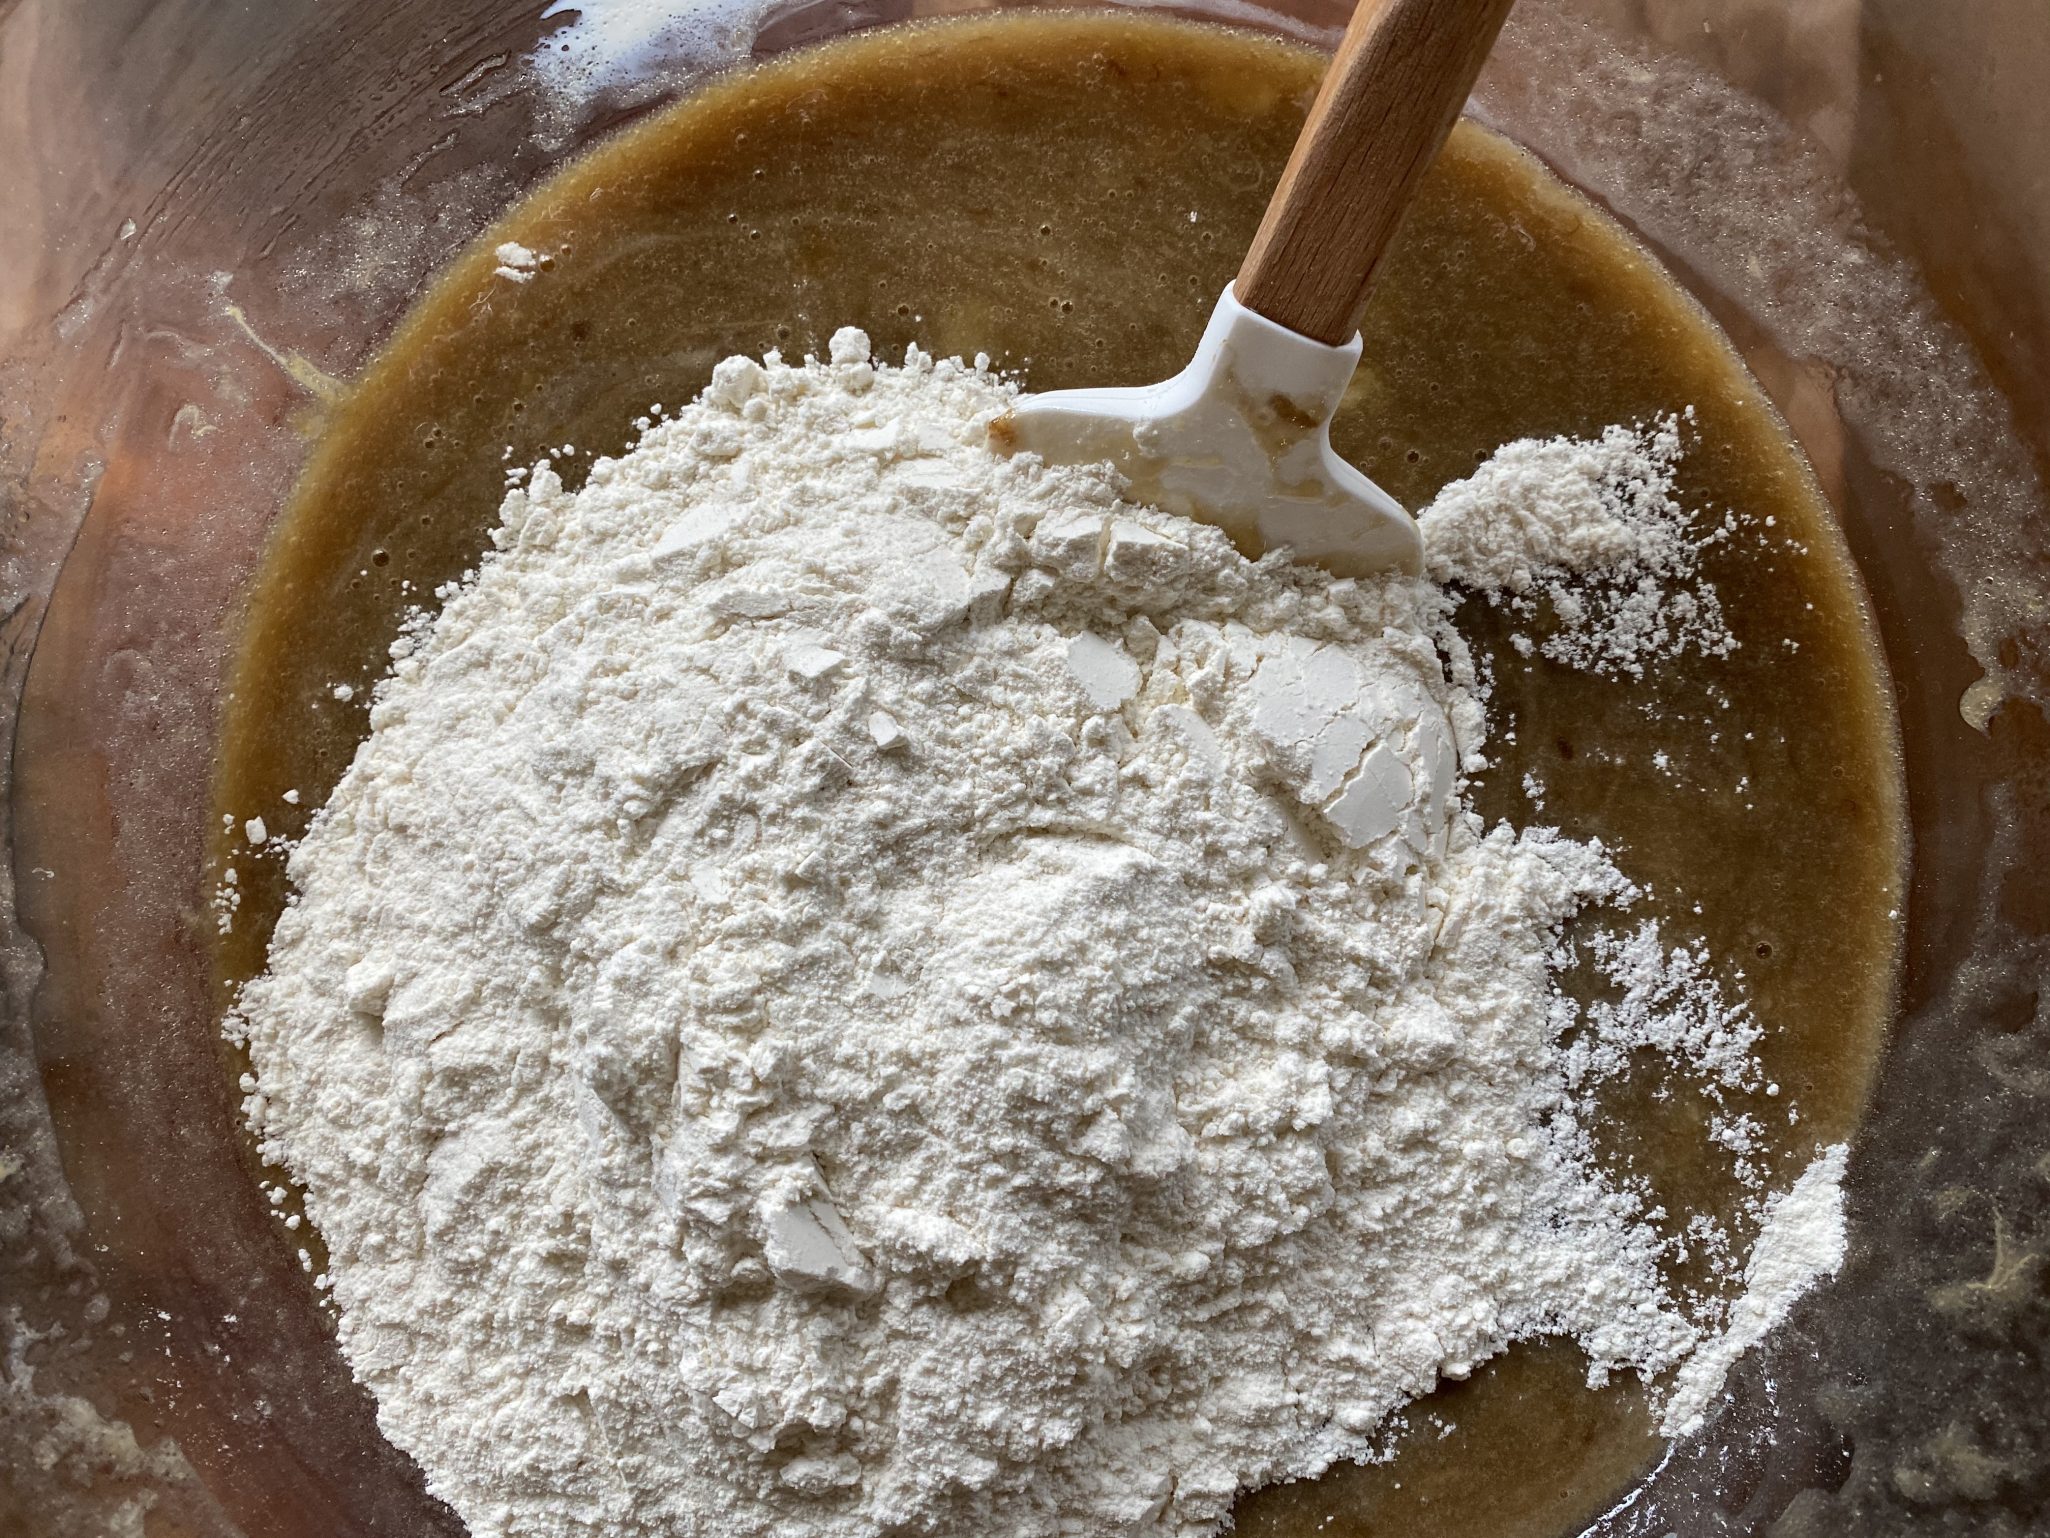
  • In a medium bowl, whisk together the flour, almond meal, baking powder, and salt. Set aside.
  • In a small liquid measuring cup, whisk together the milk and the vanilla. Set aside.
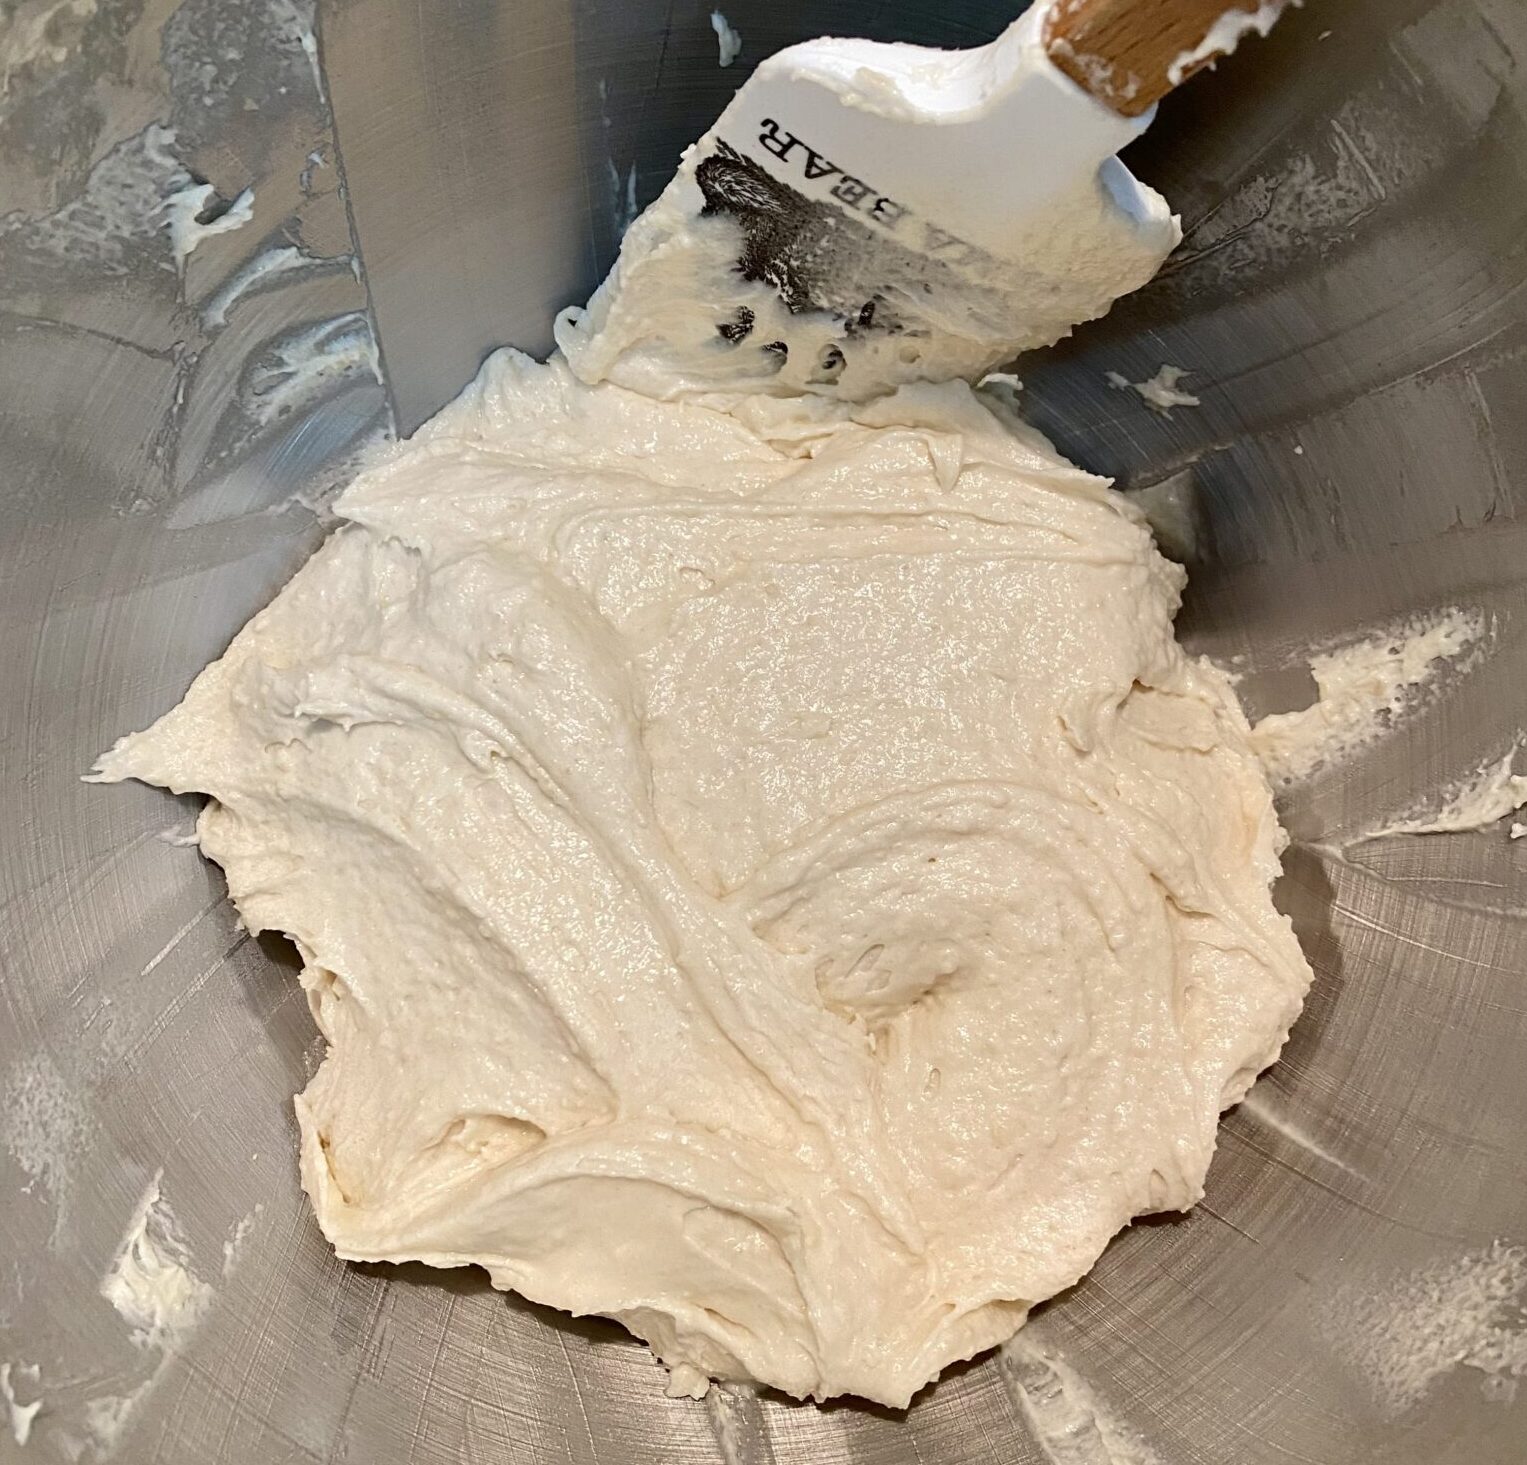
  • In the bowl of a stand mixer fitted with the paddle attachment, combine the sugar and butter. Beat on medium-high until light, fluffy, and doubled in volume, 2 to 3 minutes, using a rubber spatula to scrape down the bottom and sides of the bowl as necessary.
  • Reduce the mixer to low and add the eggs one at a time, adding the next egg only after the previous one is fully incorporated, scraping down the bottom and sides of the bowl after each addition.
  • With the mixer still on low, add the dry ingredients in three equal parts, alternating with the wet ingredients in two parts. Start & end with the flour mixture. Beat until just combined, then scrape down the bottom and sides of the bowl once more then beat on low for an additional 30 seconds.
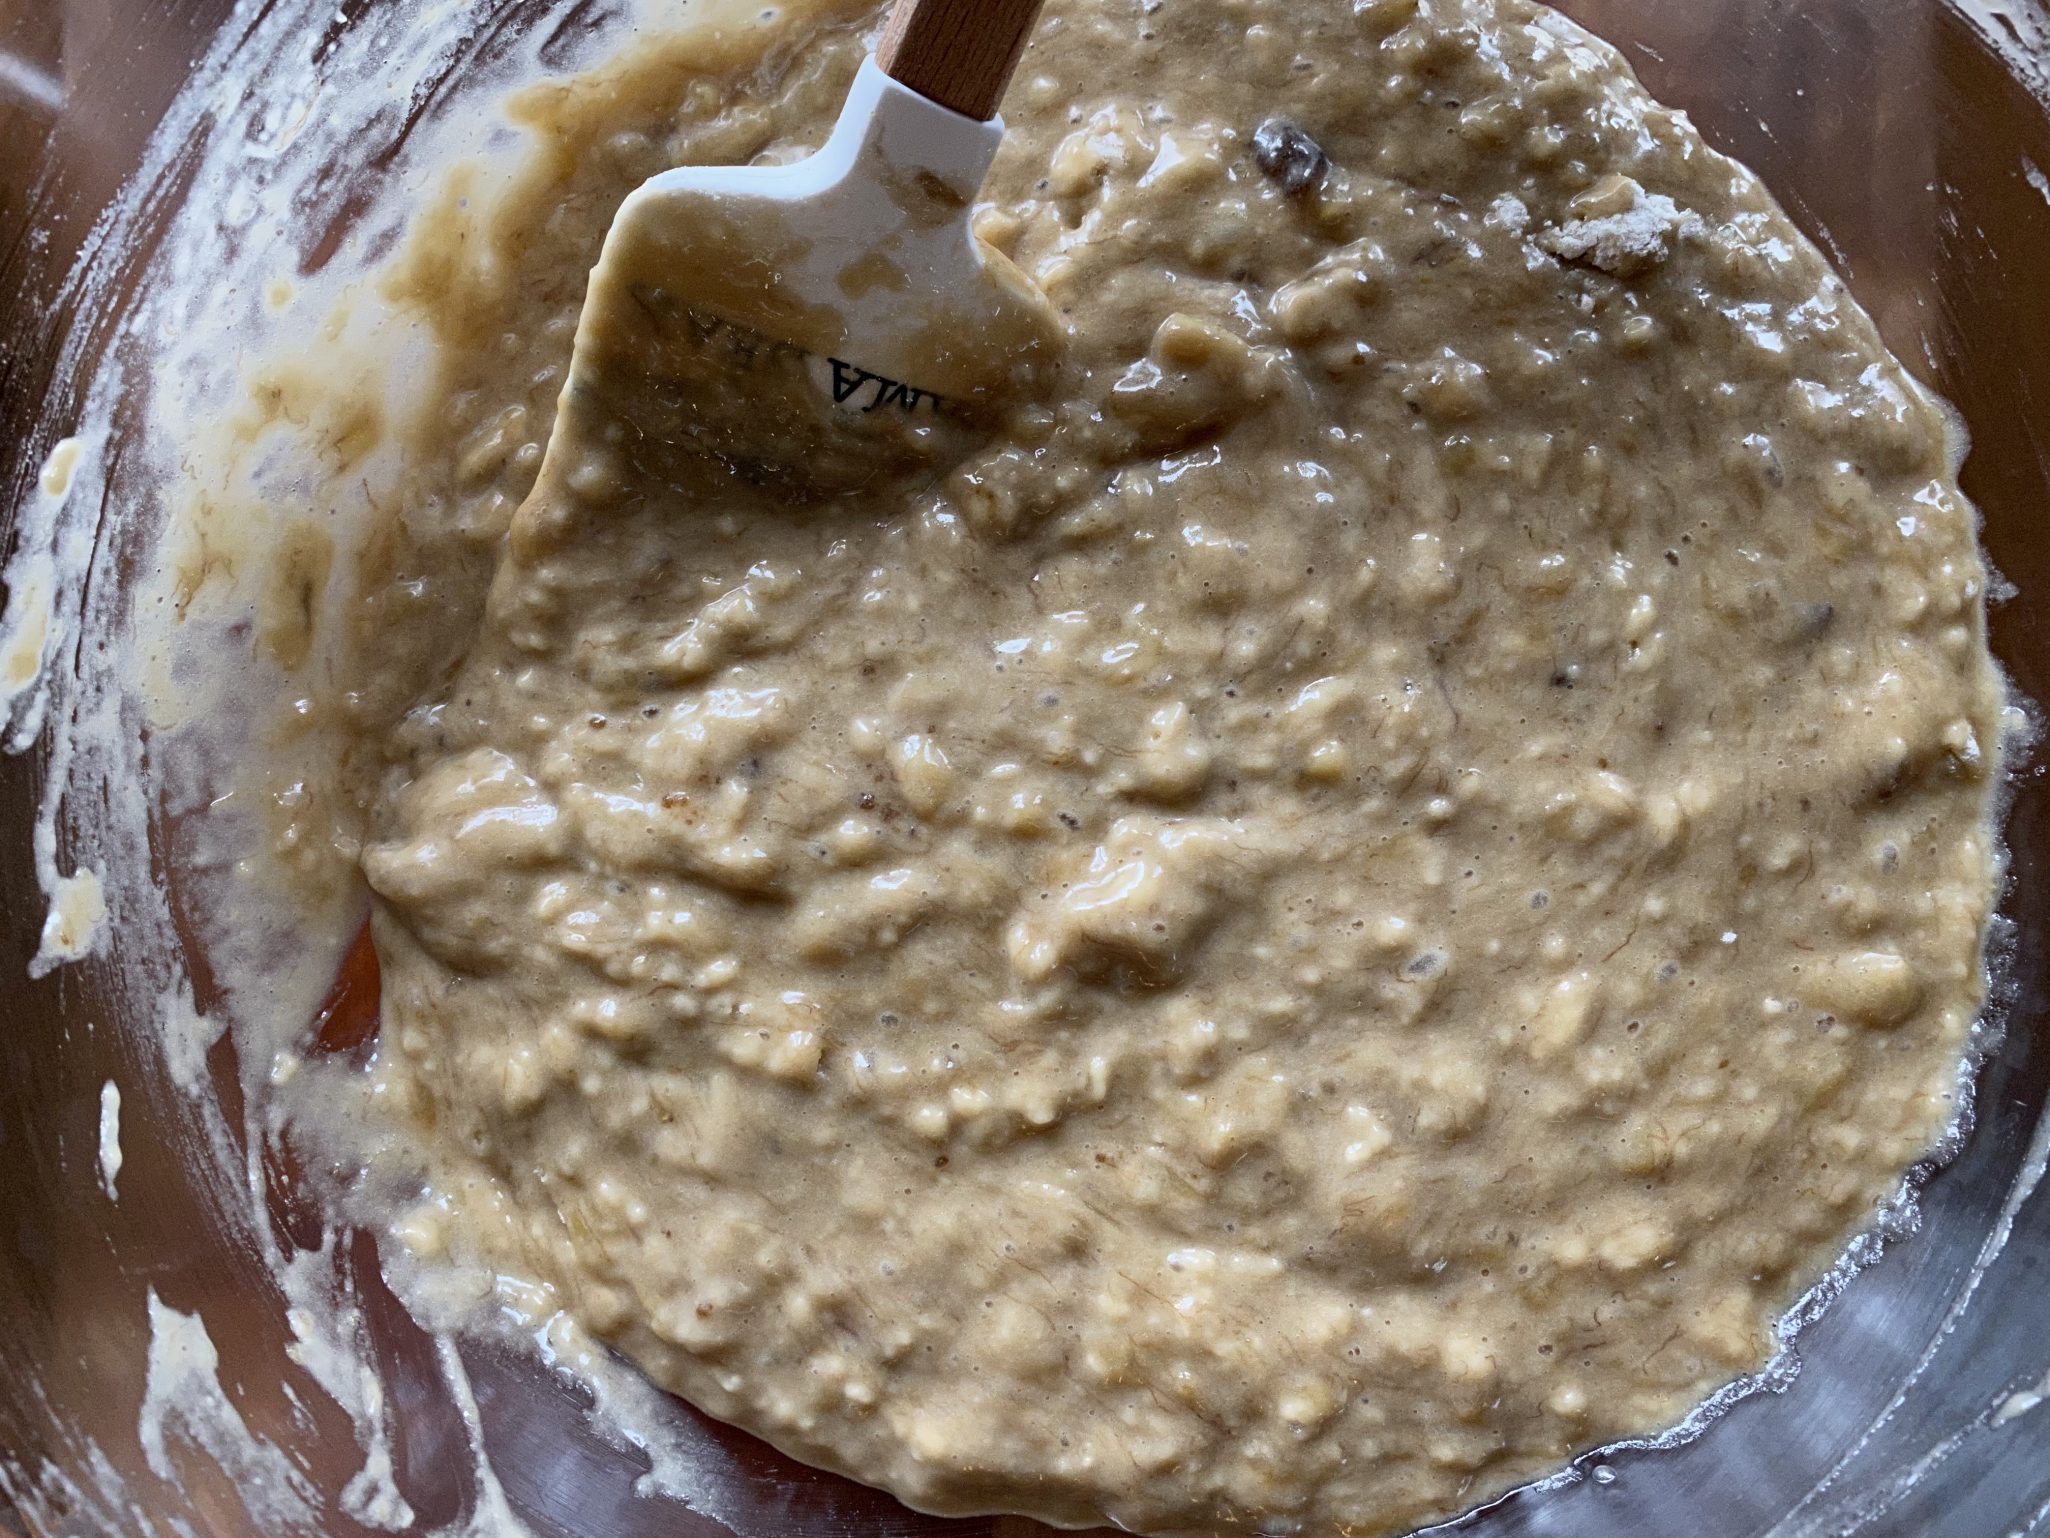
  • Take ½ cup of the blueberries and crush them with your hands so they are juicy; add to the batter and increase the mixer speed to high for 5 to 10 seconds to break up the berries to release their juices a bit more.
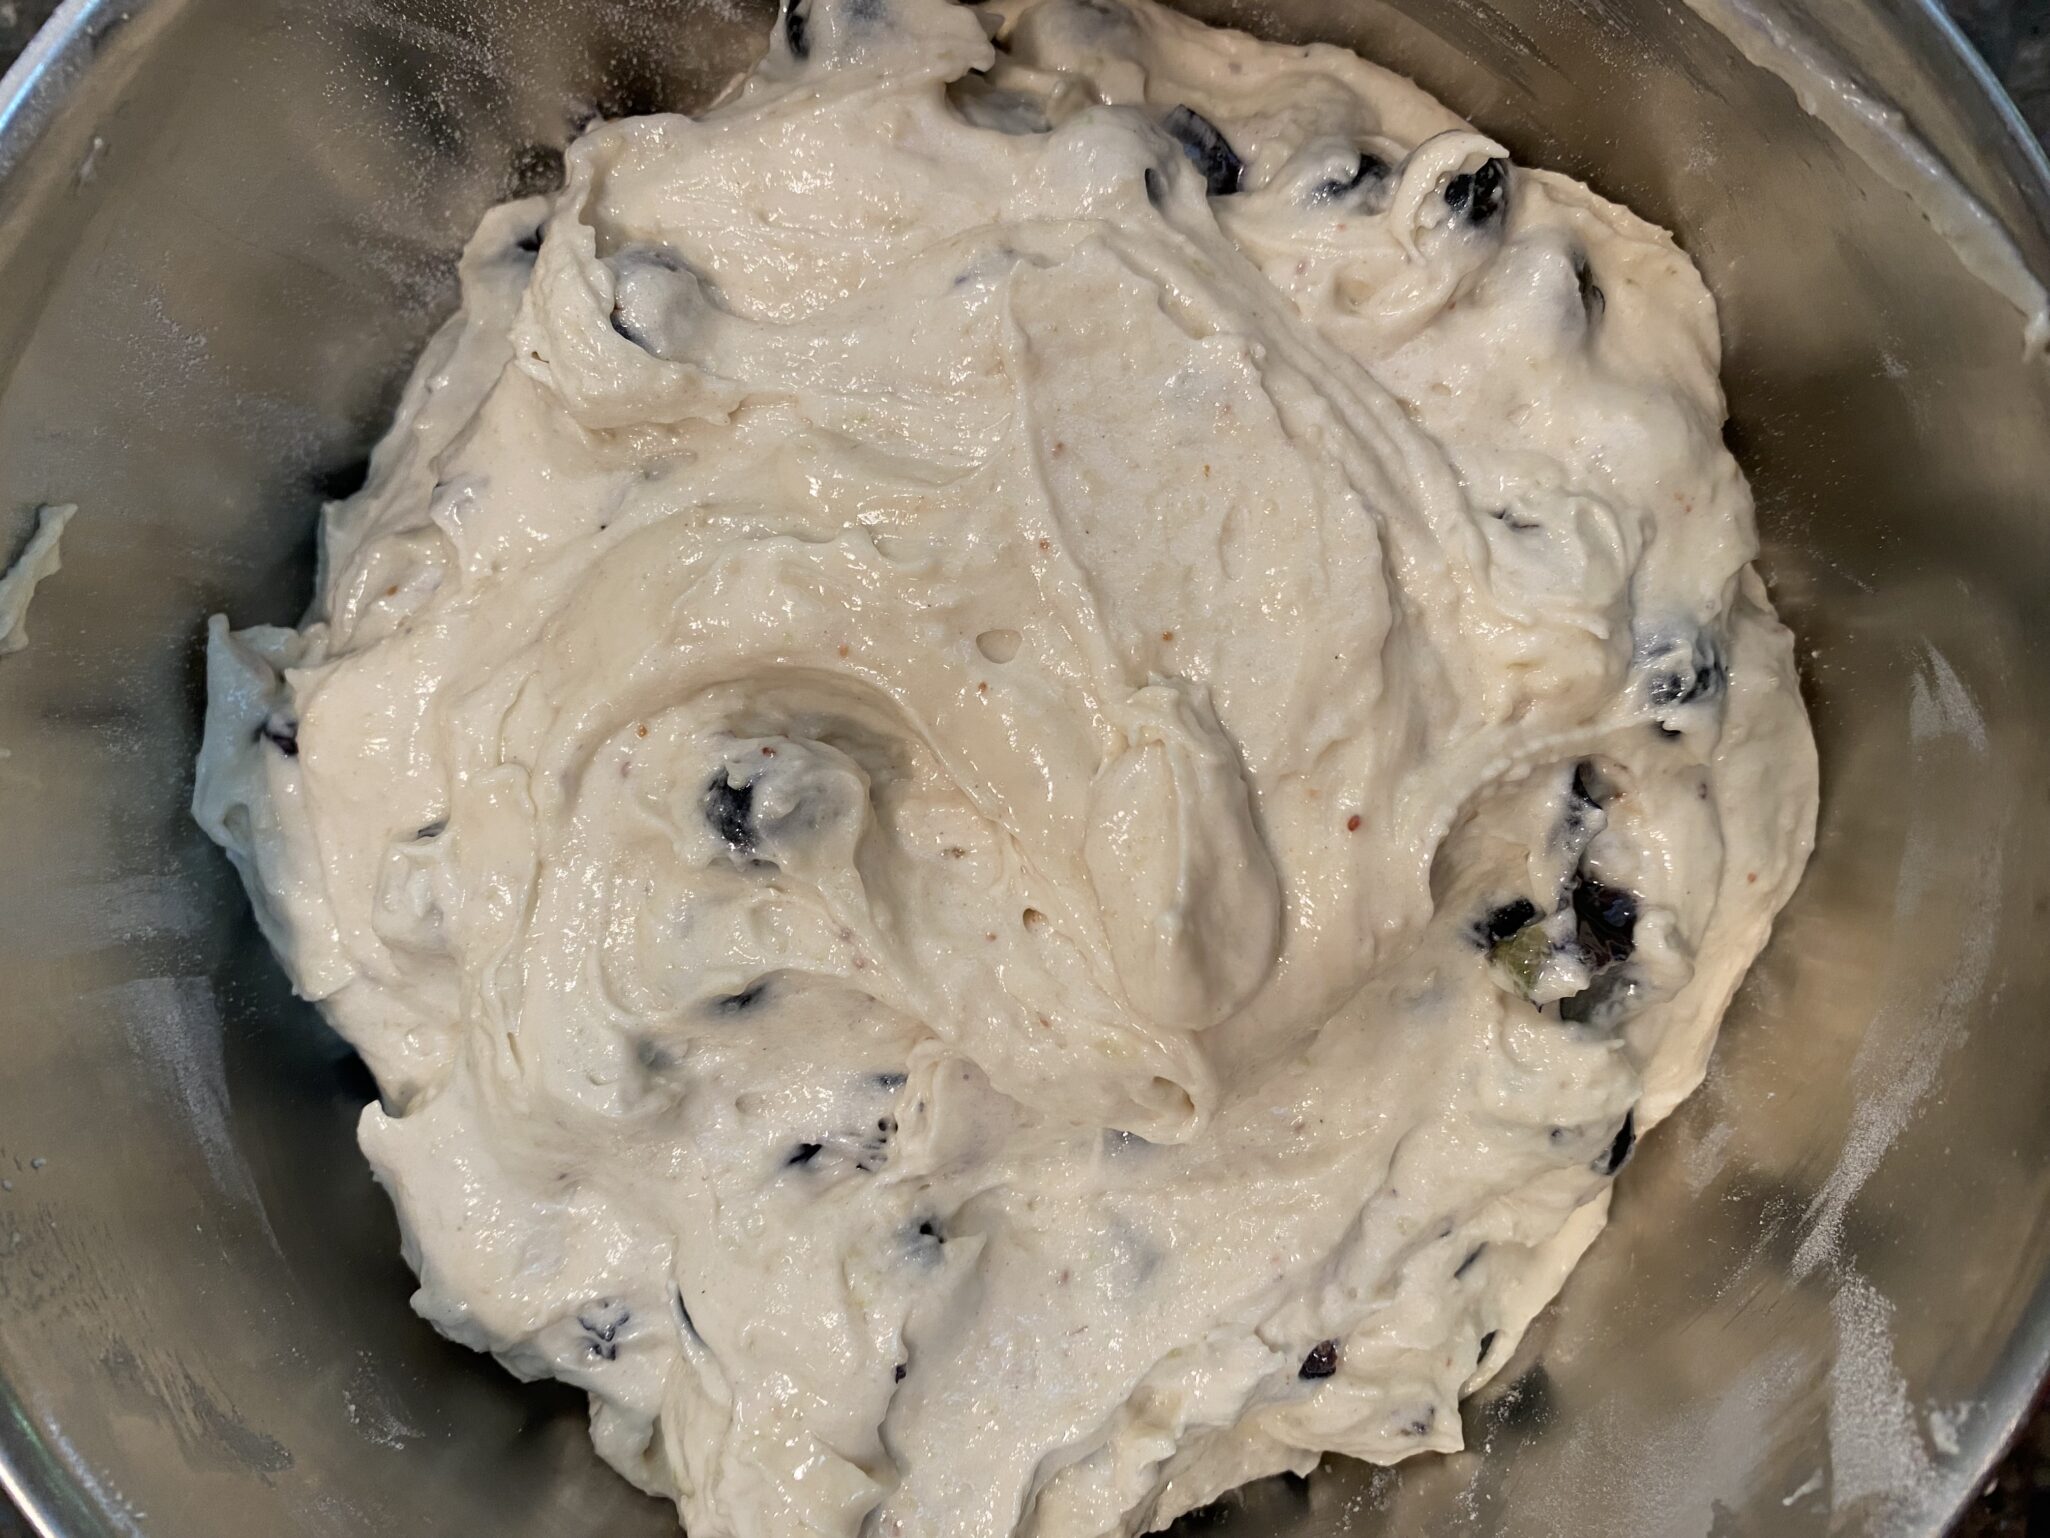
  • Reduce the mixer to low and add the rest of the berries, mixing until incorporated evenly throughout the batter, another 30 seconds.
  • Rest the batter. Cover the bowl with plastic wrap and let the batter rest at room temperature for 1 hour.
  • While the batter is resting, position a rack in the center of the oven and preheat the oven to 400℉ using the convect setting (if possible).
  • Prepare two muffin tins by spraying the inside and border of every other cavity in the muffin tin generously with cooking spray. I have USA pans that are non-stick, so I didn't to spray and the muffins were easy t remove.
  • Use a 1-Tablespoon or 3-Tablespoon cookie dough scoop to fill each sprayed cavity with 6 tablespoons of the batter. It will be a ot of batter in each. The first muffin tin will have six cavities filled, whereas the second muffin will have three cavities filled.
  • For the second muffin tin, pour water into every other cavity to mimic the placement of the batter in the first muffin tin. Sprinkle the top of each cavity, aiming for the batter and avoiding the pan, with 1 teaspoon of granulated sugar each. Don't skimp! It helps the top form.
  • Bake each muffin tin for 18 to 22 minutes, or until the muffins are domed and golden brown around the edges. A skewer inserted into the center of a muffin should come out with a few crumbs attached.
  • Cool the muffins in their muffin tin on a wire rack for 15 minutes, then use an offset spatula to run underneath the edges of the blueberry muffin tops to prevent them from sticking in the pan. Be careful to just run the offset spatula under the edges—you don't want to accidentally cut into the muffin bottom and decapitate the muffin from its top!
  • After unsticking the muffin tops, keep cooling the muffins in the tins completely to room temperature. DO NOT TRY AND TURN THE MUFFINS OUT WHILE THEY ARE STILL WARM. Because these muffins are so top-heavy, you'll run the risk of accidentally pulling the tops and bottoms apart if the cake is still warm! Wait until they are cooled completely before turning them out of the pan. Run the offset spatula underneath each muffin top once more and gently tilt the muffin upwards to turn it out of the pan.
  • Serve and store. Serve at room temperature. The muffins are best on the day that they're made, but can be individually wrapped in plastic and stored at room temperature for up to 2 days.
The Cookie Bible from Rose Levy Beranbaum!

The Cookie Bible from Rose Levy Beranbaum!

I have been a big fan of Rose Levy Beranbaum’s books for a very long time. I went to my bookshelf to see just how many of her books I have, I counted six. Of these six, my absolute favorite is Rose’s Christmas Cookies. I can’t recall a Holiday Cookie Tin that has not featured at least one of her cookies.  I was eager to take a sneak peek at her newest book coming out, The Cookie Bible.

See below for the recipe for Lemon Madeleines.

 The Layout

  • Intro – brief description and a memory or an anecdotal story for the cookie.
    Temperature, baking time, and equipment – organized into a table.
    Ingredients – listed in volume and weight measurements also organized in a table, easy to see and follow.
    Directions
  • Mise en place-steps that need to be done before making the dough ie. taking out butter to soften or bringing eggs to room temp.
  • Making the dough-If a particular cookie can be made in either a food processor or stand mixer, both methods are listed. I love this.  Followed by:
  • Forming cookies
  • Baking cookies
  • Cooling cookies

All her cookbooks are organized this way, meticulous and thorough. It’s like getting a Master Baking class in the comfort of your own kitchen.

Each recipe finishes with Baking Gems, MORE valuable tips, and tweaks!

The Recipes

I flipped through the book to earmark recipes I wanted to try. This is where I felt like the book came up a bit short. The selection of cookies seemed just a bit dated. Today’s cookies include new flavors and spices and eye-catching colors created by using freeze-dried fruits.

Few recipes in this book jumped out at me and shouted MAKE ME!  Quite a few recipes in the book are also in Rose’s Christmas Cookies. Recipes I already make and love like Cloud Cookies, Meltaways, Lion Paws, and Spritz Cookies.  If I didn’t have Rose’s Christmas Cookies I might have been putting Post-Its on those very pages.  Recipes have been scaled back in the new book to yield smaller batches of cookies, a good thing, as it limits how many cookies I can eat.


Read through the recipe before making it.  I found this book even more detailed than her older books.  Explicit directions like when to take the butter and eggs out before making the dough or what type of flour to use for each recipe.

If only I had taken my own advice and read the recipe first

I plowed through the first recipe, Dream Chocolate Chip Cookies, only to be stumped when I found I hadn’t added the egg. Turns out that twenty minutes before making the dough, I was supposed to crack the egg into the mixer bowl, add the vanilla, and cover it so it can come to room temp first. The egg should have been in the mixer when I creamed the butter and sugar.

Lemon Poppy Seed Madeleines were next up.  Once again, detailed instructions produced a tender sweet-tart Madeleine.  Next time, I would reduce the poppyseeds, a bit too much crunch.  I actually liked them more the next day as the syrup had time to absorb so the cookies weren’t sticky to touch and the tartness had mellowed.

The Verdict

With all that being said. Here is my take. If you do not own a Rose Levy Berenbaum Cookbook, this would absolutely be a lovely addition to your kitchen.  This book will make you a better baker.  Filled with invaluable tips and technique information, it takes that extra step of explaining why specific ingredients and techniques work in a recipe.  Although there isn’t a photo for every cookie in the book, the photos included are gorgeous.

Happy baking!

I reviewed The Cookie Bible via NetGalley

Lemon Madeleines

From Rose Levy Beranbaum's upcoming book, The Cookie Bible
Course cookies
Cuisine American, French
Keyword easy recipe, leomn poppy seed madeleines, madeleine, rose levy beranbaum
Prep Time 20 minutes
Cook Time 15 minutes
Servings 24 servings

Ingredients

Oven Temp 350f/175c. Baking Time: 14-15 min for large madeleines Special Equipment: Madeleine molds-lightly coat with baking spray with flour. Disposable pastry bag fitted with a 3/8-1/2 inch pastry tube. 2 baking sheets lined with plastic wrap and lightly coated with nonstick spray.

    Batter

    • 8.5 tablespoons + 2 teaspoons, unsalted butter 120 grams
    • 2 large eggs 100 grams 1/3 cup plus 1 T, (94ml)
    • 1 teaspoon vanilla 5ml
    • 2 tablespoons milk 30 grams (30ml)
    • 1 cup bleached cake flour, sifted into the cup and leveled off 100 grams
    • 1/2 cup sugar, preferably superfine 100 grams
    • 1/2 teaspoon baking powder, preferably aluminum-free
    • 1/4 teaspoon fine sea salt
    • 3/4 cup sugar 5.25 ounces = 150 grams
    • 2 teaspoons loosely packed grated lemon zest 4 grams (from about 2 lemons)
    • 2 tablespoons poppy seeds, optional 19 grams I would use a little less

    Lemon Syrup

    • 1/4 cup sugar 50 grams
    • 3 tbsp freshly squeezed lemon juice, strained 47 grams

    Instructions

    Preheat Oven

    • 20 minutes or longer before baking, set oven racks in the upper and lower thirds of oven. Set oven to 350°F.

    Mise En Place

    • 30 minutes to 1 hour ahead, cut butter into tablespoon-size pieces. Set on the counter to soften.
    • 30 minutes ahead, into a 1 cup/237 ml glass measure with a spout, weigh or measure the eggs. Whisk in vanilla. Cover tightly with plastic wrap and set on counter.
    • Wash lemons with dishwashing liquid, rinse, and dry before zesting. Finey grate lemon zest. Freeze any extra for future use.

    Make the Batter

    • Add the milk to the egg mixture and whisk it in.
    • In the bowl of a stand mixer fitted with the flat beater, mix the flour, sugar, baking powder, salt, lemon zest and optional poppy seeds on low speed for 30 seconds. Add the butter and half the egg mixture. Mix on low speed until the dry ingredients are moistened. Raise the speed to medium and beat for 1 minute. Scrape down the sides.
    • With the mixer off between additions, add the remaining egg mixture in two parts. Beat after each addition, starting on medium-low speed and gradually raising the speed to medium, then beating on med speed for 30 seconds, to incorporate the ingredients and strengthen the structure. Scrape down sides of bowl.

    Pipe the Batter into the Molds

    • Fill the prepared pastry bag about 3/4 full with batter. Pipe the batter into the molds. filling them about 3/4 full (4gms for each mini-mold, 16 gms for large cavity). No need to smooth the batter. Refill the bag as needed.
    • Ok, I didn't pipe I just used two spoons and scooped the batter into the molds.

    Bake the Madeleines

    • Bake the mini-madeleines for 10-12 minutes, large ones for 14-15 minutes, or until a wooden toothpick inserted near the centers comes out completely clean and the madeleines spring back when pressed lightly in the centers. While they are baking, make the lemon syrup.

    Make Lemon Syrup (1/3 cup/95gms/79ml)

    • In 1 cup/237ml glass measure with a spout, stir together the sugar and lemon juice. Heat in the microwave just until the sugar is dissolved. (Or use a small sauce pan over medium heat.)

    Brush the Medeleines with Syrup, Unmold, and Cool

    • As soon as the madeleines come out of the oven, place the pans on a rack, poke the madeleines all over with a wire tester, and brush it with 1/3 of the syrup.
    • Metal molds, use a toothpick or pin to carefully dislodge them from molds and then invert them onto the prepared cookie sheets (this prevents sticking)
    • Brush madeleines with remaining syrup and allow to cool completely. Let sit for 2 hours for syrup to distribute.
    • STORE: Airtight one layer; room temp, 3 days; refrigerated, 5 days; frozen, 3 months.

    Baking Gems

    • Use superfine sugar for the best texture
    • After coating with baking spray with flour, brush molds with pastry brush to remove excess spray to prevent air bubbles from forming in the fluted tops of the madeleines.
    • If you do not have enough molds to bake all at once, chill batter in fridge until ready to use.
    • When done, madeleines will spring back when pressed lightly in the center even before they are done.
    Thin, Crispy, Gooey, Chocolate Chip Cookies-Get It On, Bang a Pan

    Thin, Crispy, Gooey, Chocolate Chip Cookies-Get It On, Bang a Pan

    I have been a slouch when it comes to holiday cookies this year. LUCKY FOR ME, Jamie is home and baking up a storm…I get the difficult task of eating and posting about whatever deliciousness she has baked up.

    I had all this planned of course.  My copy of Sarah Kiefer’s 100 Cookies finally arrived which I then strategically left on the kitchen island in full view. Heh, heh, heh.  The book is a beauty both in content and style.

    She took the bait. Flipping through the book, Jamie landed on the Neopolitan Cookies exclaimed “so making these”.   I kept nodding enthusiastically with every cookie she mentioned.  We loved the Neapolitans, buttery, chewy,  flavored with vanilla, strawberry, and cocoa.  These are definitely going in the rotation.  The Smores Bars were labor-intensive but worth the effort. Imagine a blondie base, coated with chocolate and topped with a layer of toasty homemade marshmallow fluff.

    Despite the many CCC recipes we have, her Chocolate Chip Cookies and the pan banging technique proved irresistible.  All we can say is make room for this bad boy in your chocolate chip cookie file, it’s that good.  The cookies are thin, crisp-edged yet soft in the center.  They’re dotted with chopped dark chocolate bits and finished with a sprinkle of Fleur de Sel.  The dough is sweet so don’t skip the Fleur de sel and definitely use dark chocolate for balance.

    You should be running to your kitchen now to make these.

    Pan-banging

    No, not headbanging which is what I have been doing all year, it’s been that kinda year.  I first came across pan-banging in Sarabeth’s Bakery cookbook (a beautiful cookbook)  Sarabeth’s Kitchen is a New York institution known for their breakfasts, jams, and baked goods.  Her version of Chocolate Chip Cookies, Chocolate Clouds, calls for rapping the pan on the oven rack with a couple of minutes left in baking.  This causes the cookies to deflate and develop their signature cracks.  I adopted this rapping the pan for several of my drop cookie recipes including the Oatmeal Apricot Cookies from Dahlia Bakery.  Love the way cracks and crevices look in drop cookies.

    Sarah takes it to a whole new level, by repeatedly banging the pan in 2-minute intervals, you get these super cool circular ridges that look like a tree’s age rings.  The cookies bake thin and flat, they spread quite a bit, so plan on about 5 cookies per baking sheet.

    So take your 2020 aggressions out by making these pan banging chocolate chip cookies and end up with beastly cookies. Win-win.

    Chocolate Chip Cookies (100 Cookies)

    From 100 Cookies Thin and Crispy, Ridged Chocolate Chip Cookies
    Course cookies
    Cuisine American
    Keyword chocolate chip cookies
    Prep Time 20 minutes
    Cook Time 10 hours 14 minutes

    Ingredients

    • 2 cups all-purpose flour (284 grams) Gold Medal AP Flour will give you better ridges
    • ½ teaspoon baking soda
    • ¾ teaspoon salt
    • ½ pound unsalted butter (227 grams) 2 sticks, room temperature
    • 1 ½ cups granulated sugar (300 grams)
    • ¼ cup brown sugar (55 grams) dark brown preferred
    • 1 large egg
    • 2 tablespoons water
    • 1 tablespoon vanilla extract
    • 6 ounces bittersweet chocolate (170 grams) about 60 percent cacao solids, chopped into coarse pieces, bits and shards. We used TJ's Pound Plus Dark Chocolate
    • Fleur de sel or Maldon Salt, for sprinkling

    Instructions

    • Adjust an oven rack to the middle position. Line 2 baking sheets with parchment paper
    • In a small bowl, whisk the flour, baking soda and salt.
    • In the bowl of a stand mixer fitted with a paddle, beat the butter on medium until creamy about 1 minute. Add the granulated and brown sugars and beat on medium until light and fluffy, 2 to 3 minutes. Add the egg, vanilla and 2 tablespoons water, and mix on low to combine. Add the flour mixture, and mix on low until combined. Add the chocolate and mix on low into the batter. (At this point, the dough can be refrigerated for several hours or overnight.)
    • Heat the oven to 350 degrees. Form the dough into 2.5 ounce (~70 gram) balls (#24 ice cream scoop 1/3 cup each). Place 4-5 balls an equal distance apart on pan.
    • Place the baking sheet in the oven and bake 7 minutes, until the cookies are puffed slightly in the center. Lift the baking sheet and let it drop down against the oven rack, so the edges of the cookies set and the inside falls back down. (This will feel wrong, but trust me.) Bang it down, if necessary, to make the center fall.
    • After the cookies puff up again, 2 minutes later, repeat lifting and dropping the pan. Repeat a few more times, every 2 minutes, to create ridges around the edge of the cookie. Bake 13 to 14 minutes total, until the cookies have spread out, and the edges are golden brown, but the centers are much lighter and not fully cooked.
    • Transfer the baking sheet to a wire rack and sprinkle with Fleur de sel or Maldon salt. Let cool10-15 minutes before removing the cookies from the pan.
    • Repeat with remaining cookies. Store in an airtight container.

    Notes

    We used a #24 ice cream scoop, ~2.5 ounces and baked for 14 minutes.  The original recipe calls for 3 ounces of dough and bake for 15-16 minutes. 
    You can use King Arthur Flour (higher protein) but it may not develop as many ridges. 
    I would recommend weighing ingredients, esp flour, for accuracy.
    Orange You Gonna Try Persimmons? They’re Delicious

    Orange You Gonna Try Persimmons? They’re Delicious

    It’s persimmon season!

    About this time every year, my friend & co-worker, Trang, comes to work with bags of homegrown persimmons.  I am not ashamed to admit I am Johnny on the spot when she is doling them out.  I adore persimmons.  The thought has crossed my mind that I should plant my own persimmon tree but I think I will just depend on the generosity of friends that have persimmon trees. (HINT HINT)

    How to enjoy persimmons.  Eaten out of hand, diced and tossed in salads, and baked in bread, cookies, and puddings.  How about stirred into a risotto for a sweet counterpunch to the cheese and rice?  Or dried, a wonderful way to enjoy them throughout the year.

    I have been especially waiting for this persimmon season.  Way back at the beginning of this year from HELL, we celebrated our birthdays with dinner at State Bird Provisions in The City. (Dining in a restaurant-remember that?).  State Bird adopted the Chinese tea house concept, little plates of deliciousness brought out on trays for you to pick and choose from, just like dim sum.  Their signature fried quail, dumplings, risotto, house ribs…plate after plate of tasty tidbits that dazzled us.

    The kicker for me was a beautiful dish consisting of bite-size pieces of crisp, sweet persimmons bathed in a dressing of sesame, Kinako powder, and ginger finished with a sprinkling of toasted black sesame seeds and flaky salt.  Simple and absolutely delish, I made a mental note to try this at home.  I found the recipe in my copy of the State Bird Provisions Cookbook.  The dish is incredibly easy to make. I spent more time getting the ingredients than putting the dish together.  The cookbook runs the gamut from this simple, elegant dish to complex dishes better left to enjoy at their restaurant.  I think of it as a coffee table cookbook, beautiful photos, an interesting read.

    A Persimmon Primer

    There are two kinds of persimmons, Hachiya and Fuyu.  They are NOT interchangeable.  Hachiya is an oblong, acorn-shaped fruit and pretty astringent.  They cannot be eaten until they are super soft and very ripe.  If eaten before they are soft, they will make your mouth pucker.  I use Hachiyas for baking (soft gushy fruit is not my thing).  Fuyu’s are flat, round, more tomato shape. They are non-astringent and can be eaten while they are still firm. For this salad, select ripe, firm fruit.

    The recipe calls for grapeseed oil but you could use canola oil instead.  We bought Kinako Powder at H-Mart but it can be found in most Asian stores. Made of soybean, it has a nutty flavor, kind of like roasted peanuts.  If you have munched on manju or mochi covered with a fine light brown powder that’s Kinako.  Toasted sesame oil and black sesame seeds can also be found in Asian markets.

    Persimmons with Kinako Dressing and Black Sesame Salt

    A simple and delicious tapas dish of sweet persimmons served with a savory sesame soybean powder dressing from State Bird Provisions
    Course Appetizer
    Cuisine American, Asian
    Keyword Persimmons with Kinako Dressing and Black Sesame Salt
    Prep Time 15 minutes

    Ingredients

    • 6 ripe Fuyu persimmons peeled and cut into chunks

    Dressing

    • 1/2 cup kinako roasted soybean flour, plus more for sprinkling
    • 1 teaspoon kosher salt
    • 1/2 teaspoon ground ginger
    • 1/4 cup plus 1 tablespoon grapeseed oil or substitute canola oil
    • 1/4 cup plus 1 tablespoon toasted sesame oil found in most Asian stores
    • 2 tablespoons unseasoned rice vinegar
    • 2 tablespoons Black Sesame Salt

    Black Sesame Salt

    • Makes about 1/4 cup
    • 1/4 cup pre-toasted black sesame seeds
    • 1/4 teaspoon flaky sea salt

    Instructions

    Dressing

    • Combine the kinako, kosher salt, and ground ginger in a medium bowl and stir well. Slowly pour in the oil, sesame oil, and vinegar, whisking constantly until the dressing is well combined. It helps to let it sit just a bit for the powder to absorb liquid.
    • Pour the dressing in shallow serving bowls, arranging the persimmons on top, and sprinkle on the black sesame salt and a generous pinch of kinako. Serve immediately.

    Black Sesame Salt

    • Combine the sesame seeds and salt in a mortar and pound until the mixture resembles coarsely ground black pepper.
    • Transfer to an airtight container and store in a cool, dry place for up to 2 weeks.
    Midwest Made Banana Bread

    Midwest Made Banana Bread

    Yes, I tried yet another banana bread recipe.  Unlike biscuits, I am not in search of the best banana bread in the universe.  I LIKE the recipe I have for banana bread.  AND yet, like Pavlov’s Dogs, I see a banana bread recipe and I get an overwhelming urge to try it.  Go figure.  Such was the case with Shauna Sever’s banana bread recipe from her book Midwest Made.

    In my defense, her BB (please, can I just abbreviate for expedience) was getting rave reviews on Food52 and I did have overripe bananas. I have baked a couple of goodies from the book and all were pretty darn good.  Her Donut Loaf was a big hit with family and friends as were the jam bars.  The book is filled with recipes that are familiar, comforting, and delicious. Treats we have all grown up with, brownies, cookie jar gems, cobblers, and pies-desserts with roots in the Heartland. Right now that’s what it is all about…

    Comfort in the Time of COVID-19

    The book is a gem and perfect for the times.  If you would like a copy, I have links to Indie Bookstores that could really use your patronage.  In Los Angeles please order from Now Serving LA, and in the Bay Area, Books Inc. (Free delivery!).  A little further away, the iconic institution, Powells City of Books is also delivering (free shipping).  I’m not sure if Omnivore Books in the City has it in stock, but they have a fantastic selection of cookbooks, check it out.  They are also taking orders, shipping, or curbside pick-up.

    Back to Banana Bread

    What sets Midwest Made’s BB is a crunchy, sweet, coat of sugar on the top of the bread.  Novel.  You wet your fingers and rub the sugar around until it gets clumpy and scatter them on the BB batter.  This creates the crunchy top of the bread, genius.

    The loaf comes out of the oven picture-perfect.  The bread has a nice texture with the added crunch of sweet topping.  My bottle of rum was missing in action, a victim of Shelter In Place perhaps, too bad,  the Rum might have cut some of the sweetness or made the flavor a little more complex.  Next time I would add Rum or nuts to the recipe to balance the sweetness.

    The recipe uses oil as the fat which makes it super easy and quick to throw together.  The dry ingredients are combined and folded into the wet.  Try not to overmix (mantra), the batter will be lumpy and pourable.  This is essentially a one-bowl, one spoon or spatula, recipe.  How easy is that?

    Pour the batter into a 9×5 loaf pan and make the sugar topping.

    I would add chopped pecans or walnuts to the batter or the sugar topping.  The sugar is the kicker.

    I was amazed that the sugar didn’t melt into the batter but remained formed and crunchy.

    I liked this recipe and would make it again but does it replace my Best Damn Banana Bread recipe, probably not.

    The Only Banana Bread You’ll Ever Need from Midwest Made

    Course quick breads
    Cuisine American
    Keyword Banana Bread
    Prep Time 15 minutes
    Cook Time 1 hour 10 minutes
    Servings 10 servings

    Ingredients

    • 1 3/4 cups mashed very ripe bananas
    • 3/4 cup plus 2 tablespoons firmly packed dark brown sugar
    • 1/2 cup vegetable oil
    • 1/3 cup well-shaken buttermilk at room temperature
    • 2 large eggs
    • 1 tablespoon dark rum optional
    • 1 teaspoon pure vanilla extract
    • 2 cups plus 2 tablespoons unbleached all purpose flour spooned and leveled
    • 1 teaspoon baking powder
    • 1 teaspoon baking soda
    • 1/2 teaspoon fine sea salt
    • 3 tablespoons granulated sugar for sprinkling
    • 1/2 cup pecans or walnuts chopped

    Instructions

    • Position a rack in the lower third of the oven and preheat it to 325-degrees F. Spray a 9x5-inch loaf pan with nonstick cooking spray and line it with parchment paper with a couple of inches overhang on 2 opposite sides.
    • In a large bowl, stir together the mashed bananas, brown sugar, oil, buttermilk, eggs, rum (if using) and vanilla.
    • In a medium bowl, whisk together the flour, baking powder, baking soda, and salt. Pour the dry ingredients into the wet and fold until just blended. Pour the batter into the prepared pan.
    • Place the granulated sugar in a small bowl. Dampen your fingertips with water and work them into the sugar until it just begins to look like snow-if you pinch some, it should just barely hold together. Sprinkle the dampened sugar over the batter, aiming to get it clumped up together in spots.
    • Bake until a toothpick inserted into the center of the cake comes out clean, 60 to 70 minutes. Let cool for twenty minutes in the pan, then use the parchment paper to help lift the loaf out of the pan and cool completely on a wire rack. Store any leftovers in an airtight container for up to 5 days.


    Banana Cake with Cream Cheese Frosting (Coop-vid Up and Going Bananas)

    Banana Cake with Cream Cheese Frosting (Coop-vid Up and Going Bananas)

    I bought WAY TOO many bananas on my COVID reconnaissance to the grocery store last week.  Luckily, too many bananas is a happy problem.  Eat em’, freeze em’, bake em’ in a cake.

    Banana Bread was out. I had just baked a loaf of banana bread from Shauna Severs’ latest book, Midwest Made.  These overripe bad boi bananas were destined for a banana cake with CREAM CHEESE FROSTING. After all, calories don’t count during the time of COVID-19.  That’s right, zippo calories.

    Let them eat CAKE

    My favorite Banana Cake recipe comes from Clementine Bakery in Los Angeles. I found it on the blog site, Ipso Fatto (love, love, love). How good is it?  It’s our 2nd most favorite birthday cake, right after Wes’s Carrot Cake.  It’s really good.  Mui just made one and took it to another level by adding a layer of chocolate ganache in the middle and gorgeous sprinkles on the top. Just for little, OLD, me for my birthday.  Time to find another banana cake recipe to add to my evergrowing “all things banana” arsenal of recipes.  I went back to Ipso Fatto (she loves all things bananas as much as I do) and whaddya know, this popped up on her site.

    Best Banana Cake I’ve Ever Had

    Ever had?  That sounds like a challenge.  Game on. The recipe comes from Sally’s Baking Addiction.  It’s straightforward and comes together easily.  I made this late at night so no process pics. Classic cake instructions-cream the butter, add the sugars (in this case dark brown sugar-sweet and caramel-ly), eggs, and mashed bananas. Then alternate the dry ingredients with buttermilk (nice little tang).  Don’t worry if at various points the mixture looks curdled, it will come together as you add the dry ingredients.  The batter will be lumpy-looking but pourable at the end.  While it’s baking, start the best part of any cake, the frosting, in this case, my favorite, cream cheese frosting.

    I used hubby’s cream cheese frosting recipe, I think it’s perfect but then again I am biased. Sally’s recipe calls for 3 cups of powdered sugar, while hubby’s calls for only 3/4 cup to 1 cup at most, plenty for my taste.  Beat the cream cheese and butter until creamy and smooth BEFORE adding the powdered sugar.  This is key, once you add the sugar, mix just until blended and to the consistency you like.  Don’t overbeat as the sugar will break down the frosting.  You’ll end up with runny, loose frosting.  Spread the frosting on the cake and then lick the spatula-perks of being the baker.  The cake is yummy at room temperature or chilled, straight out of the fridge.

    Texture-wise this cake reminds me of a snack cake, springy, with a little density, and a compact crumb. You want a tall glass of cold milk to go along.  I still like the Clementine Banana Cake more, but that’s probably my personal preference.  Clementine’s cake has a looser crumb and isn’t quite as dense, perfect for a layer cake.  But both are delicious.

    That’s it folks…enjoy!

    Banana Cake (Sally's Baking Addiction)

    Best Banana Cake with Cream Cheese Frosting from Sallys Baking Addiction
    Course Cake, Dessert
    Cuisine American
    Keyword Banana Cake with Cream Cheese Frosting
    Prep Time 30 minutes
    Cook Time 50 minutes
    Servings 10

    Ingredients

    The Cake

      Dry Ingredients

      • 3 cups all-purpose flour (spoon & leveled) 375g
      • 1 teaspoon baking powder
      • 1 teaspoon baking soda
      • 1/2 teaspoon ground cinnamon
      • 1/2 teaspoon salt

      Wet Ingredients

      • 3 large ripe bananas about 1 and 1/2 cups mashed
      • 3/4 cup unsalted butter, softened to room temperature 170g
      • 1 cup granulated sugar 200g
      • 1/2 cup packed light or dark brown sugar 100g
      • 3 large eggs at room temperature
      • 2 teaspoons pure vanilla extract
      • 1-1/2 cups buttermilk, at room temperature 360ml

      Sally's Cream Cheese Frosting

      • 8 ounces full-fat block cream cheese, softened to room temperature 224g
      • 1/2 cup unsalted butter, softened to room temperature 115g
      • 3 cups confectioners’ sugar, plus an extra 1/4 cup if needed 360g
      • 1 teaspoon pure vanilla extract
      • 1/8 teaspoon salt

      Hubby's Cream Cheese Frosting

      • 1 brick Philadelphia Cream Cheese 8 ounces
      • 1 stick salted butter 4 ounces
      • 3/4-1 cup powdered sugar
      • 2 tsp vanilla extract

      Instructions

      • Preheat the oven to 350°F (177°C) and grease a 9×13 inch pan. I always use parchment on the bottom of my pan, makes it easier to remove the cake.
      • Make the cake: Mash the bananas. I use a potato masher. Set mashed bananas aside.
      • Whisk the flour, baking powder, baking soda, cinnamon, and salt together. Set aside.
      • Using a mixer fitted with a paddle attachment, beat the butter on high speed until smooth and creamy – about 1 minute. Add both sugars and beat on high speed for 2 minutes until creamed together. Scrape down the sides and up the bottom of the bow. Add the eggs and the vanilla. Beat on medium-high speed until combined, then beat in the mashed bananas. Scrape down the sides and the bottom of the bowl as needed. With the mixer on low speed, add the dry ingredients in three additions alternating with the buttermilk and mixing each addition just until incorporated. Always start and finish with the dry ingredients. Do not overmix. The batter will be slightly thick, a few lumps is OK.
      • Spread batter into the prepared pan. Bake for 45-50 minutes. Baking times vary, so start checking at 40 minutes. Keep an eye on it. The cake is done when a toothpick inserted in the center comes out clean. If you find the top of the cake is browning too quickly in the oven, loosely cover it with aluminum foil.
      • Remove the cake from the oven and set on a wire rack. Allow to cool completely. After about 45 minutes, I usually place it in the refrigerator to speed things up.
      • Make the frosting: In a large bowl using a handheld or stand mixer fitted with a paddle or whisk attachment, beat the cream cheese and butter together on high speed until smooth and creamy.
      • Add 3 cups confectioners’ sugar, vanilla, and salt. Beat on low speed for 30 seconds, then switch to high speed and beat for 2 minutes. If you want the frosting a little thicker, add the extra 1/4 cup of confectioners sugar (I add it). Spread the frosting on the cooled cake.
      • Refrigerate for 30 minutes before serving. This helps sets the frosting and makes cutting easier.
      • Cover leftover cake tightly and store in the refrigerator for 5 days.

      Hubby's Cream Cheese Frosting

      • Beat butter to soften before adding the cream cheese, 15-30 seconds. This helps prevent lumps. Add cream cheese and beat on medium high speed until smooth, light, and creamy. Beat on high if using a handheld mixer.
      • Add vanilla and beat on medium to blend. Add powdered sugar and beat on low speed to blend in and then increase to medium speed to incorporate, at most 1 minute. Do not OVERBEAT!!! Taste the frosting, add additional 1/4 cup of sugar if you want it sweeter. If it seems a little flat, add a pinch of salt.
      • Spread on the cooled cake. For special occasions flip the cake out of the pan and frost top and sides. You may need to make a recipe and a half of frosting in that case.

      Notes

      Make Ahead Instructions: Prepare cake through step 5. Cover the cake tightly and refrigerate for up to 2 days or freeze up to 3 months. Bring to room temperature, make the frosting, frost, and serve. Frosted cake freezes well, up to 3 months. Thaw overnight in the refrigerator, bring to room temperature or serve cold.
      Buttermilk: If you don’t have buttermilk, you can add 1 Tablespoon fresh lemon juice or white vinegar to a large liquid measuring cup. Then add enough regular room temperature milk (whole milk is recommended) to make 1 and 1/2 cups total. Stir and let sit for 5 minutes. This soured milk can be used in the recipe instead of buttermilk.
      Cupcakes: I’ve gotten a few questions about turning this cake into cupcakes. For about 2 dozen cupcakes, fill the cupcake liners halfway and bake for about 20-22 minutes. Same oven temperature.
      Bundt Cake: You can bake this batter in a 10-12 cup bundt pan, but I find it’s not quite as moist when baked in the bundt shape. Bake for 50-65 minutes, give or take. Use a toothpick to determine doneness. Same oven temperature.
      Layer Cake: I use this recipe to make my banana layer cake. If you want to make a 2 layer cake, divide batter between 2 greased 9-inch cake pans, and bake at 350°F (177°C) for 26-30 minutes or until a toothpick inserted in the center comes out clean.
      Donut Loaf Around, Make This Soon!

      Donut Loaf Around, Make This Soon!

      I visited my town library recently and requested the cookbook Midwest Made by Shauna Sever. This is a feeble attempt to be more discriminating before buying another cookbook.  The librarian cheerfully responded with, “we can order that from Amazon for you! The book will be sent directly to you and you can then keep the book for any length of time. When you are good and ready, return it to the library.

      You’re joking, right?  Nope.

      Two days later, I found a brand spanking new copy of Midwest Made sitting on my front doorstep.  I broke open that puppy and started scanning the book for recipes I wanted to try.

      I started with her Jammy Winter Fruit and Brown Butter Bars (will post soon).  The cookie dough, studded with walnuts and oatmeal, serves as both the base and topping.  It’s a keeper.  But the filling, an apple and pear jam, didn’t stand out.  I would try a berry jam or use tart apples next time to bump up the flavor.  

      On the other hand, the Donut Loaf was a straight winner!  Initially, the 2 teaspoons of nutmeg threw me for a loop, not my favorite spice. But multiple positive reviews convinced me to take the donut challenge.  I’m glad I did.  Think giant powdered sugar donut but sliced from a loaf.  The inside of the loaf is moist, tender with a nice crumb with just a bit of density like a cake donut.  The outside makes me feel like a kid again, a flurry of powdered sugar with every bite.

      The recipe is pretty much a classic loaf bread cake.  Cream butter and sugar.  Add just a quarter cup of the flour mixture, beat and then add eggs one at a time. I’m not sure why she adds a small amount of the dry ingredients before the eggs, maybe it prevents the batter from curdling after adding the eggs.  Just a guess.  Add the dry ingredients by alternating with the buttermilk.  The process results in a fine crumb, tender cake-delicious.  I used freshly grated nutmeg for the cake as recommended.  It wasn’t overpowering but surprisingly subtle.

      Donut Loaf from Midwest Made

      Powdered sugar donut of your childhood back as an easy to make Donut Loaf
      Course Cake, Dessert, Snack
      Cuisine American
      Keyword Donut Loaf, Loaf bread
      Prep Time 15 minutes
      Cook Time 1 hour

      Ingredients

      • Nonstick cooking spray for pan
      • 2 3/4 cups unbleached all-purpose flour spooned and leveled
      • 2 1/2 teaspoons baking powder
      • 1/2 teaspoon baking soda
      • 1 teaspoon fine sea salt
      • 2 teaspoons freshly grated nutmeg
      • 14 tablespoons unsalted butter at room temperature
      • 3/4 cup plus 2 tablespoons granulated sugar
      • 1 teaspoon vanilla extract
      • 3 large eggs at room temperature
      • 1 cup well-shaken buttermilk at room temperature
      • To finish:
      • 1 cup powdered sugar sifted, plus more as needed
      • 2 tablespoons unsalted butter melted

      Instructions

      • Position a rack to the lower third of the oven and preheat it to 325°F. Spray a 9x5-inch light-colored metal loaf pan with nonstick cooking spray and line it with 2 perpendicular strips of parchment paper — 1 cut skinnier to fit lengthwise across the bottom and up the 2 short sides, 1 to fit crosswise and up the 2 longer sides. Cut the strips long enough to have a few inches of overhang on all sides.
      • In a medium bowl, whisk together the flour, baking powder, baking soda, salt, and nutmeg.
      • In the bowl of an electric mixer fitted with the paddle attachment, beat the butter on medium-high speed until creamy. Add the sugar and vanilla and beat until light and fluffy, about 3 minutes. Beat in 1/4 cup of the flour mixture. Beat in the eggs, 1 at a time. Reduce the mixer speed to low, and stir in the remaining flour mixture and buttermilk in 5 alternating additions, beginning and ending with the flour mixture. Finish folding the batter by hand to make sure everything is incorporated — the batter will be very thick.
      • Scrape the batter into the prepared pan and smooth the top. Bake until the loaf is golden with a couple of cracks on top, and a toothpick inserted into the center comes out clean, 60 to 75 minutes. Let cool in the pan set over a wire rack for 15 minutes. Use the parchment paper to lift the loaf from the pan. Let rest for another 30 minutes.
      • When the loaf is cool and firm enough to handle, but still slightly warm, sift the powdered sugar all over a large rimmed baking sheet (keep the sieve handy). Peel the parchment from the cake. Gently turn the loaf over in 1 hand, using part of your forearm to support it. Using a pastry brush, brush the bottom of the cake with some of the melted butter. Carefully set the loaf, right-side up, in the powdered sugar. From there, brush the long sides with the butter, turning the cake from side to side to coat in sugar, then brush and coat the short sides. Lastly, brush the top with the butter, grab a handful or two of sugar from the tray, deposit into the sieve, and sift sugar generously over the top of the loaf. Roll the entire loaf in sugar once more so that it resembles a giant powdered sugar donut. Carefully transfer the cake to a wire rack to cool completely before slicing and serving, touching up the loaf with a quick sifting of sugar as needed.

      Notes

      Nutmeg: Freshly grated makes a difference.
      Jan Hagels, Anyway You Slice It, That’s the Way I Want It

      Jan Hagels, Anyway You Slice It, That’s the Way I Want It

      Bah Humbug, for some reason I have not been able to get into holiday “drive”.  Maybe I’m still jet lagged from our trip to New Orleans or I am still in a Creole butter coma.

      The Cookie Cure

      Gotta Snap Out Of It. Maybe baking tried and true recipes might work.  I dug out my Christmas cookie journal to peruse and get in the cookie mood.  A binder filled with cookie recipes from magazines, photocopies of recipes from books along with my own notes, and pictures drawn by my kids when they were little.   It’s my cookie bible.

      I flipped to “Our Favorite Cookies”, from an old issue of Ladies Home Journal.  Ninety percent of you are thinking, what? It’s a Women’s magazine, think, Better Homes and Garden with dresses and makeup tips. Raise your hand if you remember it (seriously dating yourself now). This is the epicenter of my annual holiday cookie extravaganza.

      Jan Hagels are on the “gotta make them every year” part of the list.  Which is always a good way to start to find your cookie groove.  These little Dutch gems are thin and crispy, spiced with cinnamon, ginger, and allspice, and flecked with sliced almonds.  They are my mom’s favorite and the first one she will reach for on the cookie platter.  How can I not start with these?

      Options, roll out the Jan Hagel dough and emboss the dough for traditional Jan Hagel OR form the dough into a log, chill, slice, and bake.  Yeah, picking option #2.  Chill the dough well, which makes it much easier to slice into the prerequisite 1/8-inch slices.  Bake on parchment as the cookies will stick to the pan as they cool.  Trust me on this one.

      This recipe makes quite a few cookies and the finished cookie keeps very well.  Stash a log in the fridge or freezer for freshly baked cookies at a moment’s notice.

      Just Can’t Put My Finger On It

      The Walnut Thumbprints from the same article also find their way onto my annual baking list.  They’re buttery, nutty, tender, a little bit crumbly, and absolutely delicious. Last year I switched hazelnuts for the walnuts, a genius move.  Find toasted hazelnuts at TJ’s, which makes life infinitely easier.  As much as I love pecans, they aren’t a good choice, they don’t have that pronounced bite walnuts and hazelnuts have.

      Slice, Slice Baby

      On a roll with slice and bake cookies.  Next up, Ginger Oaties from Grand Central Bakery cookbook, a book that has languished on my shelf for years.

      Jan Hagels

      Lovely slice and bake Dutch cookie made with almonds, butter, and brown sugar. Flavored with allspice, cinnamon, and ginger. Sweet, spicey, crisp, perfect with a cup of tea.
      Course cookies
      Cuisine Dutch
      Keyword Dutch Almond Cookies, holidays, Jan Hagel
      Prep Time 20 minutes
      Cook Time 10 minutes

      Ingredients

      Da Dry Stuff

      • 1-1/2 cup All purpose flour
      • 1 tsp baking powder
      • 1 tsp cinnamon
      • 1/2 tsp ginger
      • 1/4 tsp salt
      • 1/8 tsp allspice

      Cream the Following:

      • 1/2 cup butter reg salted (its an old recipe), if using unsalted increase salt to 1/2 tsp, 1 stick or cube
      • 1/2 cup dark brown sugar
      • 1/4 cup granulated sugar

      Da Wet Stuff

      • `1 large egg
      • 1 tsp vanilla extract

      Adds

      • 3/4 cup sliced almonds

      Instructions

      • Combine flour, baking powder, cinnamon, ginger, salt, and allspice in medium bowl. Beat butter and sugars in mixing bowl until light and fluffy. Beat in egg and vanilla. Gradually add flour mixture until blended. Stir in almonds.
      • Gather and shape dough into 8x2-1/2 -1-12 inch brick. Wrap in wax paper or parchment and chill for at least 4 hours or overnight.
      • Preheat oven to 350 F. Cut brick crosswise into 1/8-inch thick slices. Line cookie sheet with parchment and bake 8-10 minutes until firm.
      • Cool on wire rack. Makes 3-1/2 dozen
      Beta Testers (Lemon Poppy Seed Shortbread, Mexican Hot Chocolate Shortbread, Pistachio Shortbread Cookies)

      Beta Testers (Lemon Poppy Seed Shortbread, Mexican Hot Chocolate Shortbread, Pistachio Shortbread Cookies)

      With the reprint of Claudia Fleming’s “The Last Course”, I reached into the archives for a post on a trio of shortbread I “tested” on friends and family.  A delectable triple play of cookies that would be lovely in a holiday cookie tin or a festive platter for the annual swap.  Fleming’s Lemon Poppy Seed cookies are buttery, tender, lemony with a crunch from the poppy seeds while Back in the Day’s  Mexican Hot Chocolate Shortbread are rich, chocolatey, and spicy.  Bake em’ TODAY.  I love pistachios for their color and flavor, both shine in Macrina Bakery’s Pistachio Shortbread.

      Without further ado, a trio of tasty cookie bites from “back in the day” that you should bake today!

      Human nature always prevails and I am no exception.  Every New Year’s Day I make a couple of resolutions…lose weight, get more sleep, test more cookie recipes for next year’s holiday box, one out of three ain’t bad!  If I were a major leaguer with a 333 batting average I’d be batting clean up.

      DSC01290

      So from my collection of cookbooks, I pulled out Back in the Day Bakery Book and made the Mexican Hot Chocolate Shortbread,  Lemon Poppyseed Shortbread from Claudia Fleming’s The Last Course (re-issued!) and Pistachio Shortbread from More From Macrina Bakery.  I don’t like to rely on my taste buds only, so my trusty crew friends, nieces, & family were my “beta testers”.  Consensus was there was no consensus!  Although I might have to give the edge to the Mexican Hot Chocolate shortbread, me and Joe Biden..here to cast the final vote.

      A successful beta test since these three recipes would all make the cut for the holiday cookie basket.

      Mexican Hot Chocolate Shortbread

      These cookies taste like a mug of rich hot chocolate. The deep mocha-flavor is followed by a kick of cayenne pepper. Don't let the heat put you off; it only enhances the flavor.
      Prep Time 15 minutes
      Cook Time 10 minutes
      Author Back In the Day Bakery

      Ingredients

      Dry Ingredients #1

      • 1 3/4 cups unbleached all-purpose flour
      • 1/2 cup almond flour

      Creamed Mixture

      • 1/2 pound 2 sticks unsalted butter, at room temperature
      • 1/2 teaspoon pure vanilla extract
      • 1/2 teaspoon pure almond extract

      Dry Ingredients #2

      • 1 cup packed light brown sugar
      • 1/2 cup Dutch-processed cocoa powder
      • 1/2 teaspoon ground cinnamon
      • 1/4 teaspoon espresso powder or finely ground coffee
      • 1/2 teaspoon fine sea salt
      • 1/4 teaspoon cayenne pepper

      The Finishers

      • 1/2 cup mini semisweet chocolate chips
      • 1/4 cup granulated sugar for dusting

      Instructions

      • Line two cookie sheets with parchment.
      • Whisk the flours together in a medium bowl and set aside.
      • In the bowl of a stand mixer fitted with the paddle attachment (or in a large mixing bowl, using a handheld mixer), cream the butter, vanilla, and almond extract until the mixture is pale in color, 1 to 2 minutes. Turn the speed down to low, add the brown sugar, cocoa, cinnamon, espresso, salt, and cayenne pepper, and continue to mix until the mixture is smooth, 2 to 3 minutes. Add the flour mixture in thirds until just combined. With the mixer running, sprinkle in the chocolate chips, mixing until just combined.
      • Transfer the dough to another bowl and finish mixing by hand to make sure no bits of flour or butter are hiding on the bottom of the bowl and the dough is thoroughly mixed.
      • Use a small ice cream scoop to form the cookies, about 1 rounded tablespoon each, and place on the prepared cookie sheets, leaving 1 inch between the cookies to allow for spreading.
      • Flatten each cookie with a cookie stamp dusted with granulated sugar, or gently flatten each cookie with the palm of your hand and then dust the tops with sugar. They will have little cracks in the top. Refrigerate the cookies for at least 1 hour, or up to 5 hours. Position a rack in the lower third of the oven and preheat the oven to 350°F. Bake the cookies, one sheet at a time, for 8 to 10 minutes, rotating the pan halfway through the baking time for even doneness (see Tip). Cool the cookies completely on wire racks. Store the cookies in an airtight container for up to 3 days at room temperature.
      • Tip: It is really difficult to tell when dark chocolate cookies are done. Pull them out when they are firm to the touch on the edges and the sweet smell of chocolate has begun to fill your kitchen.

      Lemon-Poppy Seed Shortbread (Claudia Fleming, The Last Course)

      Ingredients

      • 1 cup 2 sticks unsalted butter, softened
      • 3/4 cup confectioners’ sugar
      • 1 1/2 teaspoons fresh lemon juice
      • 1 1/2 teaspoons grated lemon zest
      • 1/2 teaspoon vanilla extract
      • 2 cups all-purpose flour sifted
      • 1 1/2 tablespoons poppy seeds
      • 1/2 teaspoon salt

      Instructions

      • Using an electric mixer, beat the butter and sugar until creamy and smooth, about two minutes. Add the lemon juice, zest and vanilla and beat well.
      • In a bowl, combine the flour, poppy seeds, and salt. Add the dry ingredients to the butter mixture and mix until combined. Form the dough into a disk and, wrap in plastic wrap and chill for at least 3 hours and up to 3 days or freeze for up to 2 months.
      • Preheat oven to 300° F. Roll the dough between two sheets of wax paper to a 1/4-inch-thick rectangle. return dough to refrigerator for an additional 30 minutes. Cut the shortbread into shapes with a two-inch cookie cutter, or use a knife, and place 1 inch apart on parchment-lined baking sheets. Do not reroll scraps, if using cookie cutter. Prick shortbread with a fork and bake until pale golden all over, 23 to 25 minutes. Cool on a wire rack.

      PISTACHIO SHORTBREAD COOKIES

      Ingredients

      • 1 cup unbleached all-purpose flour plus more for the work surface
      • 1/4 cup granulated sugar
      • 1/2 teaspoon kosher salt
      • 1/2 cup shelled raw or roasted pistachios
      • 1/2 teaspoon vanilla extract
      • 1 stick 4 ounces unsalted butter, cold, cut into 1/4-inch pieces
      • 1 to 2 tablespoons granulated sugar sanding sugar, or raw sugar, for garnish

      Instructions

      • Pulse the flour, granulated sugar, salt, pistachios, and vanilla in the bowl of a food processor for 1 to 2 minutes, until the pistachios are finely ground. Scatter the butter pieces in the food processor and pulse several times to cut the butter into the flour. Stop pulsing when the ingredients just come together and cling to one another. (Watch carefully, as food processors work very fast and can easily overmix the dough. At first the mixture will have a coarse, crumbly texture, but then if you’re not careful it will quickly turn into a paste.)
      • Turn the dough onto a lightly floured work surface and shape it into a log about 2 inches in diameter and 10 inches long. (If the dough is too sticky, toss it in the fridge for 10 or so minutes to make it easier to work with. Dampening your hands ever so slightly with cold water also helps.) Place the log on a piece of plastic wrap or parchment paper. Tightly roll the wrap around the log and twist the ends to seal them securely. Refrigerate for at least 2 hours or up to 5 days. (This dough also freezes well for up to 3 weeks if wrapped tightly in plastic.)
      • Position 2 racks in the center of the oven and preheat to 325ºF (163ºC). Line 2 rimmed baking sheets with parchment paper and set aside.
      • Cut the chilled cookie dough into 1⁄2-inch-thick coins and place about 2 inches apart on the prepared baking sheets. Lightly brush the top of each shortbread cookie with water and sprinkle with sugar. Bake for 15 to 18 minutes, or until the cookies are lightly golden brown on both top and bottom. Let the cookies cool on the baking sheet for 5 minutes, then transfer to a wire rack to cool completely. Store the pistachio shortbread cookies in an airtight container at room temperature for up to 2 weeks.